With our NFC cube, you receive a six-sided cube and nine separate NFC stickers. You can assign any function you like to each sticker. For example, you can store a phone number, a URL, and many other types of data on them. You can then stick these stickers onto one side of the cube. The symbols on the stickers are just suggestions. Ultimately, it’s up to you exactly what type of data you write onto the NFC stickers.
In this guide, however, we will use the provided symbols as a reference and explain how to write the corresponding data types onto the NFC stickers using an iPhone. To do this, we will use our NFC21-Tools app and Apple’s Shortcuts app.
Be sure to check out our how-to guide on the NFC21-Tools app, where we explain exactly how the app works.
Content:
- Call, message and URL sticker
- Location/Address, Contact and Wi-Fi sticker
- Music
- Alarm clock
- Advanced Alarm Clock for Download
- Weather
Call, message and URL sticker
-
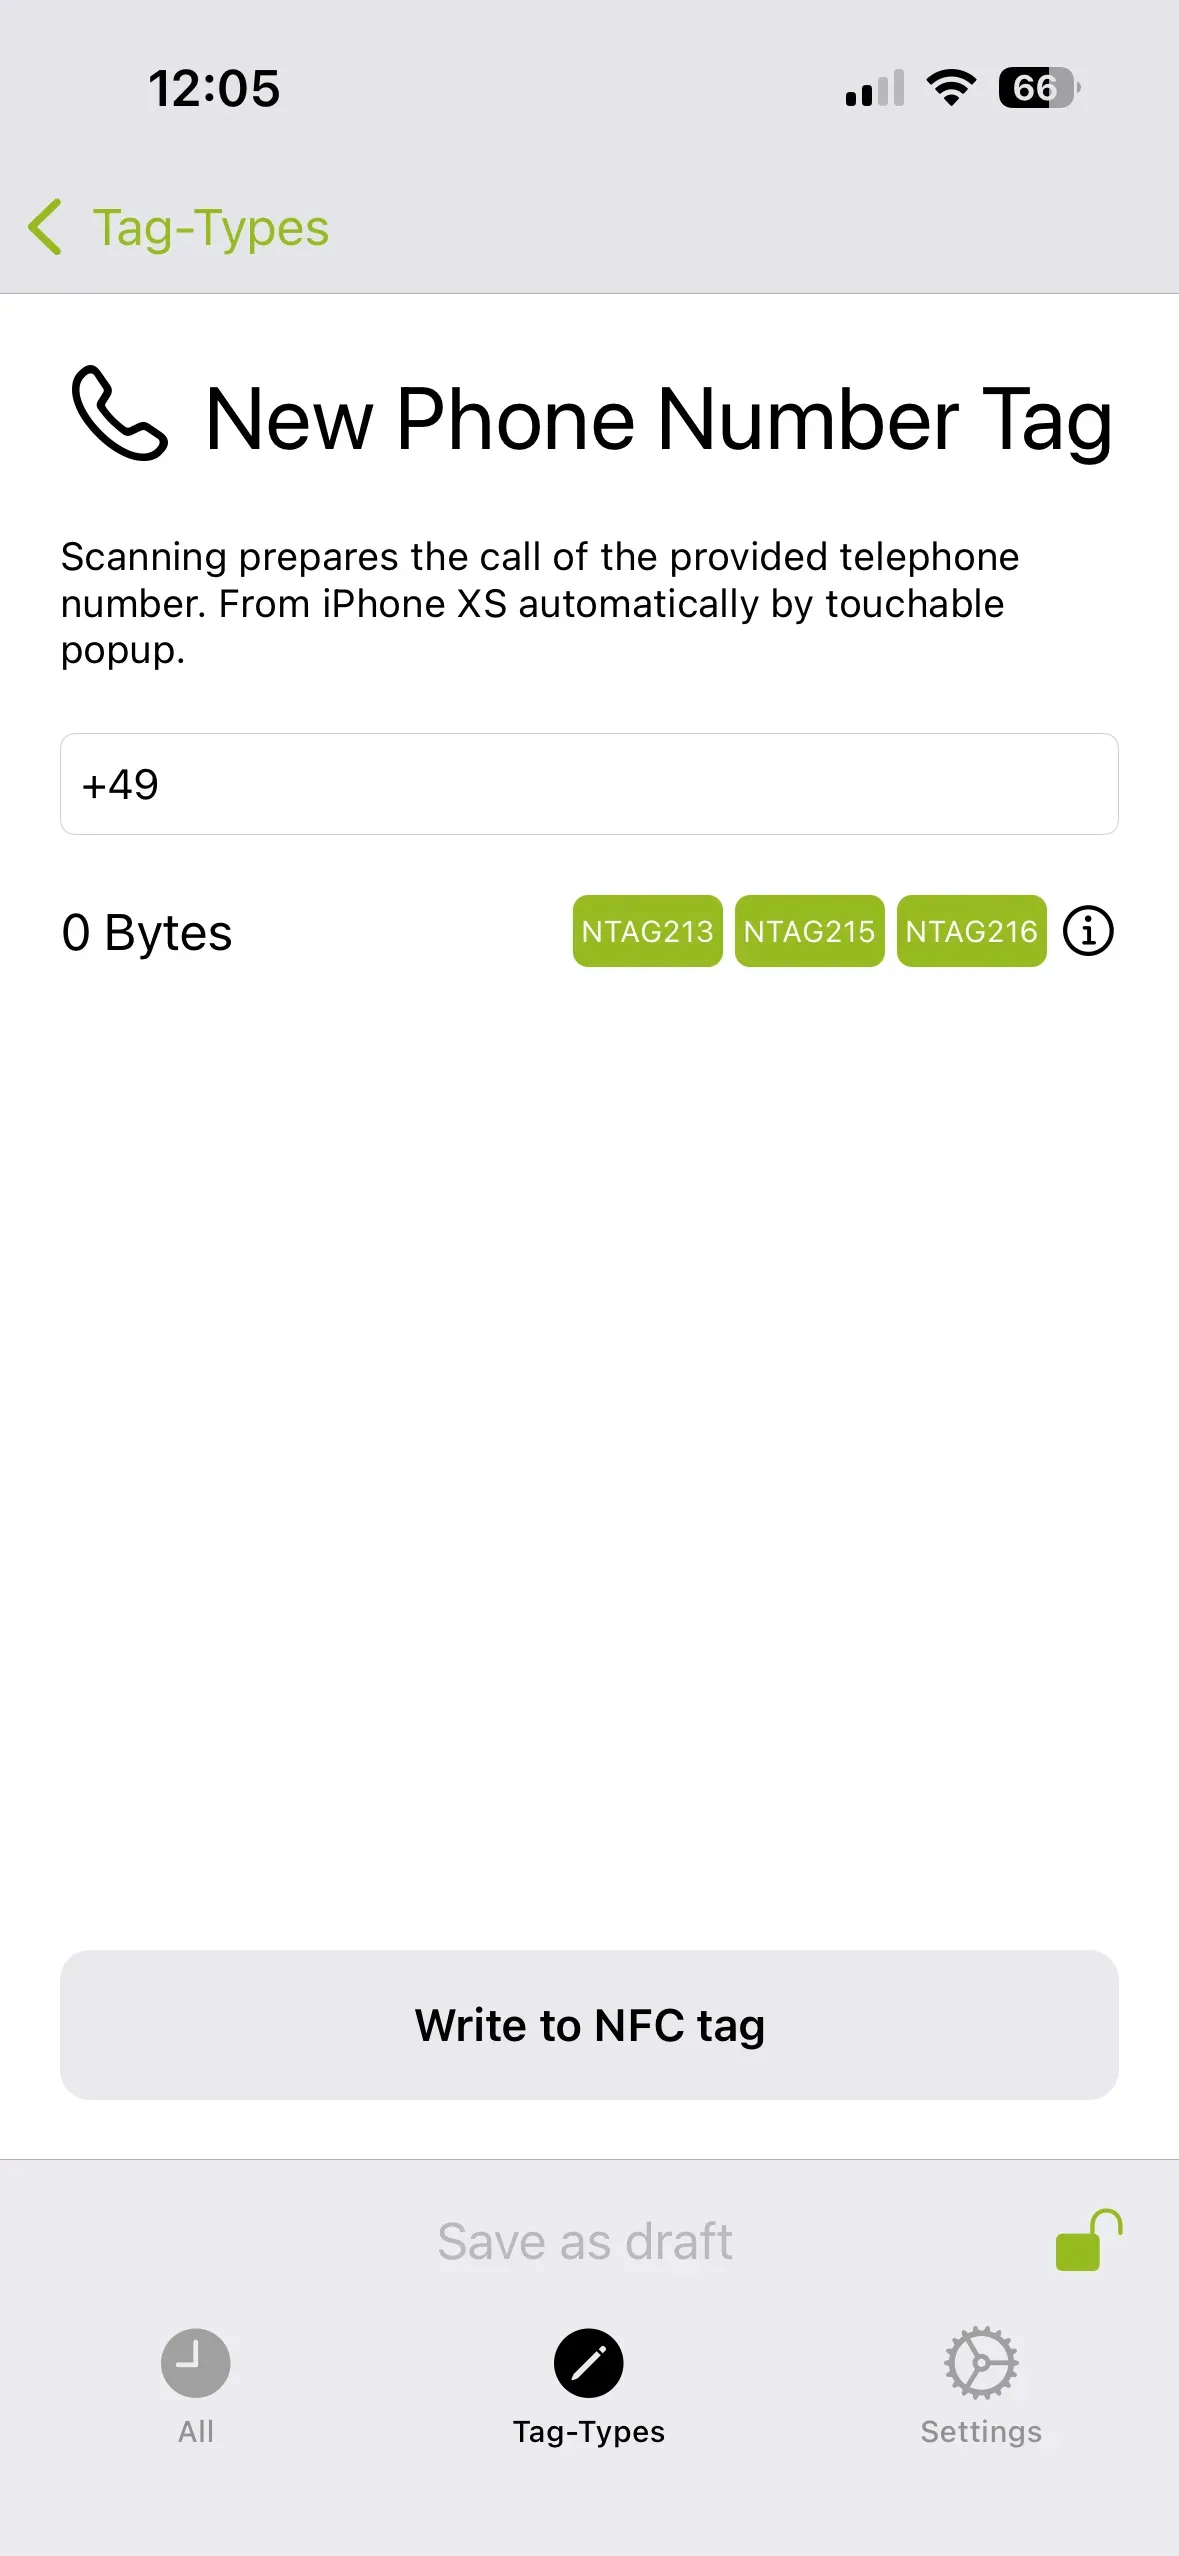
You can save a phone number on the phone sticker. This number appears when you scan the NFC tag and it can be directly called. To do this, open the NFC21 Tools app, tap Tag-Types at the bottom, and then tap Phone Number at the top. Now you can enter any phone number and save it to your phone sticker by tapping Write to NFC Tag. To do this, hold the NFC sticker against the upper back of the iPhone during the saving process.
-
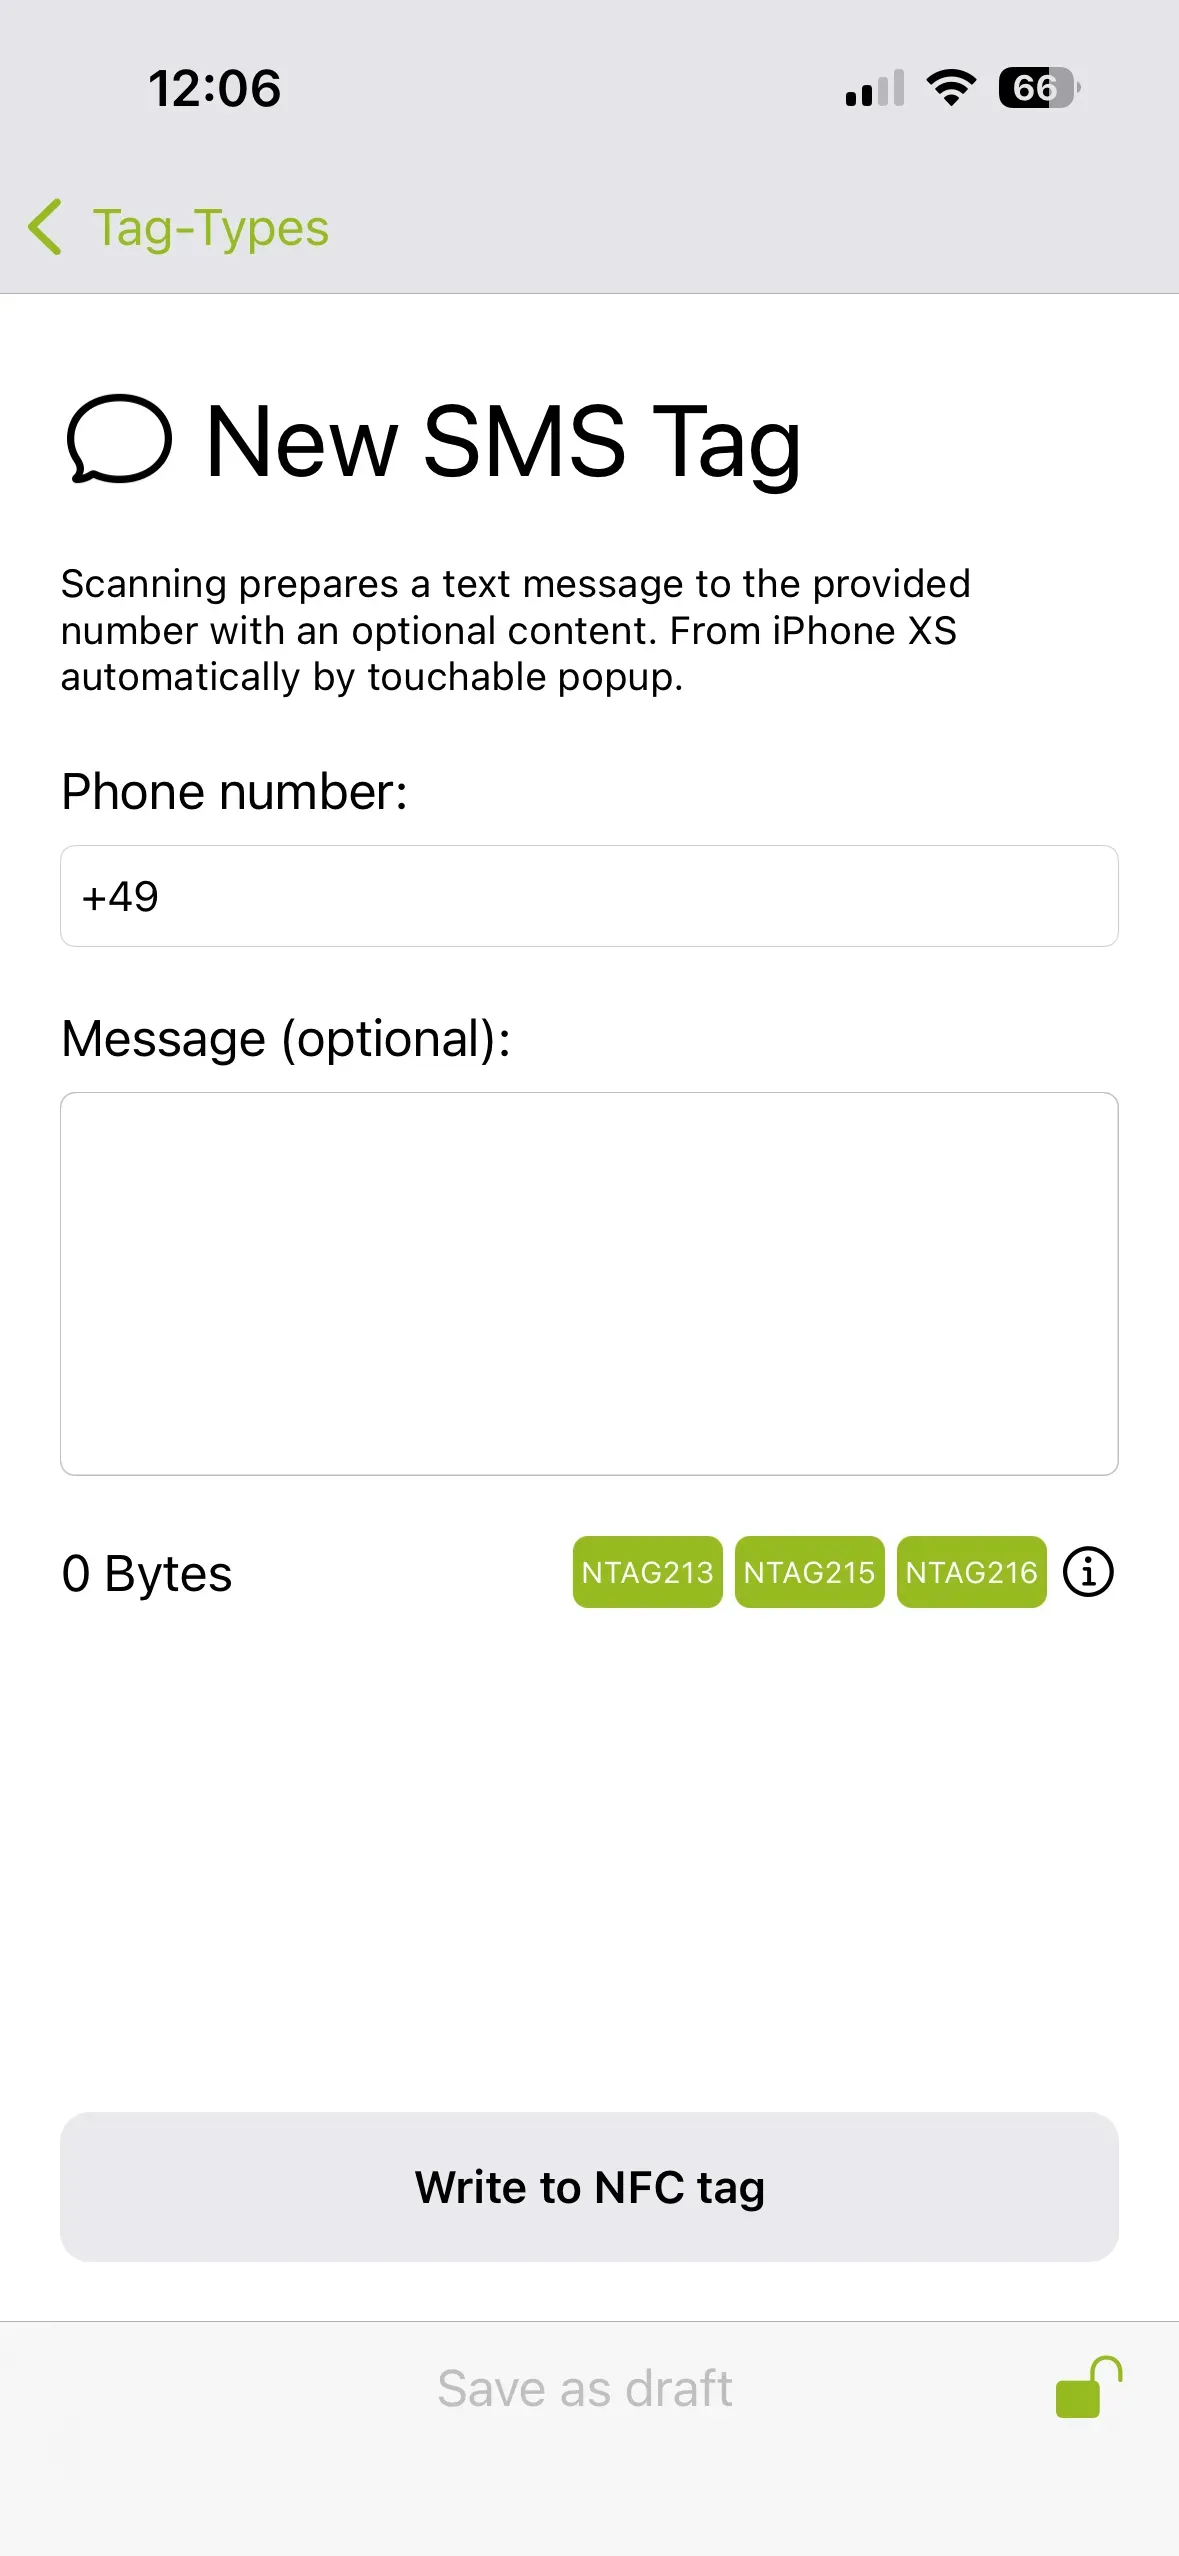
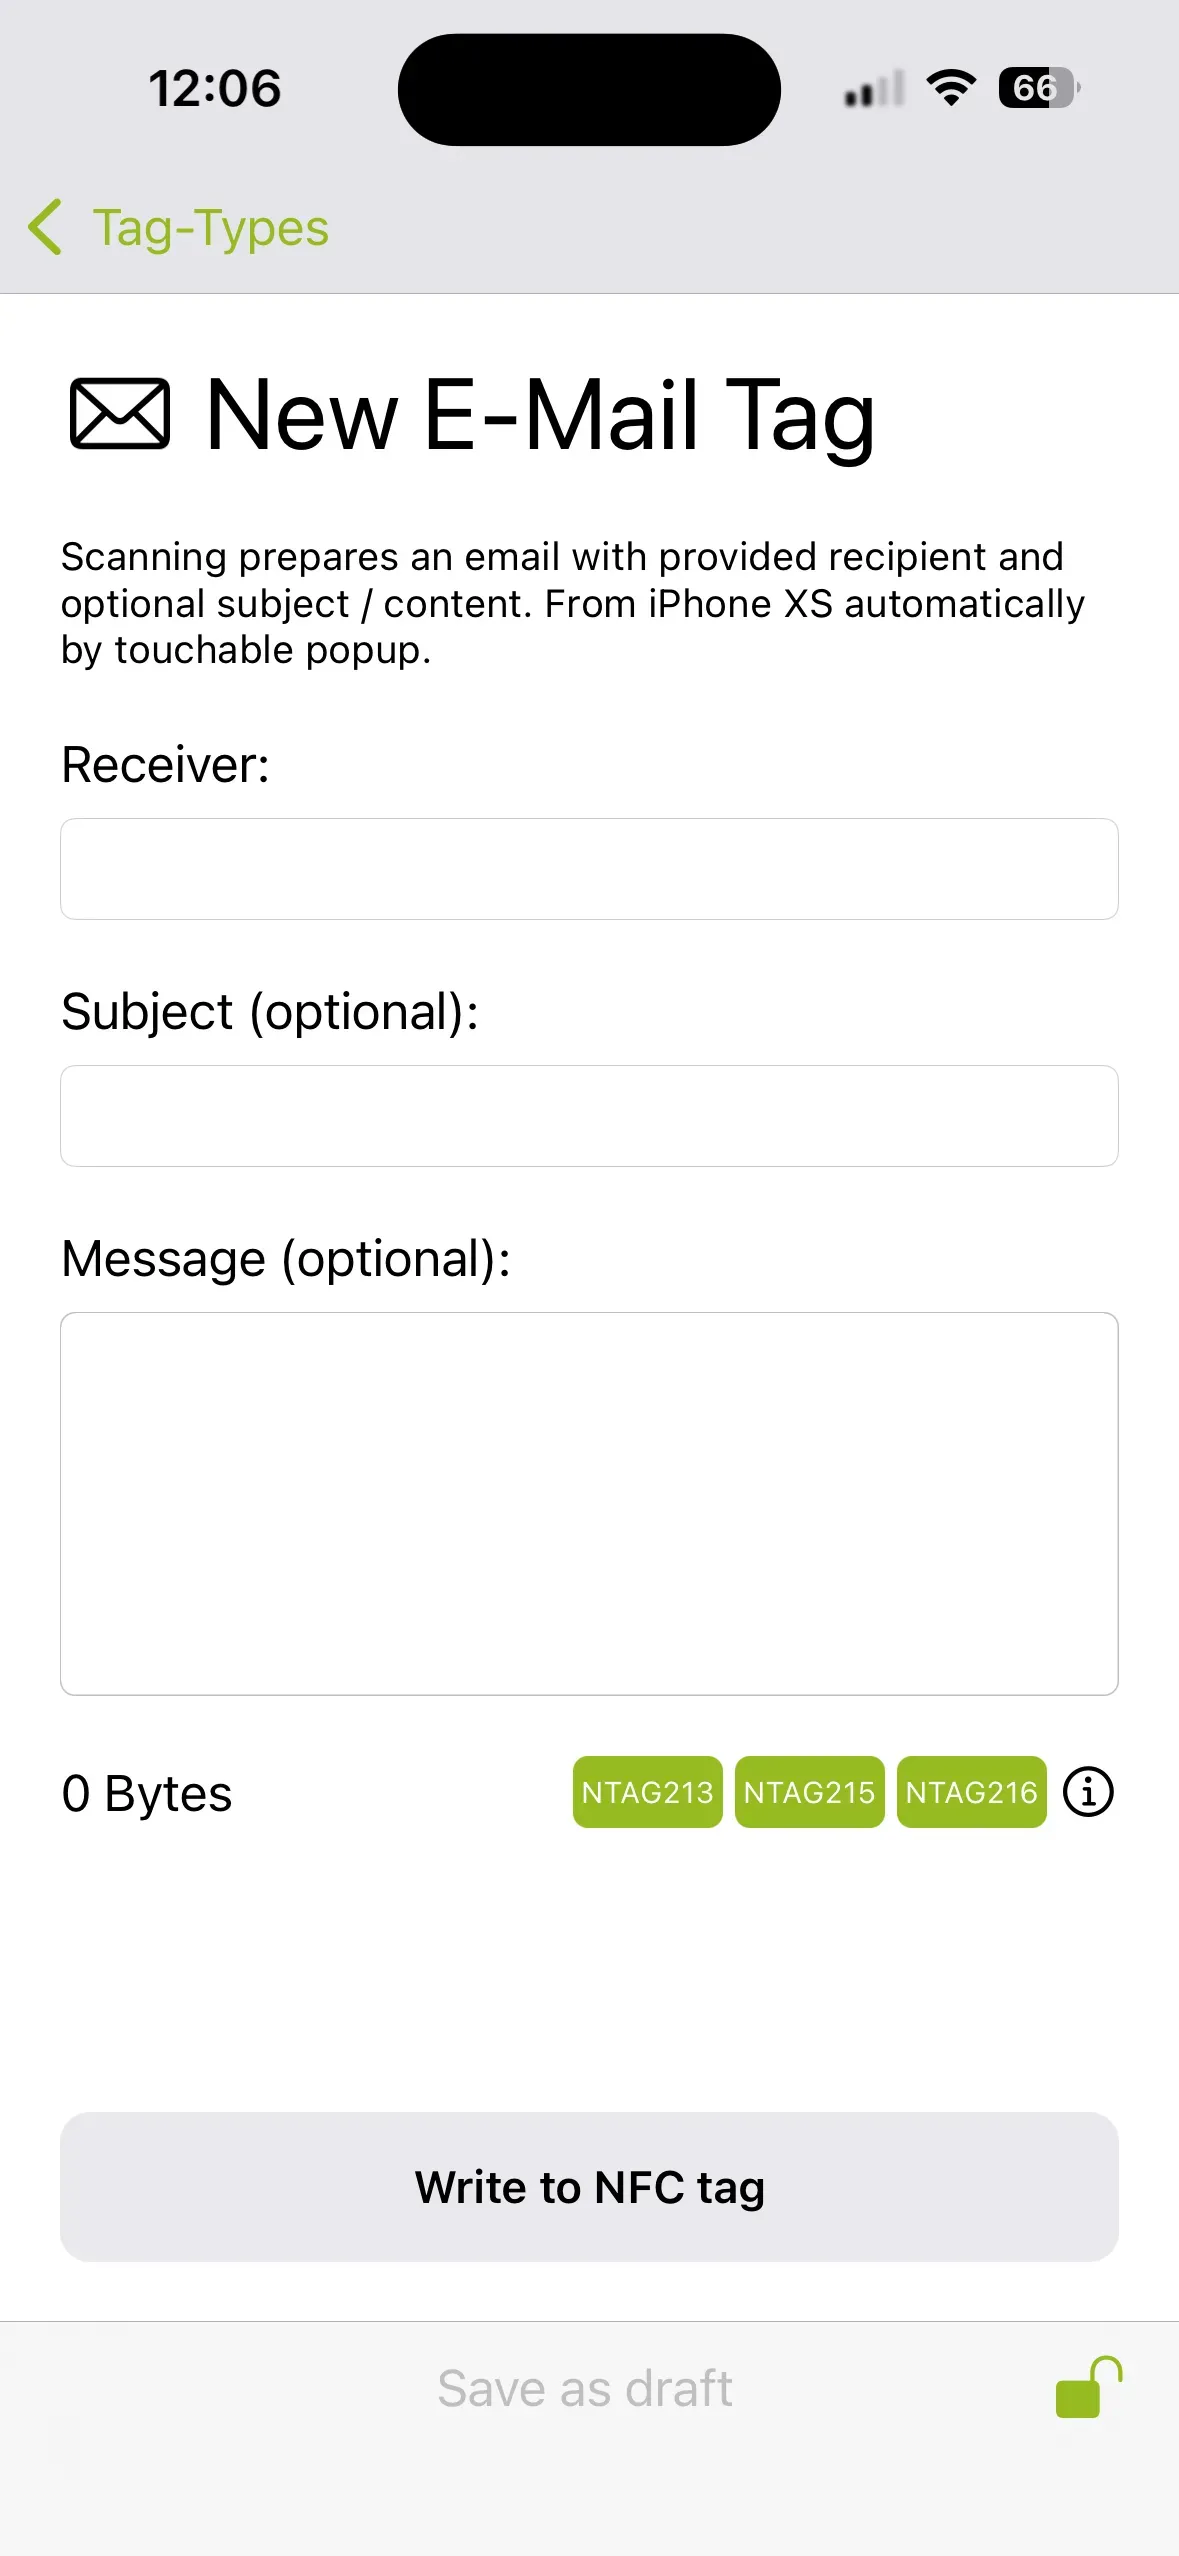
To customize the speech bubble sticker, open the NFC21 Tools app, tap Tag-Types and then tap SMS or Email, depending on what you want to link to the sticker. Once you have decided, simply enter a recipient at the top (a phone number for SMS, an email address for email) and confirm by tapping Write to NFC Tag. Now, every time the NFC tag is scanned, a new SMS or email will open to the desired recipient. Alternatively, you can also predefine a message during the labeling process.
-
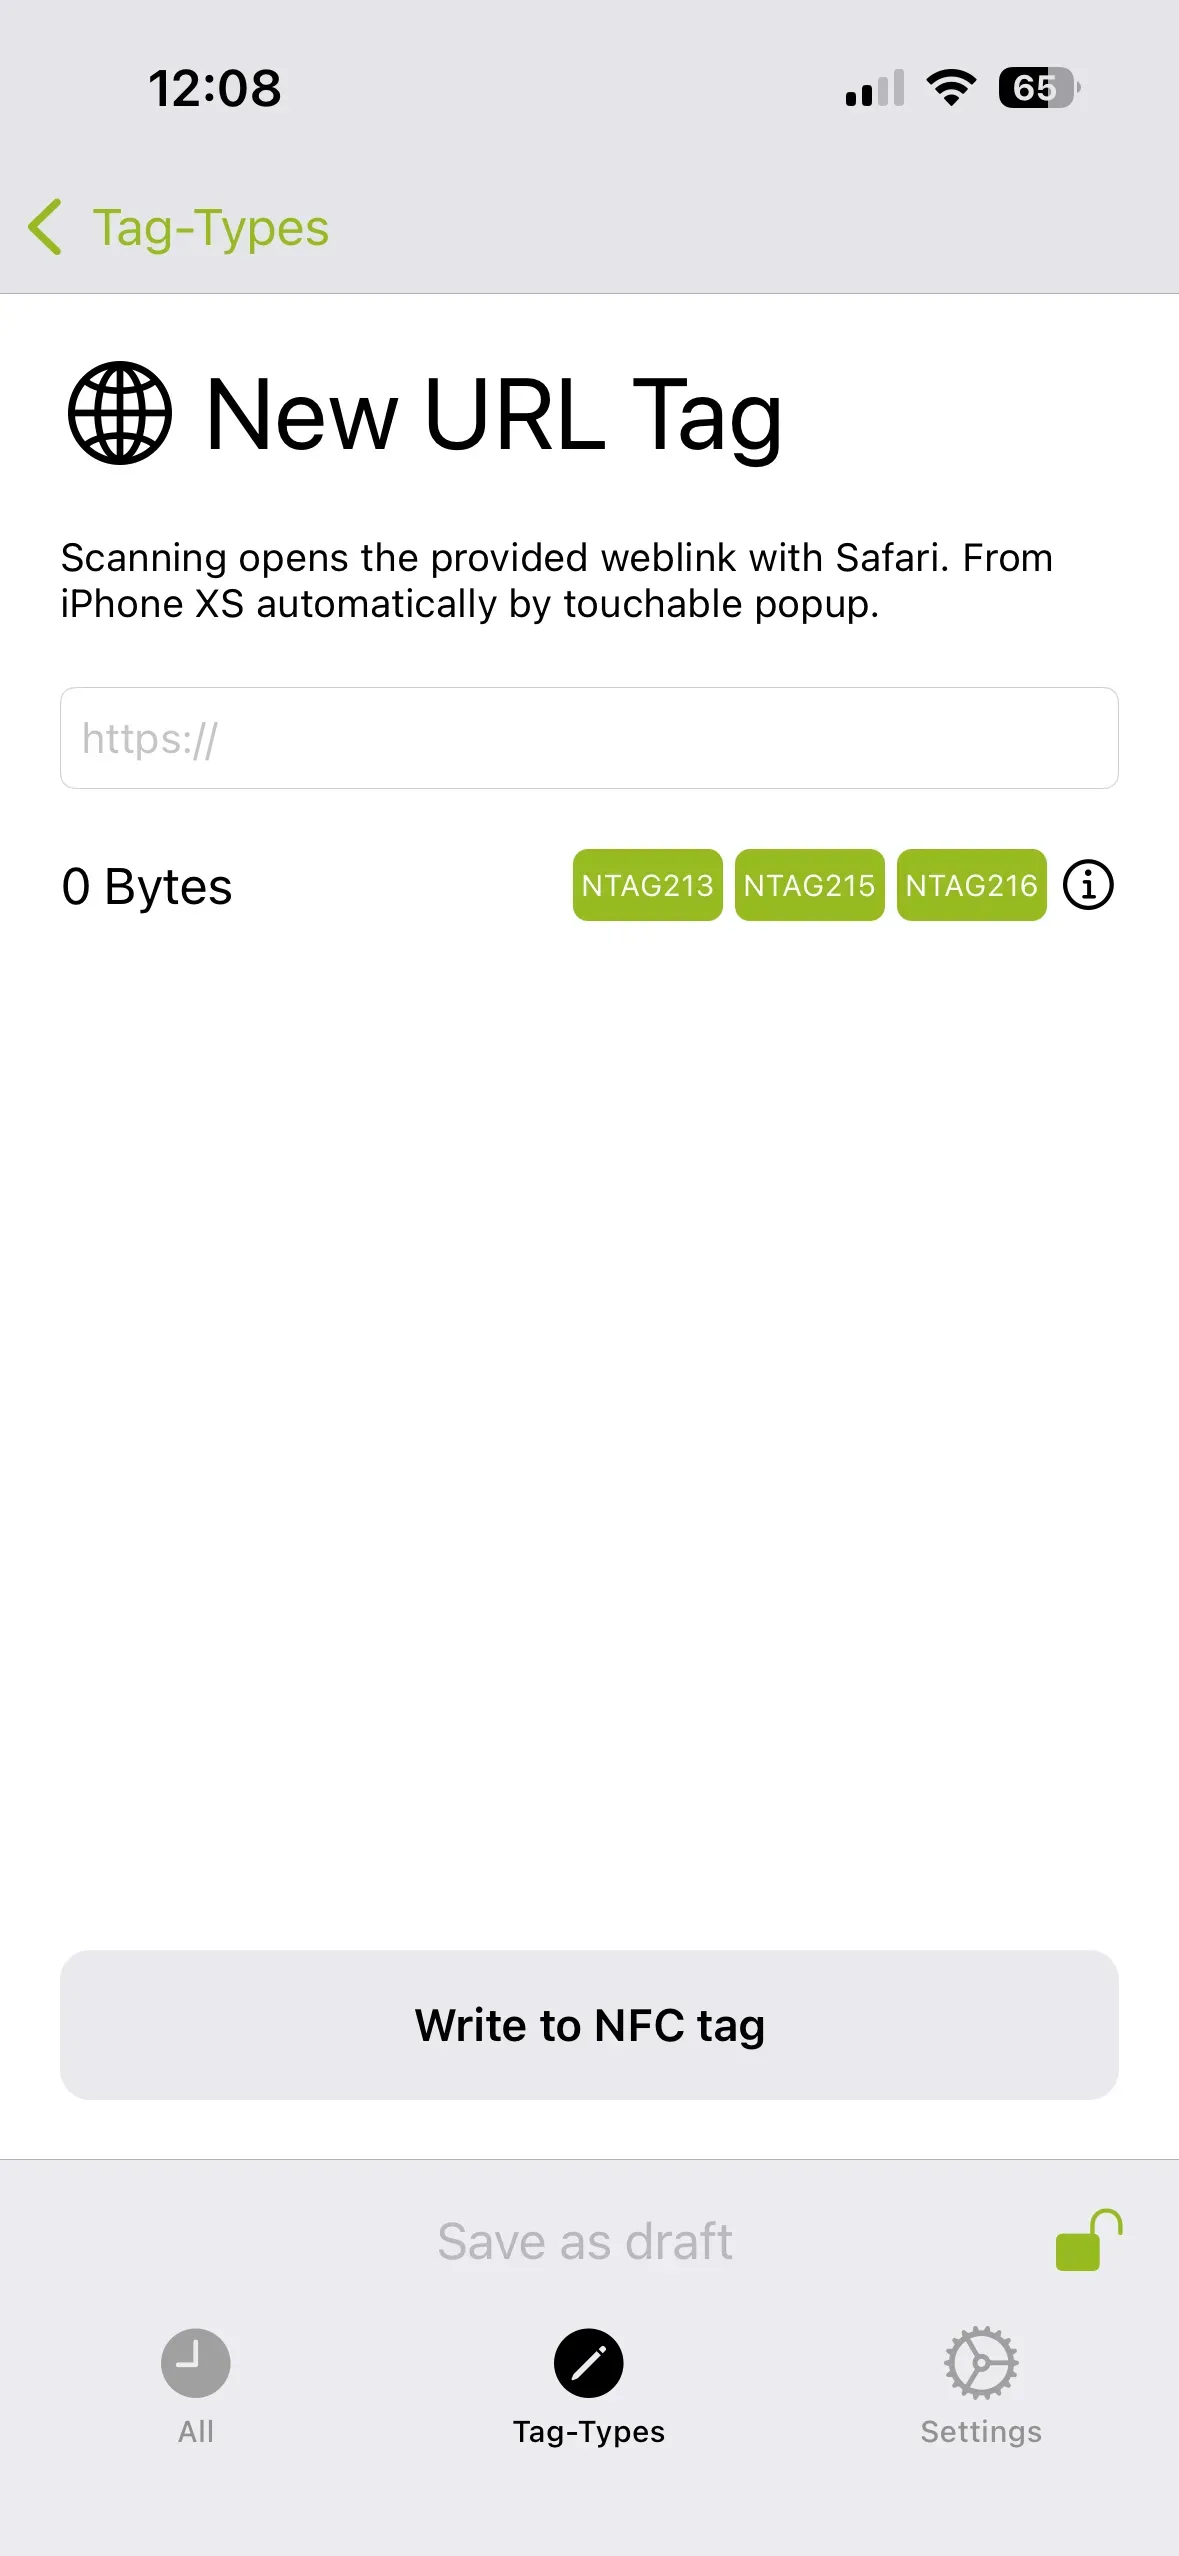
Third, you can also configure the WWW sticker using the steps mentioned above. To do this, select URL and enter the URL of your choice. Whenever the NFC tag is scanned, this webpage will open.n
Location/Address, Contact and Wi-Fi sticker
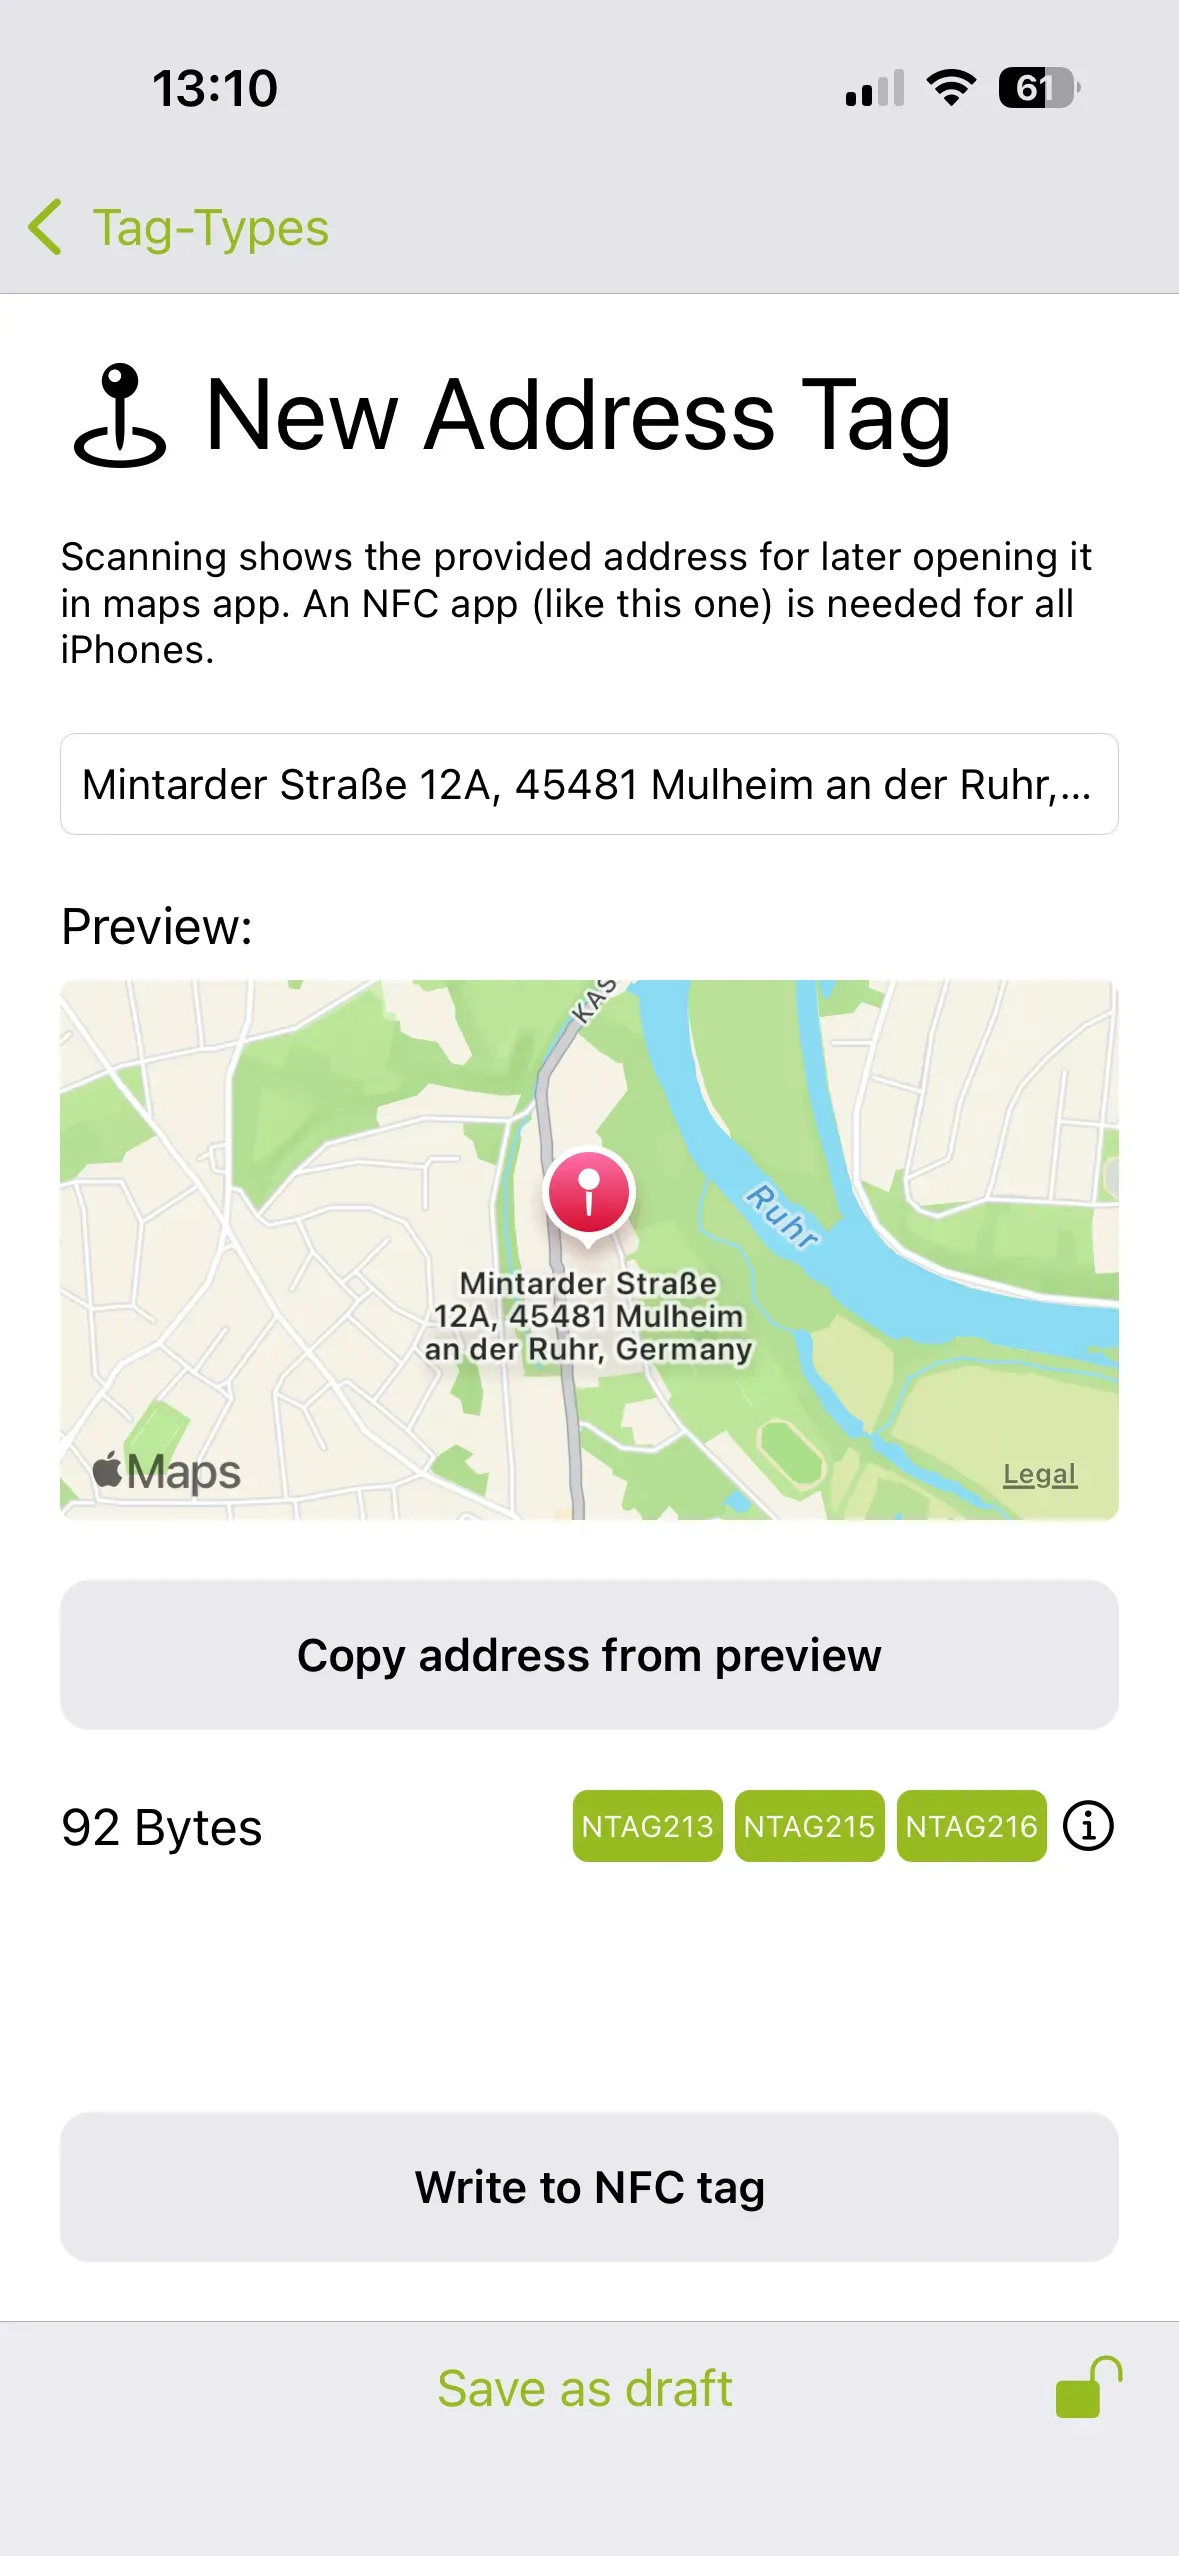
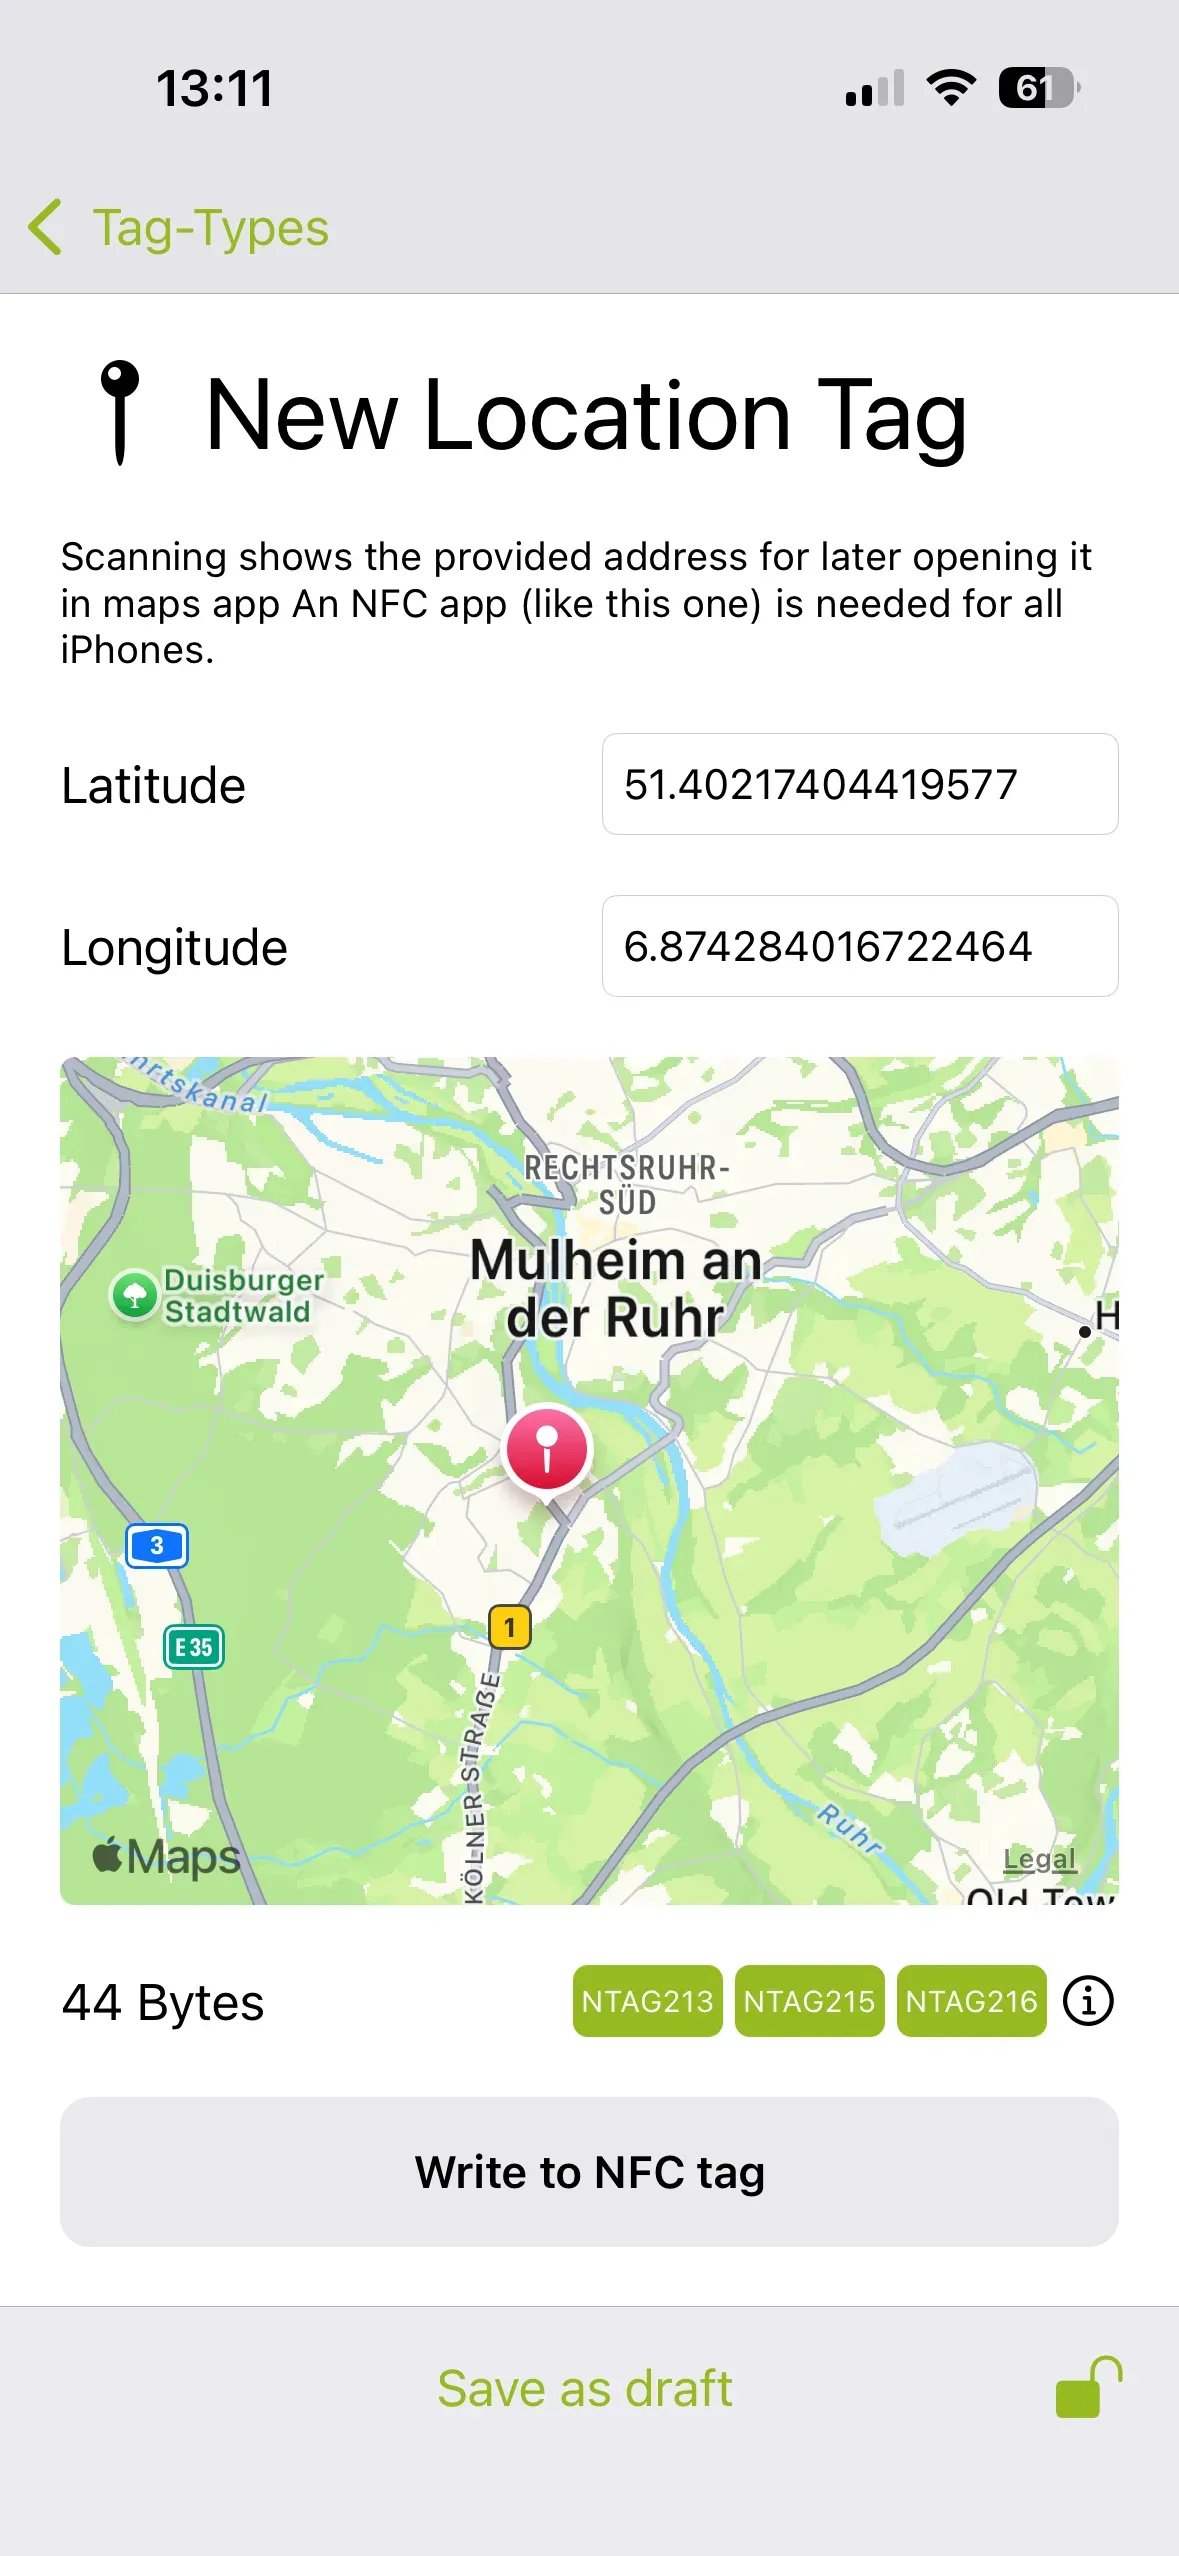
The GPS, Contact, and Wi-Fi stickers can also be programmed using our app NFC21-Tools. The corresponding templates can be found under Tag Types and Advanced Tag Types.
-
To save an address or a location to the GPS sticker, tap on Address or Location. Here, you can enter a specific address or select a location by swiping across the map. Once that’s done, save the data to the GPS sticker using Write to NFC Tag. When the sticker is scanned, you can interact directly with the location (e.g., save the address or start navigation).
-
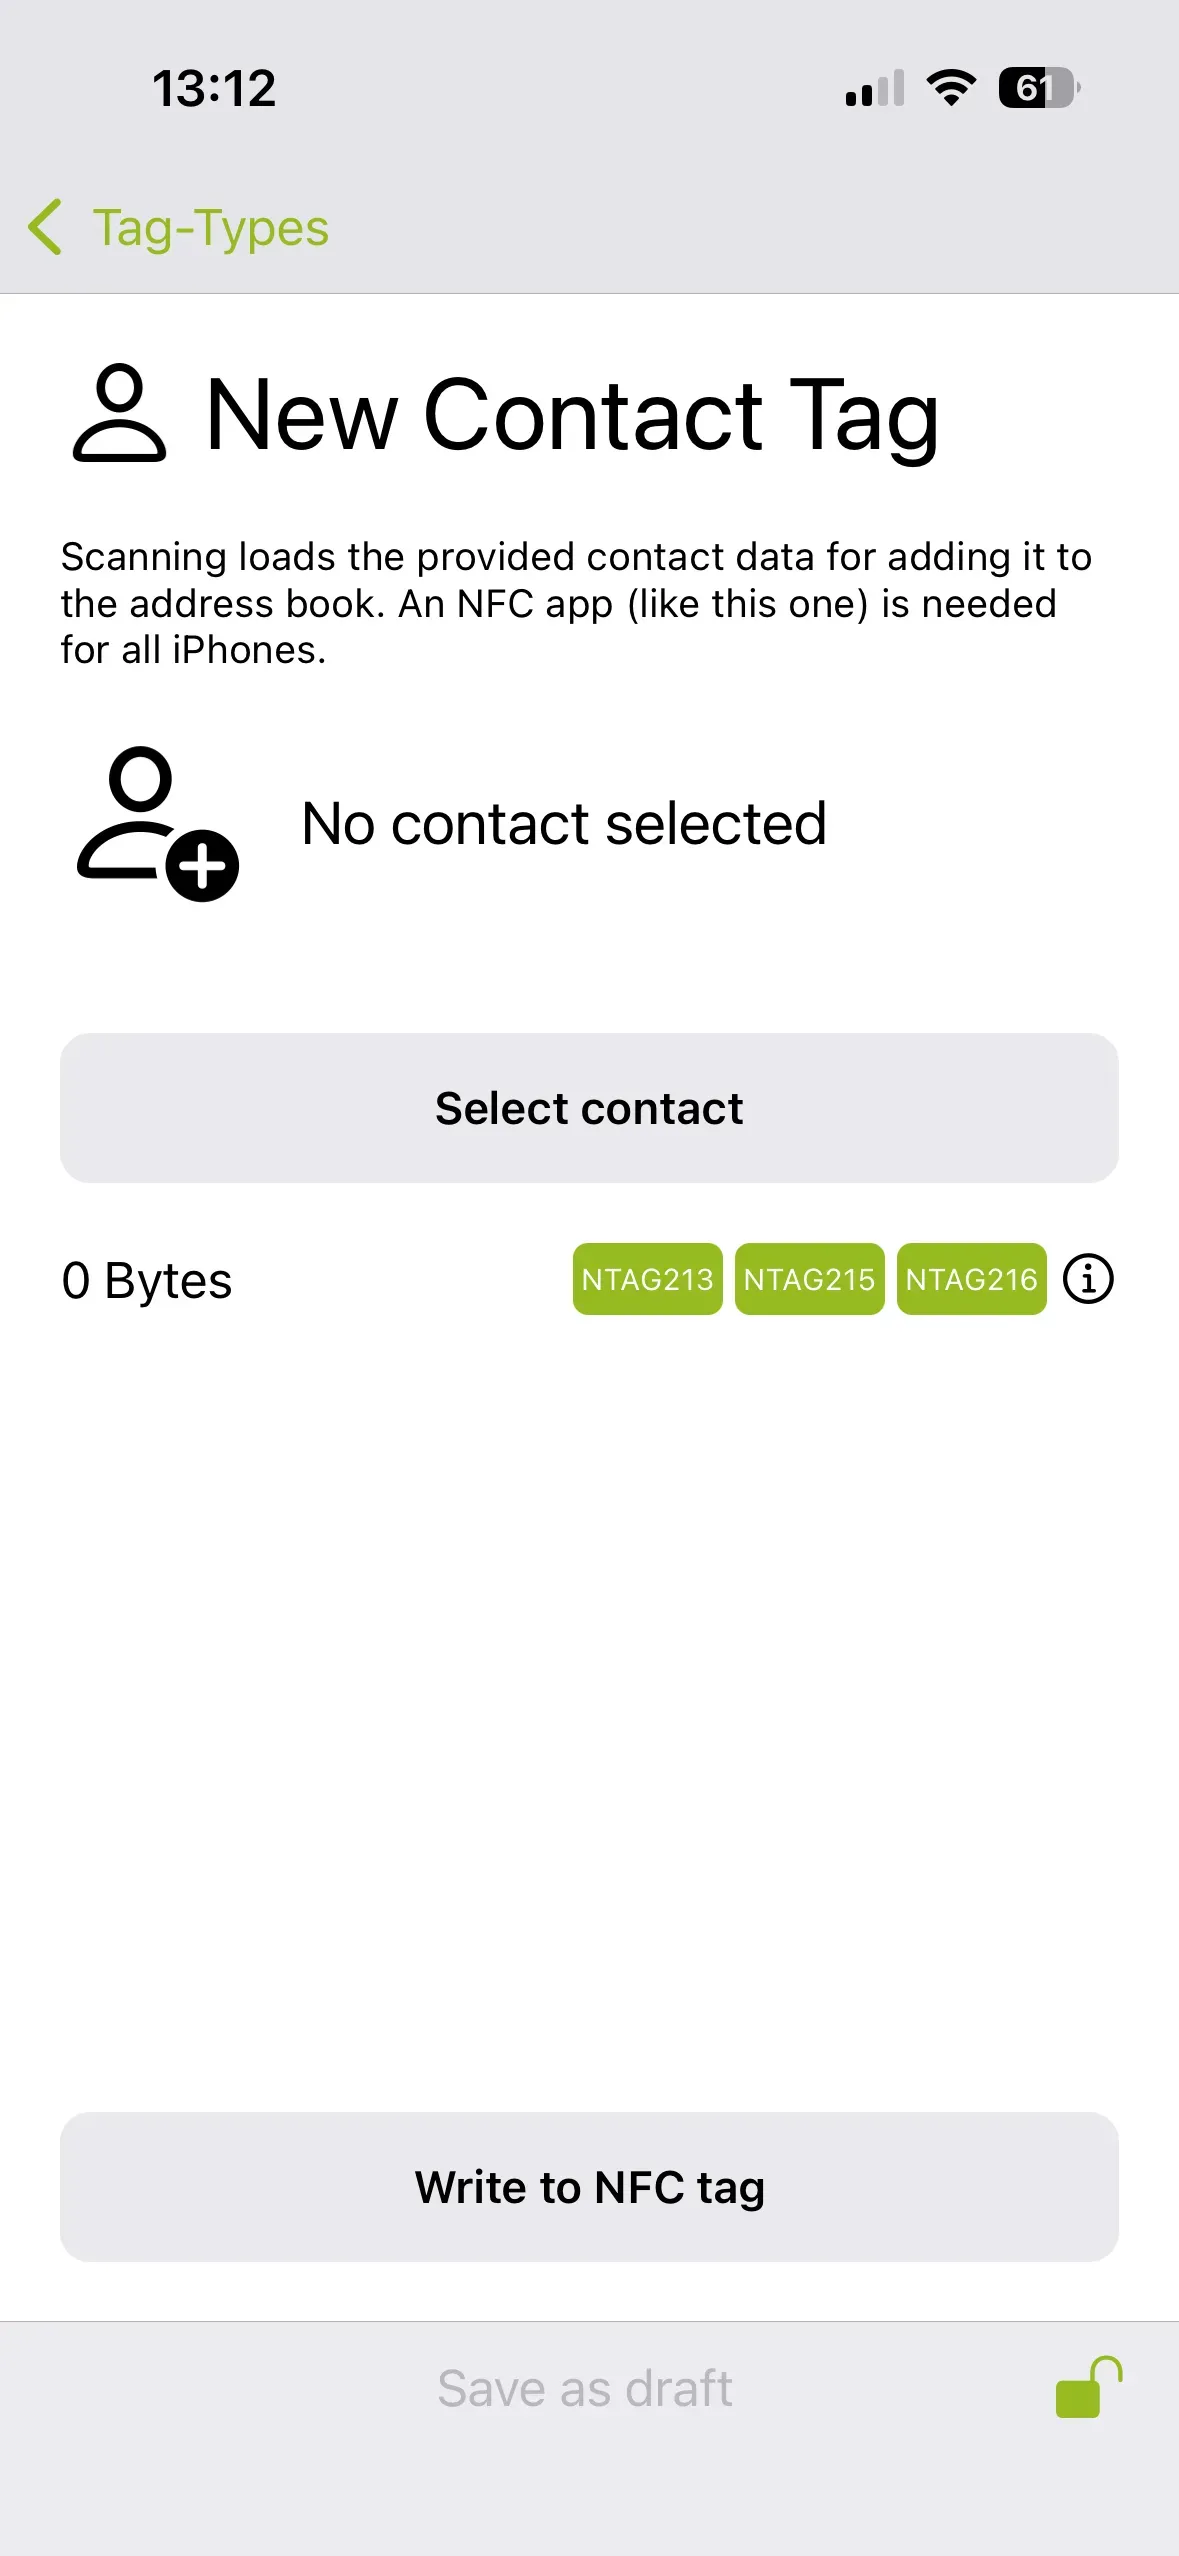
By tapping Contact, we can select a contact from our address book using the Select contact field and then save it to the contact sticker by tapping Write to NFC Tag. If this sticker is then scanned, the contact can be saved or contacted directly.
-
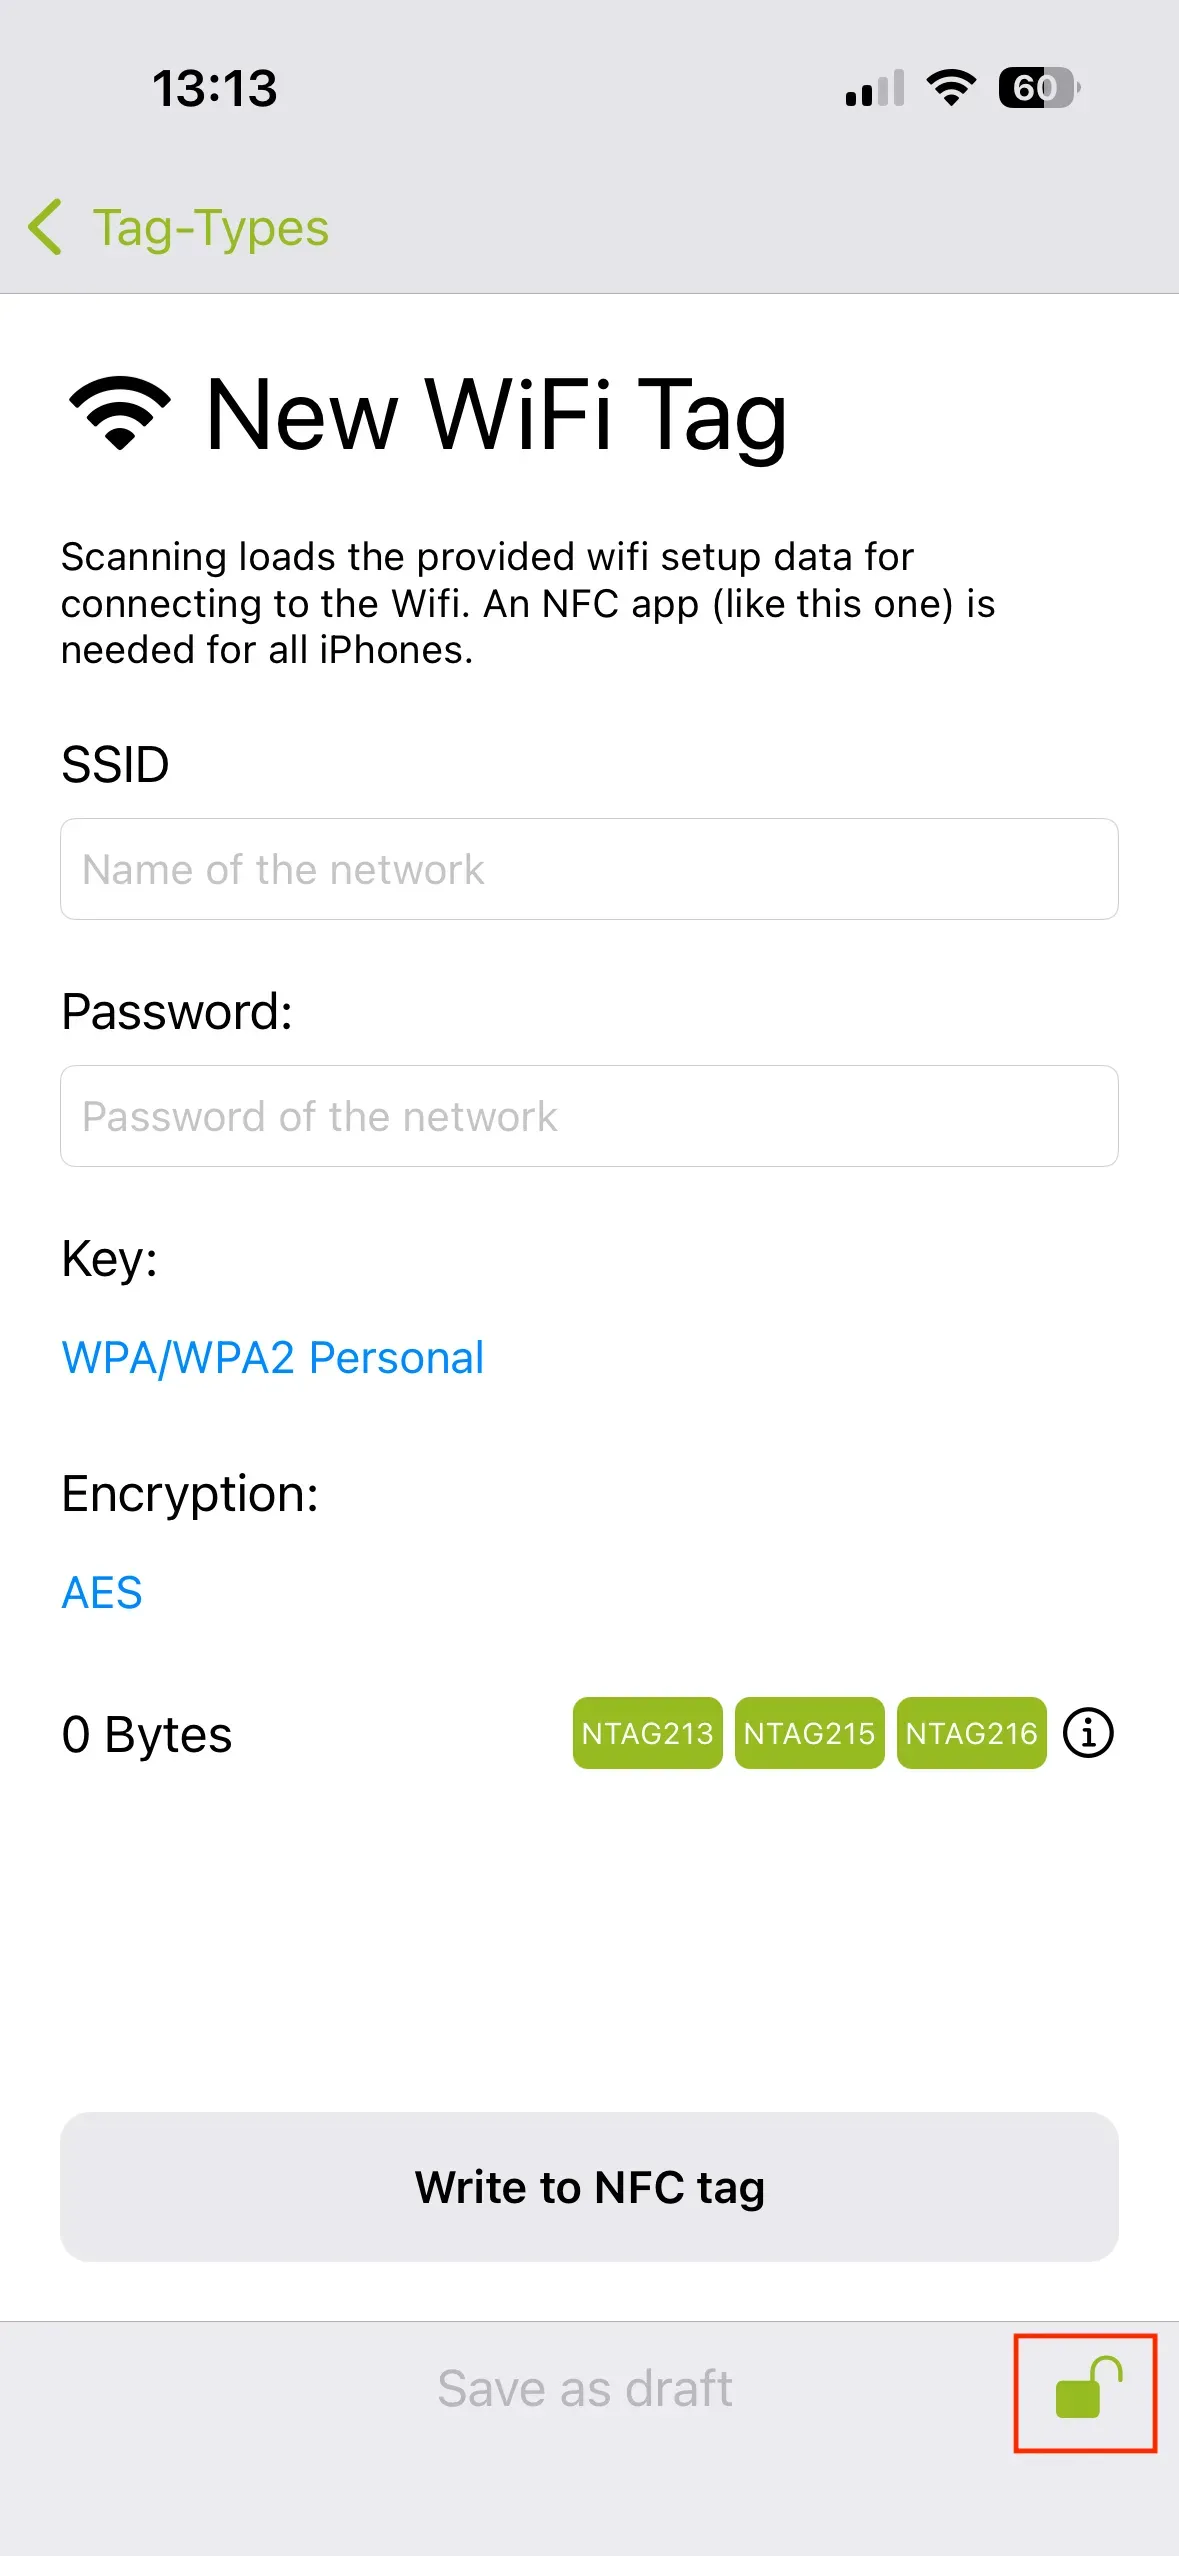
Using Wi-Fi, you can save Wi-Fi network access information to the Wi-Fi sticker. To do this, you must enter the correct network name (SSID) and password. Once the information is written to the NFC tag, other smartphones can connect to the Wi-Fi network immediately after scanning it.
You can read all of these tag types using our free NFC21 Reader app.
Note: If the NFC tag is configured in the NFC21 Tools app as described above, it can be locked using the lock icon at the bottom of the screen. Once a tag is locked, it can never be overwritten. This action cannot be undone.
Music
Here, we will show you two ways to play music immediately after scanning the Music Sticker. To do this, we will use the Shortcuts app. We explain exactly what this app can do and how it’s used in this tutorial.
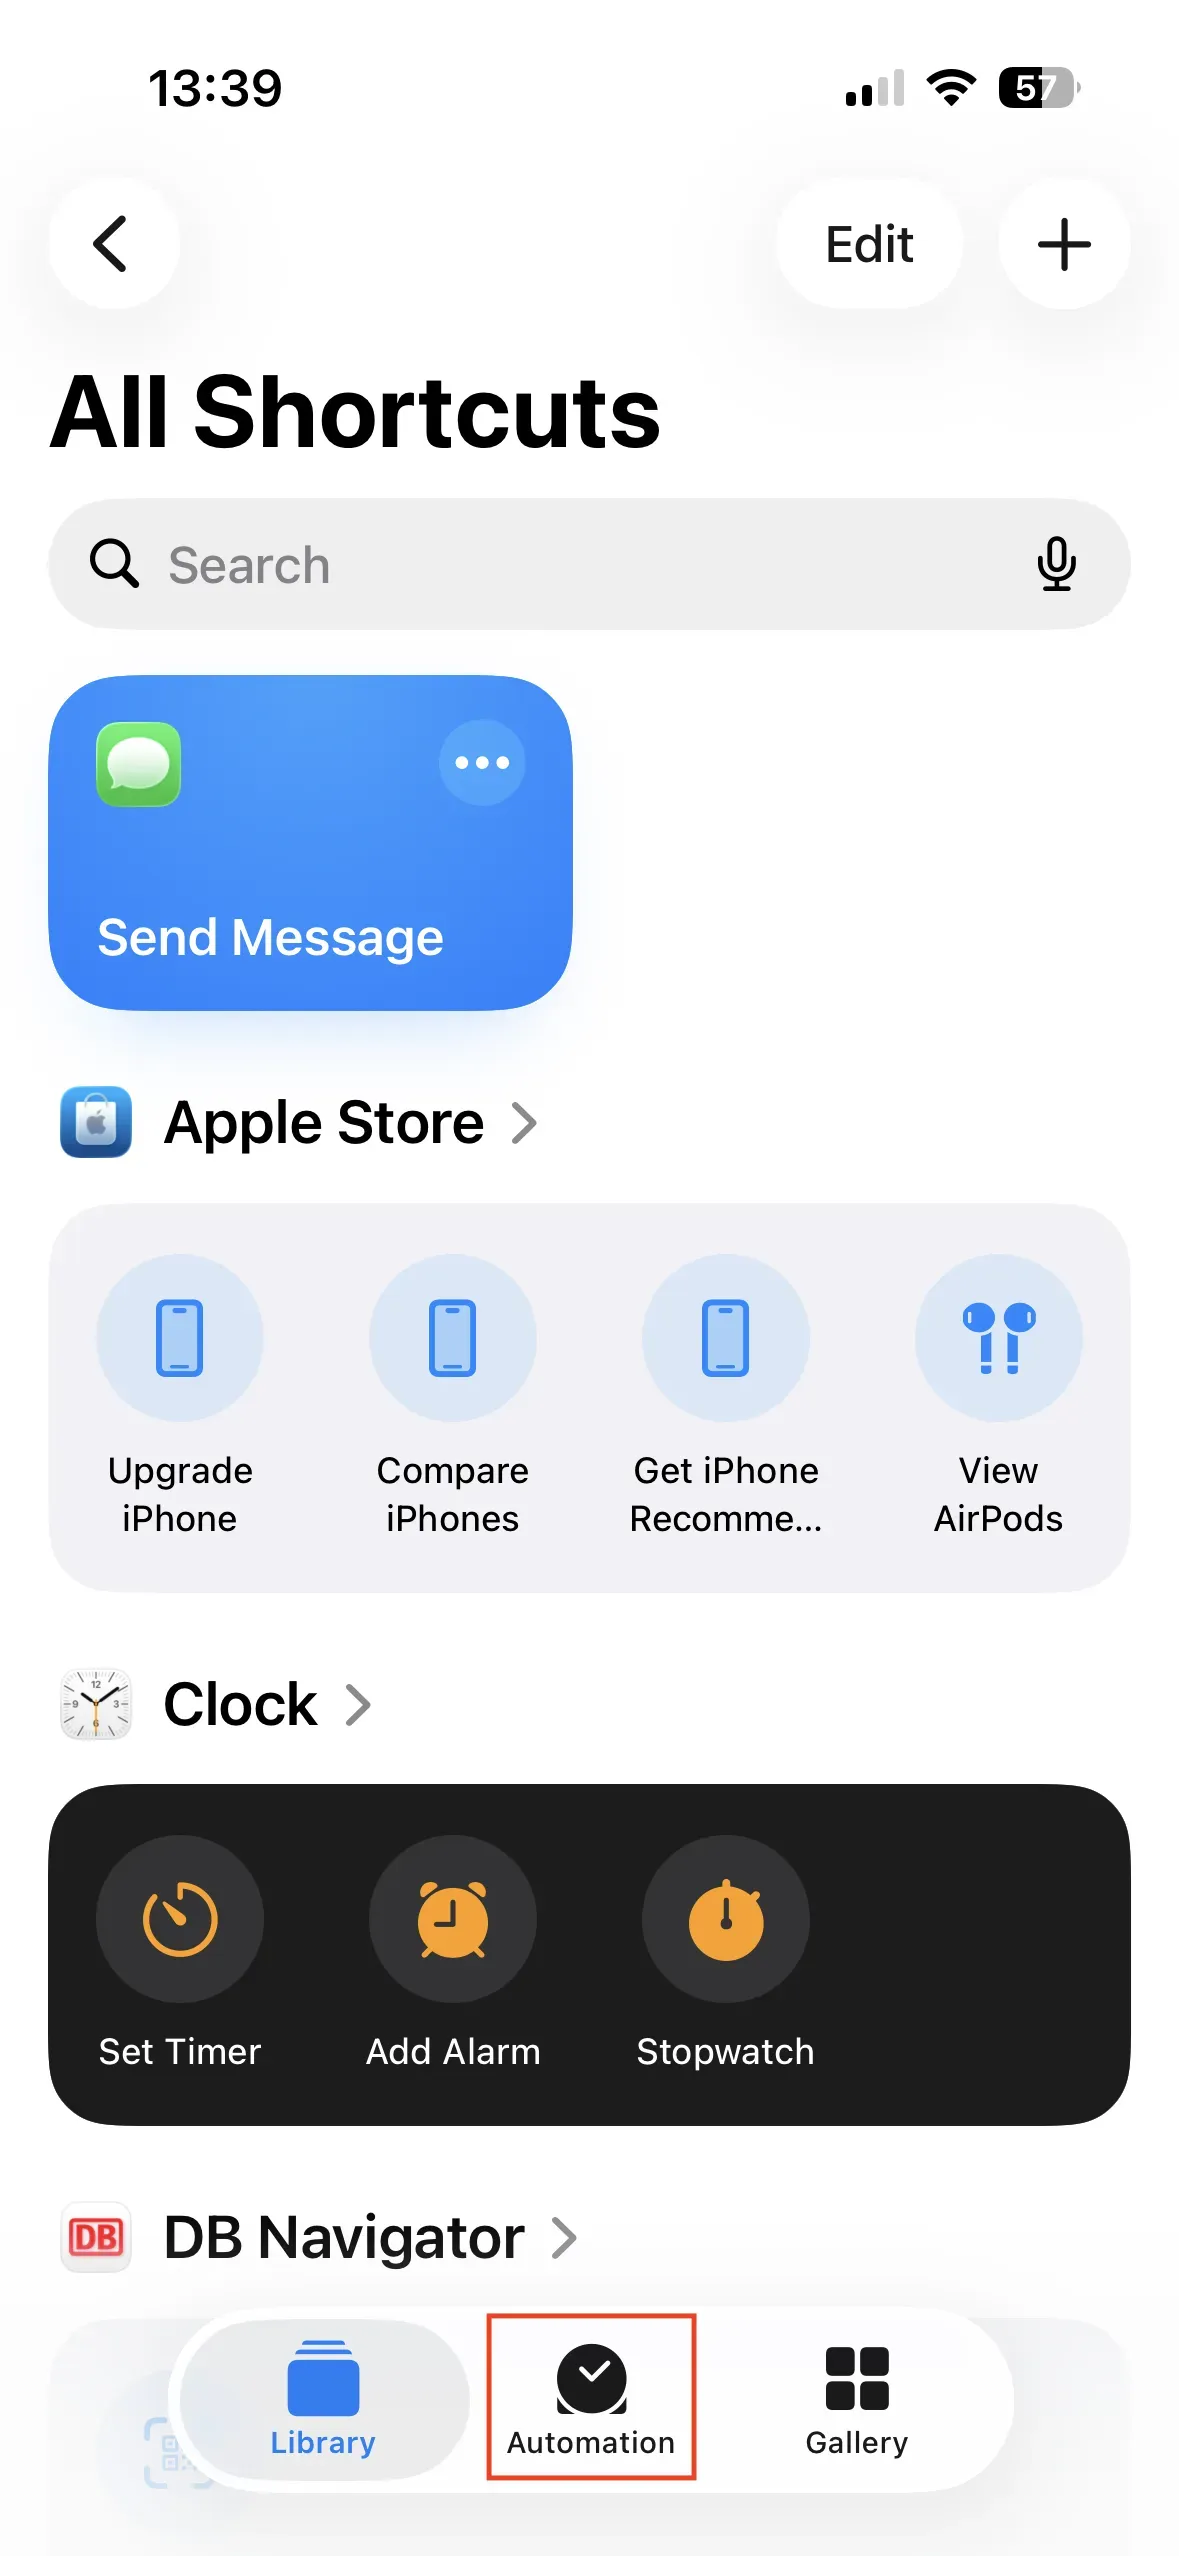
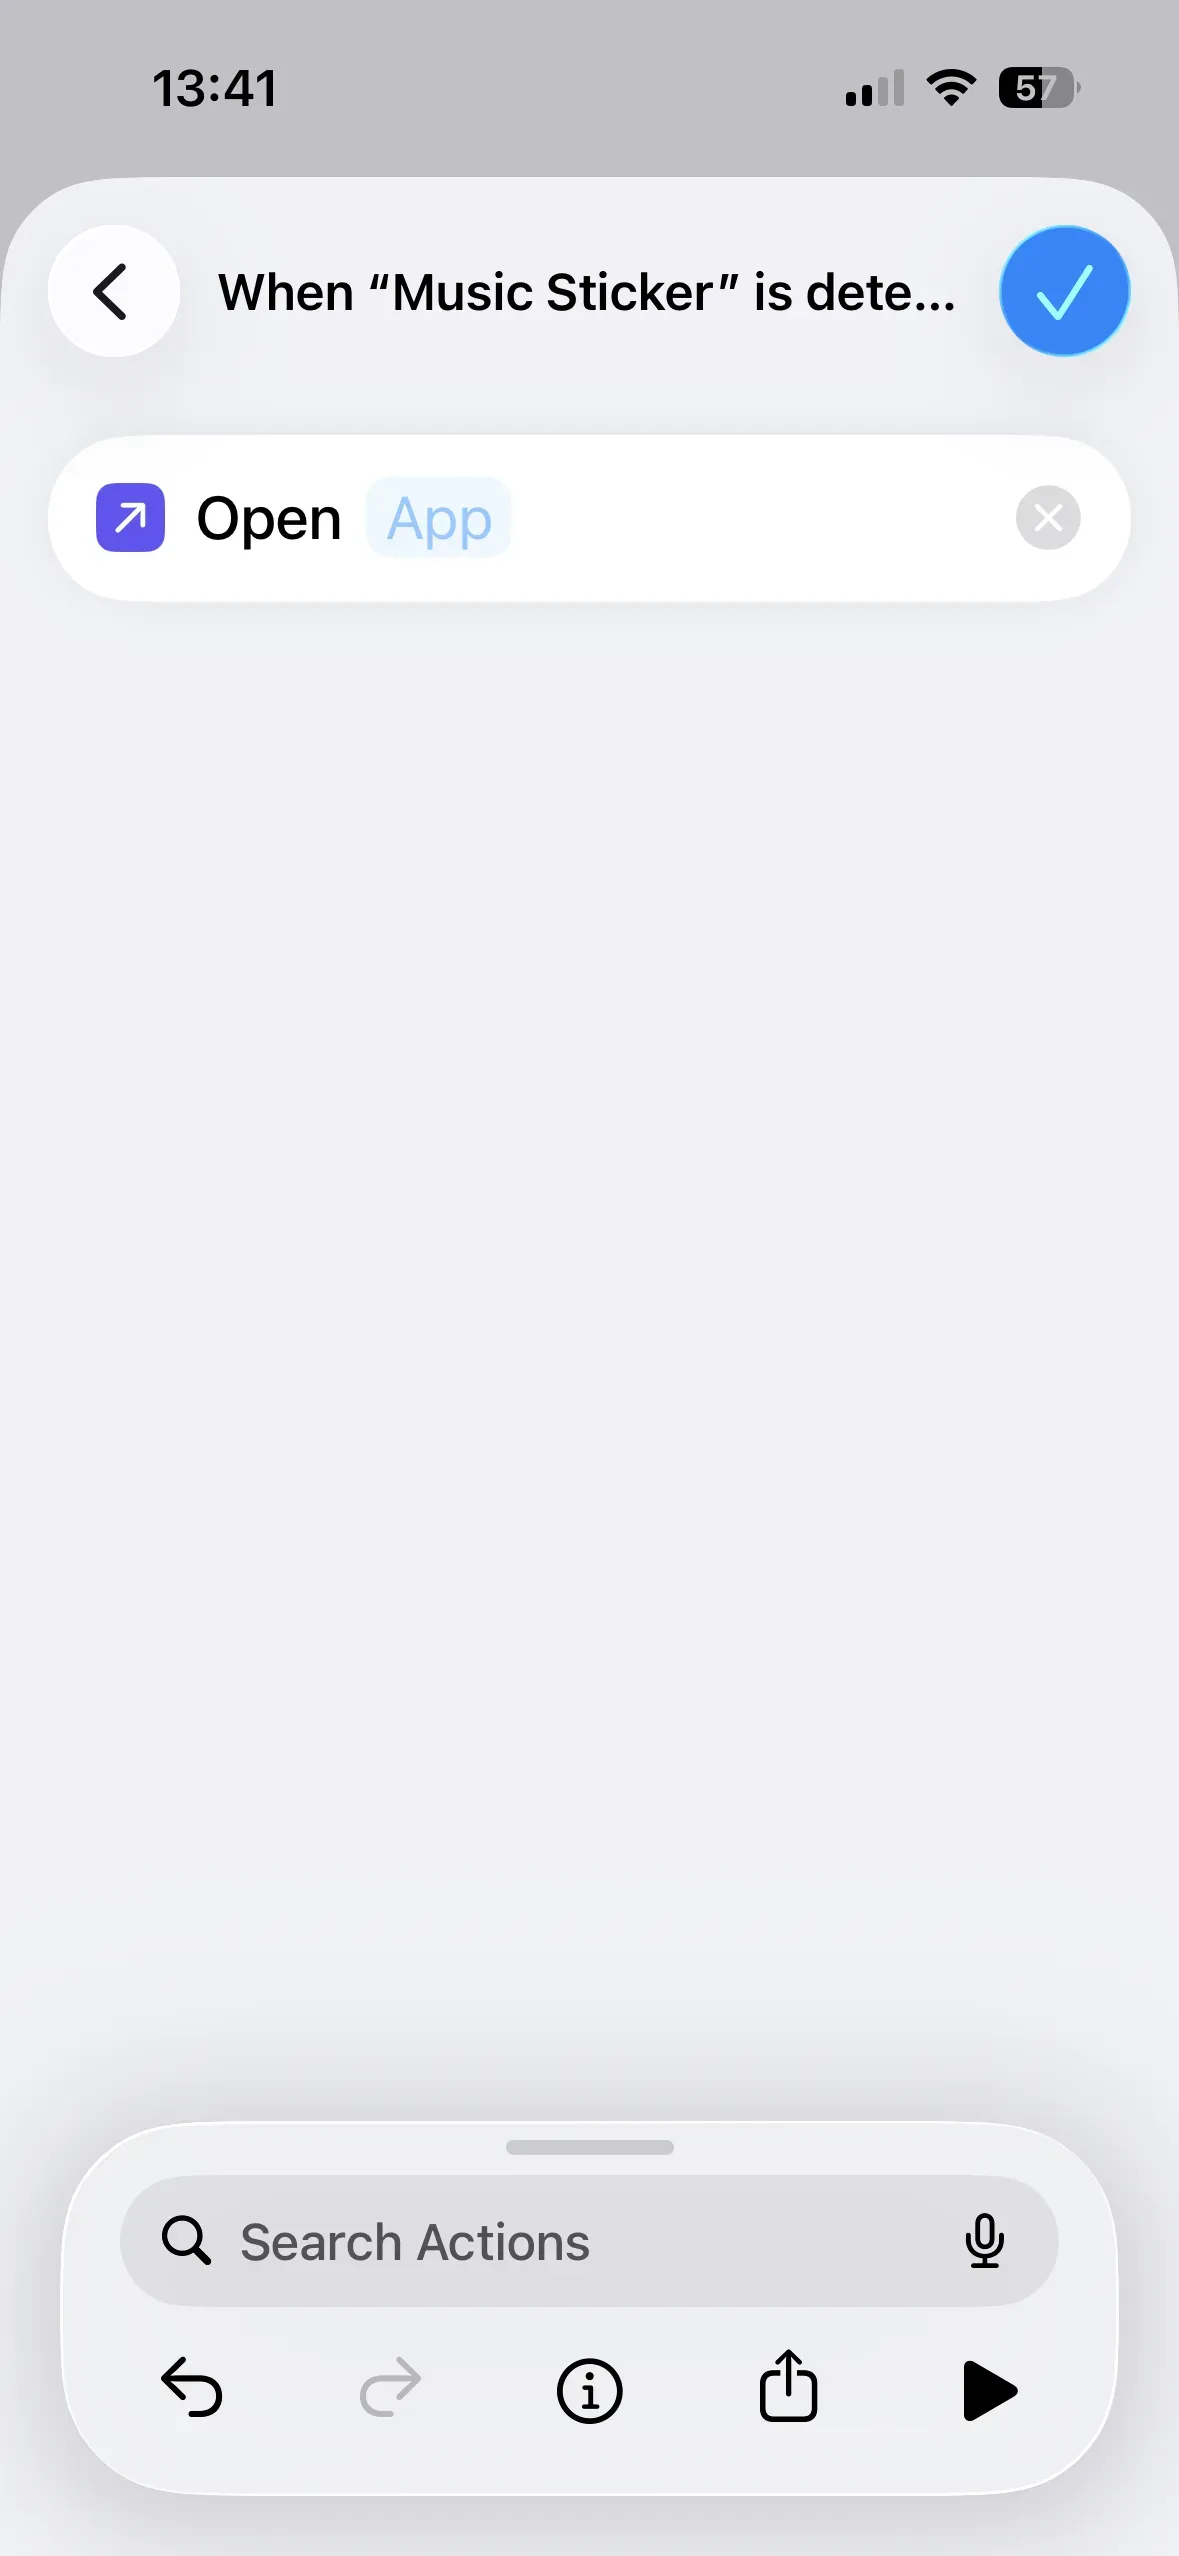
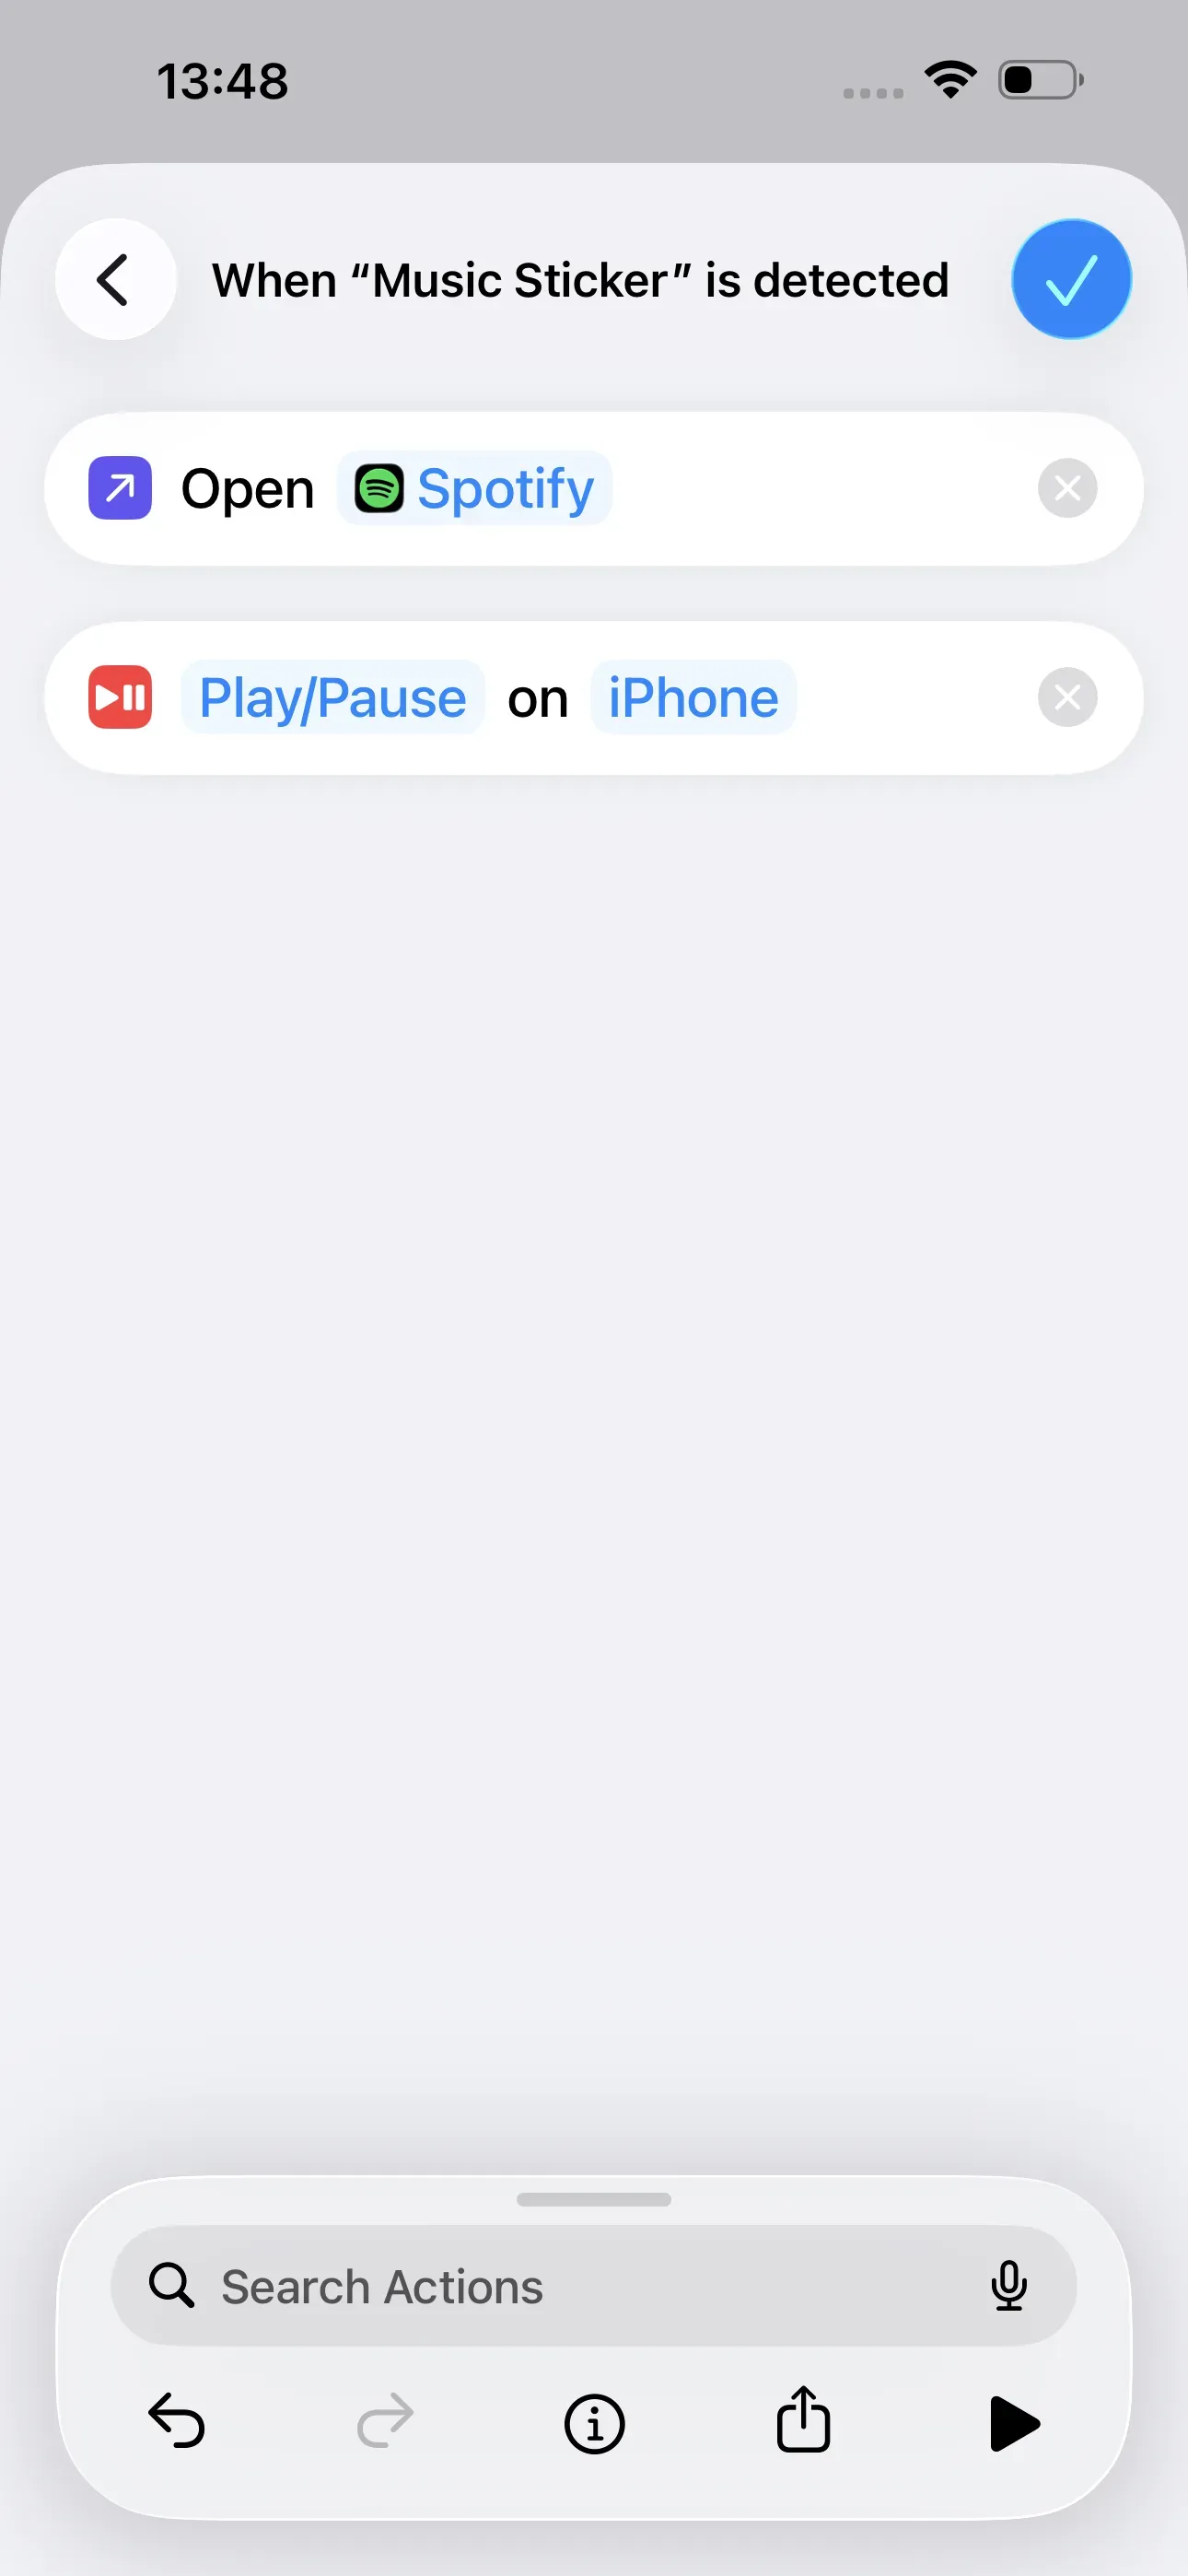
In the Shortcuts app, tap Automation → New Automation and the Personal Automation window will open. There, tap NFC → Run Immediately and scan the music sticker. Then, name it, for example, Music Sticker.
Then tap on Next → Create New Shortcut.
Now, we can decide what should happen after scanning the NFC tag. To ensure that music plays automatically when the music sticker is scanned, we still need to specify which app should play the music.
-
If we want music to play automatically from Spotify, we need to select the action Open App. Then we tap App and select Spotify. Finally, search for Play in the search bar and tap Play/Pause. Then tap the blue checkmark in the top-right corner, and the automation is complete. Now, when you scan the music sticker, Spotify will open automatically and start playing.
-
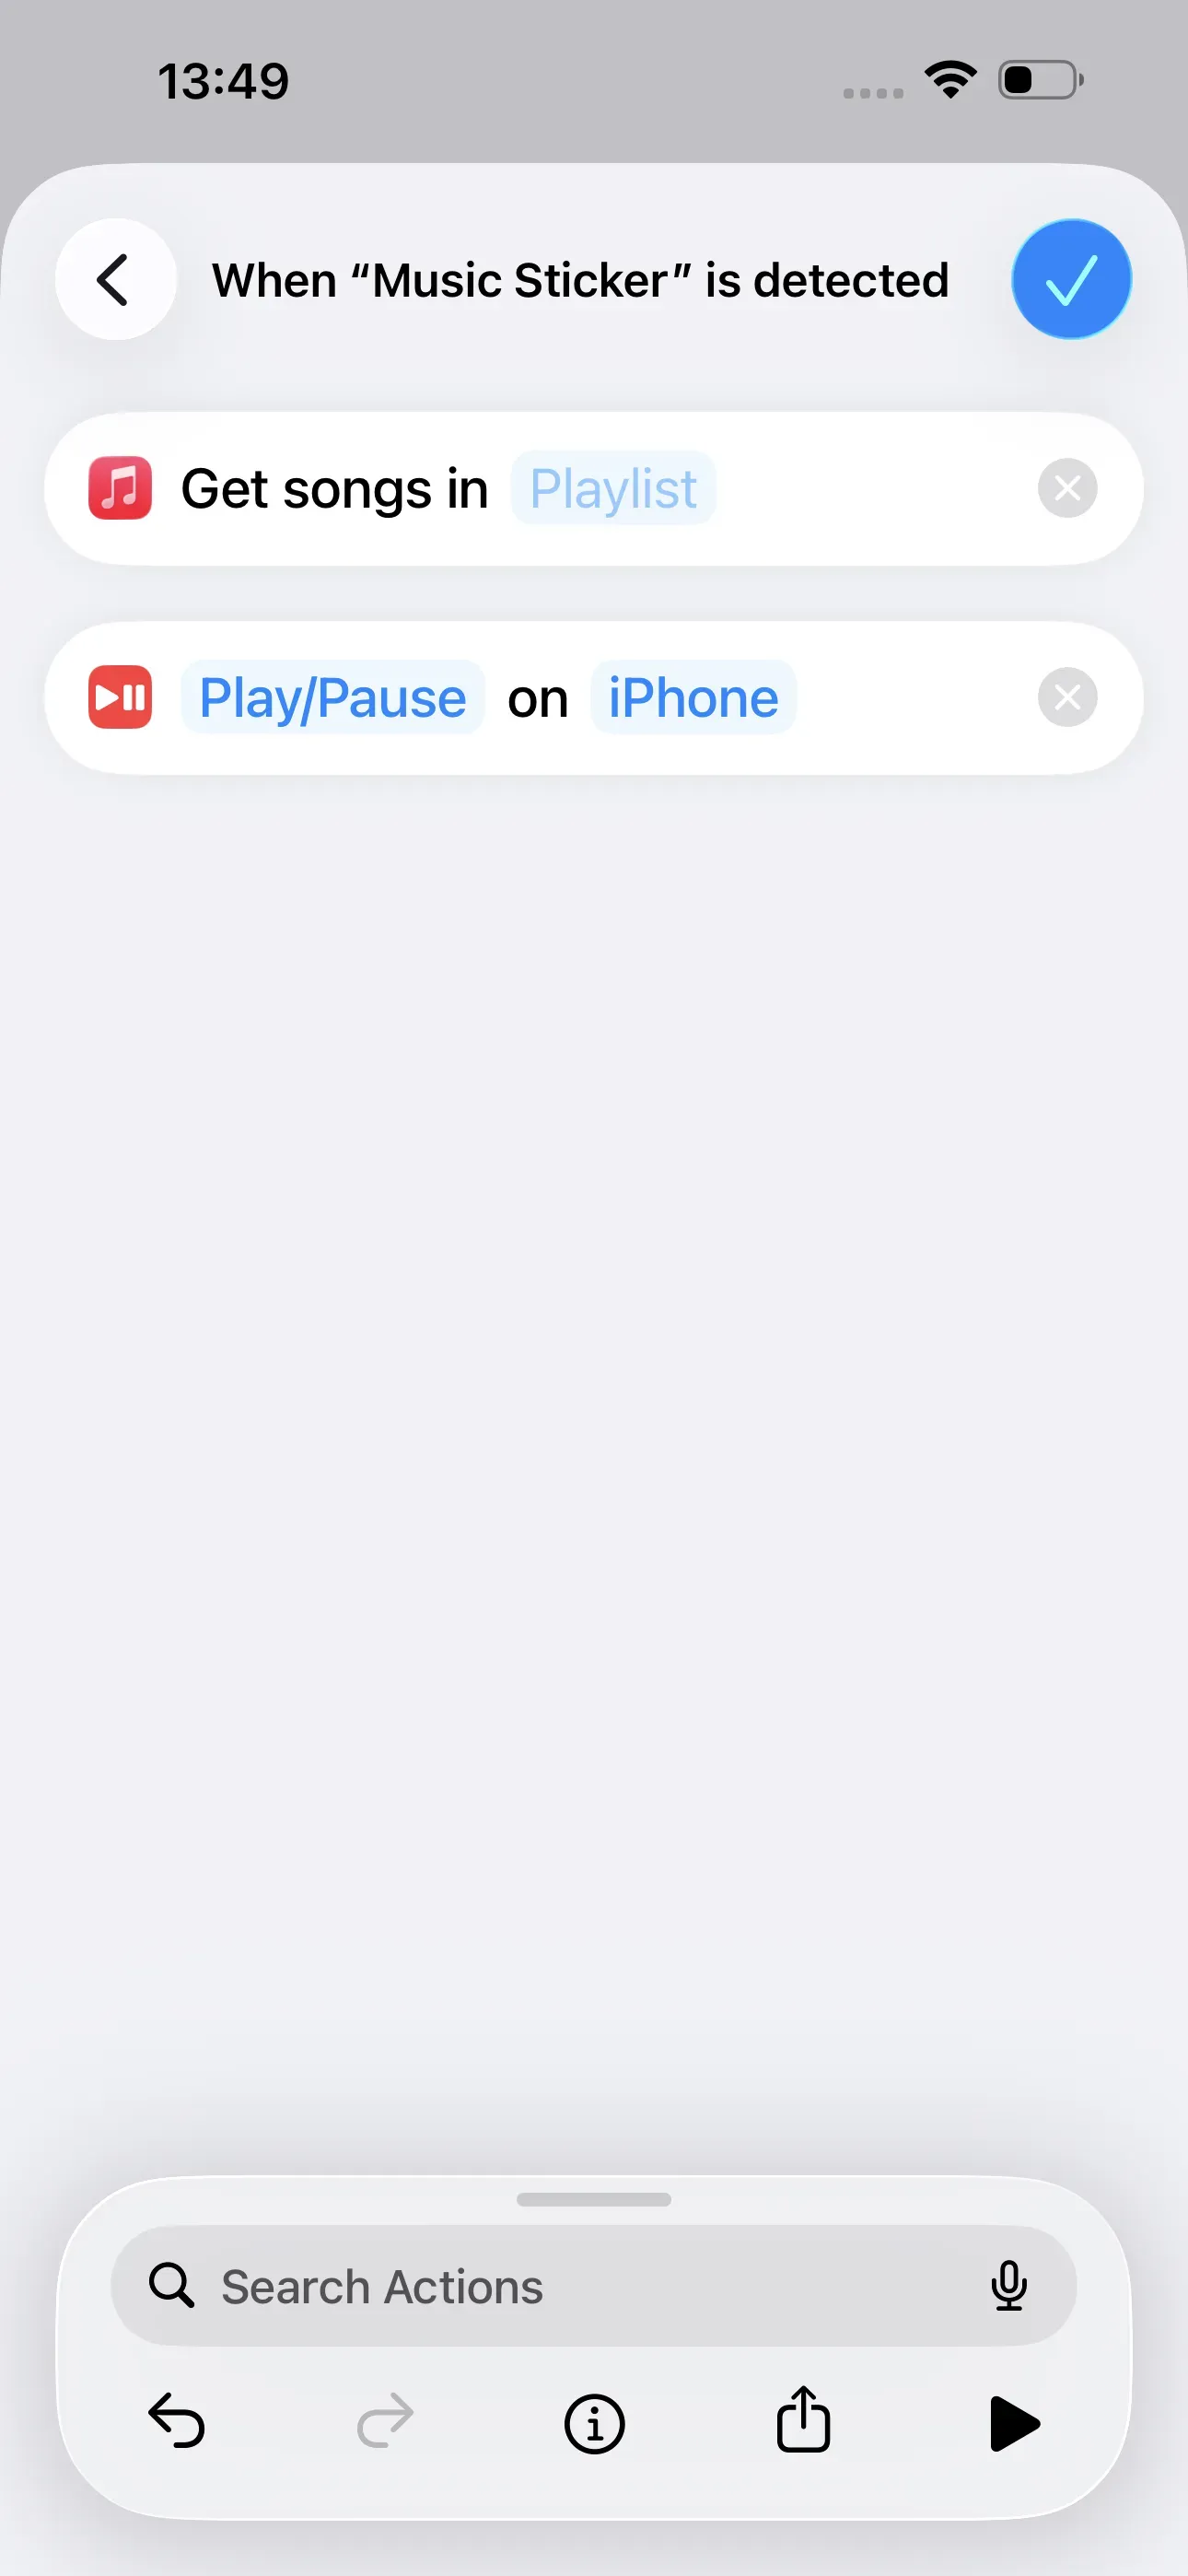
Of course, this also works with Apple Music and any other (music) app. The previous steps up to Create New Shortcut remain the same. However, to automatically play a playlist from Apple Music, we enter Playlist in the search bar and then select Get Playlist. With one final tap on Playlist, we can now select the desired playlist. Then we look for the action Play/Pause again and select it.
Read our how-to guide on playing music via a Bluetooth box using NFC to automatically play music on a Bluetooth speaker as well.

Alarm clock
By scanning the alarm clock sticker, you can automatically set an alarm. To do this, hold your smartphone up to the sticker and then enter the desired time. As with the music sticker, we achieve this using the Shortcuts app.
Open the app and tap Automation → New Automation at the bottom, the Personal Automation window will open. Then tap on NFC → Run Immediately and scan the alarm clock sticker.
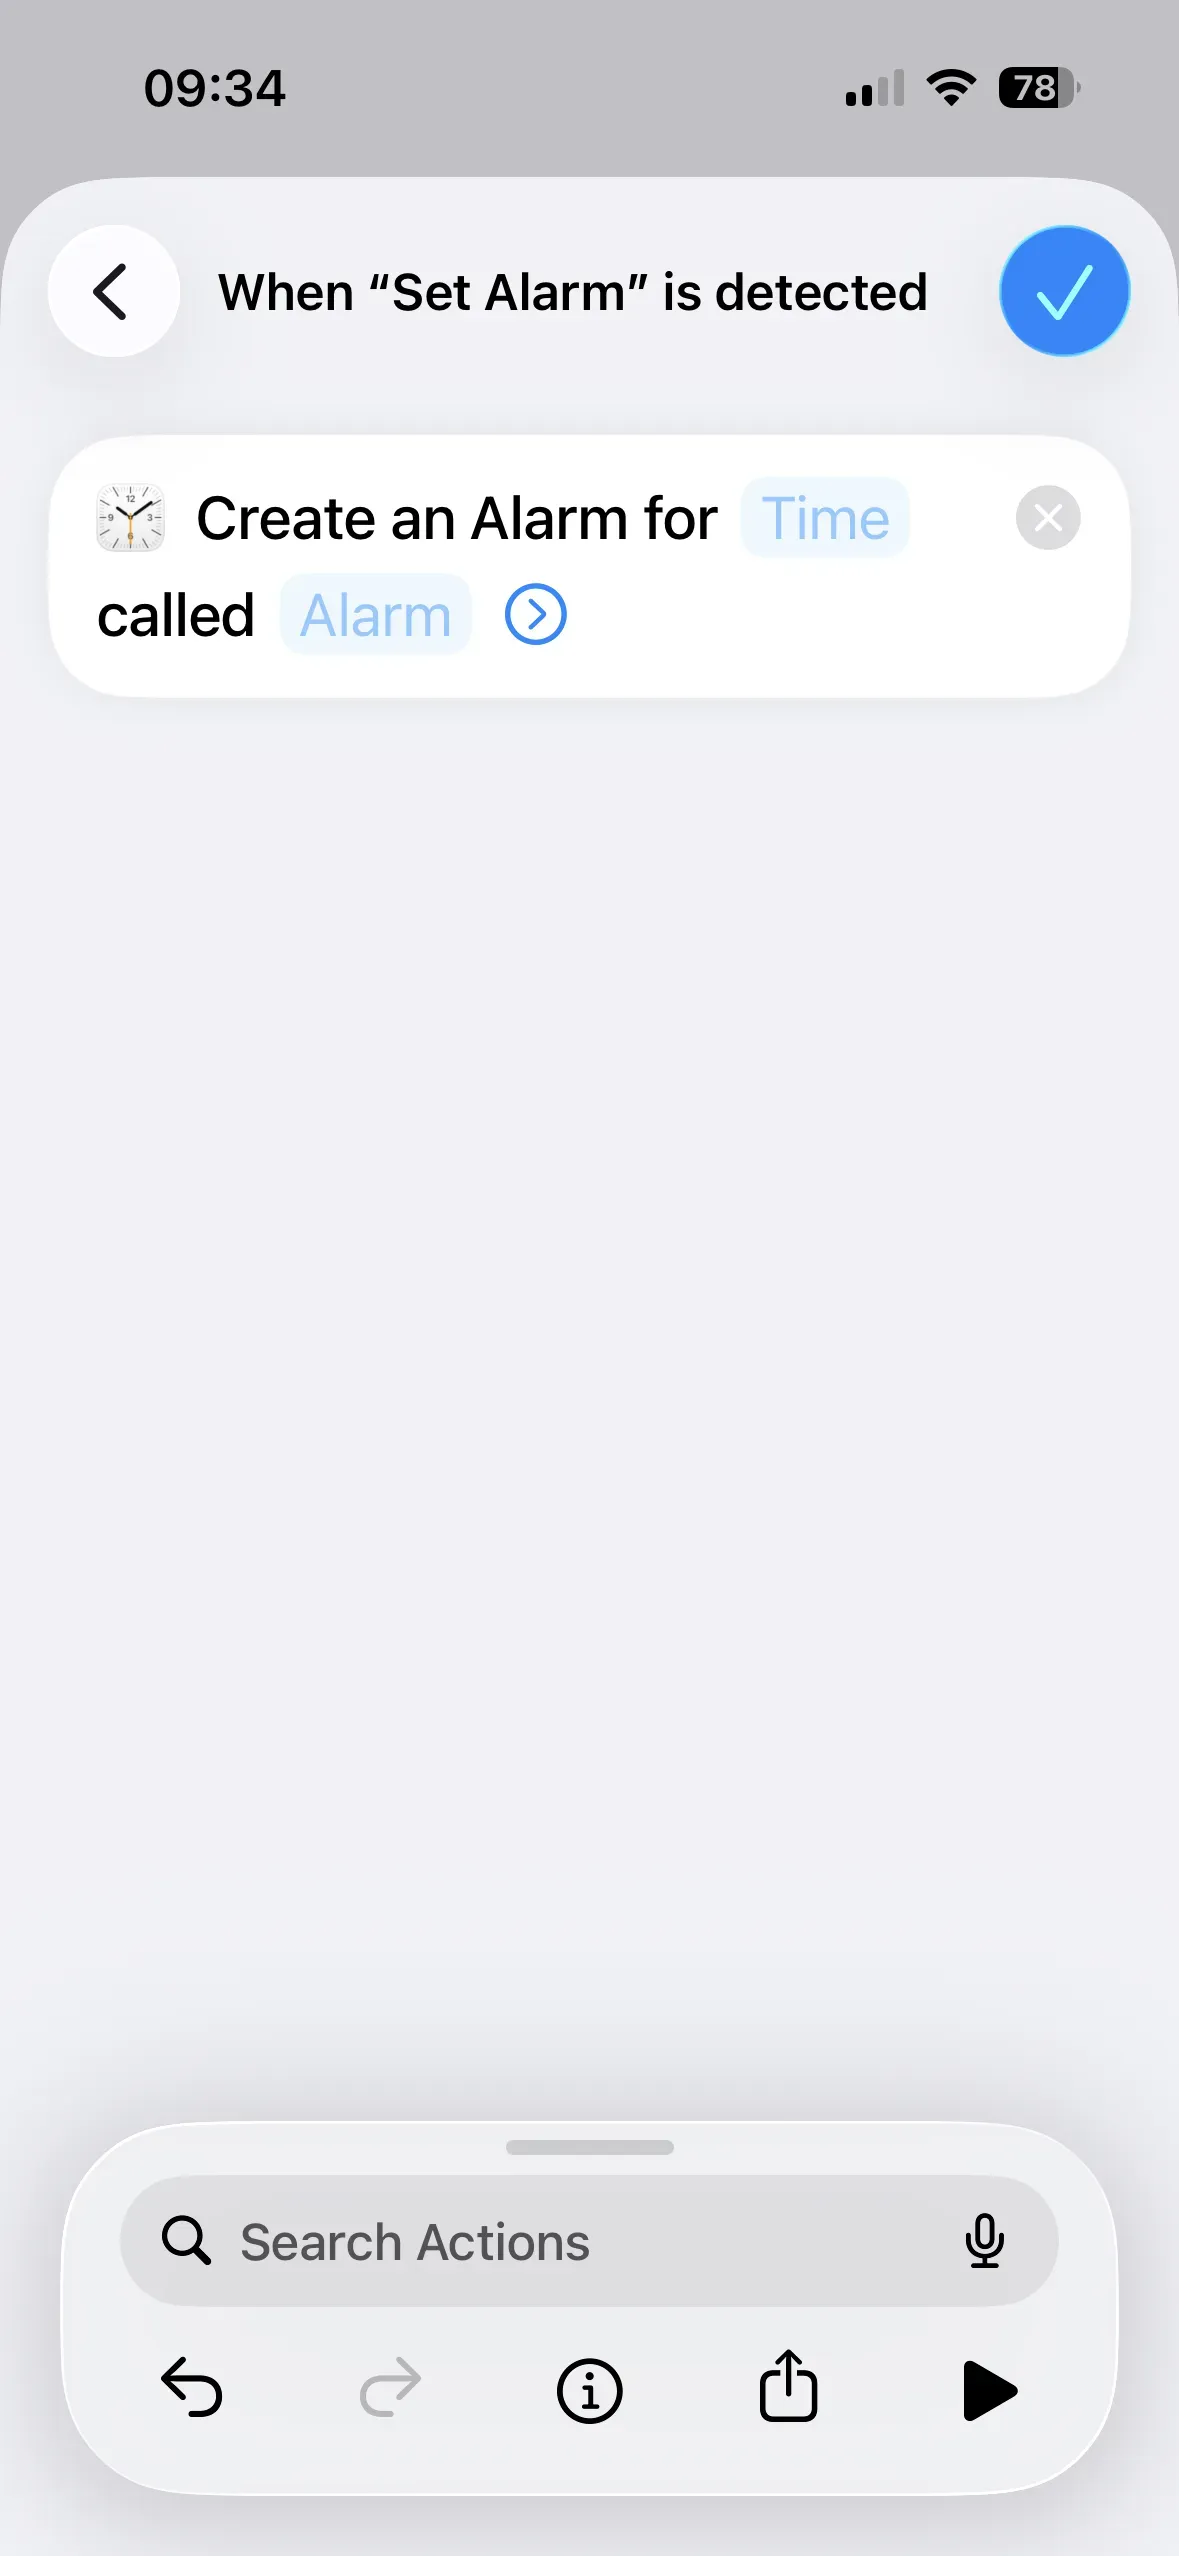
We name this Set Alarm. Then we go to Next → Create New Shortcut.
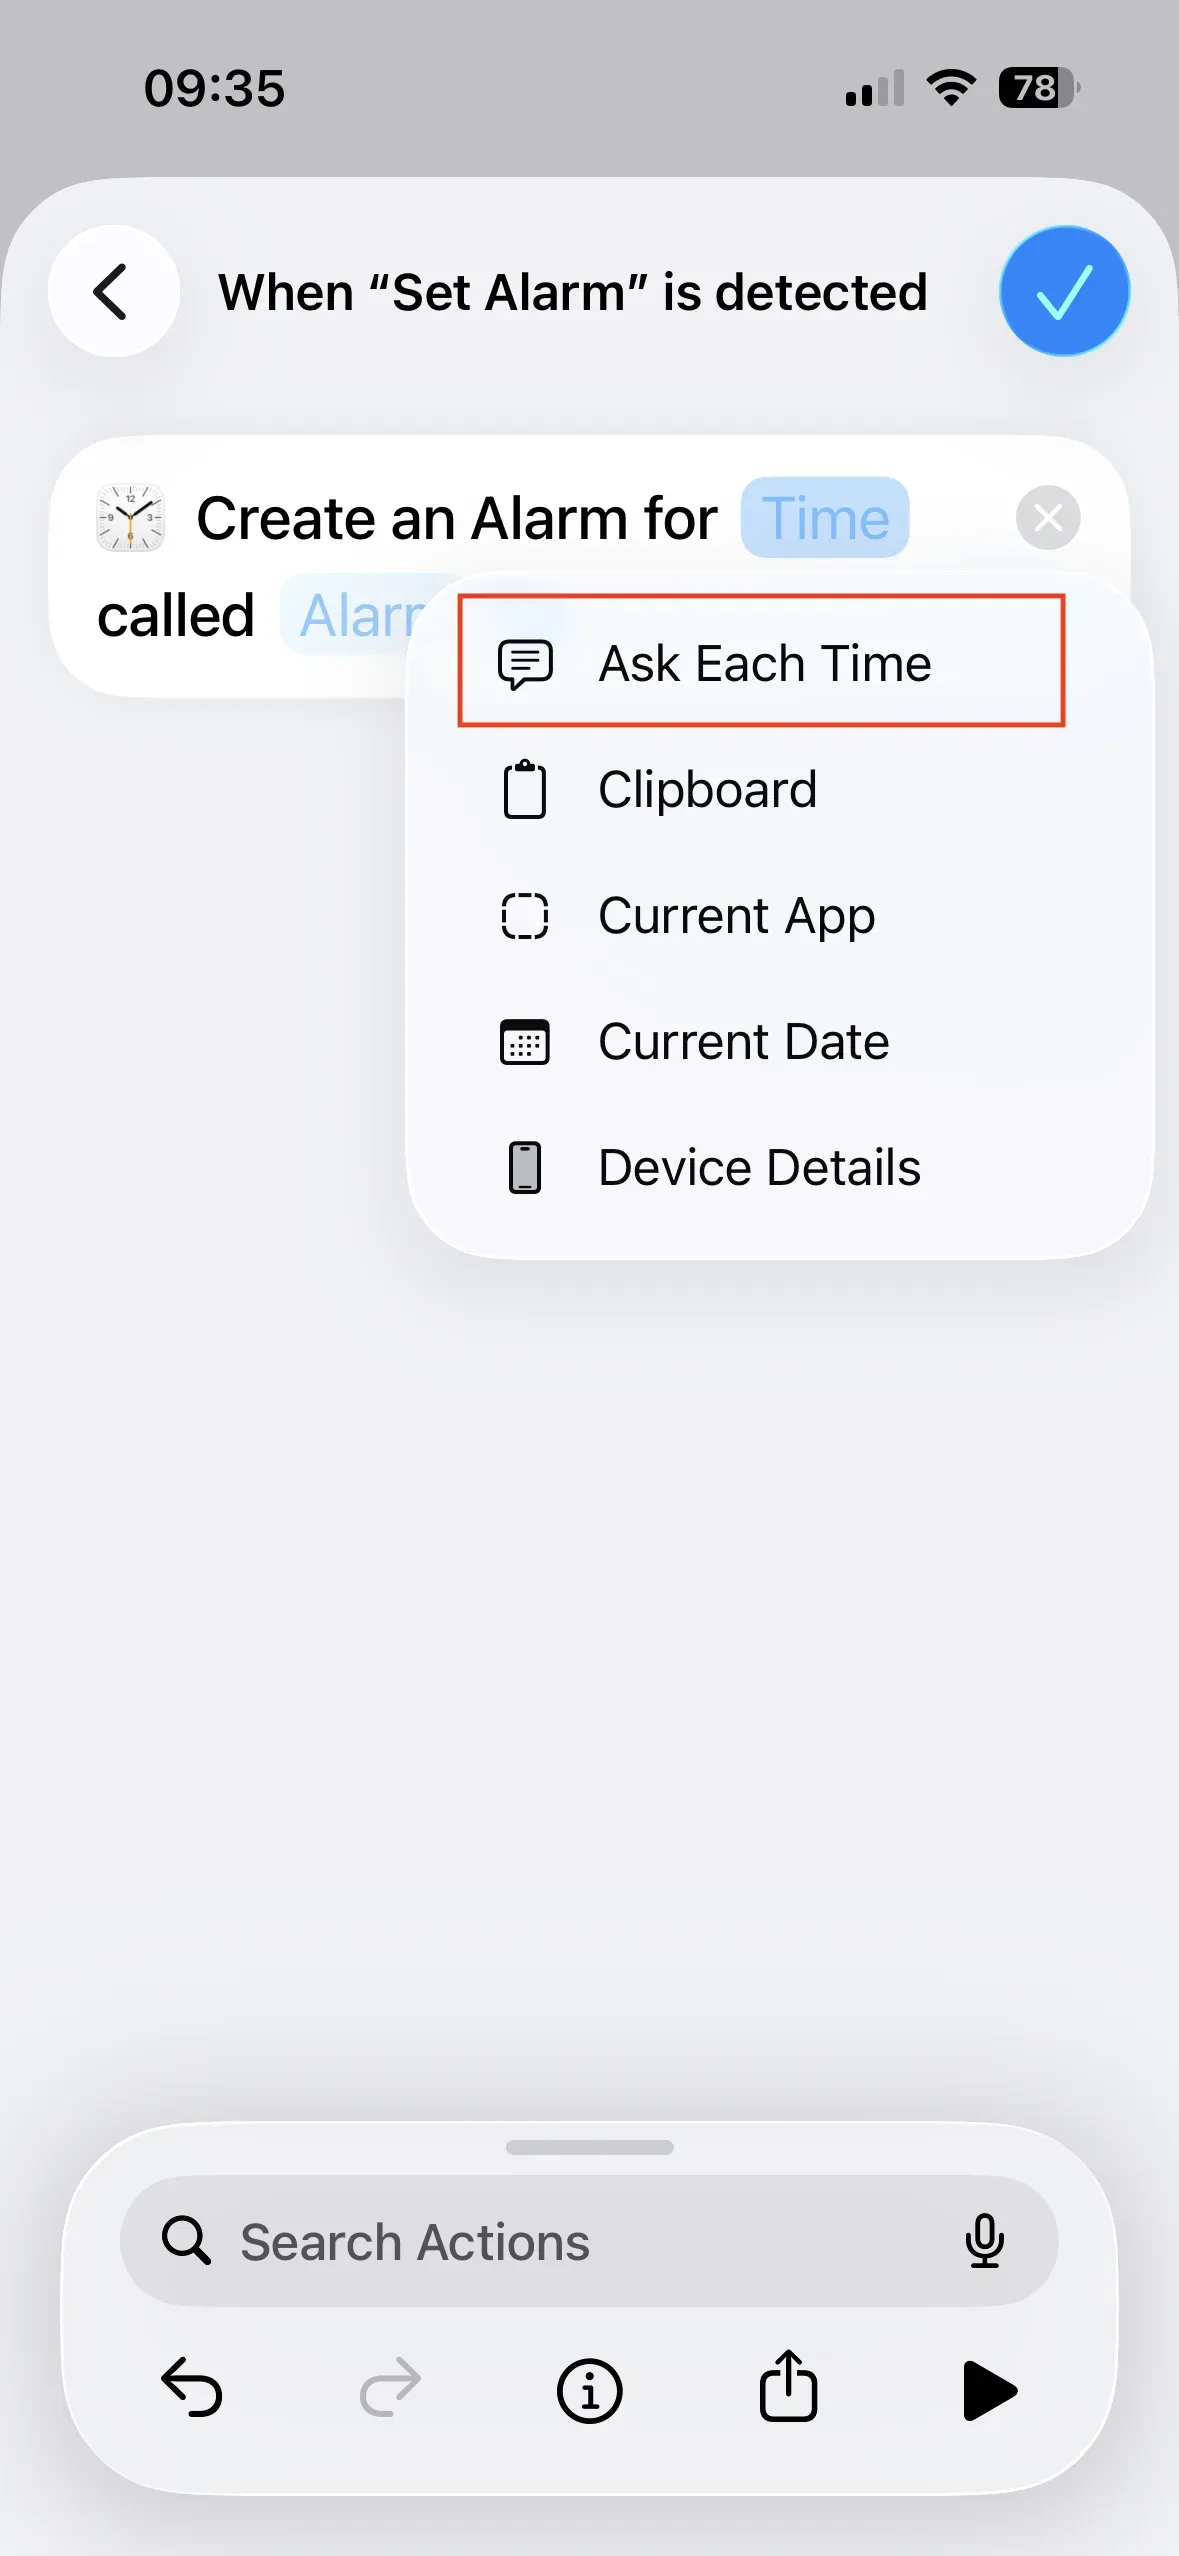
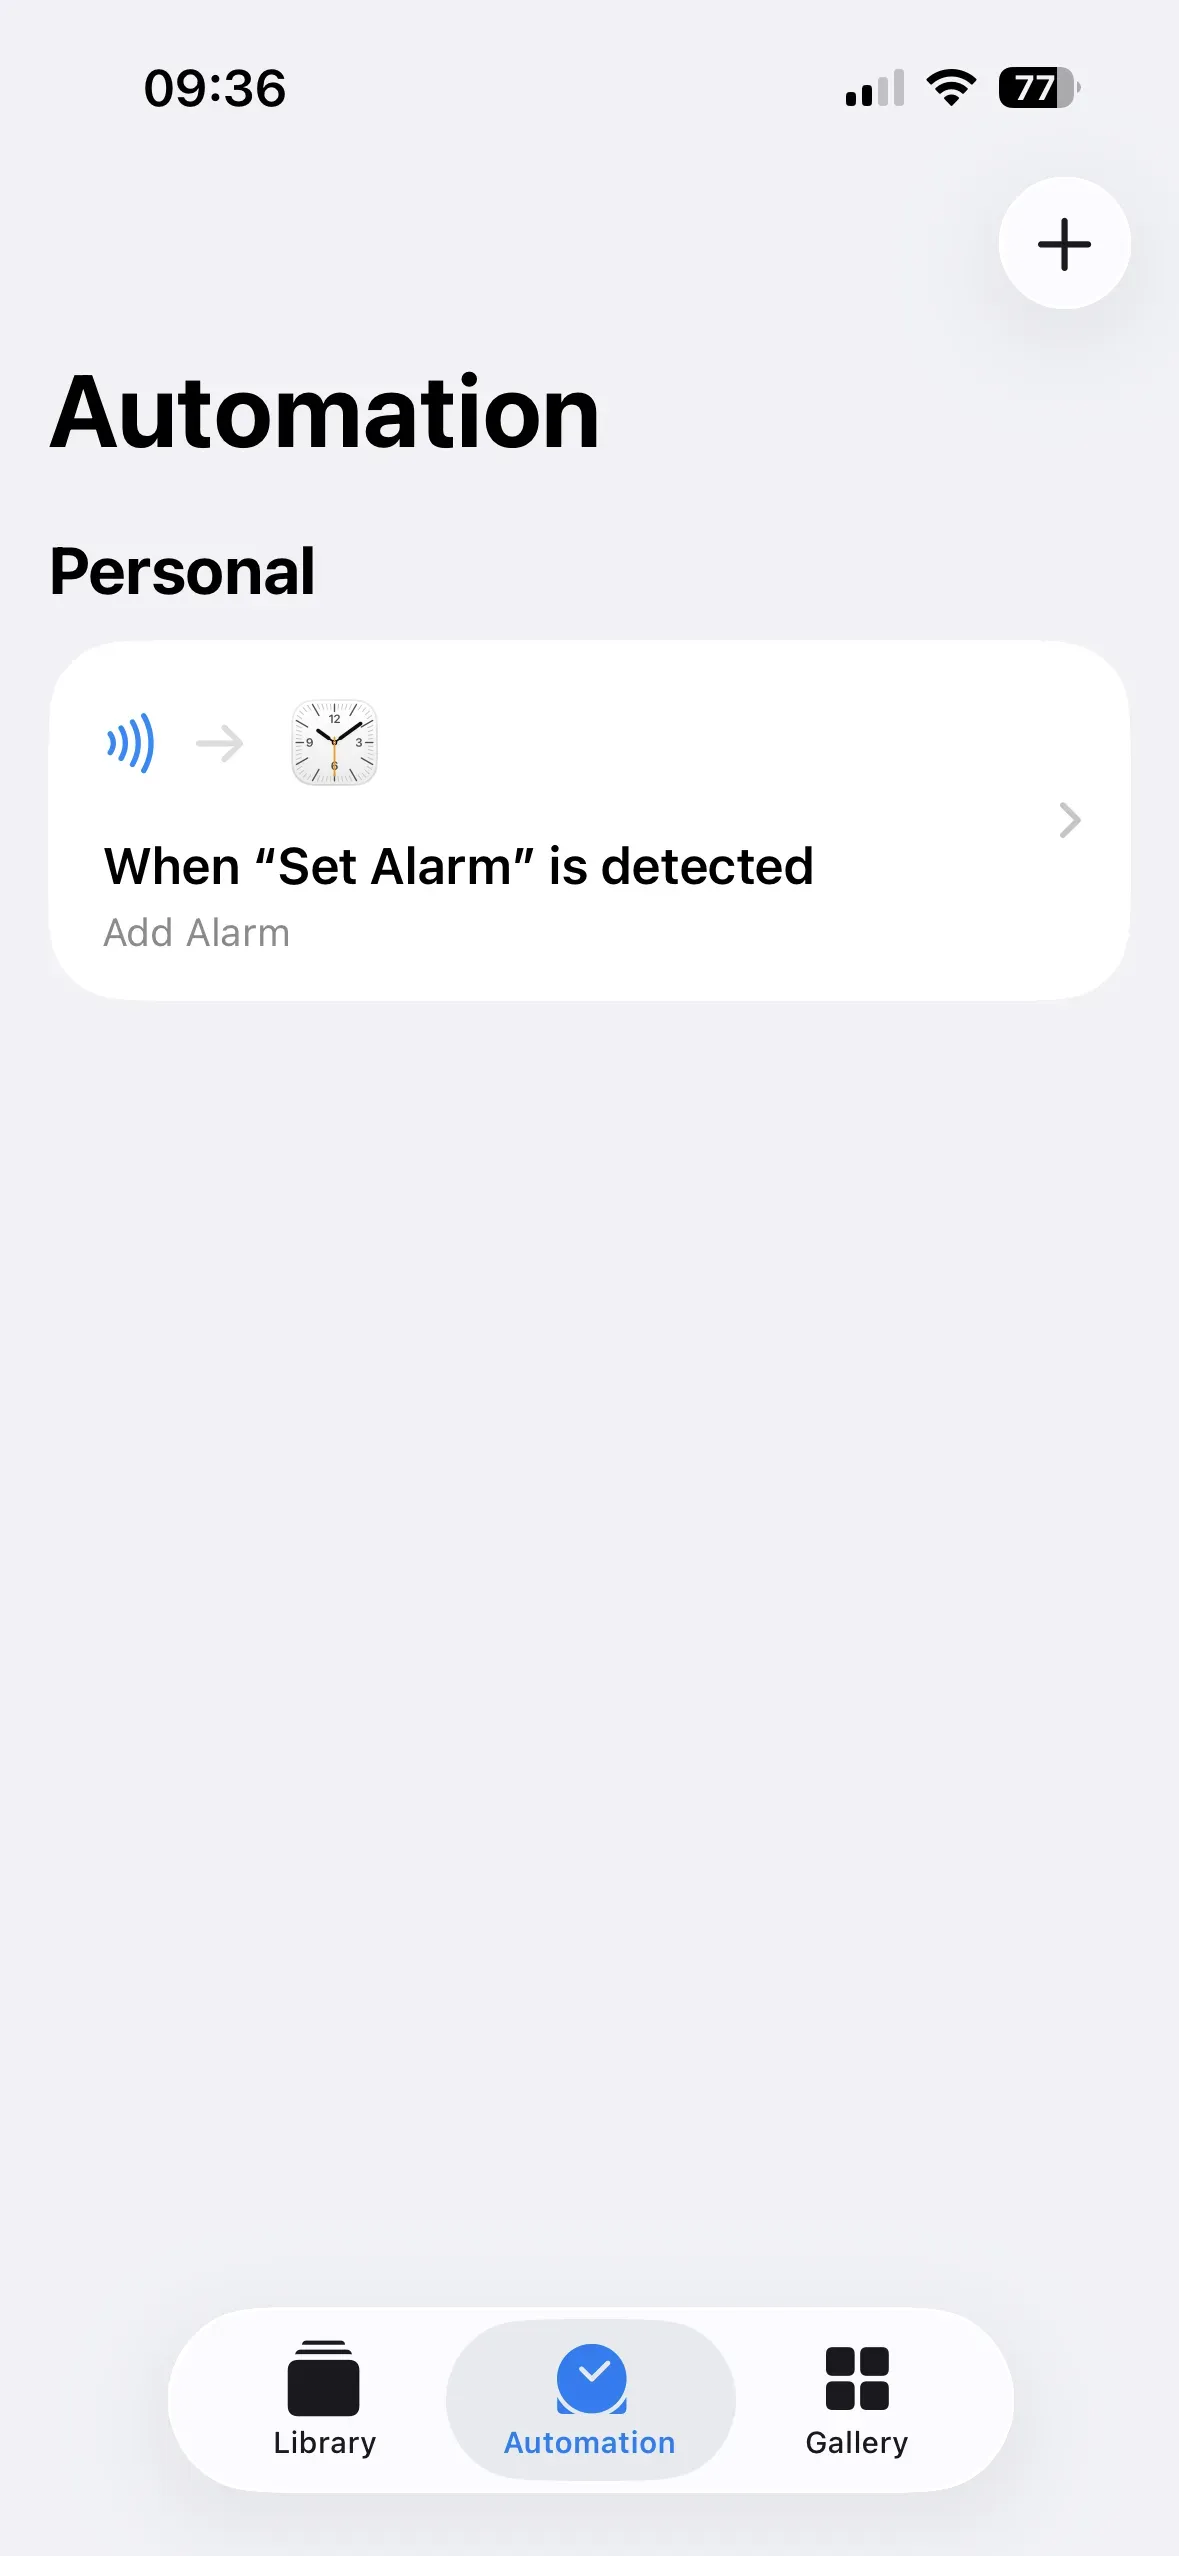
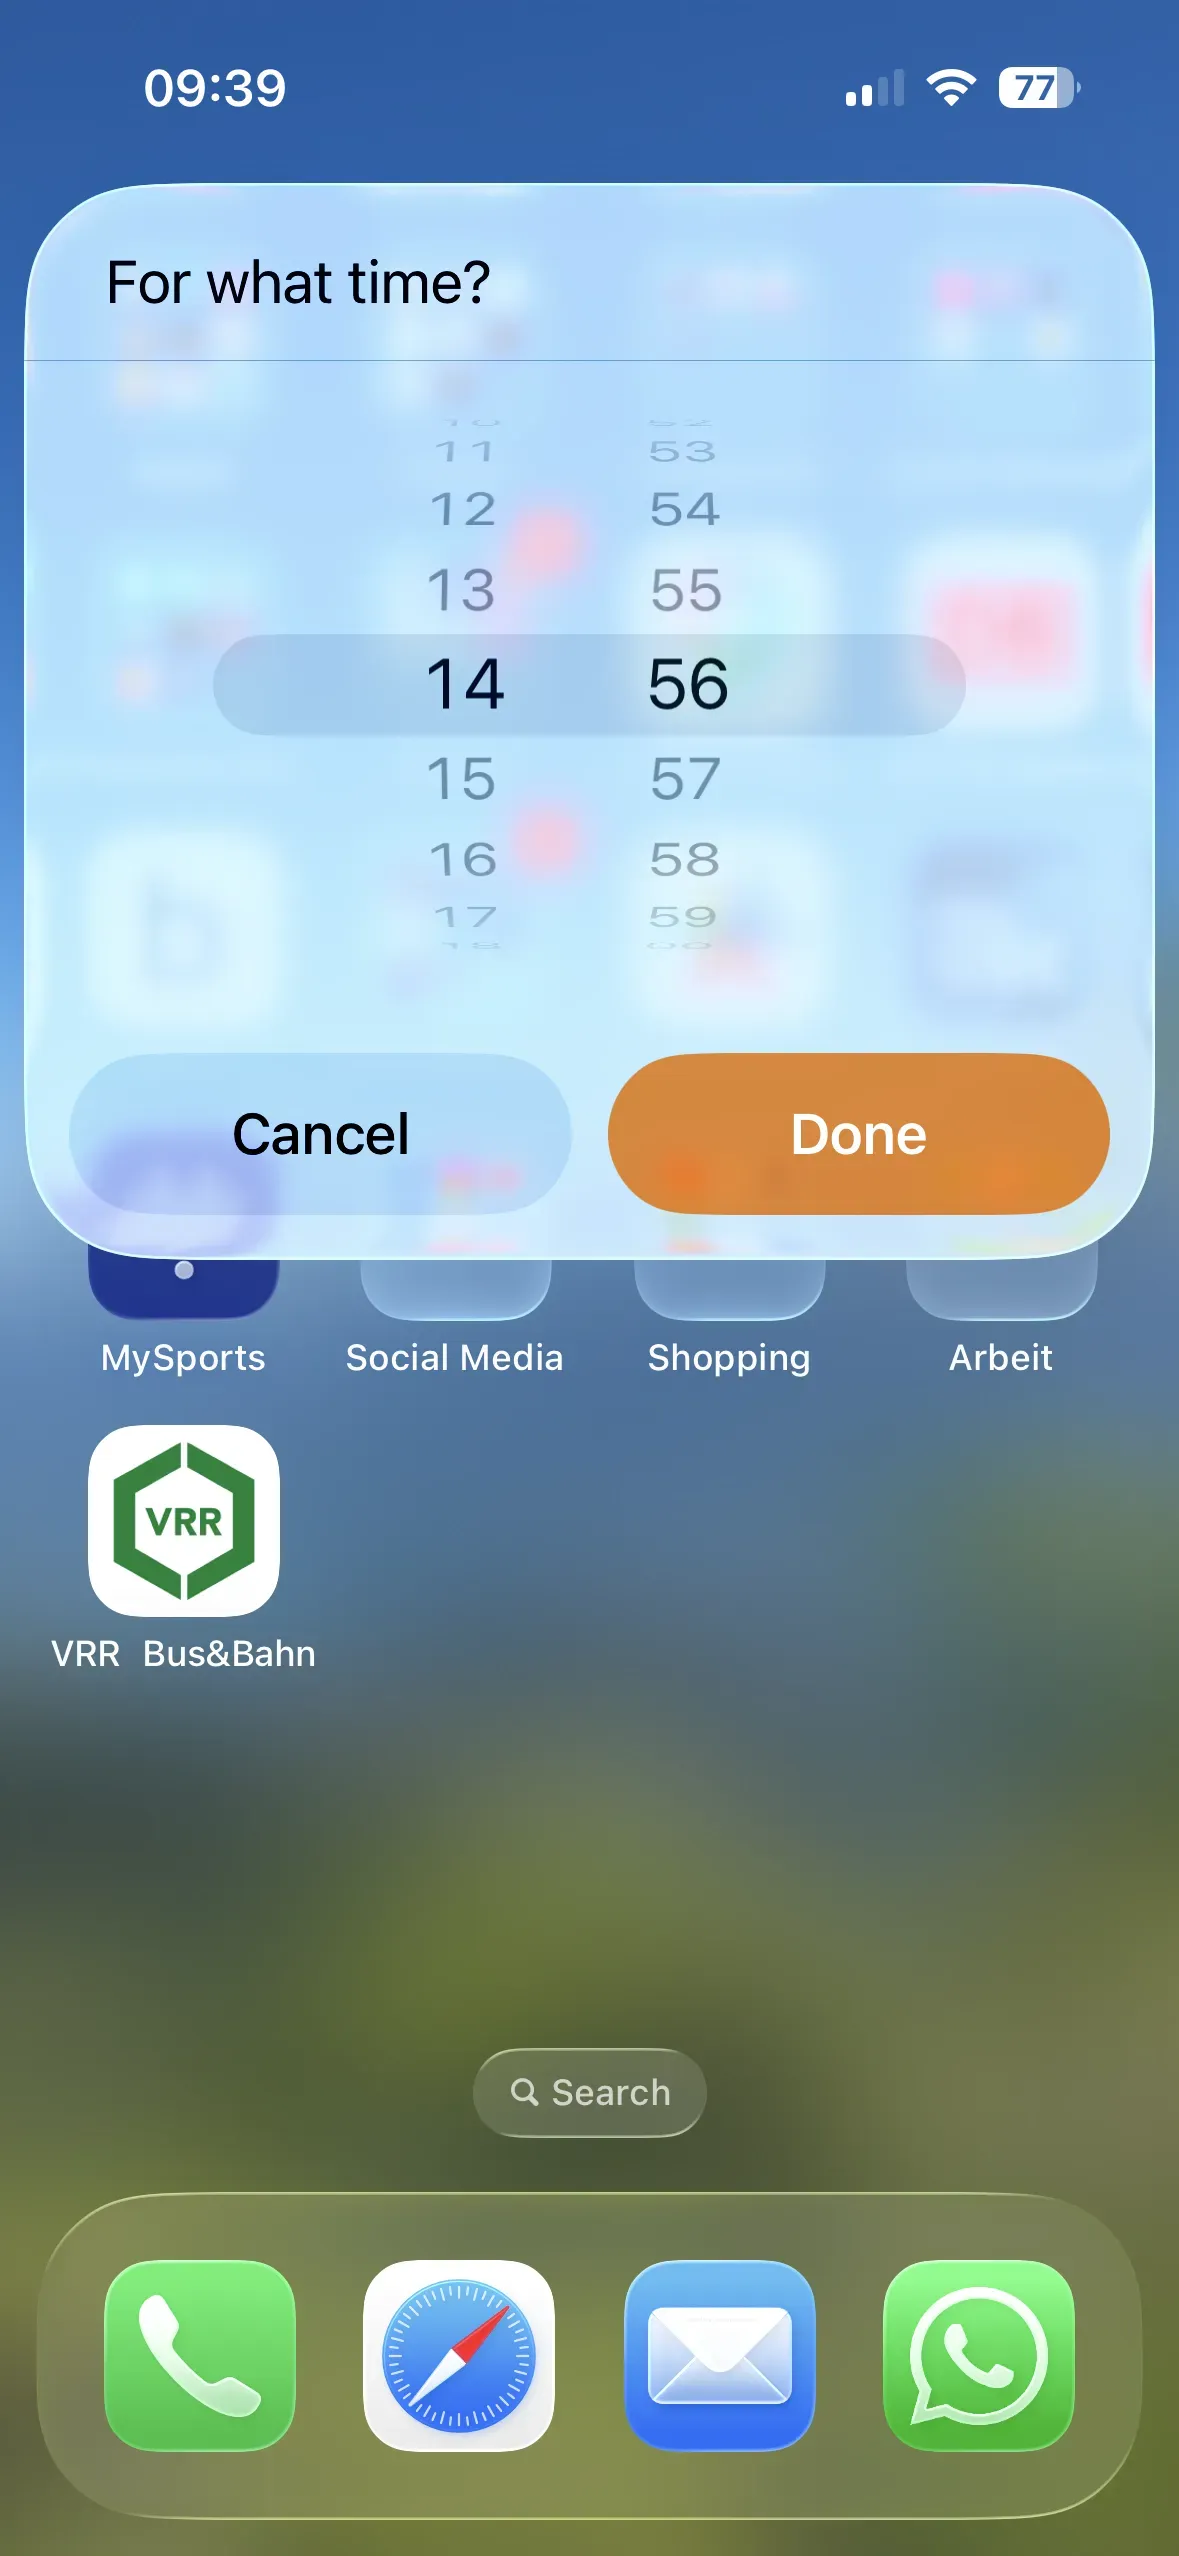
To create the new shortcut, type Alarm into the search field and select the action Add Alarm. Here, we press and hold the Time field and then select Ask Each Time. Finally, we tap the blue checkmark in the top-right corner. When you hold your smartphone up to the NFC sticker, you can enter a time for the alarm to go off and confirm the time by tapping Done. The alarm you created is now also visible in the Alarm app.
Read our article on creating more complex automation chains to learn more about other possible settings.
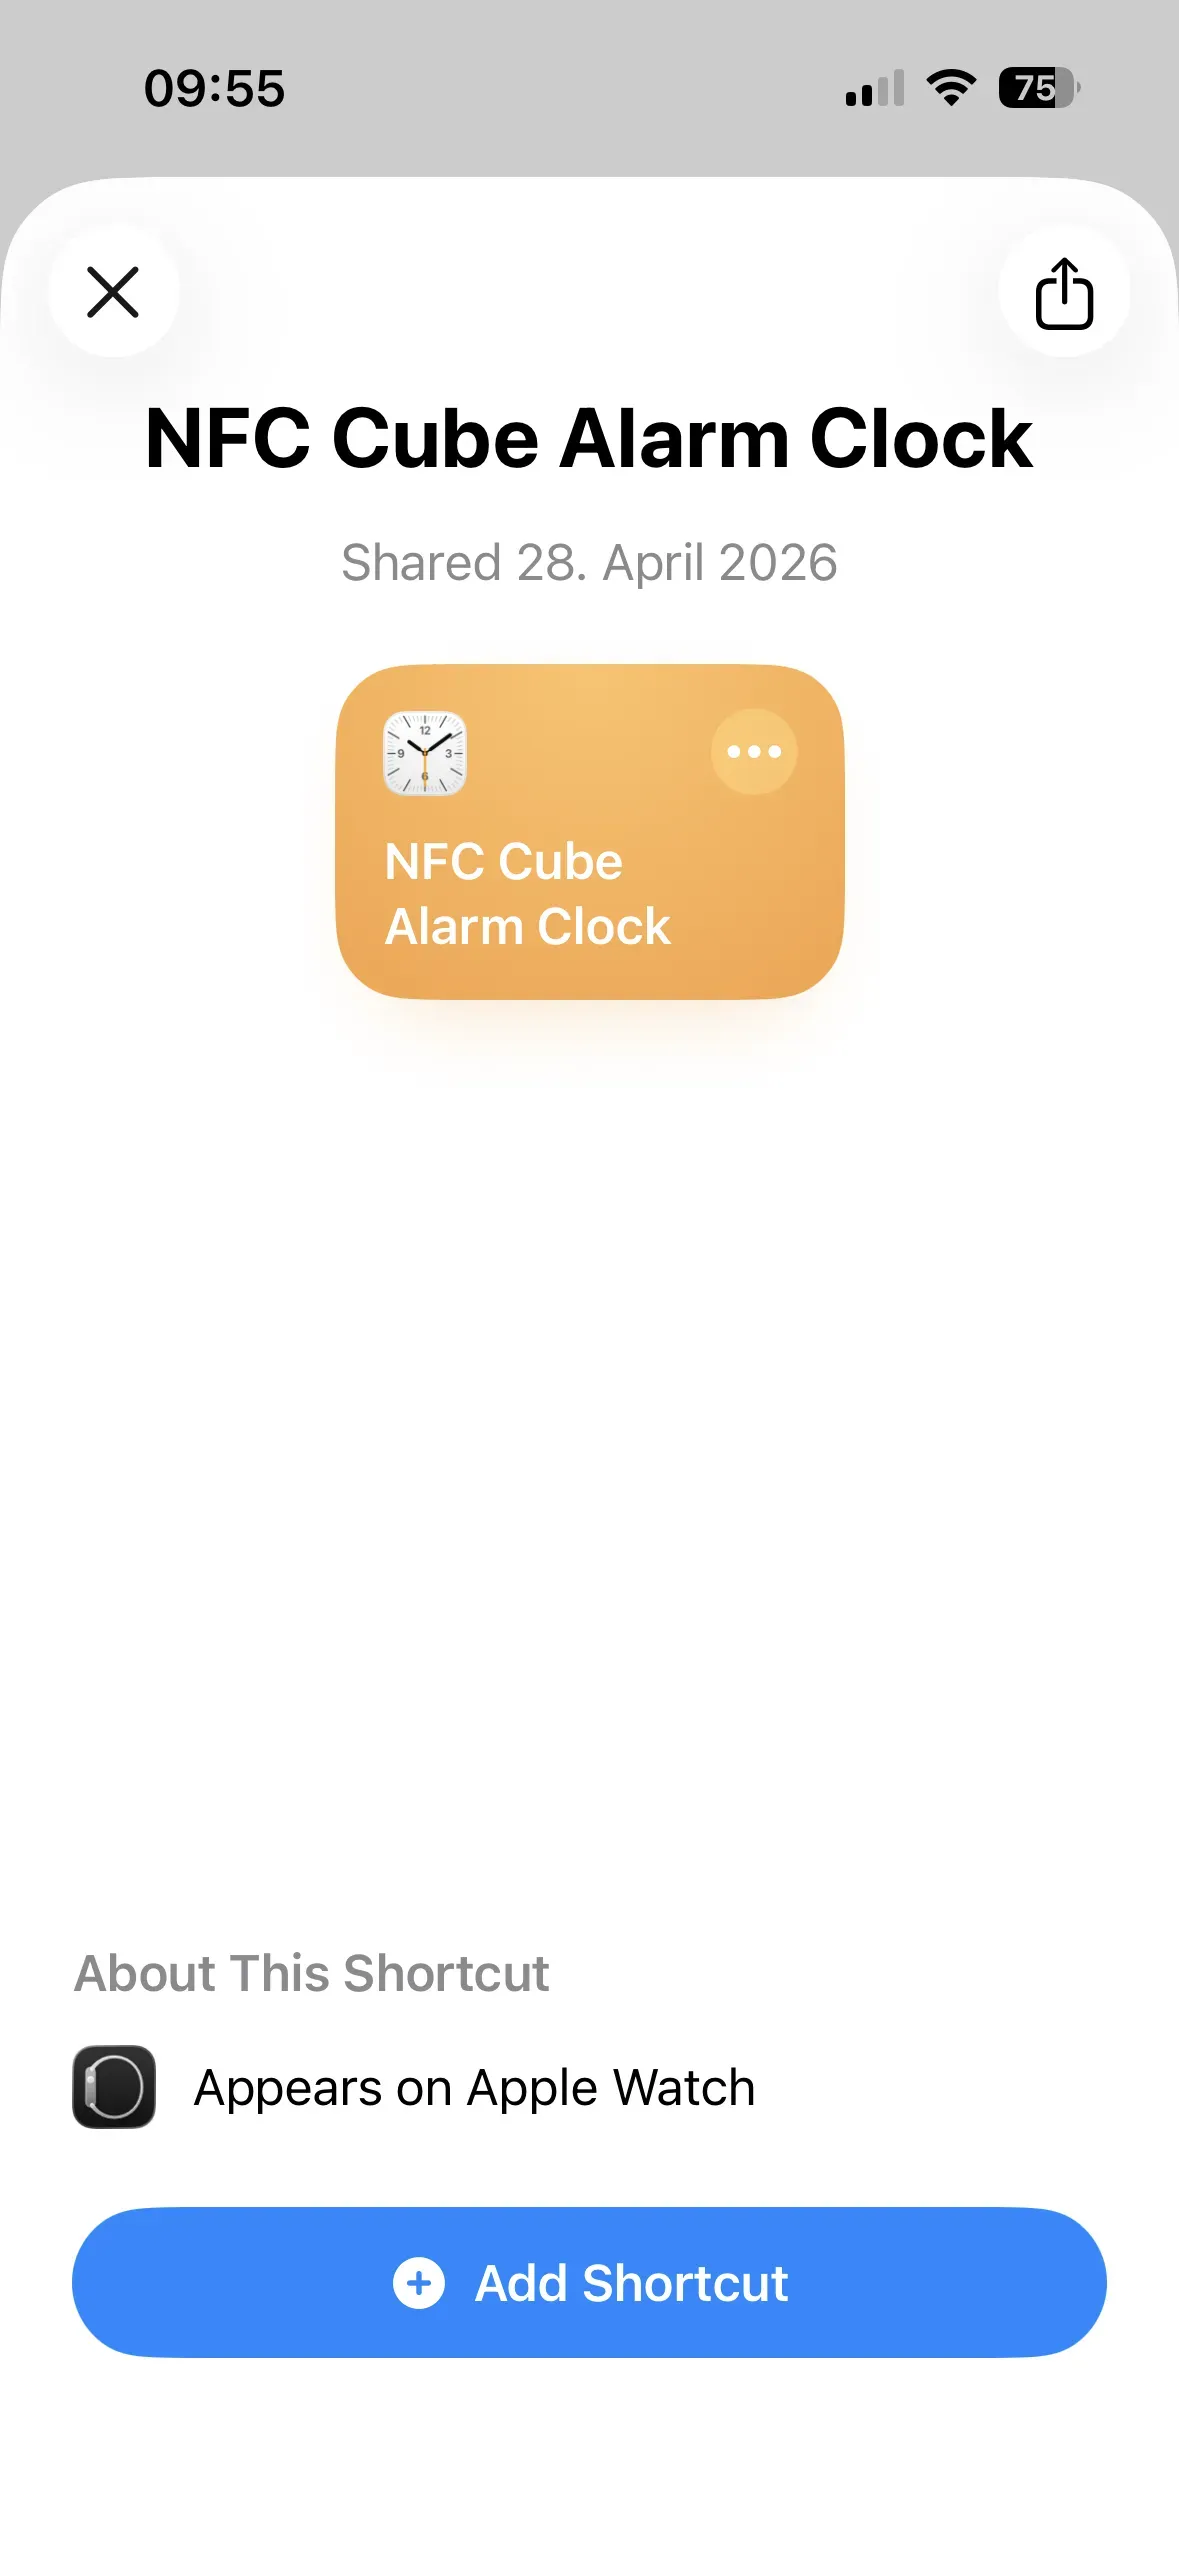
Advanced Alarm Clock for Download
We have created a pre-installed shortcut for you that lets you customize your Alarm Clock shortcut and choose between two actions:
- You can set an alarm time manually. The option here is Set Time.
- You can choose which existing alarm to turn on or off. The option here is Select Alarm.
To download the shortcut, tap + Add Shortcut.
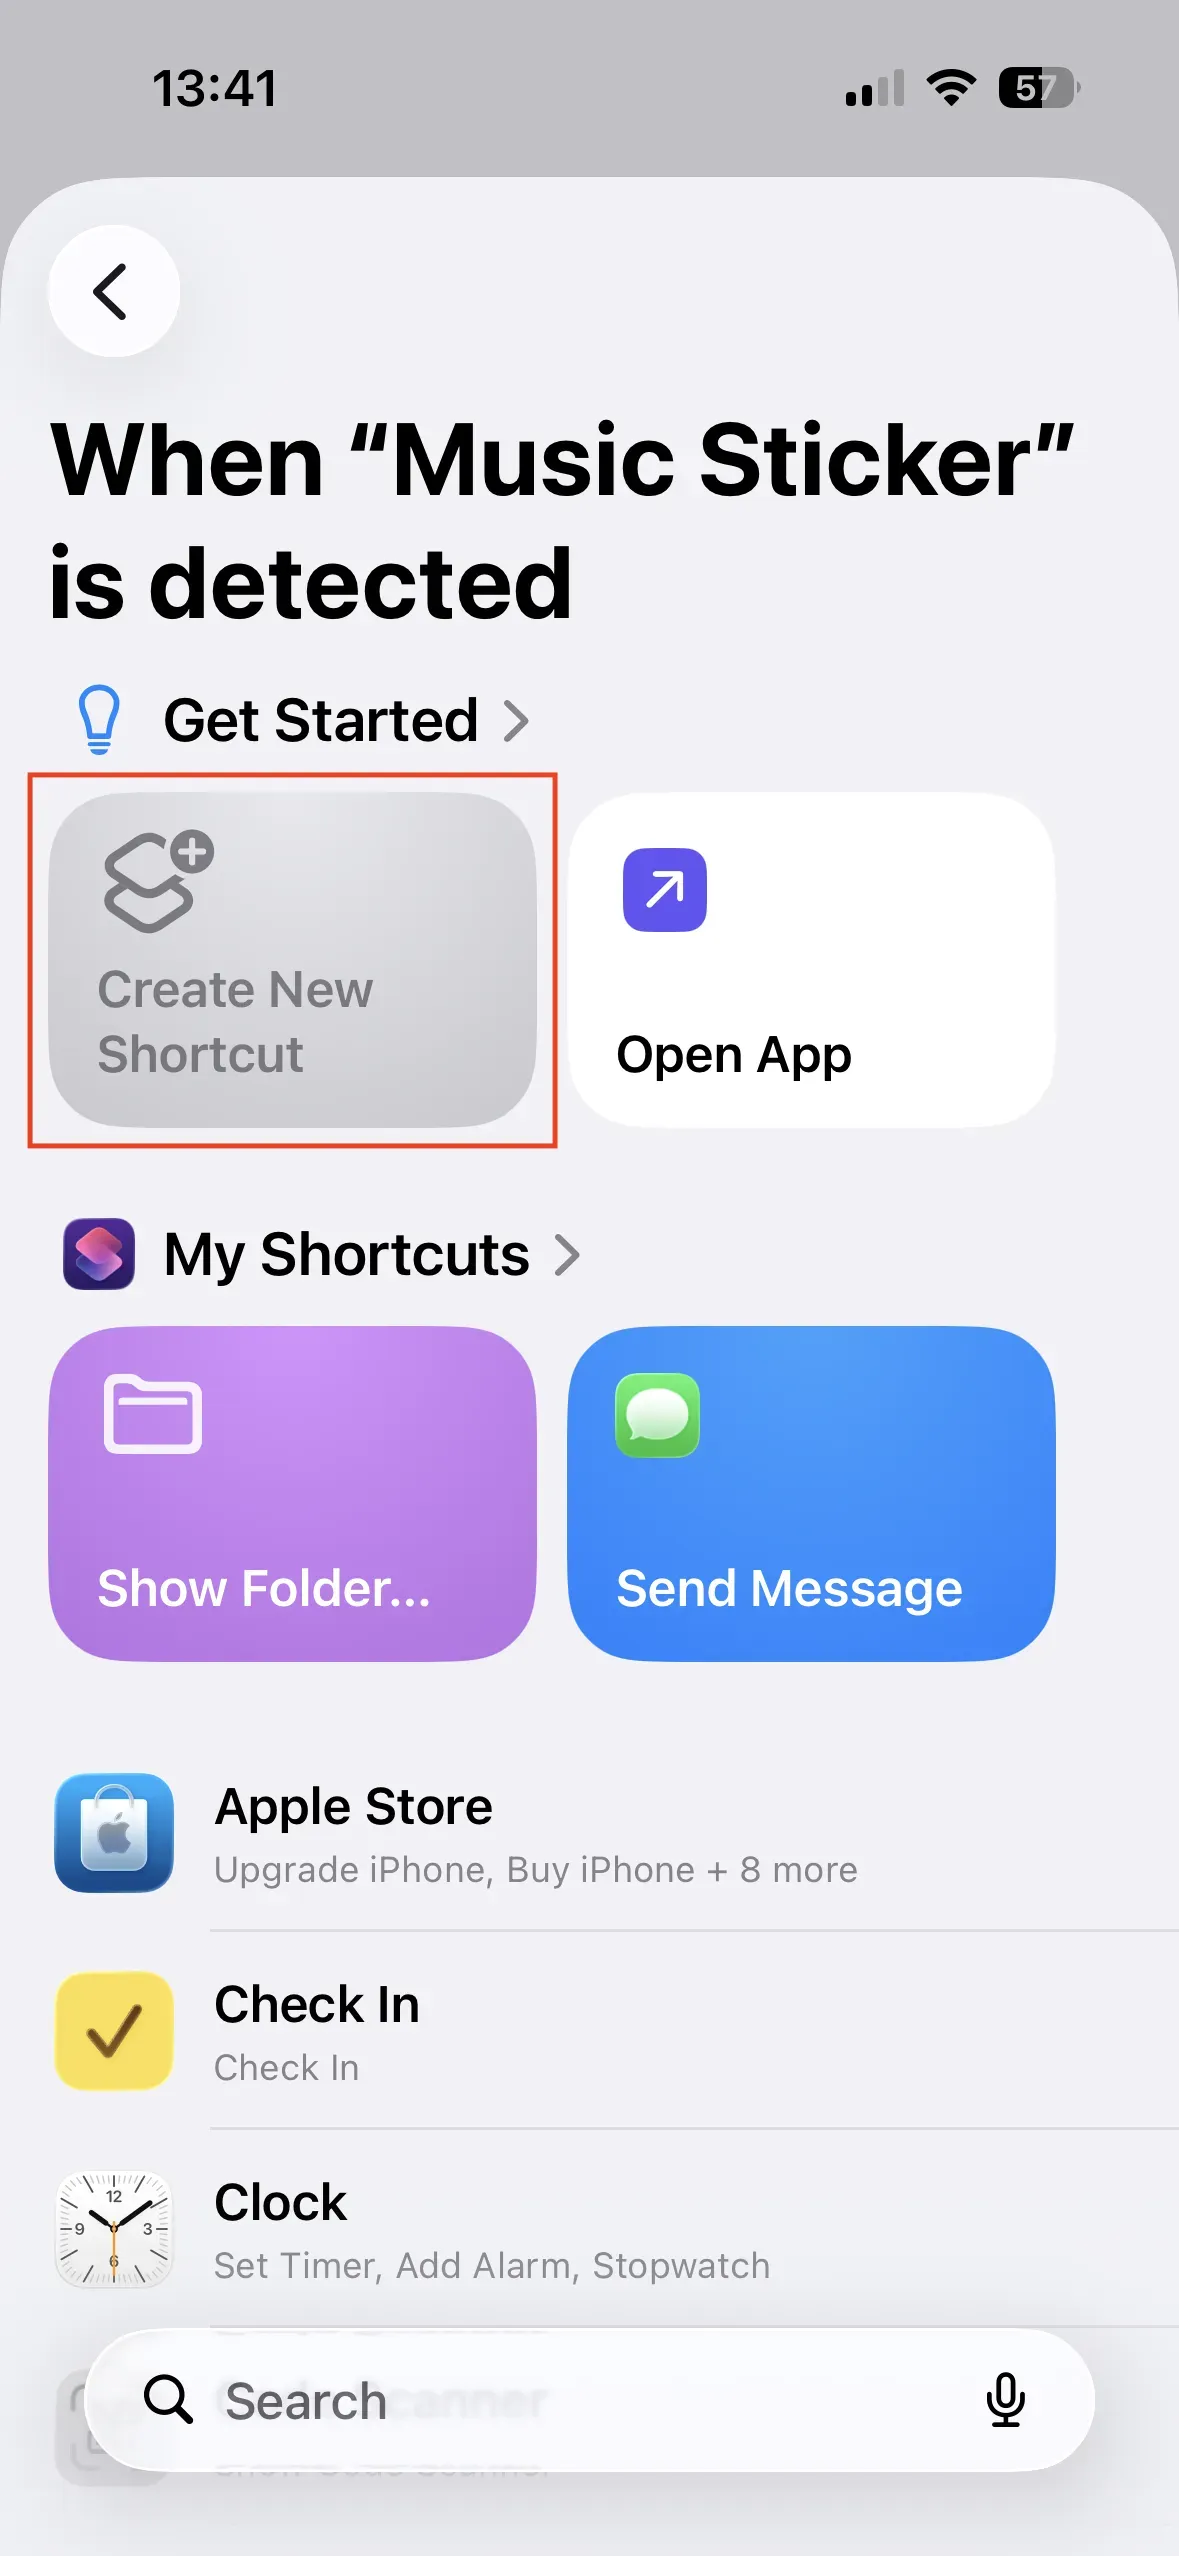
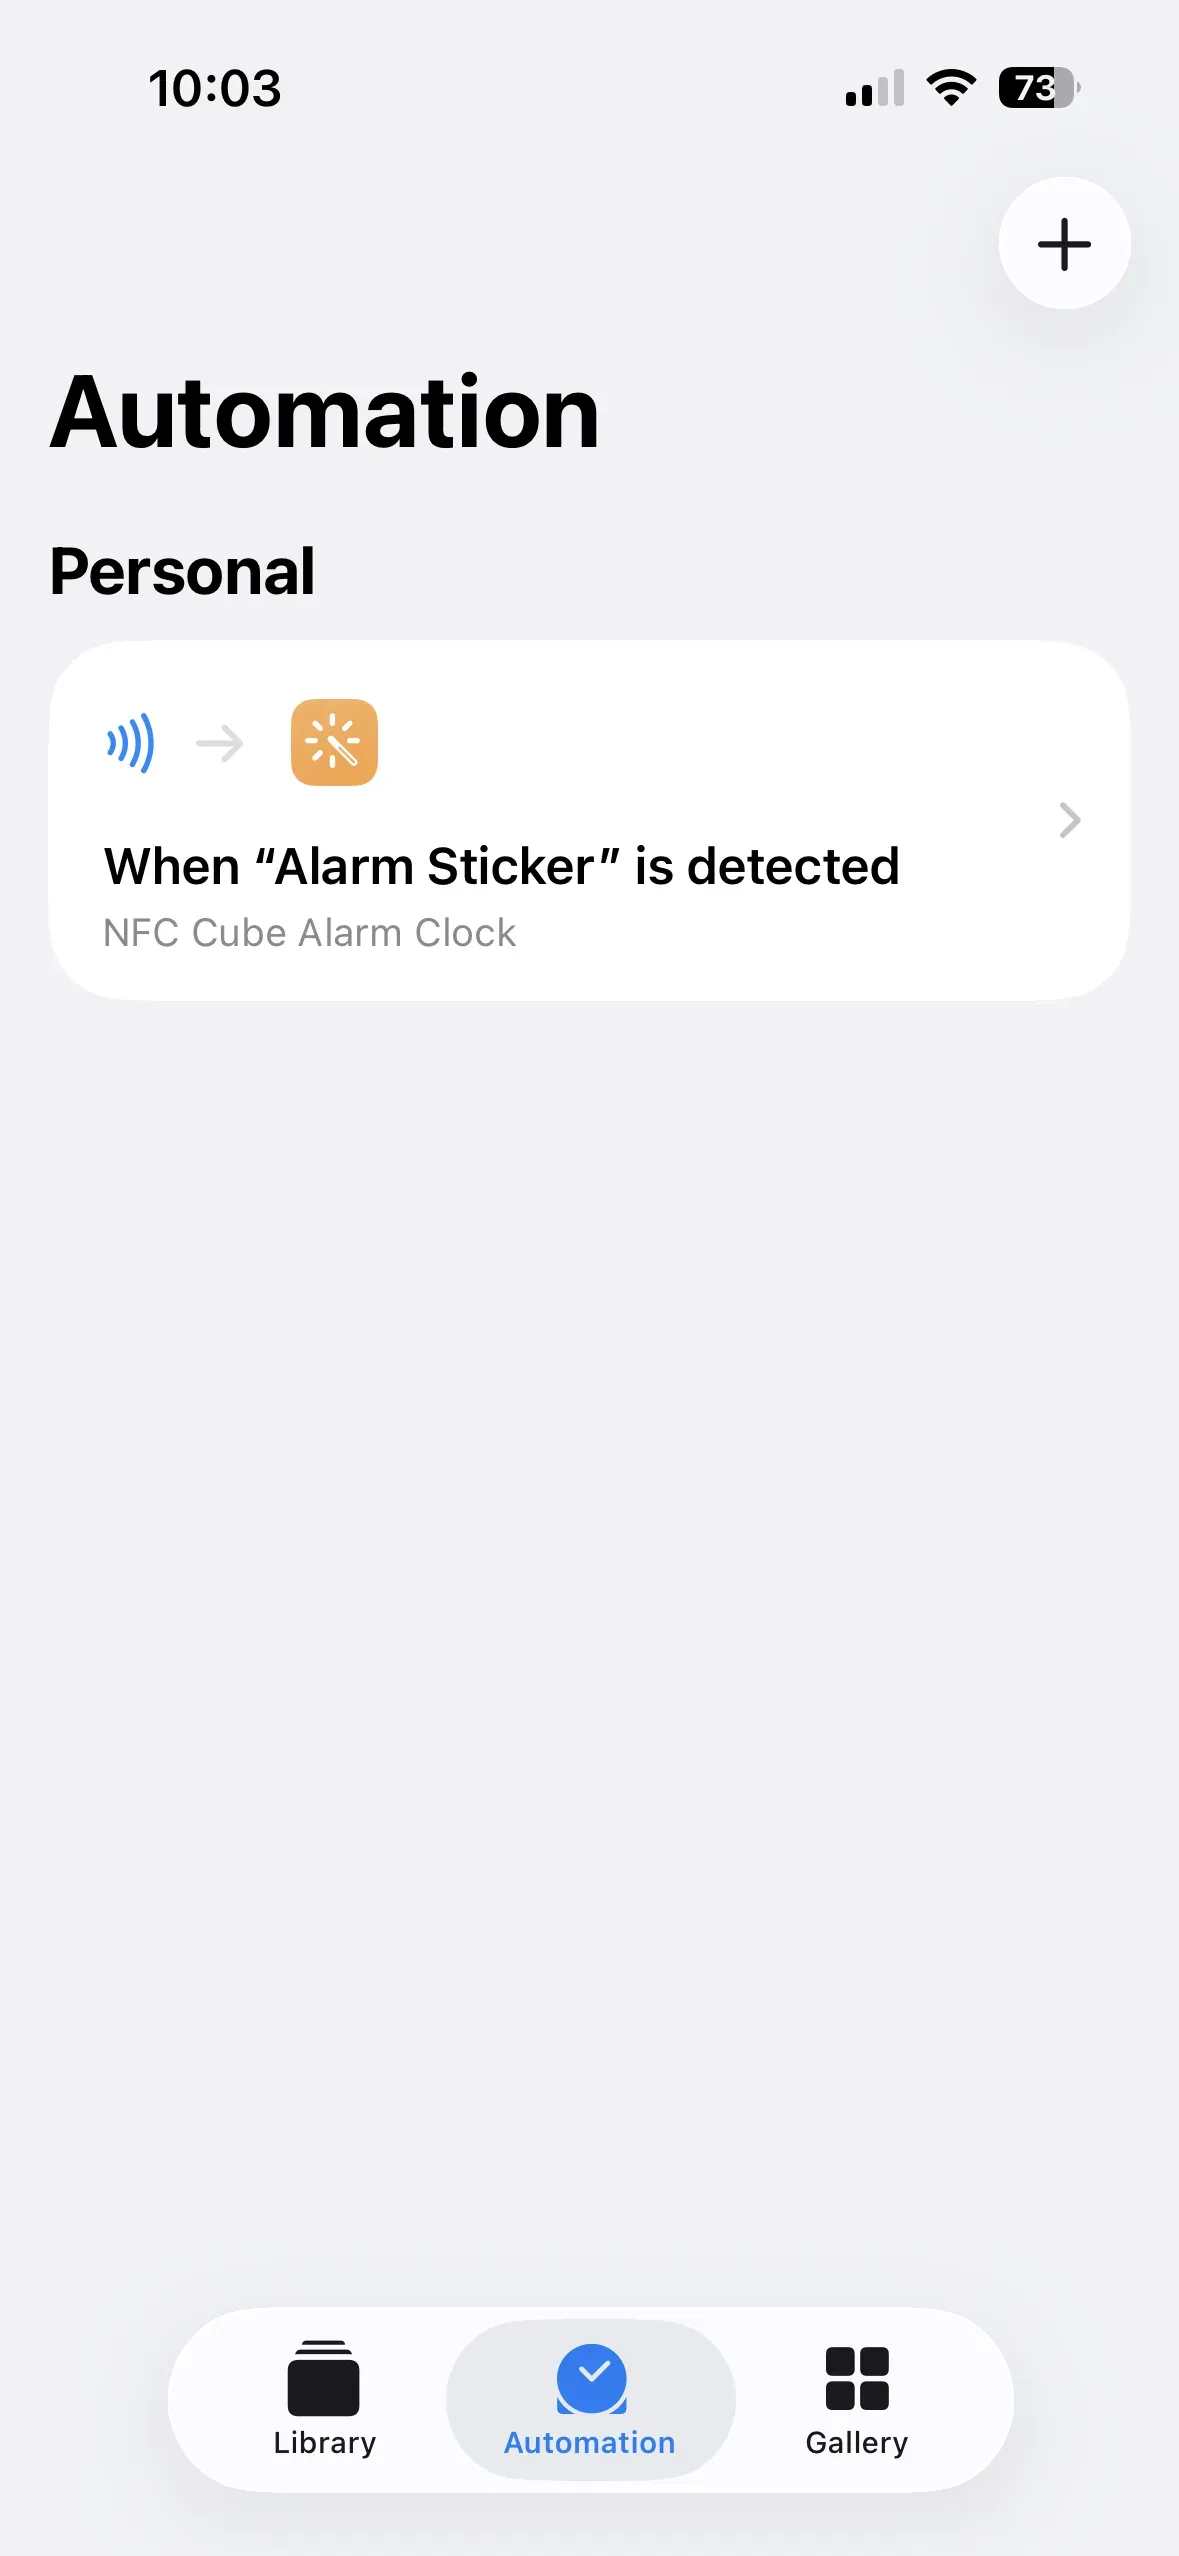
To link the shortcut to the NFC sticker, open the Shortcuts app and follow these steps again: Automation → New Automation, which opens the Personal Automation window. Then tap NFC → Run Now and scan the sticker. After that, name it, for example, Alarm Sticker and tap Next.
A window will then open titled When “Alarm Sticker” is detected. There, you can either find the shortcut:
- in the My Shortcuts section
- or enter the name of the shortcut NFC Cube Alarm Clock in the search field and tap on the downloaded shortcut.
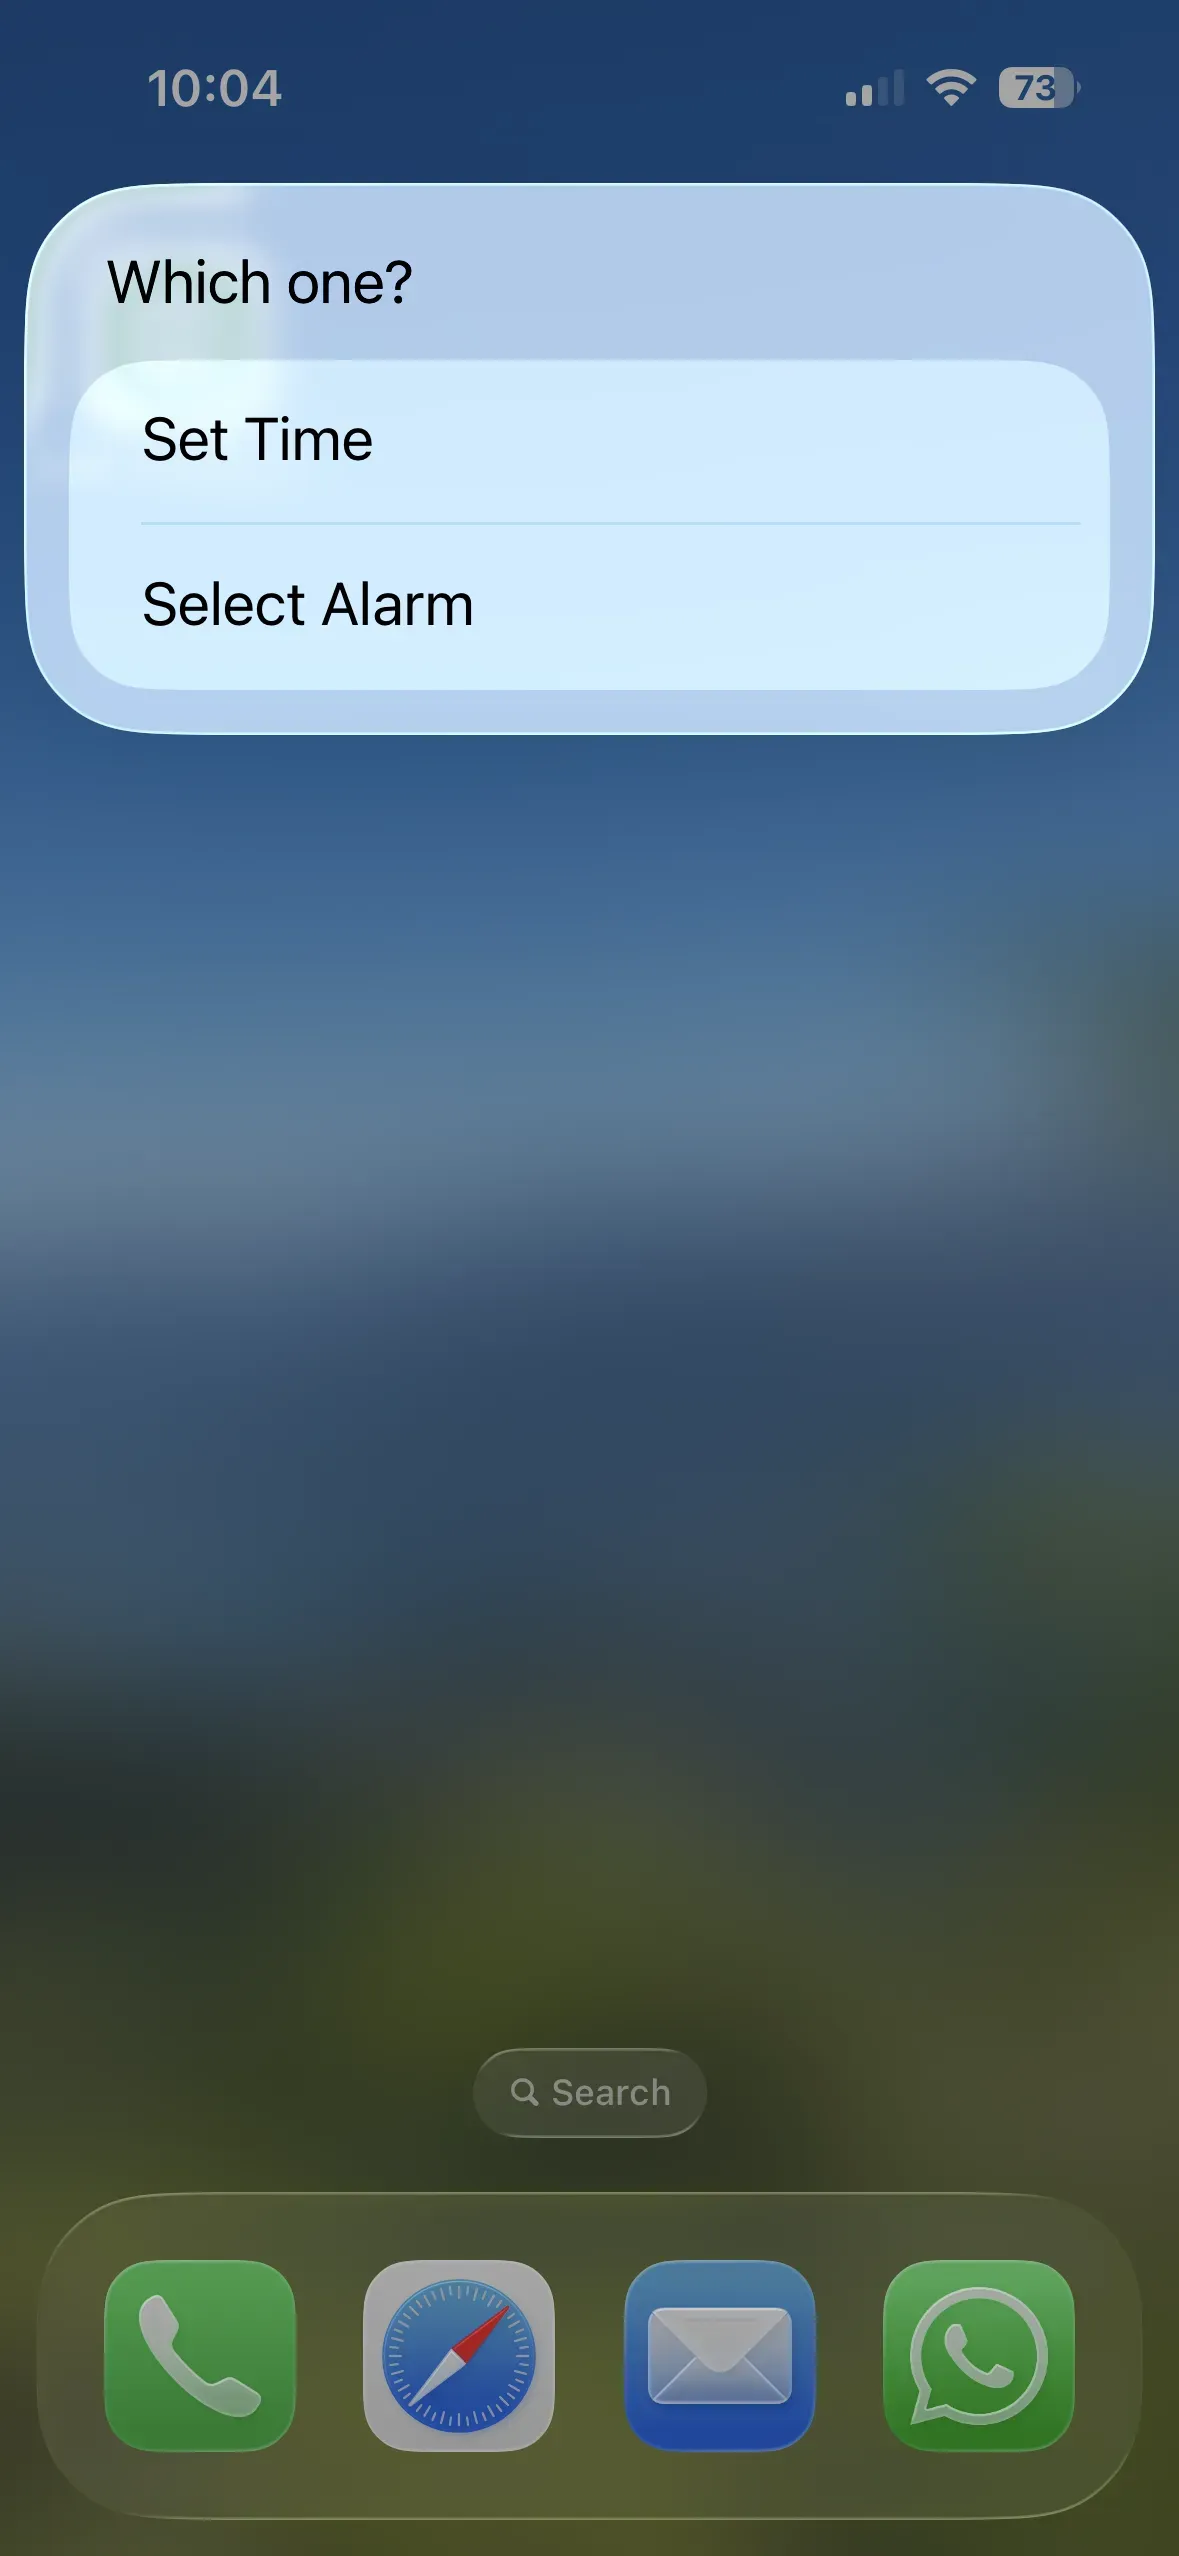
Now, when we scan the tag, we can choose between the two actions Set Time and Select Alarm.

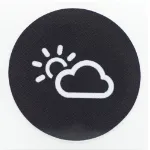
Weather
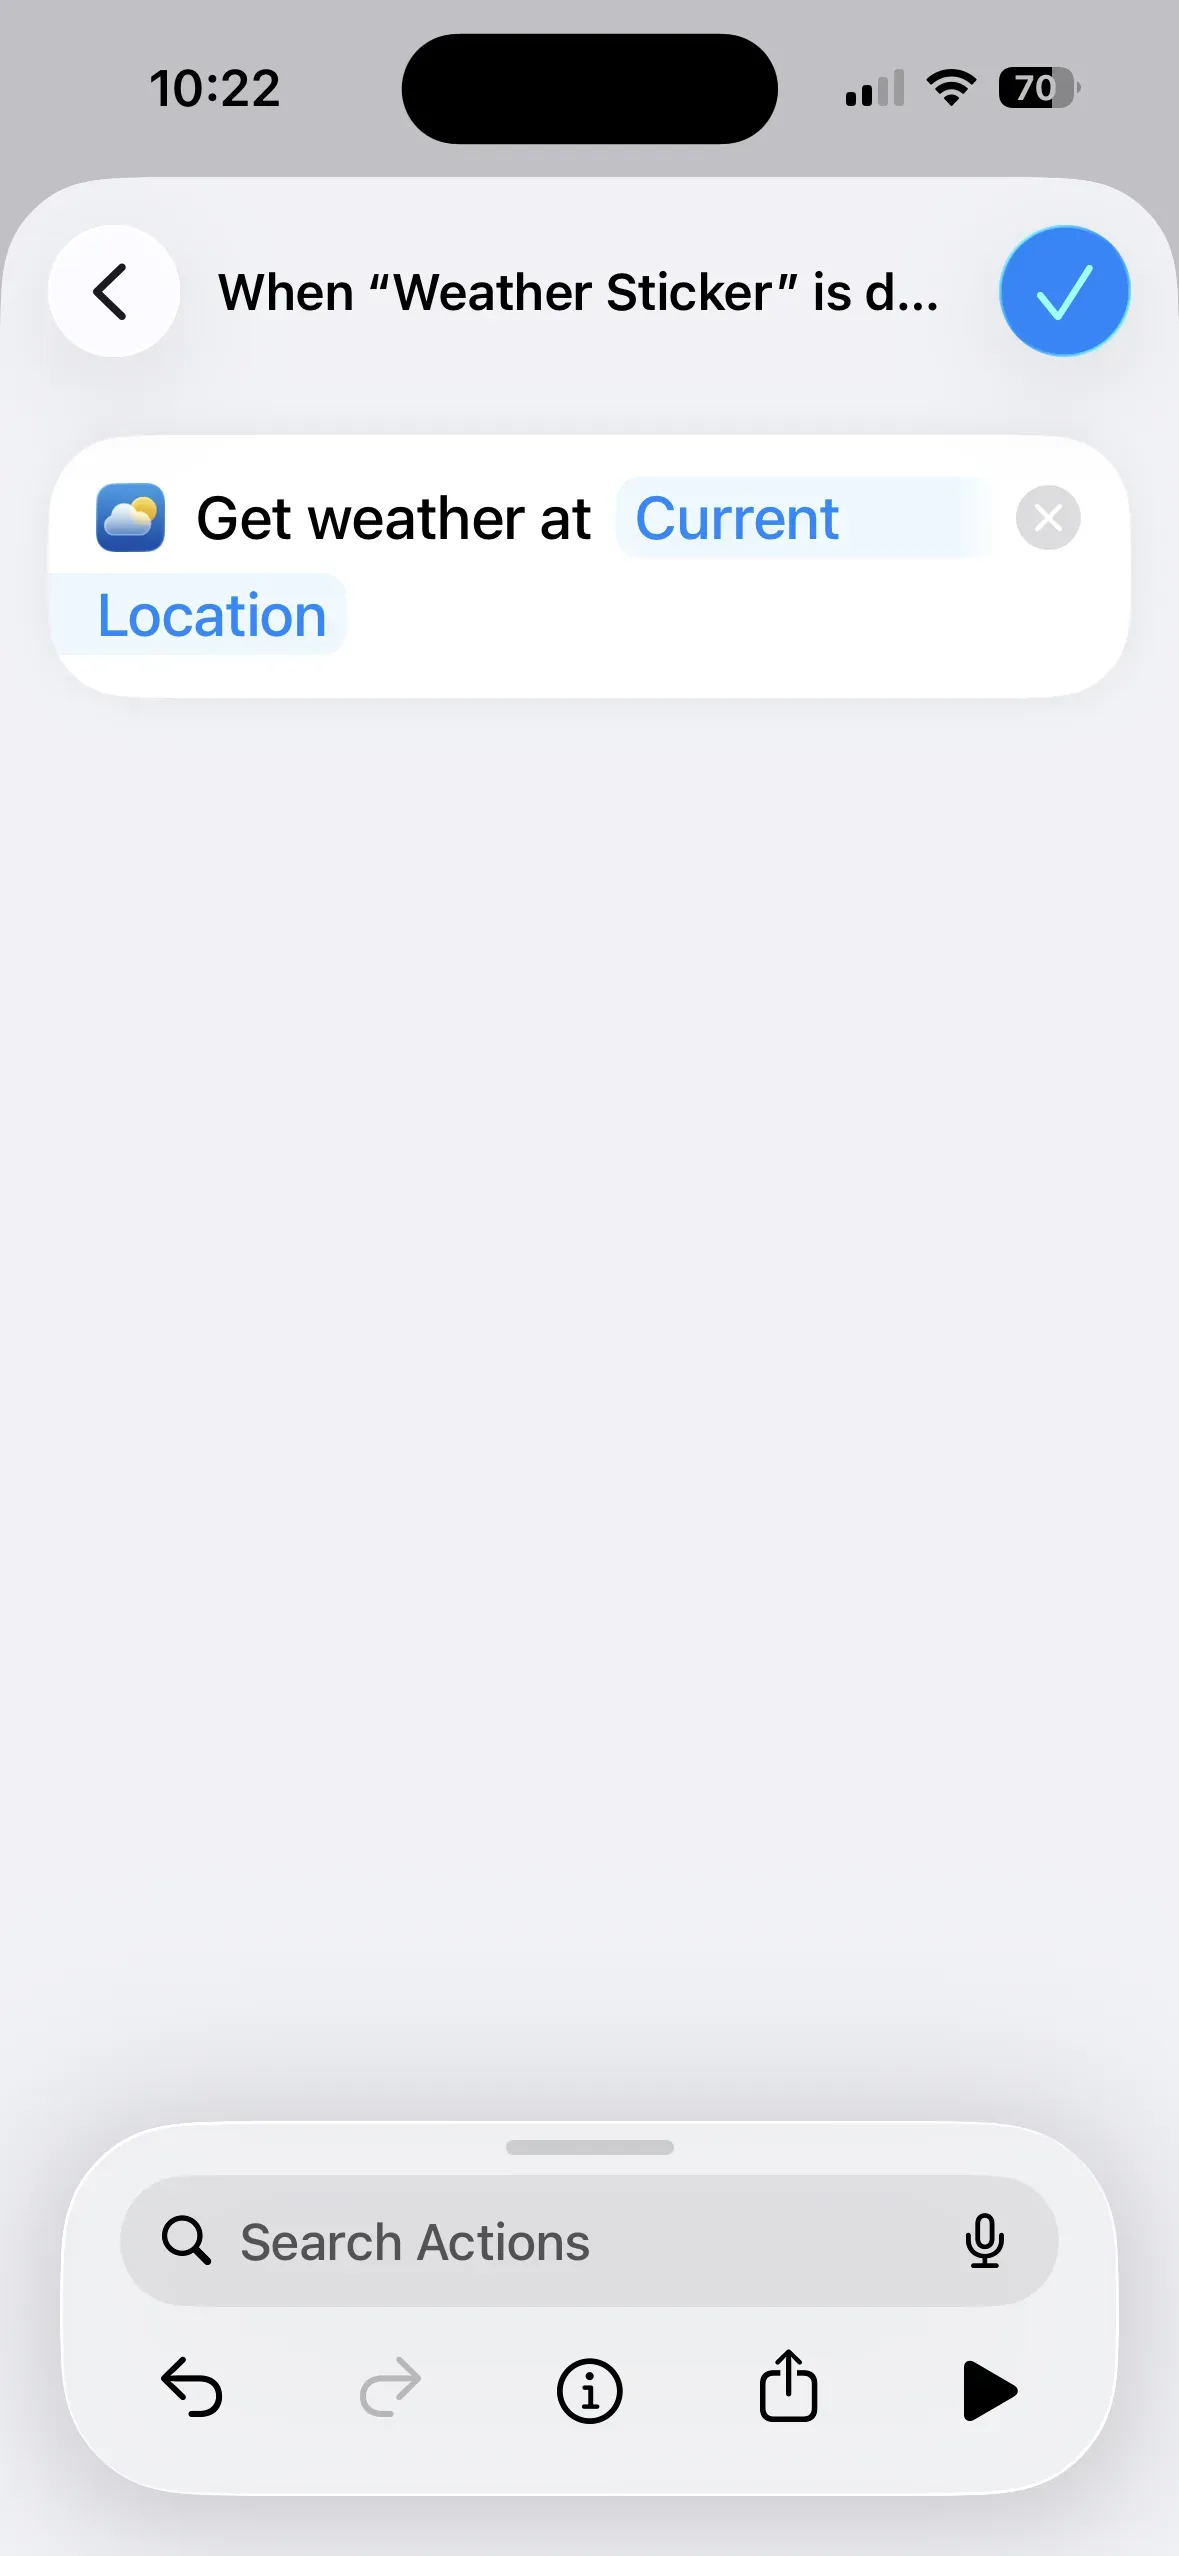
To retrieve the current weather data by scanning the weather sticker, open the Shortcuts app again and follow these steps:
Automation → New Automation, which opens the Personal Automation window. Then tap NFC → Run Now and scan the sticker. Name it Weather Sticker. Then tap Next → Create New Shortcut.
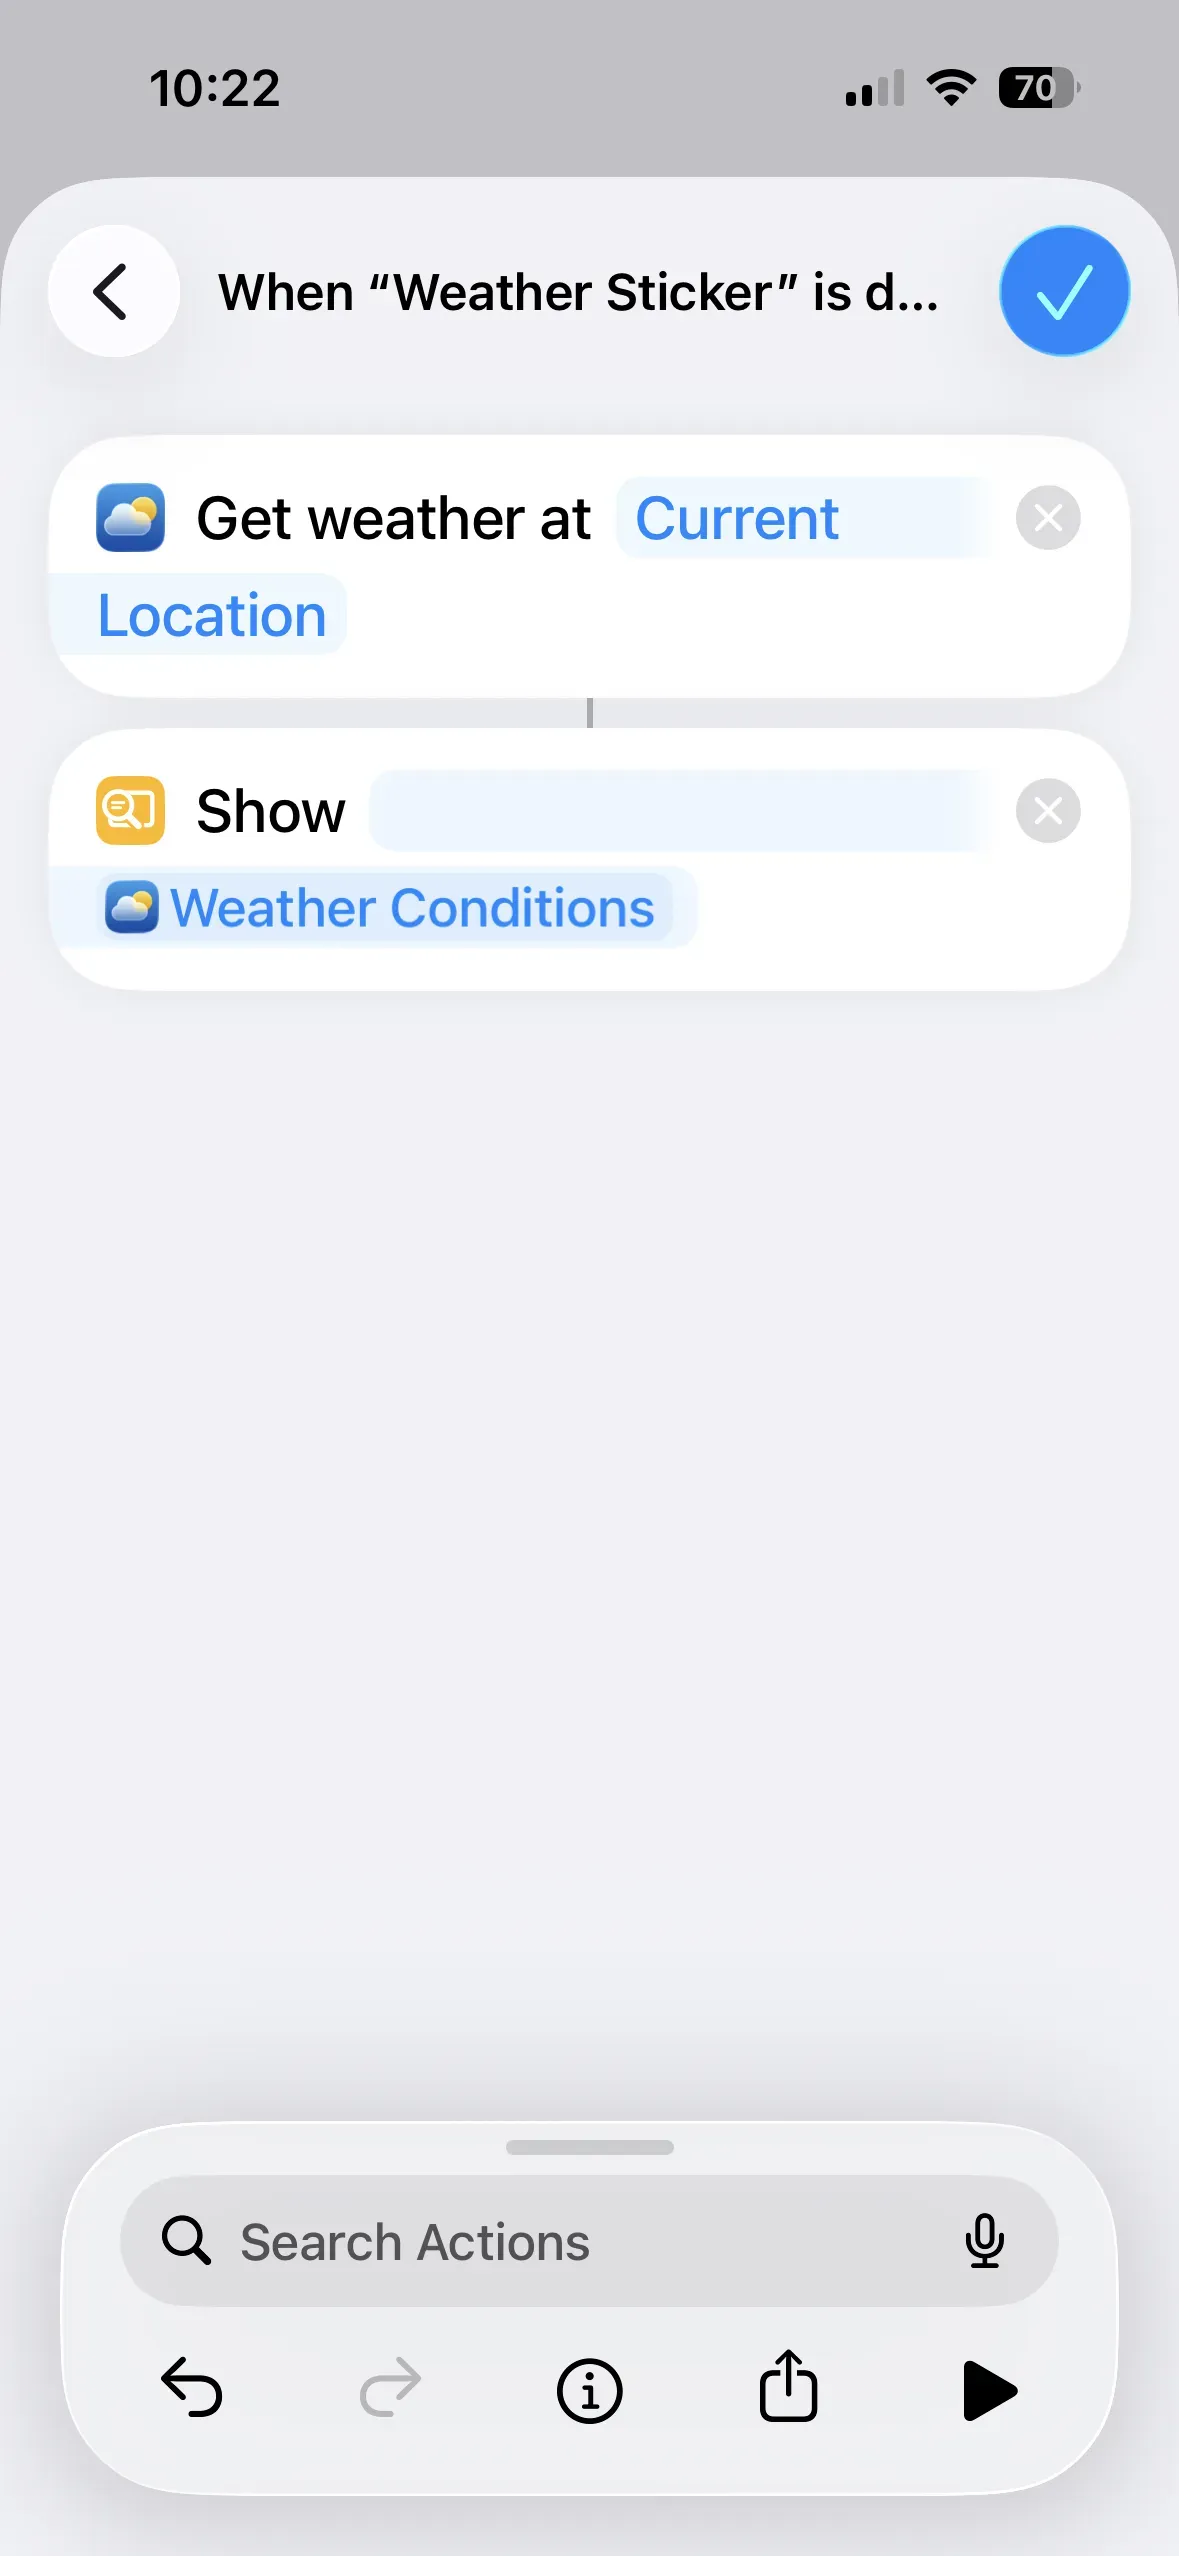
Now, enter Weather in the search field and select Get Current Weather. Then, search for Content and select Show Content.
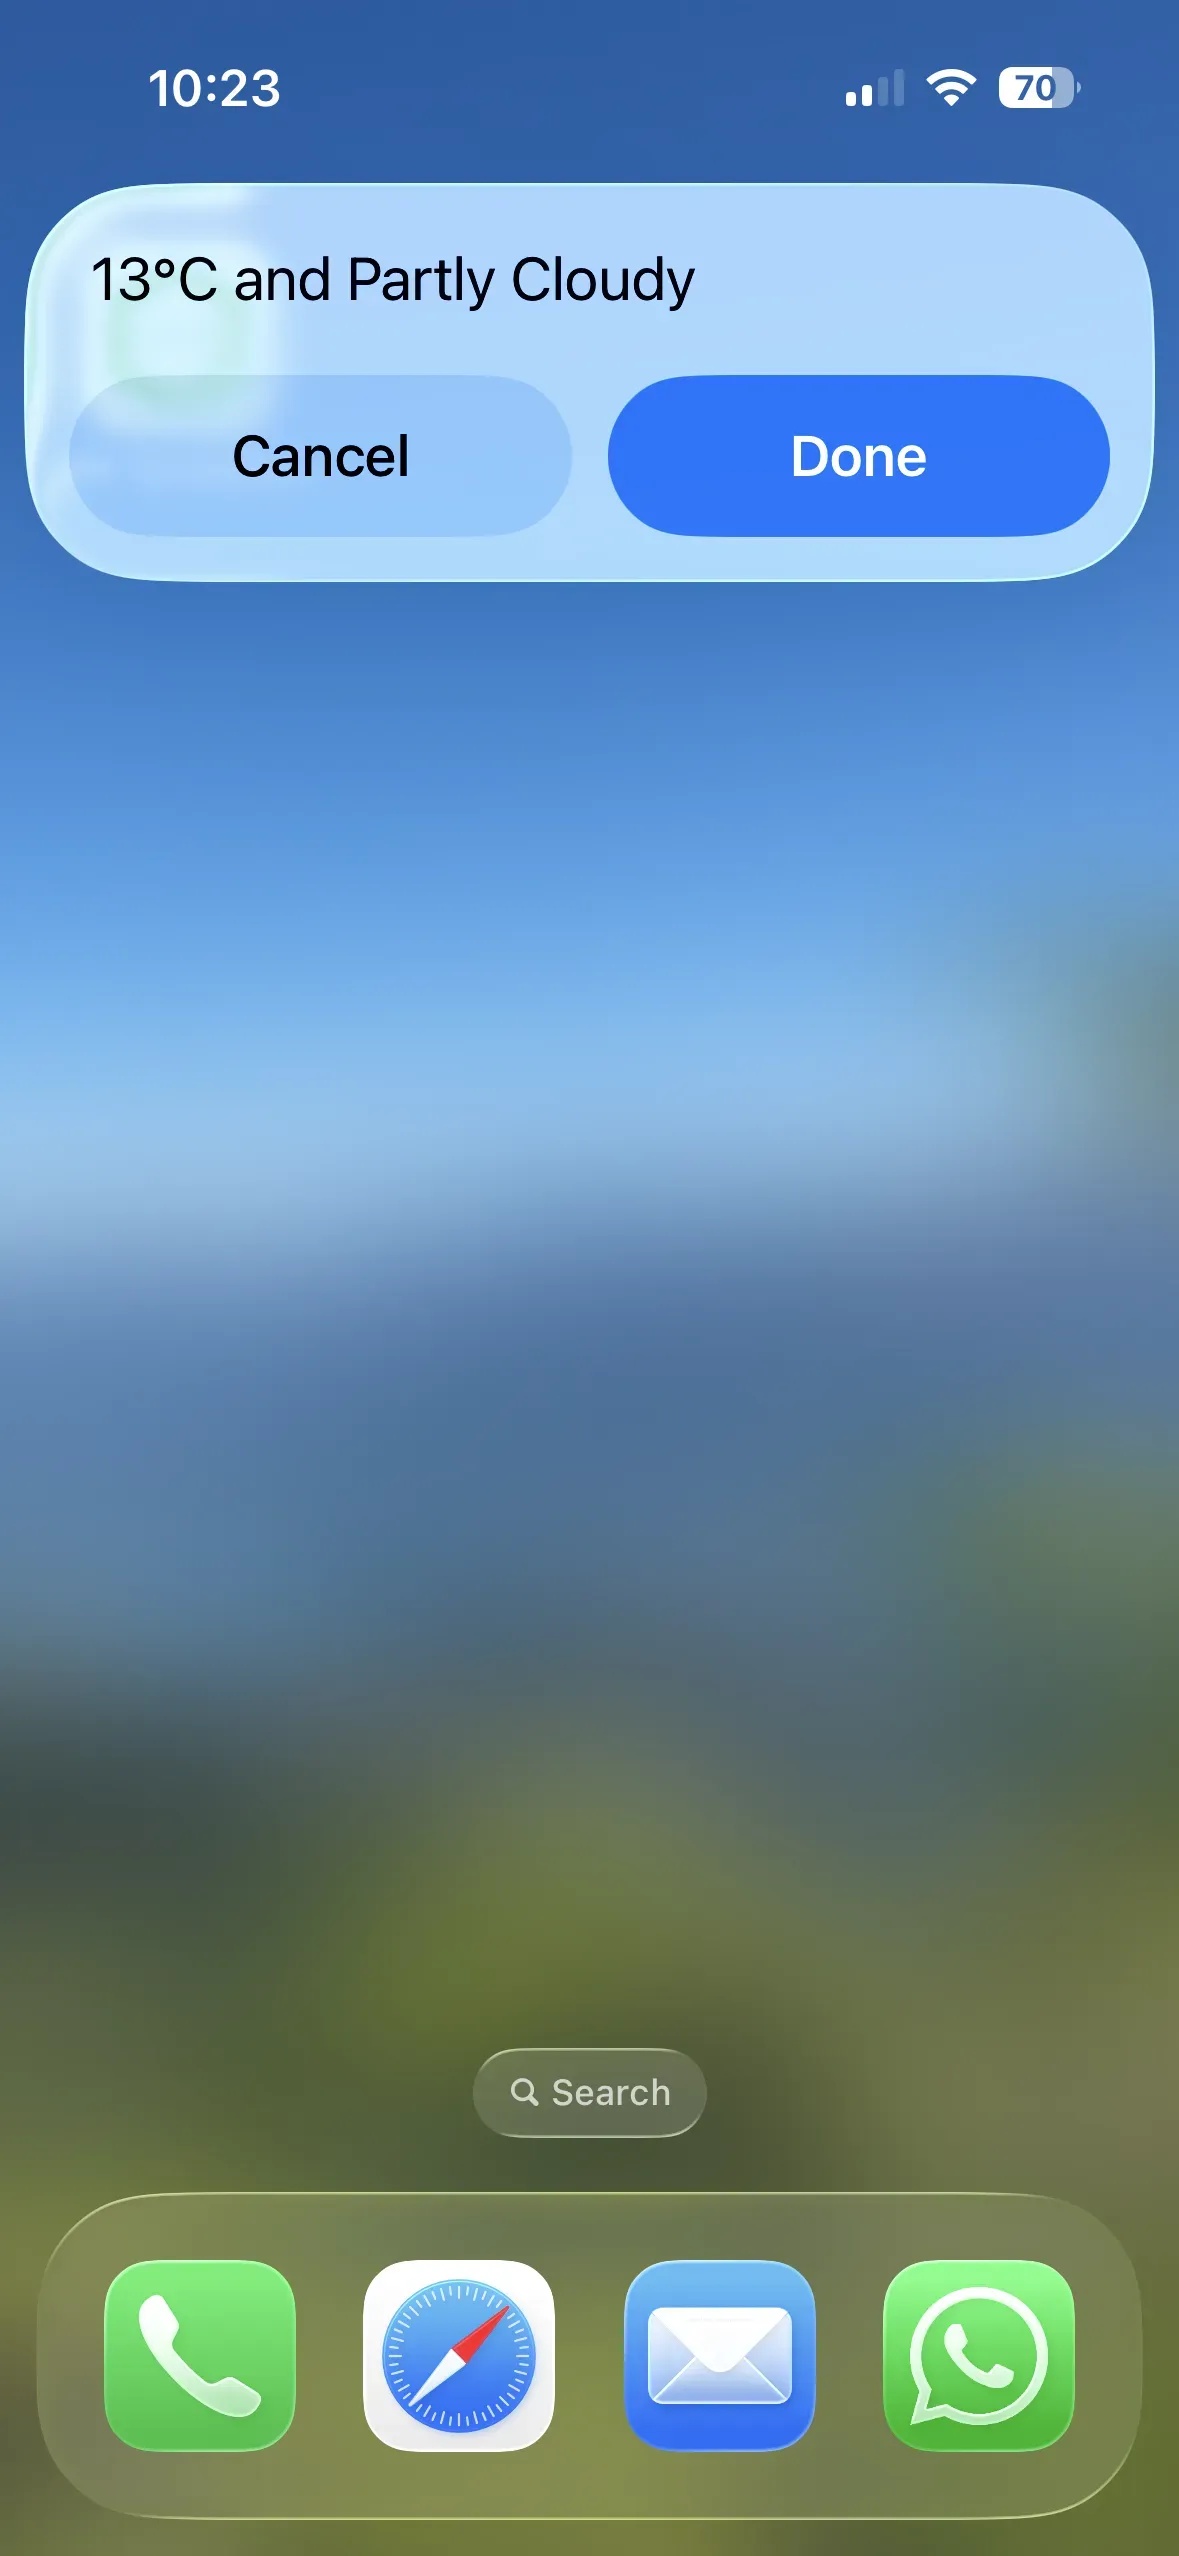
Now tap the blue checkmark in the top-right corner, and your automation is complete. When you hold your smartphone up to the NFC sticker, the current weather data for your location will be displayed.
Summary
In this article, we have introduced you to all the stickers for the NFC Cube. We have assigned meaningful actions and links to each NFC sticker based on their symbols. Of course, you can customize any sticker to suit your own needs. You can find additional NFC tags to which you can save the actions described above in our Starter Kits.
Associated operating systems
iOSFirst published: 25.07.2023 / Updated: 28.04.2026