With the following example scenario we explain how to create a more complex automation and how different actions can be linked together in a meaningful way.
In our example, we want various smartphone functions to be executed automatically when contacting an NFC chip that is located at a fixed location (e.g. the entrance area of the apartment):
We recommend that you have read the following articles beforehand: Basics: Programming iPhone shortcuts and triggering them with an NFC tag, Advanced: Performing actions through an automation and, if necessary, Start music playback via a Bluetooth box with NFC.
Content:
- 1. Create automation and add actions
- 2. Track the arrival time with a note
- 3.1 Create selection menu
- 3.2 Assign selection menu with alarm clocks
- 4. Create and assign another selection menu
- 5. Configure and display push message
- Testing and saving the automation
1. Create automation and add actions
In a first step, we create automation as usual using the App "Shortcut" by the + symbol, Create Personal Automation → NFC → Scan.
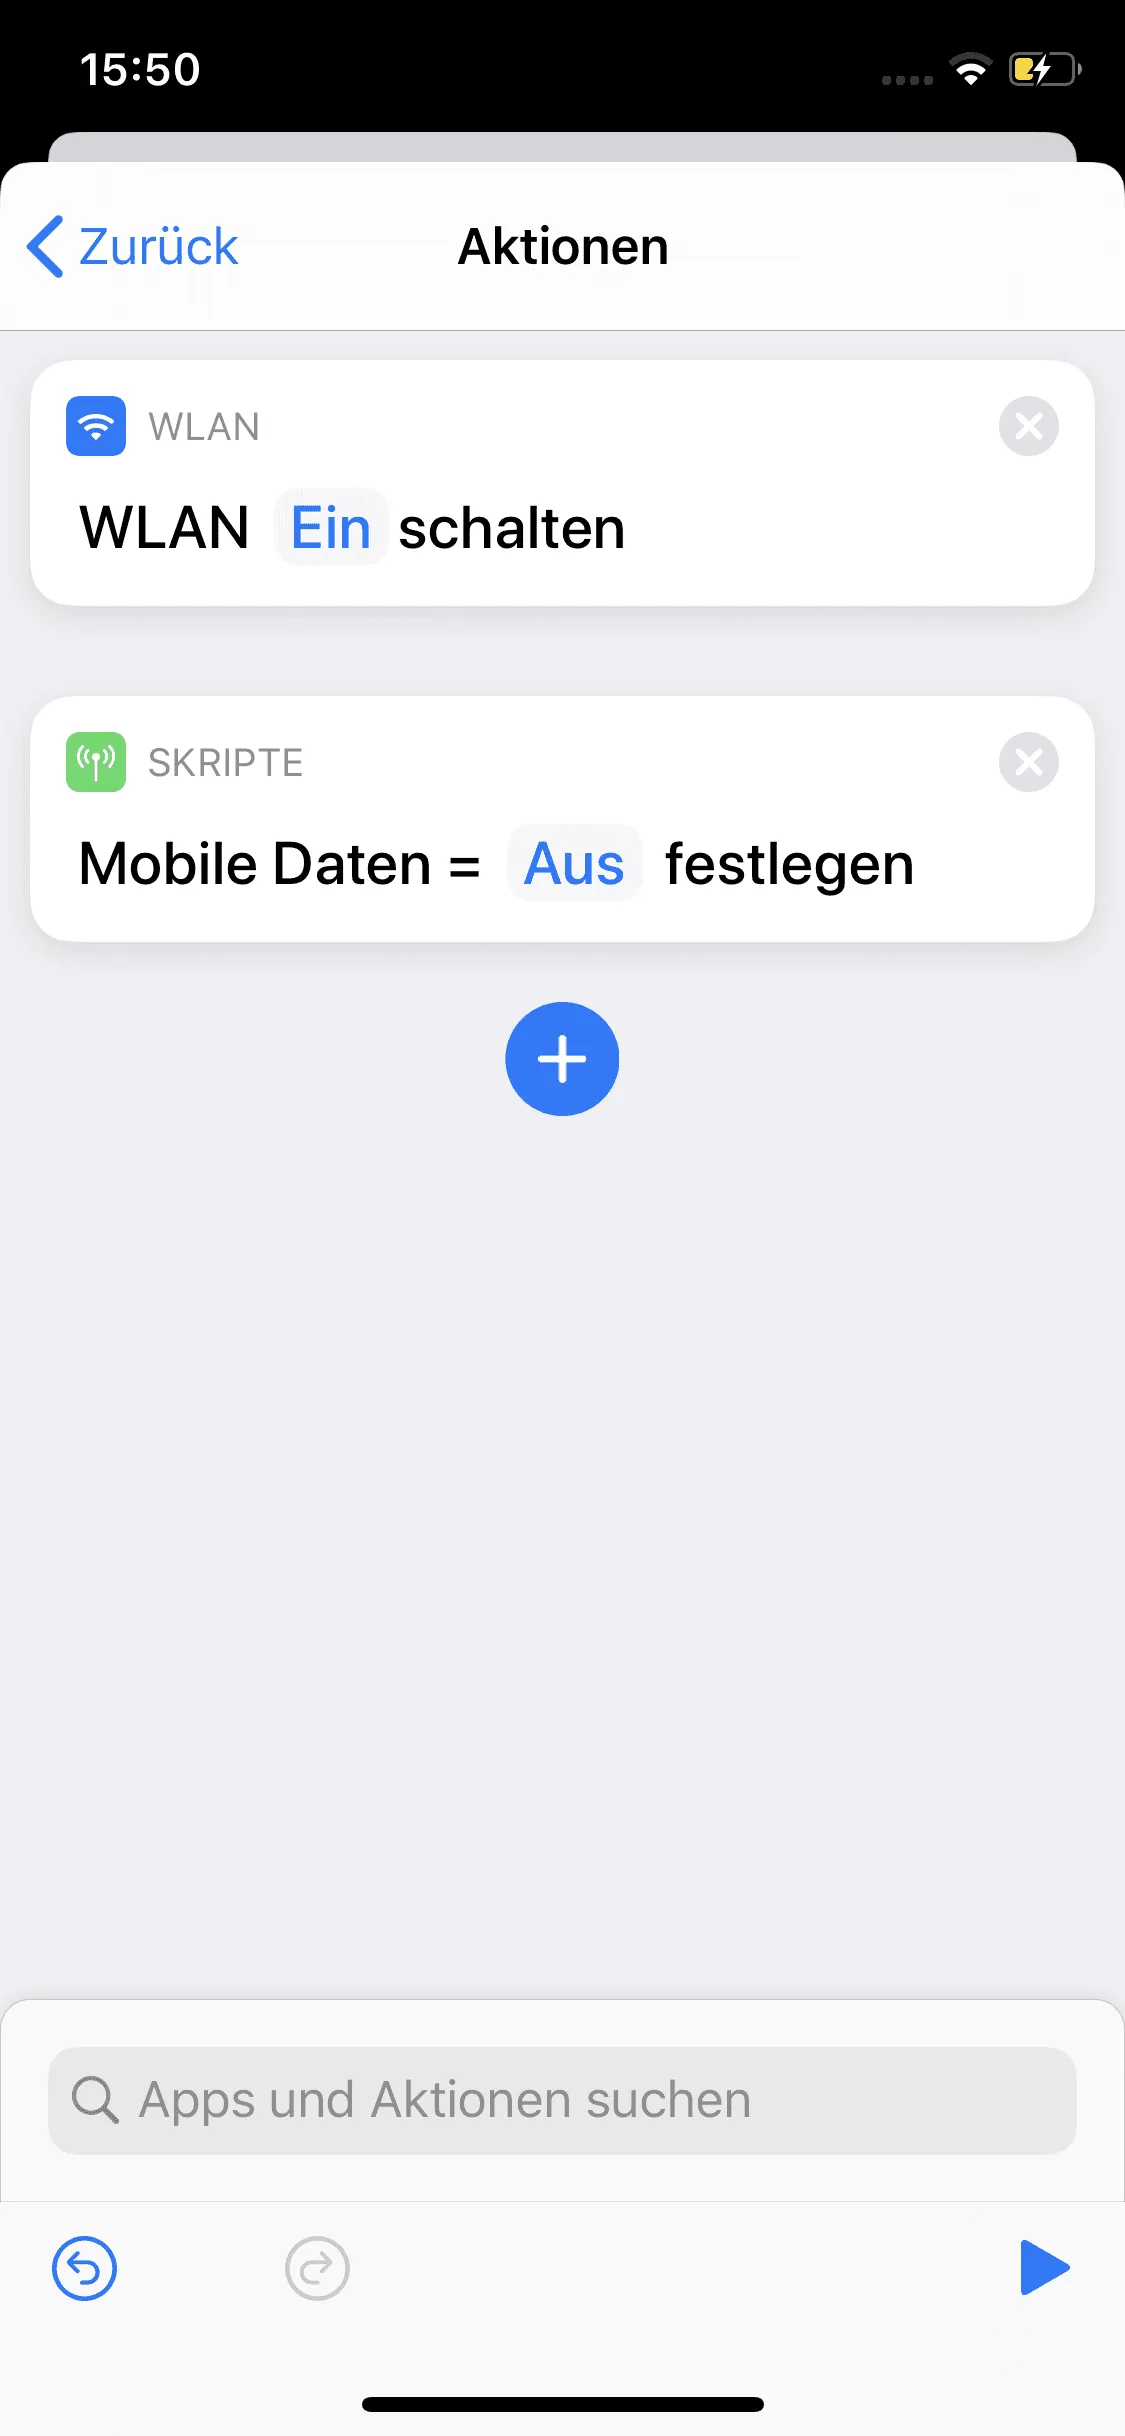
By Add Action we add Set Wi-Fi by using the keyword Wlan and then add Set Mobile Data by using the keyword mobile.
Finally, we change Turn Mobile Data On, to Turn Mobile Data Off, by tapping On. We have now created the first two simple actions.
2. Track the arrival time with a note
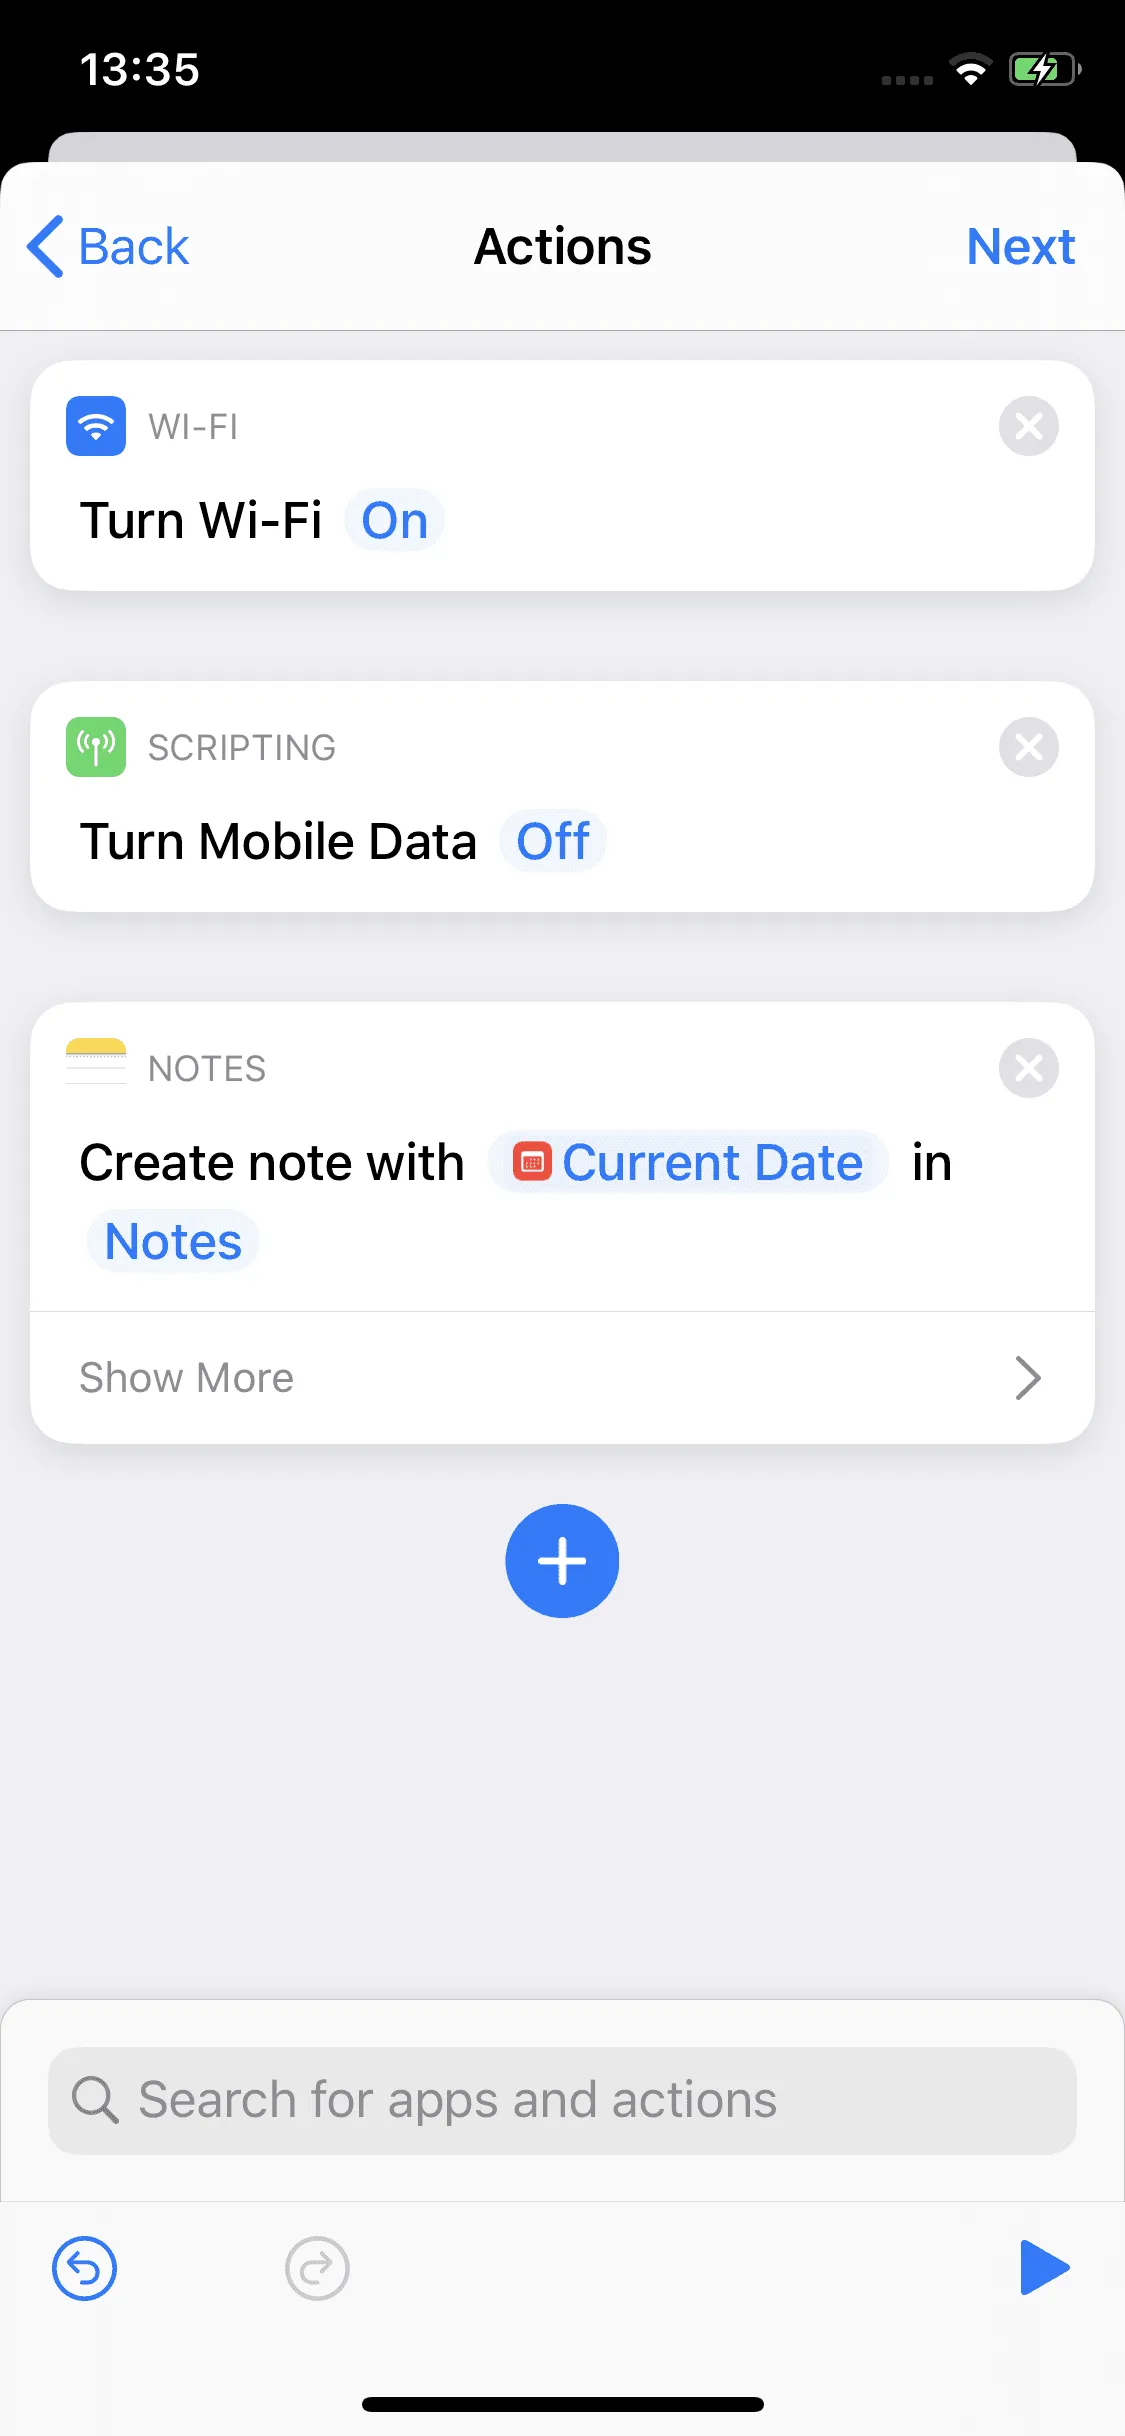
The next step is to save the current time in a note folder. To save the arrival time we select the + symbol, search for note and select Create note.
We get the default action Create note with Body in Folder. We first tap on Body and can now select different variables by a slider above the keyboard. Here we select Current date. Afterwards we can change the date format. We leave the date format at medium and the time format at short and confirm with Done.
Finally, we tap on Folder in Create note with Current Date in Folder and select Arrival times. We must have created this notes folder "Arrival times" in the iPhone app "Notes" before.
Now we want the iPhone to give us the options to set an alarm clock. To do this, we need to create a menu with individual choices. Depending on the selection, different actions should then be performed. What sounds complicated at first sight is easy to implement:
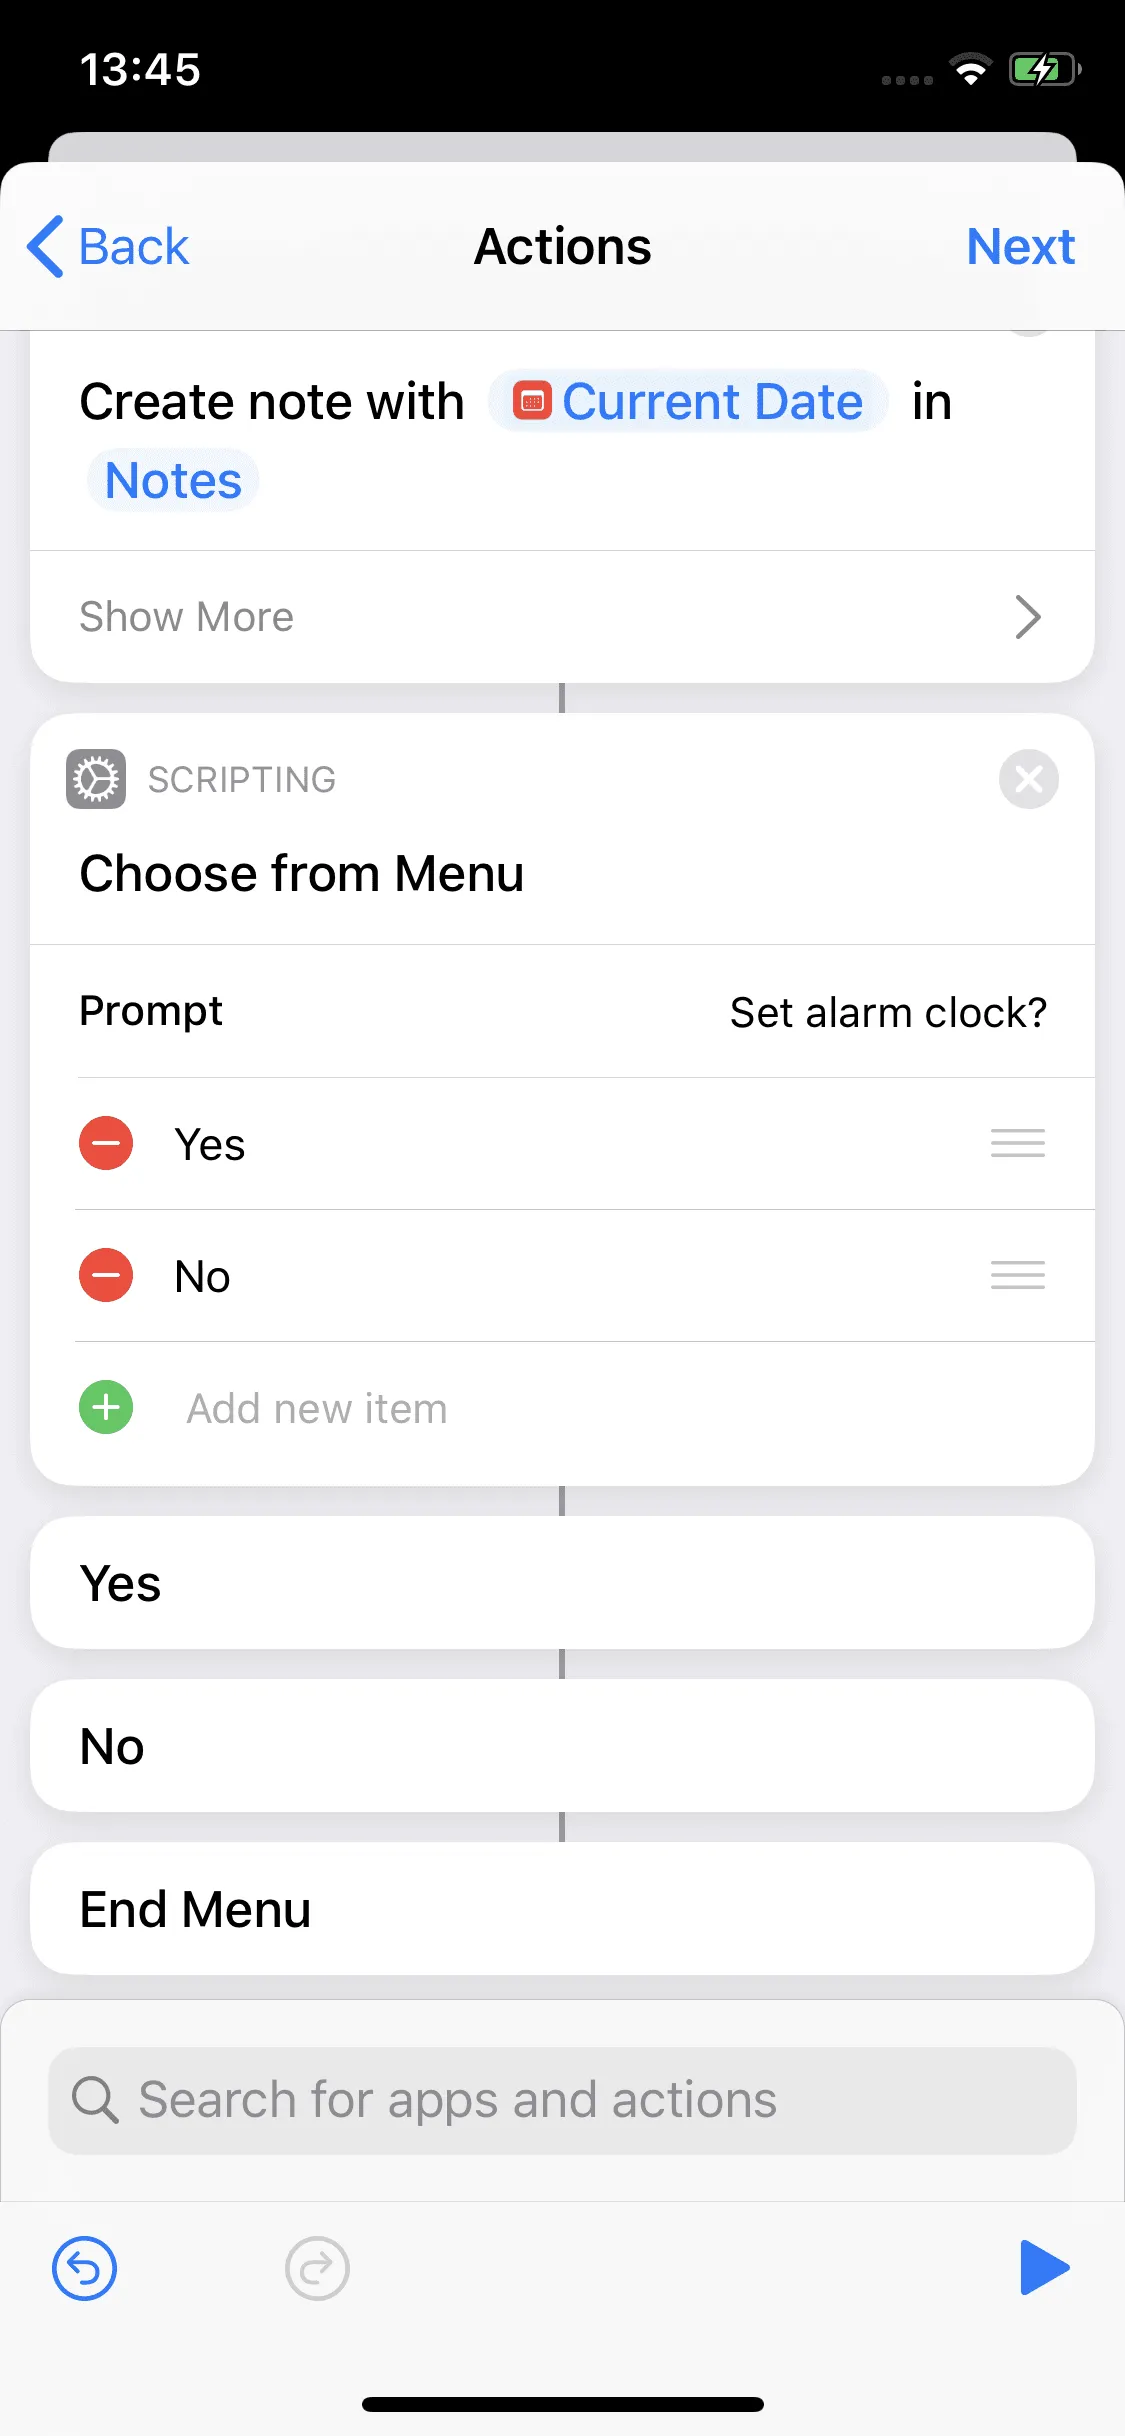
We tap + again and search for menu. We select Choose from menu. By tapping Prompt below it, we can create a title for our query. We enter Set alarm clock?
One and Two are currently placeholders for our answer options. We replace One with Yes and Two with No. The ► icon allows us to test our automation once. We get a selection menu that opens from the bottom with the options "Yes" and "No".
In the next step, we will explain how to add actions to each selection so that our selection results in an action.
In this step we would like to assign an action to our selection option "Yes".
To do this, we tap +, search for Alarm Clock and select Get All Alarms. Then we tap + again at the bottom, search for list and select Choose From List.
We've just created a list of all the alarms, from which we can select the one we want.
In the last, most important step, we tap and hold the white area that encloses our lower action "Get All Alarms". Normally, the iPhone signals us by a short, light vibration that we can now move the selected action. We hold it down and pull it up until it is positioned under Yes and over No. Then we release it again.
We do the same with the action "Choose from Alarm" and position it under Show all alarms and above No.
Since the actions are performed chronologically from top to bottom, Get all alarms now create a list of all alarm clocks, after which you can select an alarm clock by clicking Select from Alarm Clock. The whole thing happens if "Yes" is selected, if "No" is selected nothing happens.

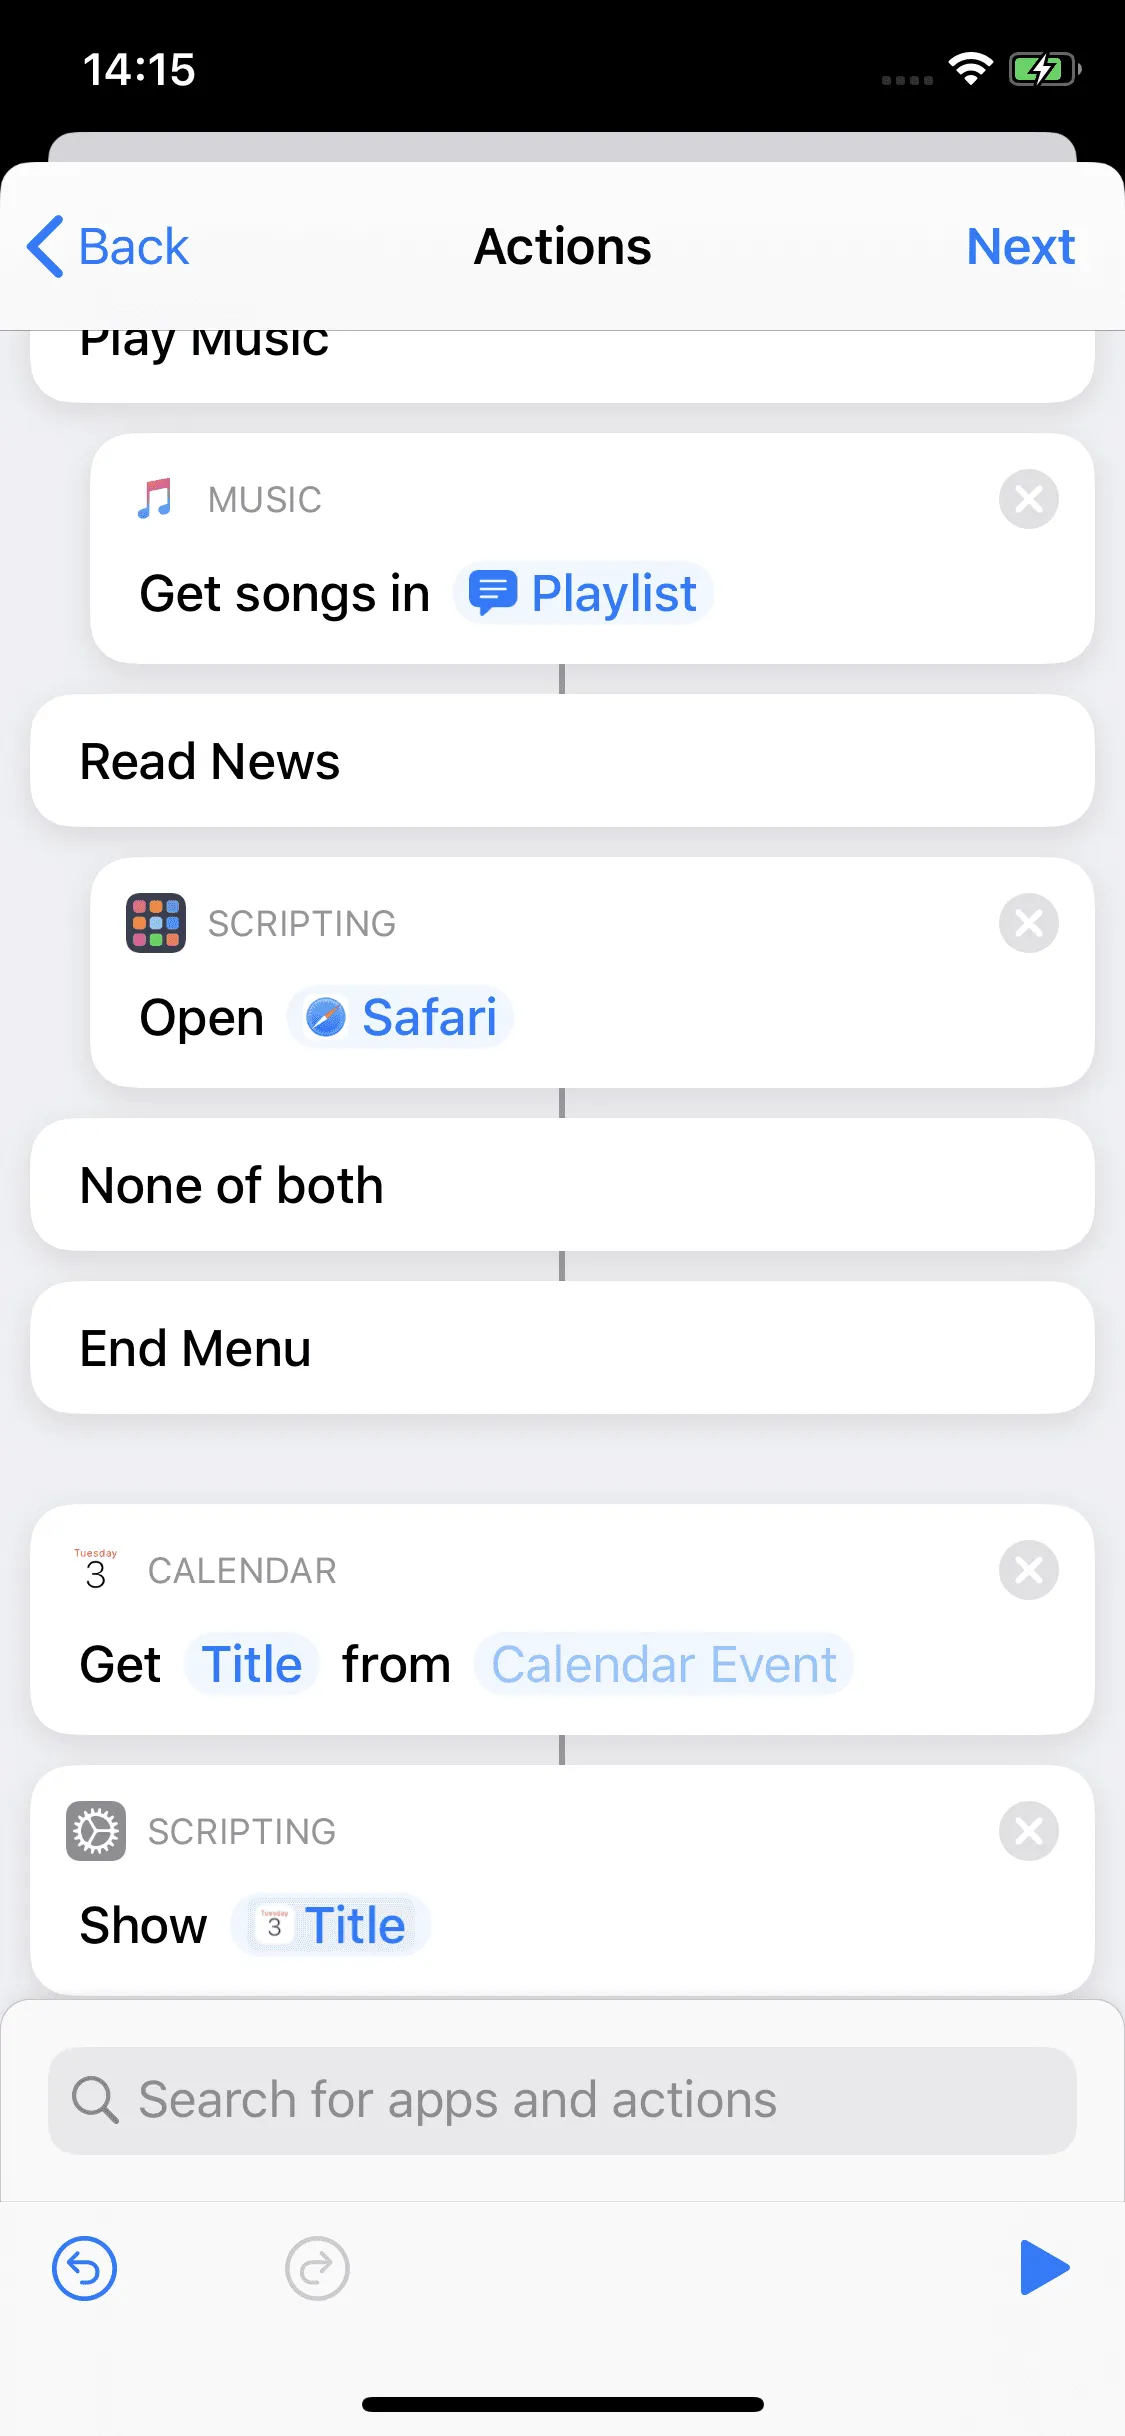
Through another menu query we want to be able to select whether music should be played, a message app opened, or nothing should happen.
We start again, as in the penultimate step "3.1 Create Selection Menu", with creating the menu and naming it in Play Music or Read News? This time we replace One with Play Music, open two with Read News and add another object called None of Both.
Next, we tap +, search for Playlist and select Get Playlist. In the action Get songs in Playlist, we tap on Playlist and select the desired playlist. Then we tap the + button again, search for Open App and select Open App. In Open Select, we tap Select and select an app to open - in our example, a news app.
Last but not least, we drag the lower two actions, as in the previous step, up to the appropriate menu items Play Music or Read News.
Note: The possible combinations at this point are almost unlimited. Our example is just one of many. We would like to introduce the functionality and variety of functions so that you can easily create your own individual automations.

5. Configure and display push message
In the last step we would like to receive an individual push message. In our case this should show the events for the respective day.
To do this, we first need to create the content of the push notification. In our case a list with the events for the respective day.
To do this, we tap on +, search for Calendar and select Get Details of Calendar Events.
Then we tap + again, search for Show and select Show Result. The result of the calendar query from the action will be displayed by a push message.
Testing and saving the automation
Finally, we can test the automation as usual by tapping the ► icon in the lower right corner of the screen. Pressing the ► symbol simulates contact with our NFC.
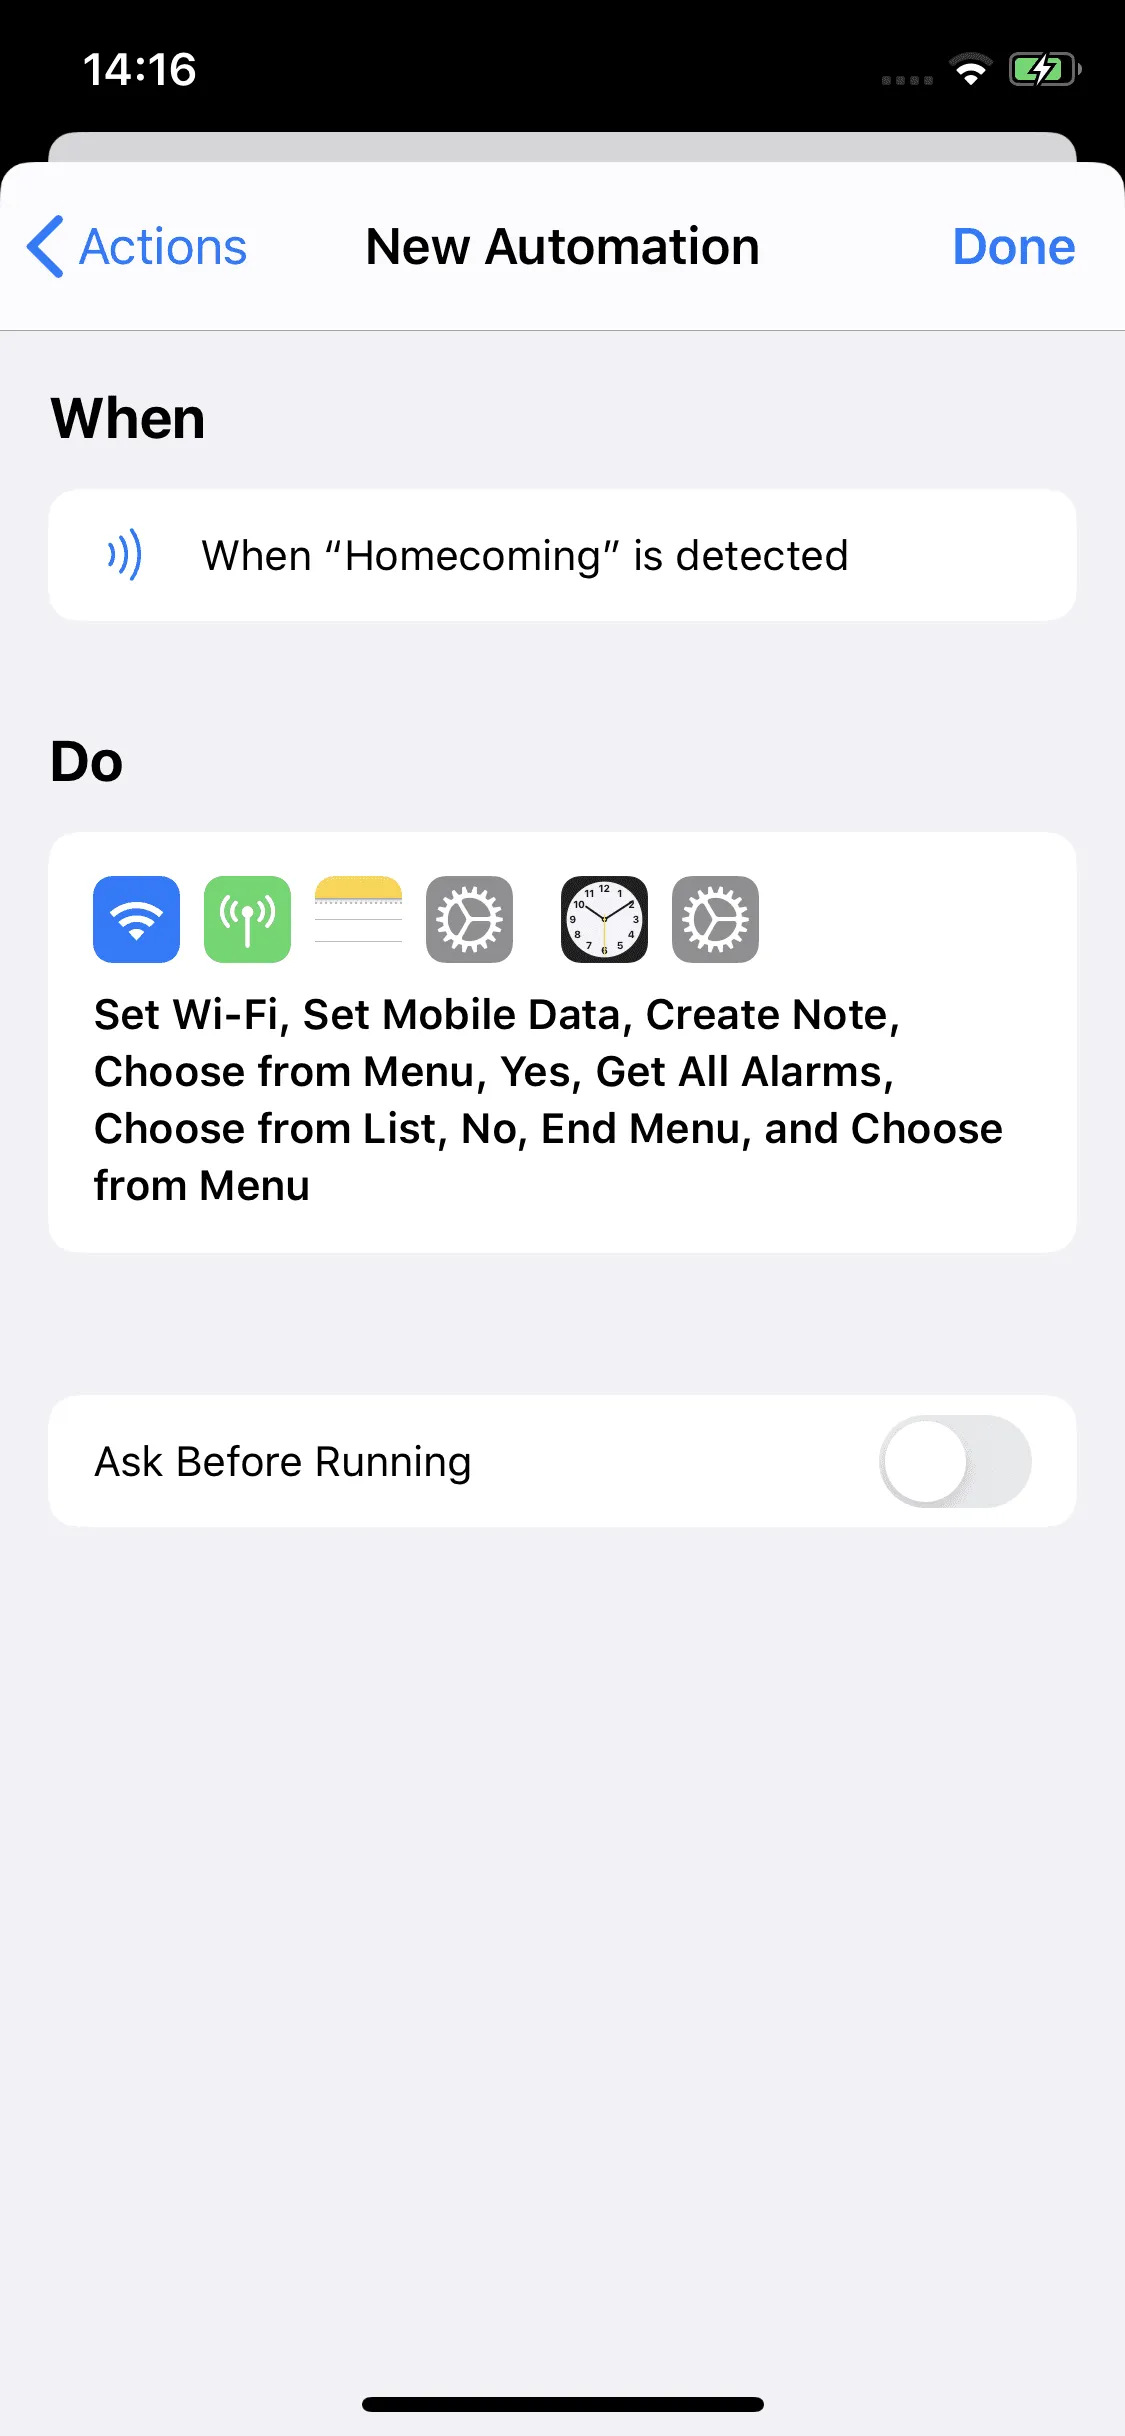
After successful testing, we tap Continue in the top right-hand corner, then deactivate Confirm Before Execution with Do not confirm, so that the desired automation is started immediately by contacting the NFC tag.
We end the process with Done. In the overview we now see our further automation When "Homecoming" is detected.
Summary
In this article we have described how a complex, personalized automation chain can be created with the iPhone. The goal was to show how different commands can be linked together to create automations according to your own needs and preferences.
The possible combinations are so manifold that it is impossible to show every one of them. Nevertheless we hope that by describing our examples the basic principle has become clear, so that it is easier to create automations that can make everyday life easier.
Associated operating systems
iOSFirst published: 25.07.2023 / Updated: 23.07.2025