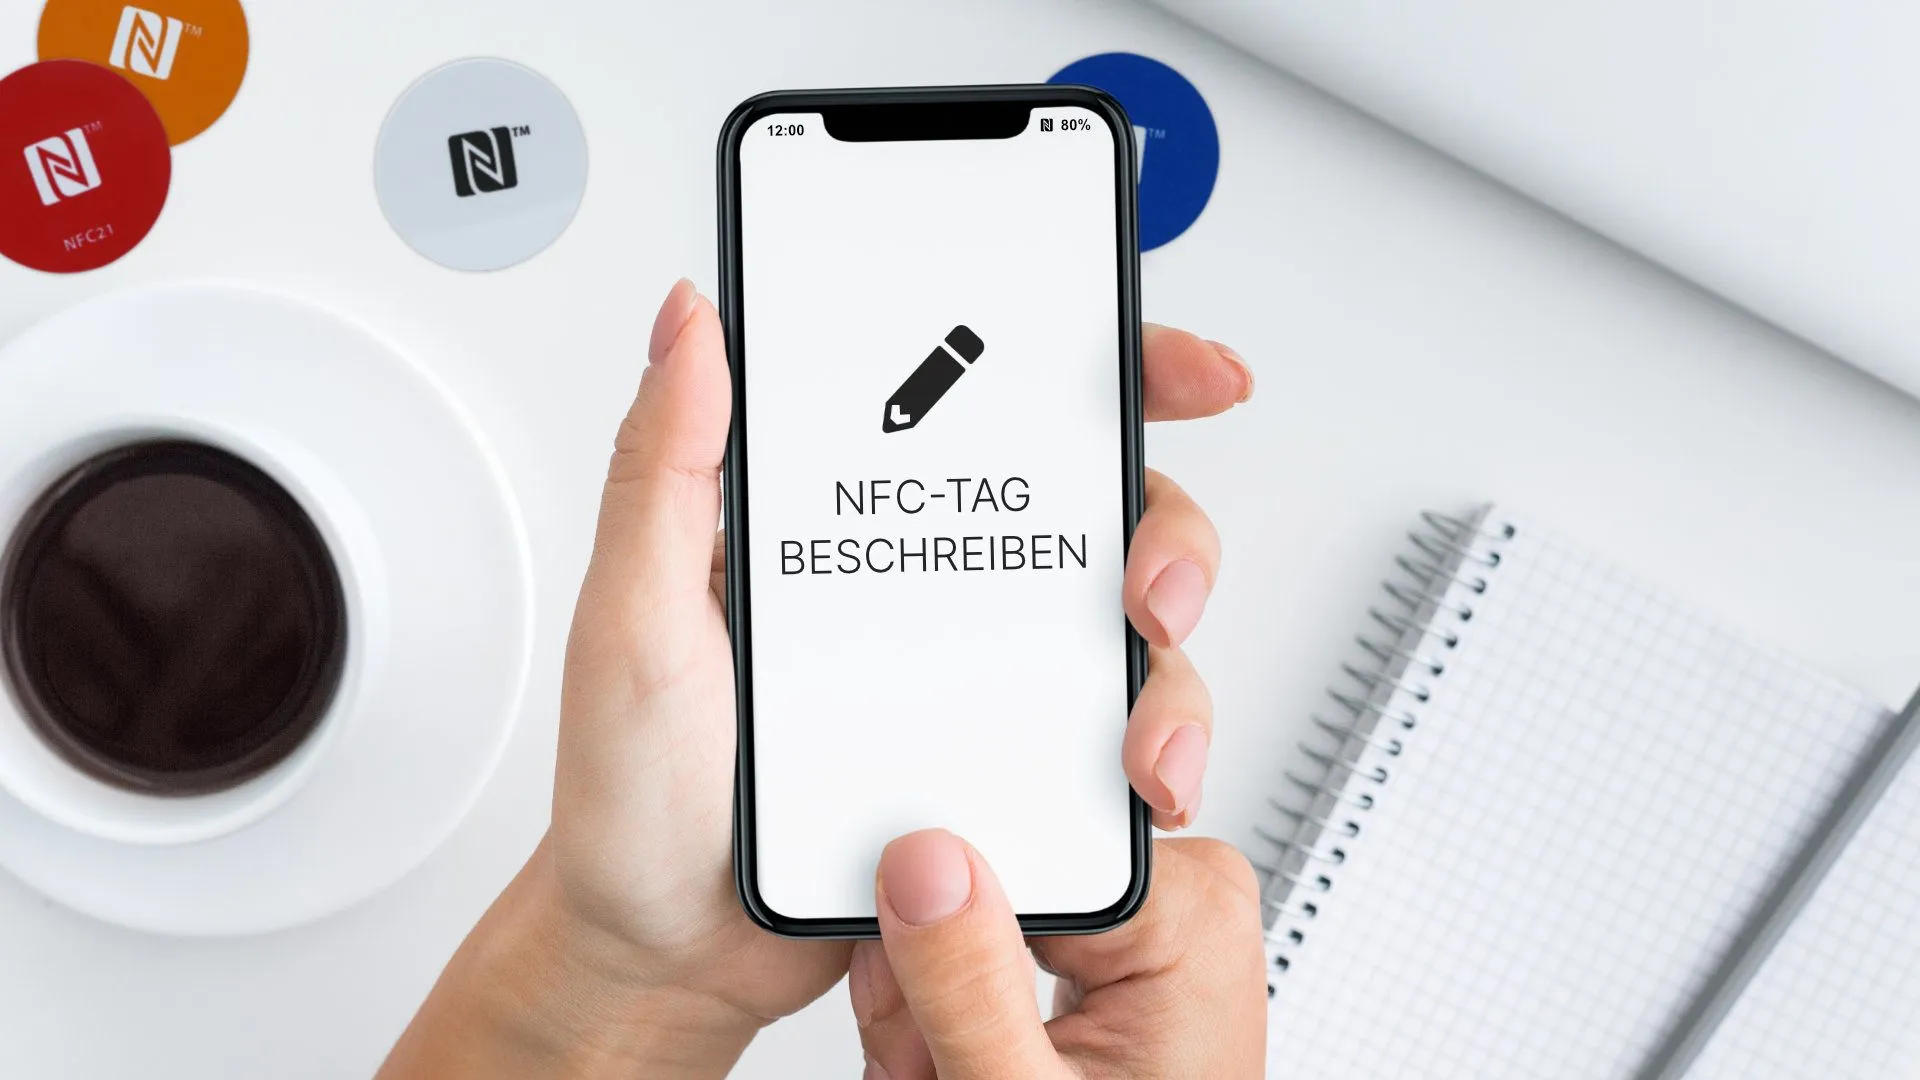
Besides reading NFC tags, writing to NFC tags is also possible with an Android smartphone. For this purpose, there are a number of apps in the Google PlayStore that support these functions. These apps differ in their handling, but all have the same purpose: Writing (and reading) NFC tags.
In our example we use the free app NXP TagWriter from the Google PlayStore to describe NFC tags.
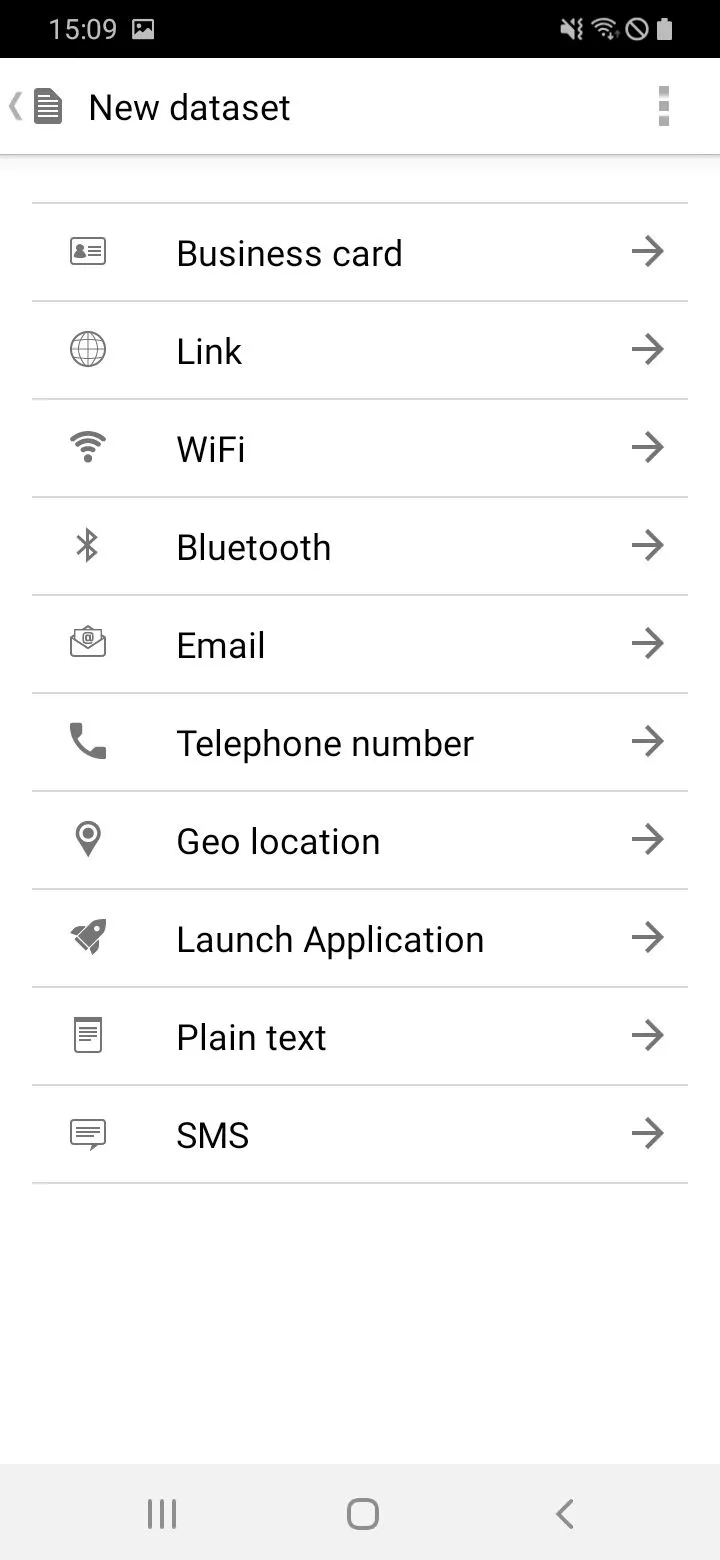
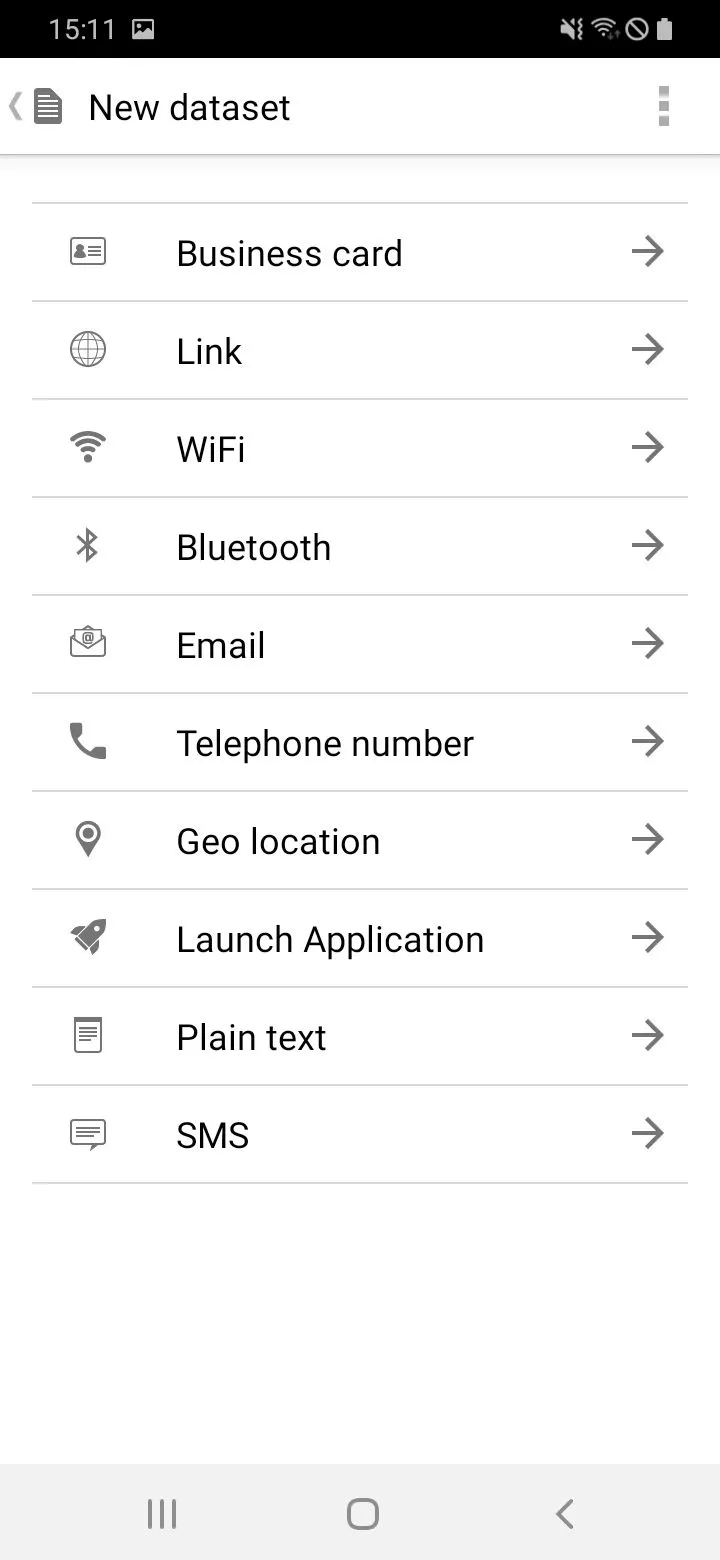
The following data types can be written to the NFC tag:
Content:
- NXP Tag Writer - First steps
- Describe NFC tag
- Save web link to NFC tag
- Save text to NFC tag
- Save business card to NFC tag
- Save phone number on NFC tag
- Save WiFi connection to NFC tag
- Create Email through NFC tag
- Save location to NFC tag
- Create SMS through NFC tag
NXP Tag Writer - First steps
To describe an NFC tag we recommend the free app NXP TagWriter.
When you open the app for the first time, we tap on I AGREE.
Describe NFC tag
To describe an NFC tag we tap Write tags. Here you can add different data sets by clicking on New dataset. If we then select WRITE and follow the instructions, we can write to the NFC tag.
These steps are generally the same for each data type.
Nevertheless, in the following we explain briefly for each data type how it can be saved to the NFC tag in a few steps.
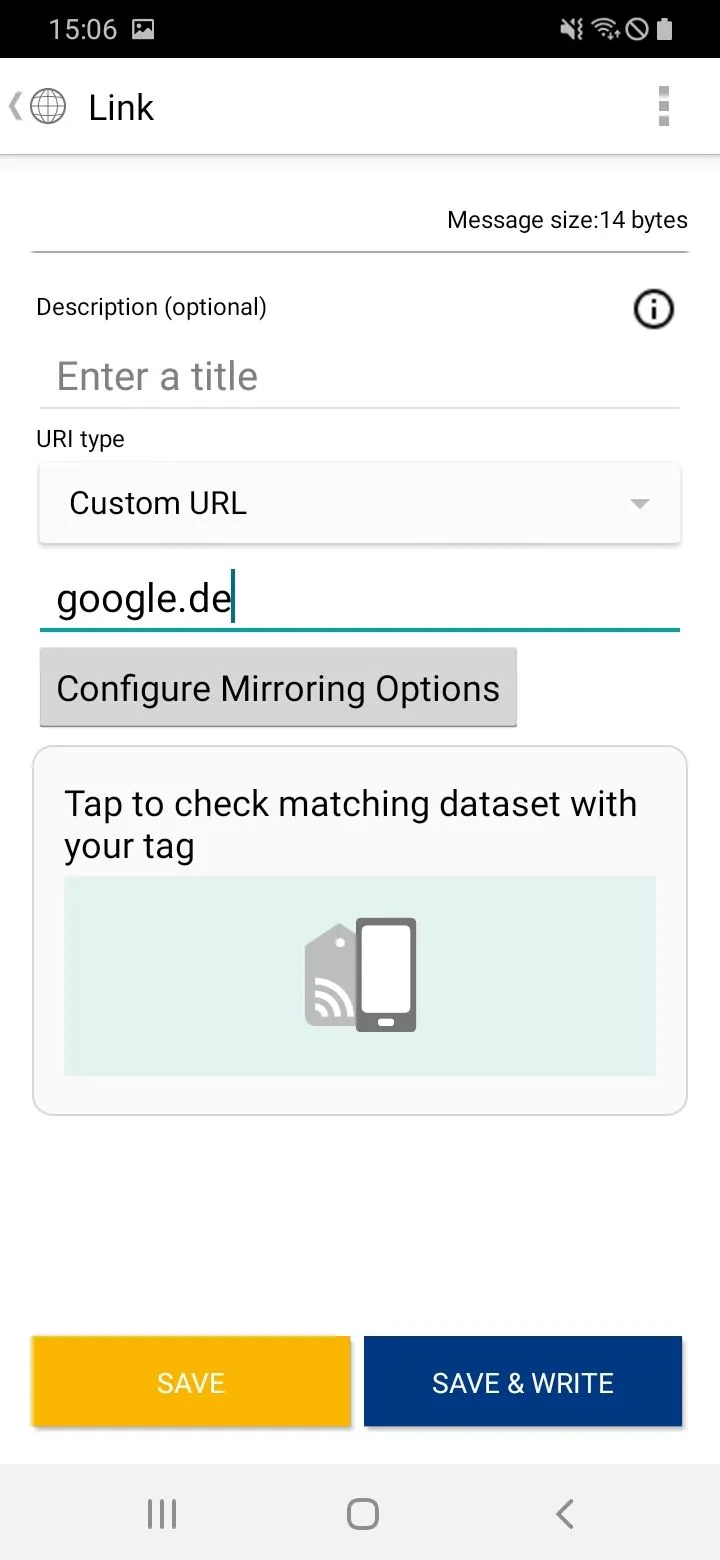
Save web link to NFC tag
To save a web link to the NFC tag we proceed as follows:
- We tap on Link
- Describe (optional): Enter title (In our example: Weblink)
- Type your weblink
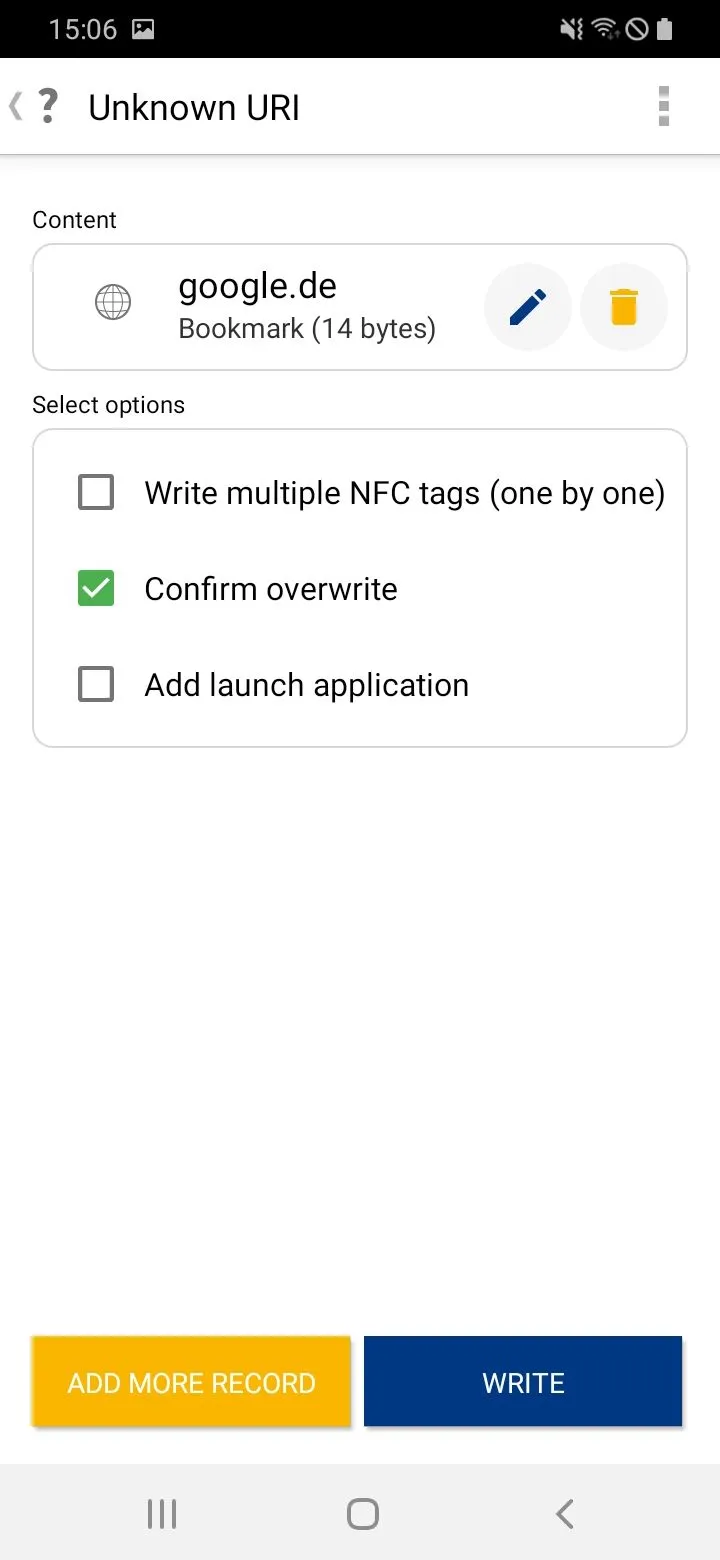
- SAVE & WRITE
- WRITE
- TAP TO CONFIRM STORE
At the top it says: Result: Writing successful. Tap DONE.

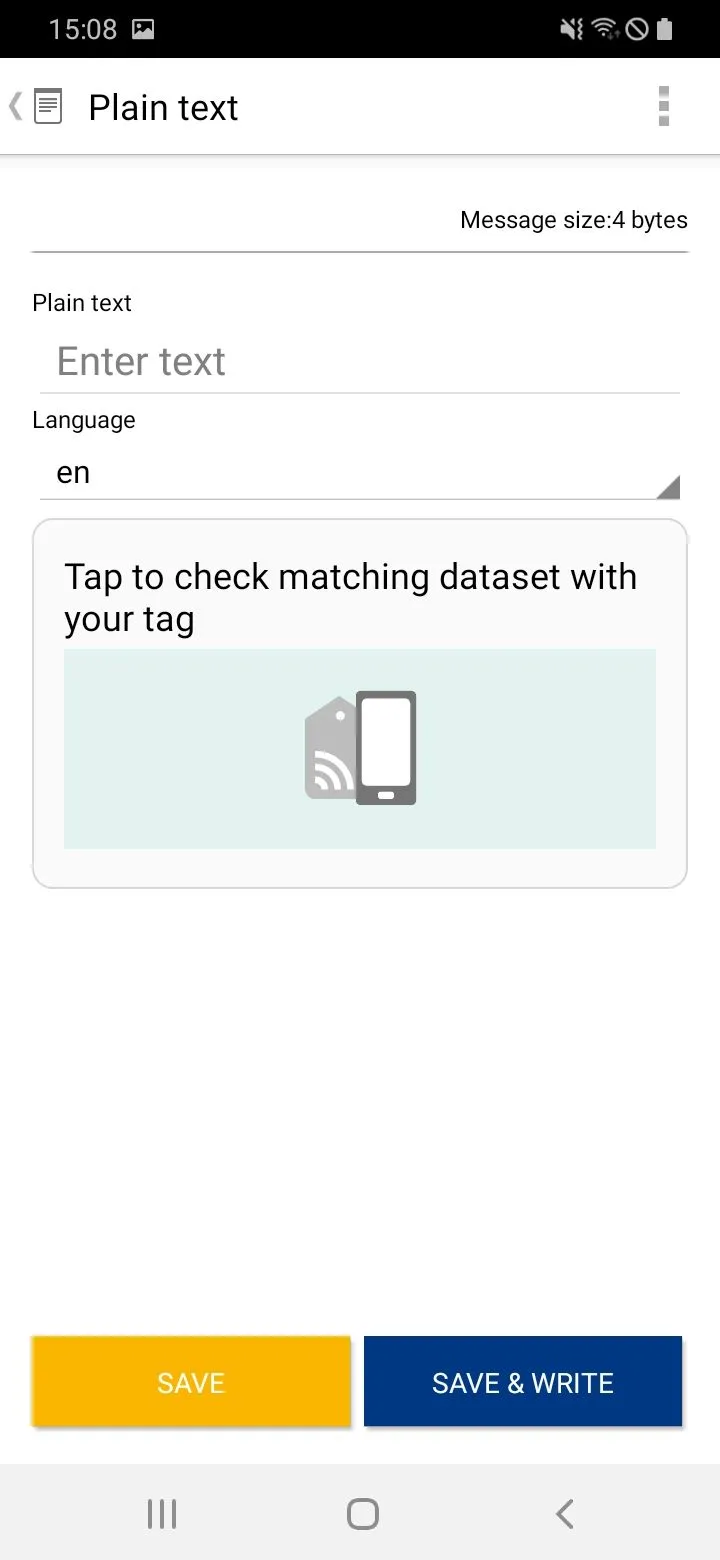
Save text to NFC tag
To save a text to the NFC tag we proceed as follows:
- Tap on Plain Text
- We enter our text at Enter Text.
- Tap WRITING
- WRITE
- CONFIRM TO STORE
- Result: Successful writing. Tap DONE.

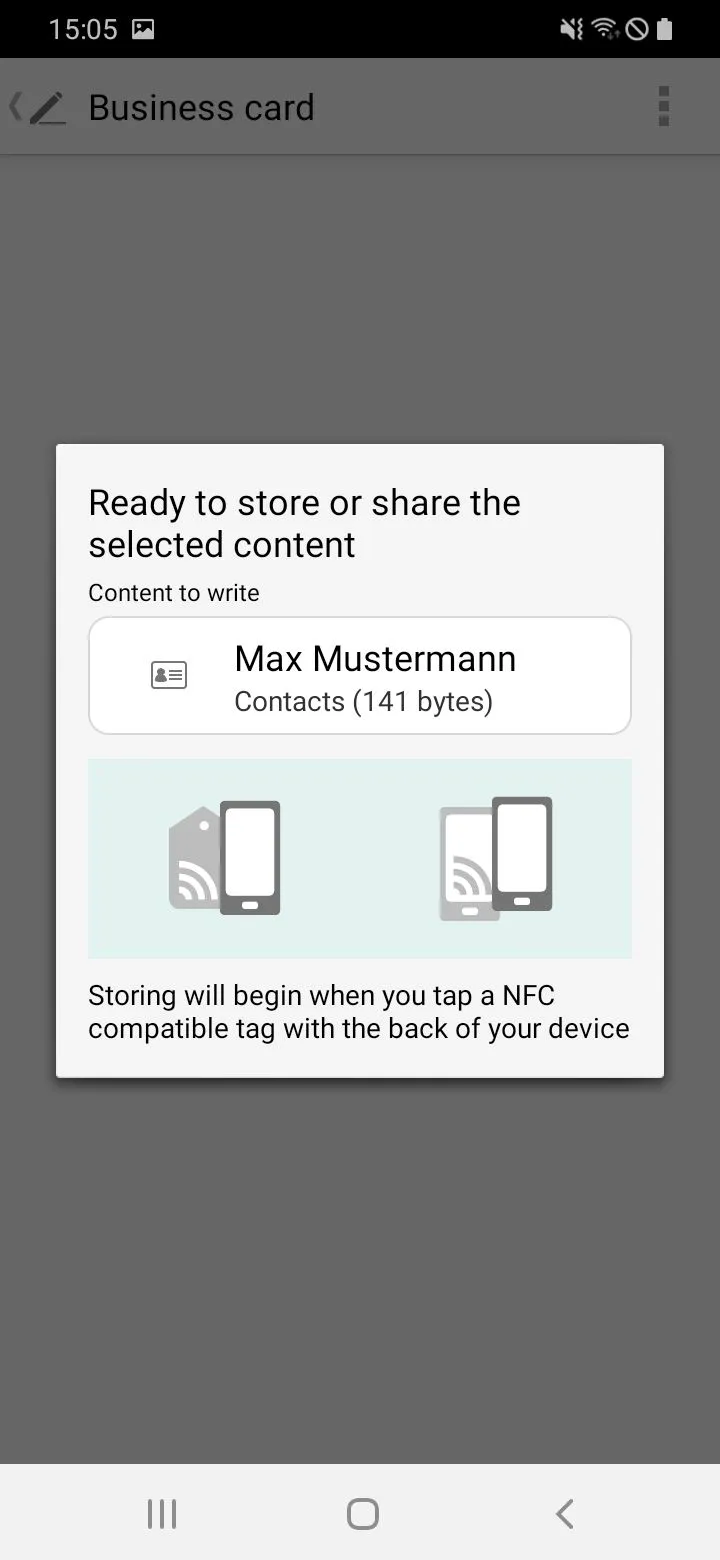
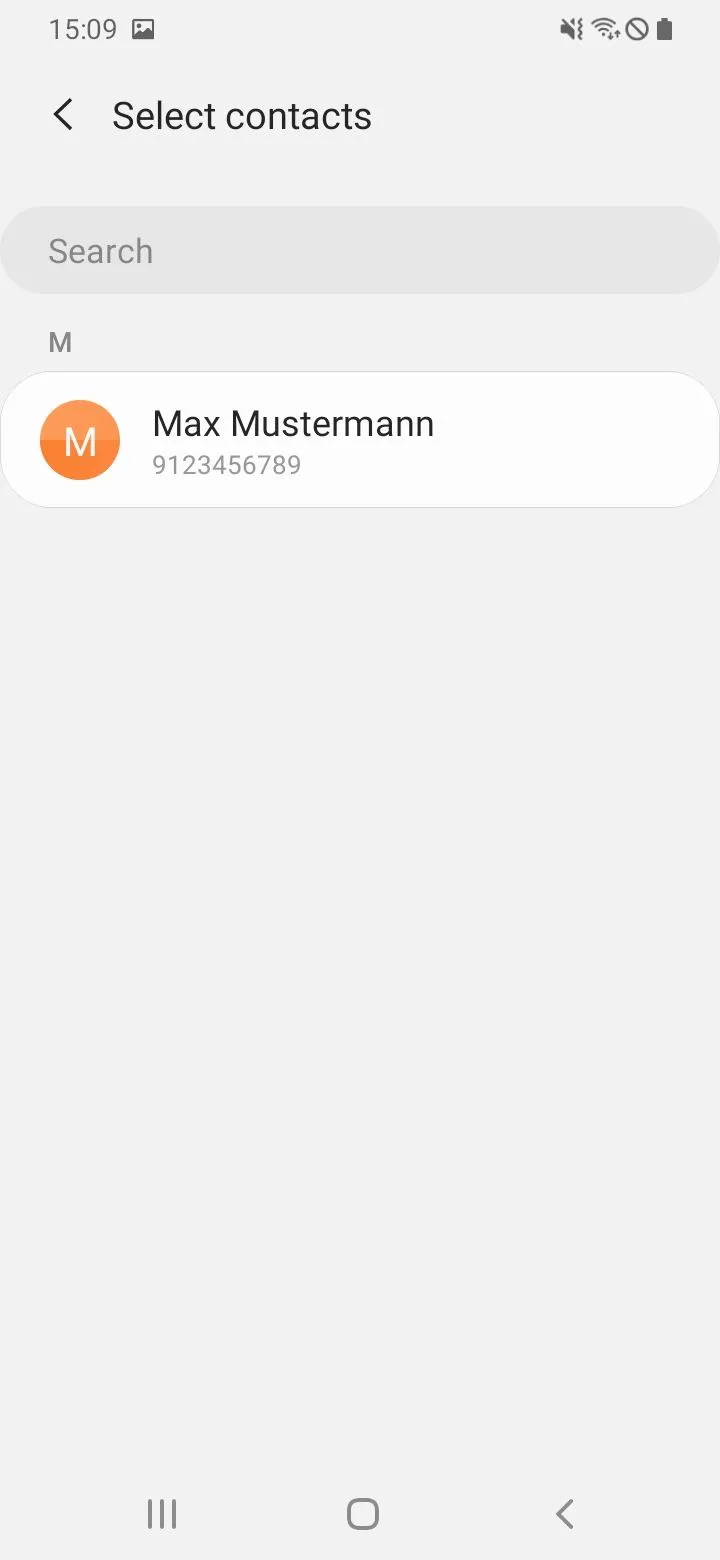
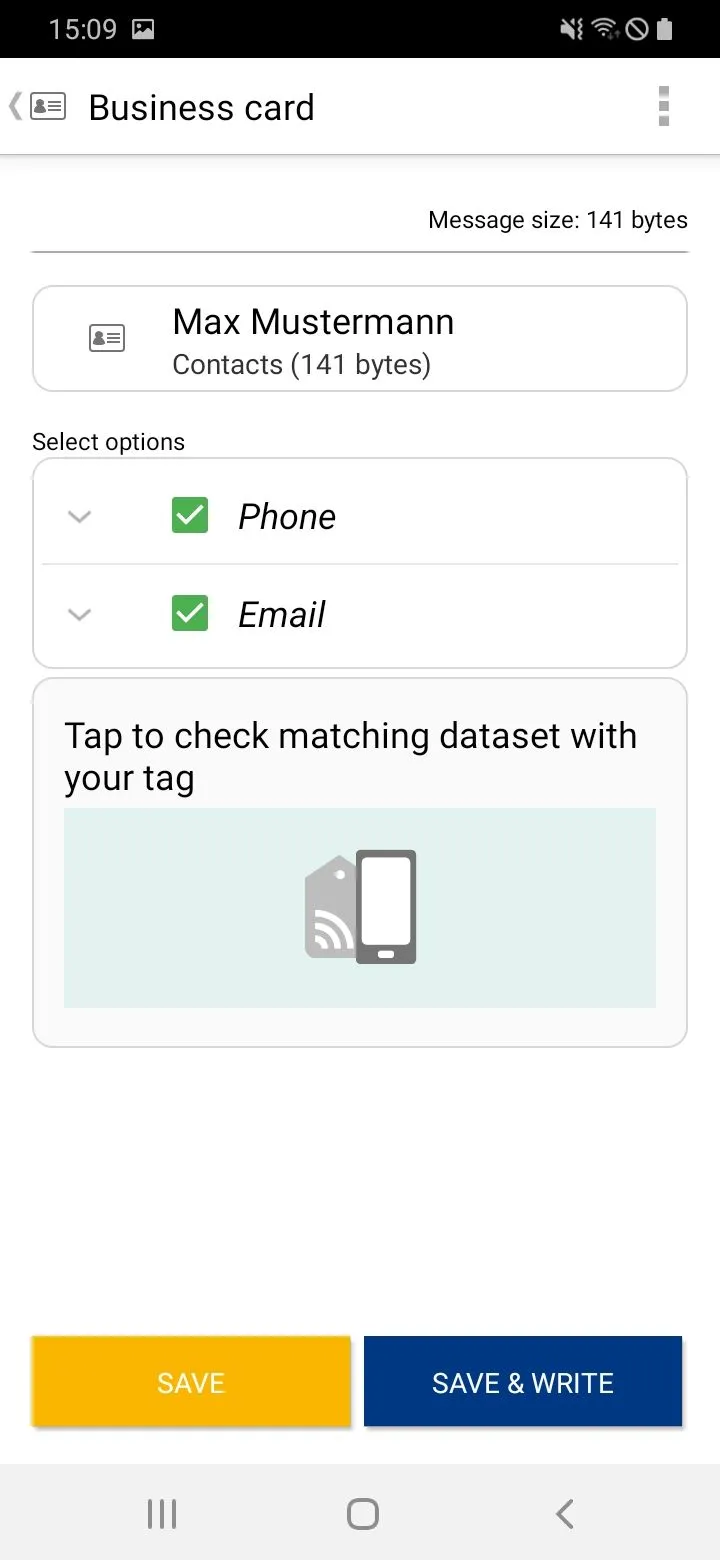
Save business card to NFC tag
To save a contact from the phone to an NFC tag, we tap Business card and then select the desired contact. In the following window we can decide which information of the contact should be saved on the NFC tag by the green check marks. The full name is always saved automatically.
In our example we want to save the phone number and the e-mail address on the NFC tag.
We tap on WRITE → Deactivate overwrite (if the possibly existing data on the NFC chip should not be overwritten).
We tap on SAVE & WRITE again and hold the NFC tag against the top back of the smartphone and keep it there until we tap on CONFIRM TO SAVE in the next step.
In the last window Write successful appears at the top and we confirm with DONE.
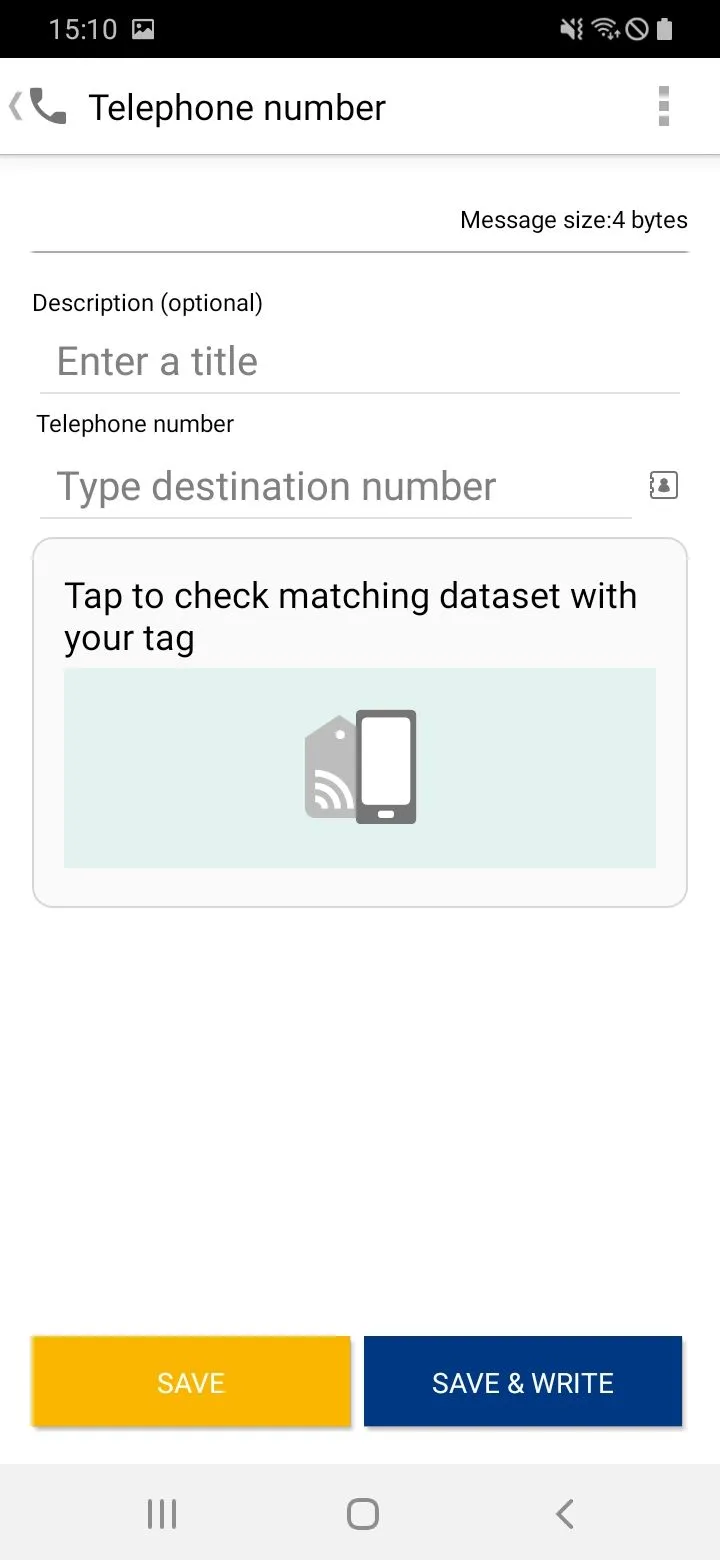
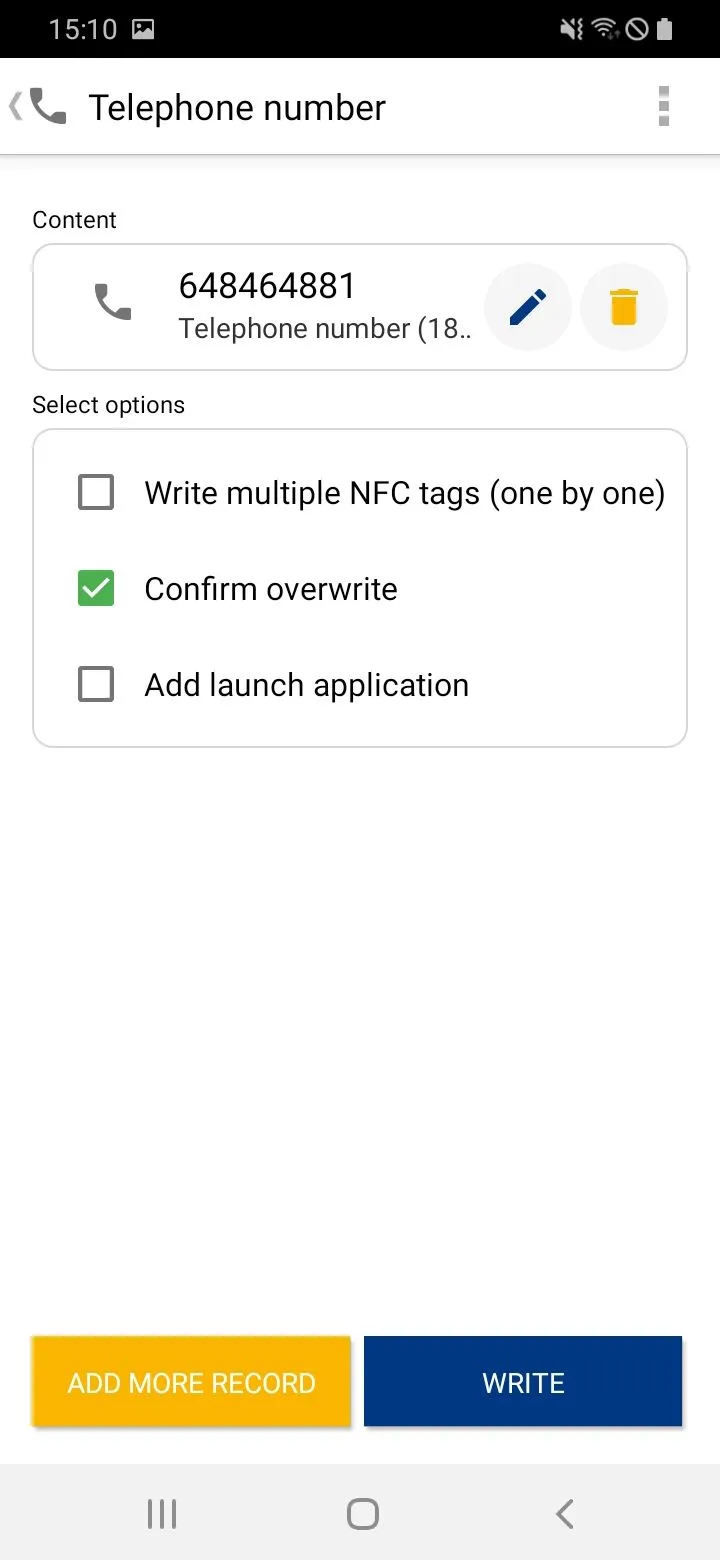
Save phone number on NFC tag
Besides a complete contact, only one phone number can be stored on the NFC tag:
- Tap Telephone number
- Add optional description
- Type in the number
- SAVE & WRITE
- WRITE
- TAP TO CONFIRM STORE
- Result: Writing successful. Tap DONE.
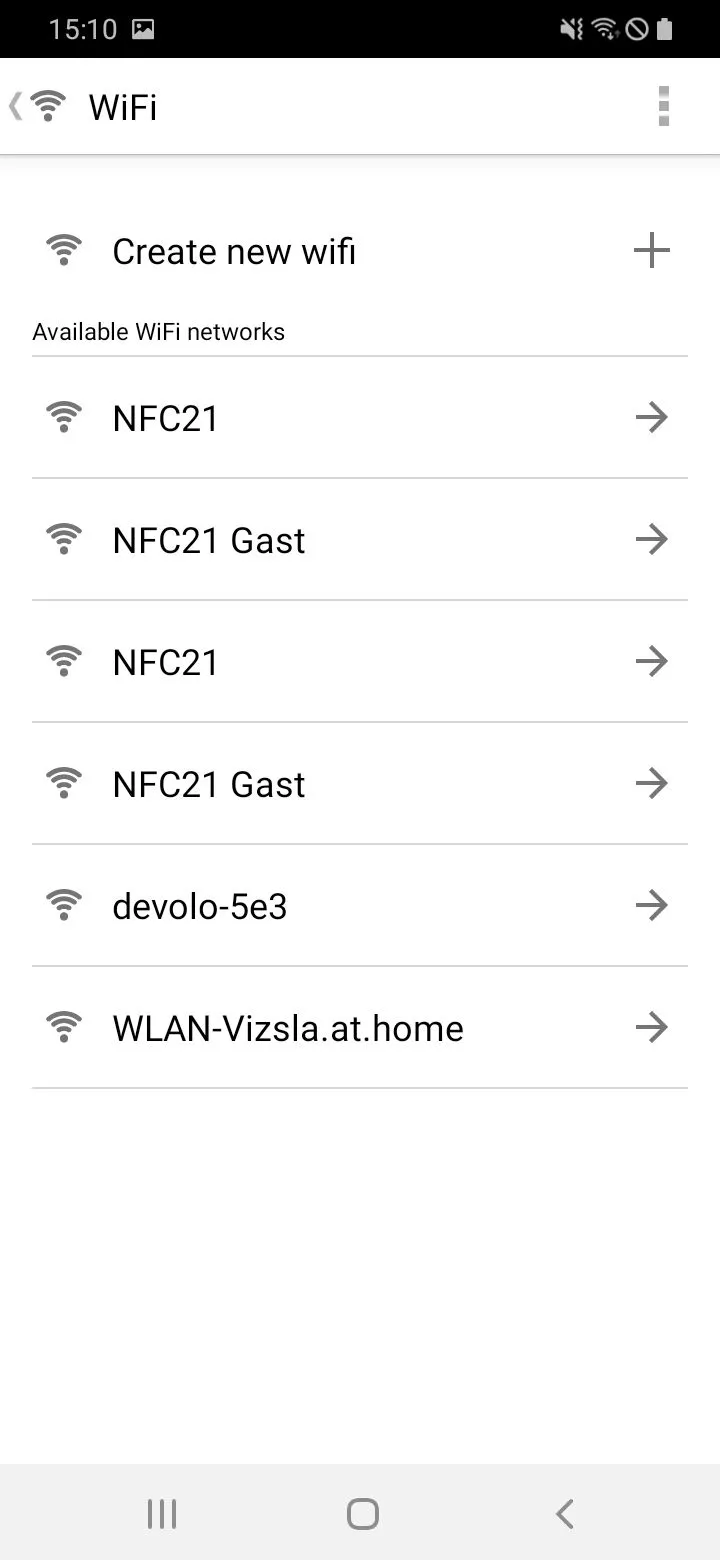
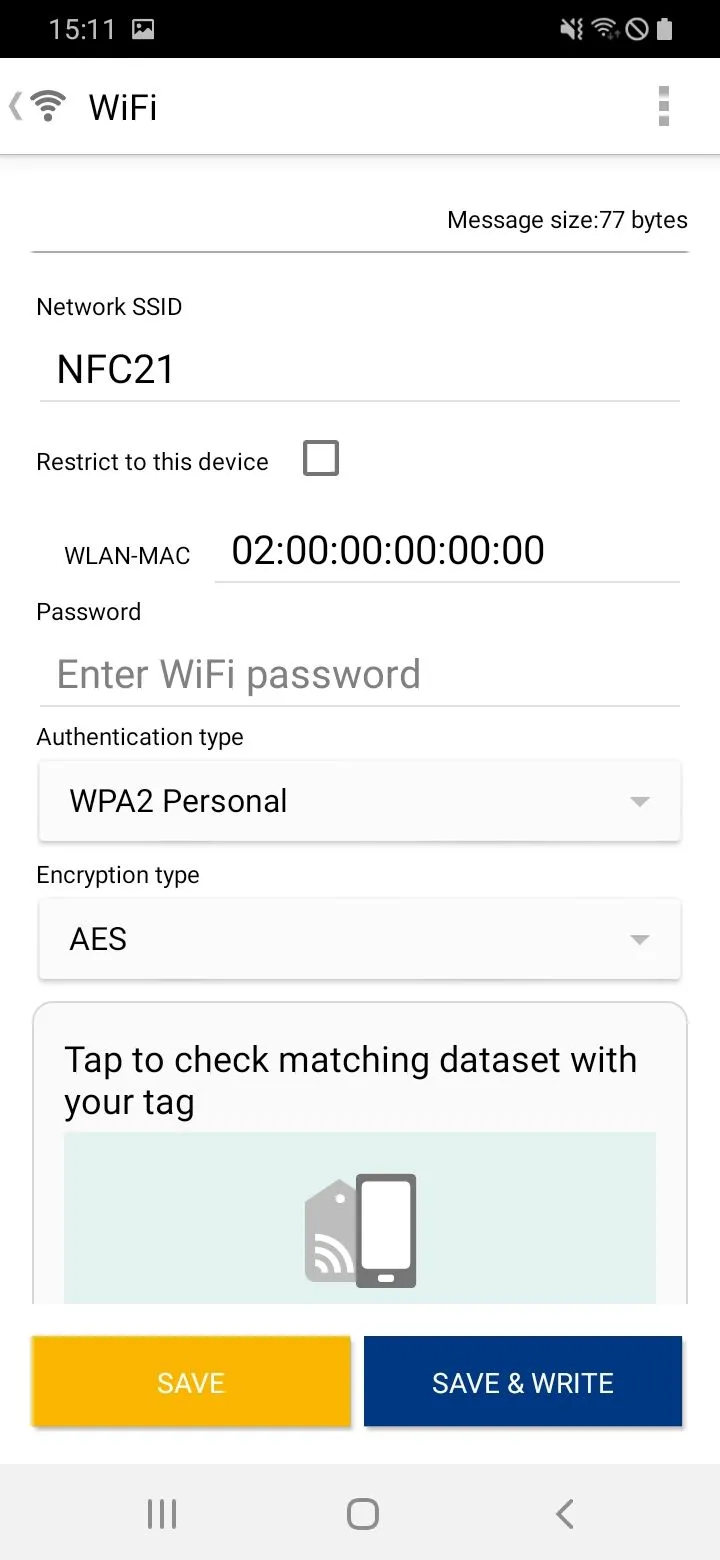
Save WiFi connection to NFC tag
Access data (network name and password) for a WLAN network can be stored on an NFC tag. This allows other devices that scan this NFC tag to connect directly to the stored network without having to enter the access data manually.
- We tap on WiFi
- In the following list, we select the WiFi connection we want to store on the NFC tag
- Next, we enter the corresponding WiFi password.
- WRITE
- Hold the NFC tag against the top back of the smartphone
- CONFIRM TO SAVE
- At the top it says: Result: Writing successful. Tap DONE.
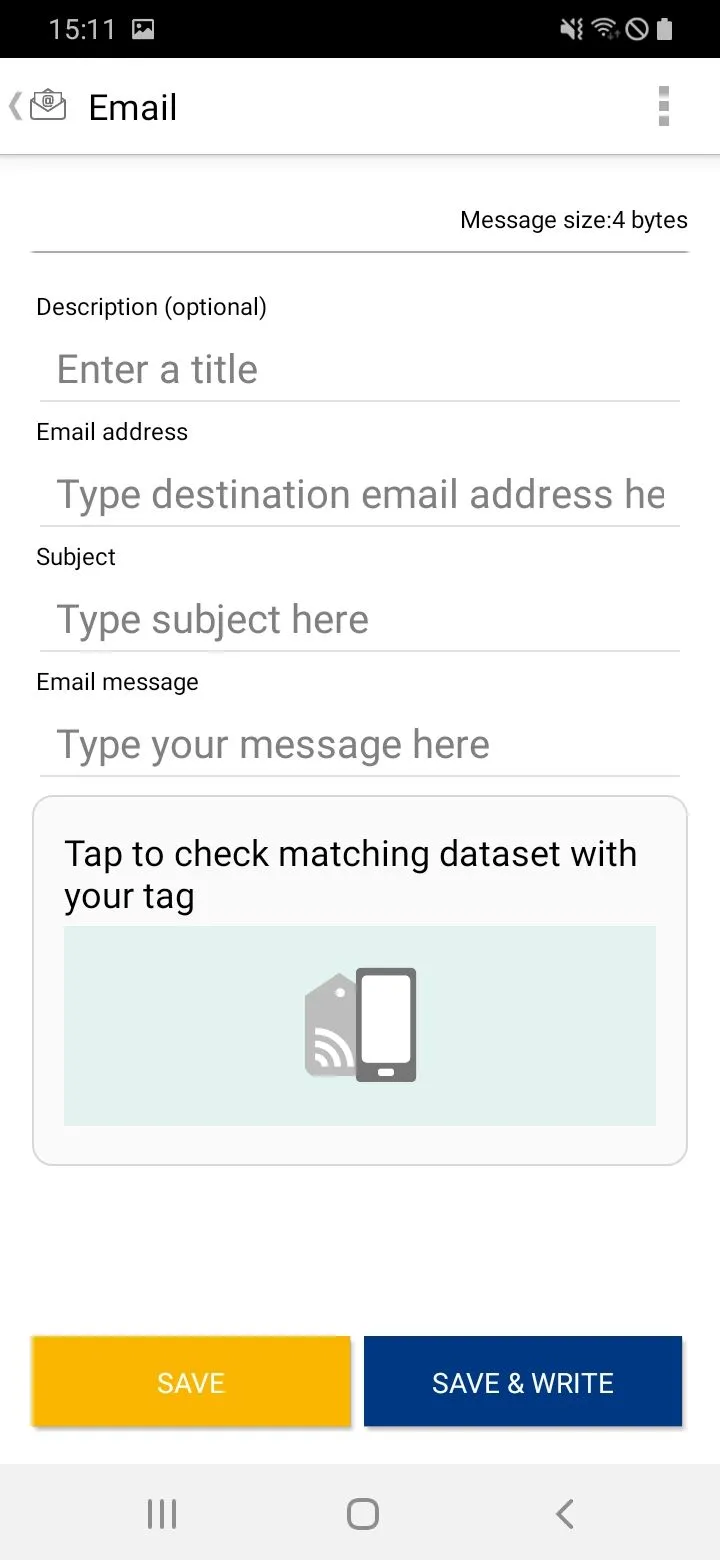
Create Email through NFC tag
The creation of an e-mail template with a predefined recipient, subject and content can be triggered by an NFC tag. It is up to us whether or not we already insert a text and a subject into the e-mail template.
- Tap on Mail
- Now we can format our e-mail template. We can enter a description, a recipient, a subject and the content with Email message. In our example we want to create an email template without content to a specific recipient (beispiel@mail.com) so that we can label it before sending it.
- Tap WRITE
- Hold the NFC tag against the top back of the smartphone
- CONFIRM TO SAFE
- At the top it says: Result: Writing successful. Tap DONE.
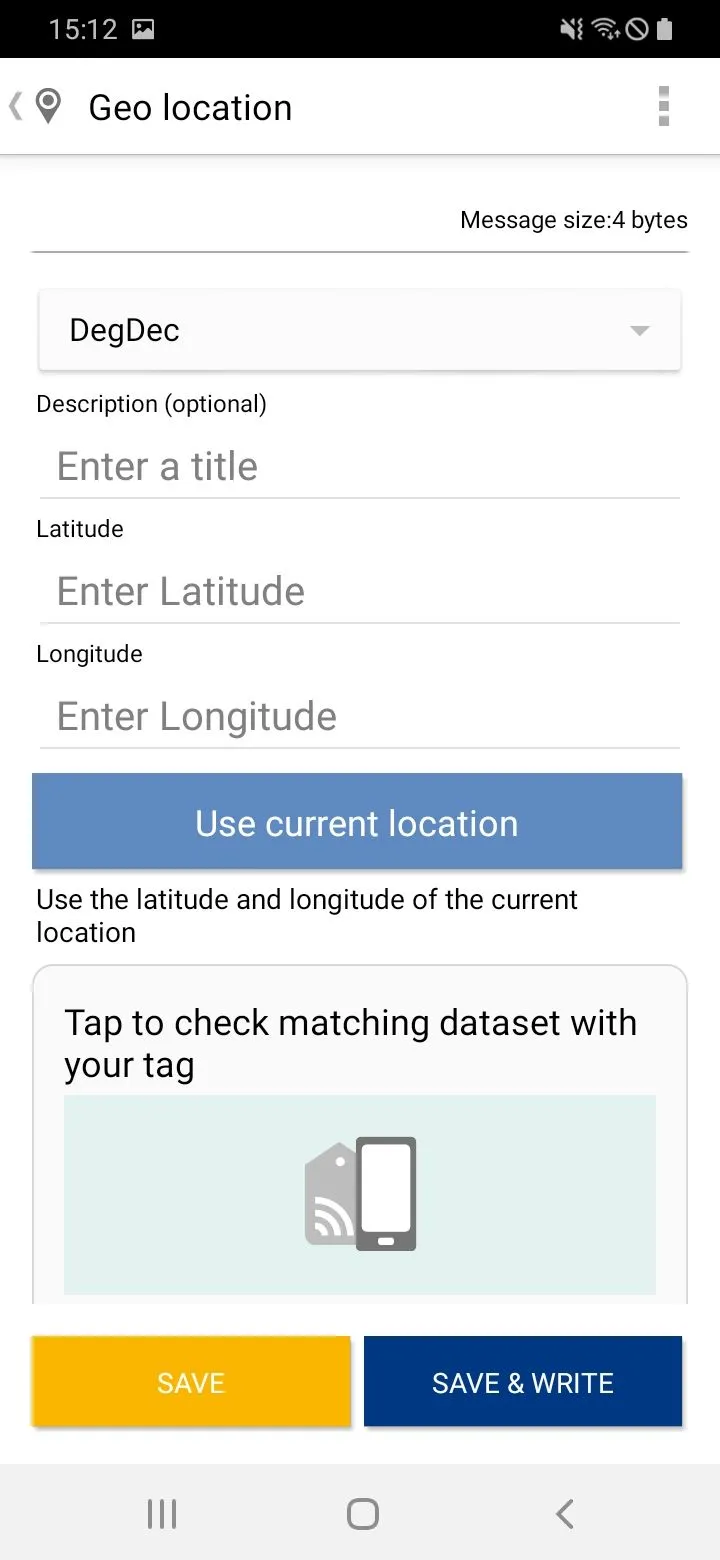
Save location to NFC tag
There are two ways to save a location to an NFC tag using the NXP TagWriter: Either the desired location can be entered using the previously determined latitude and longitude lines, or the location is saved directly on the NFC tag:
- Tap on Geo location
- Use Current Location automatically loads the longitude and latitude of the current location.
- WRITE
- Hold the NFC tag against the top back of the smartphone
- CONFIRM TO SAVE
- At the top it says: Result: Writing successful. Tap DONE.
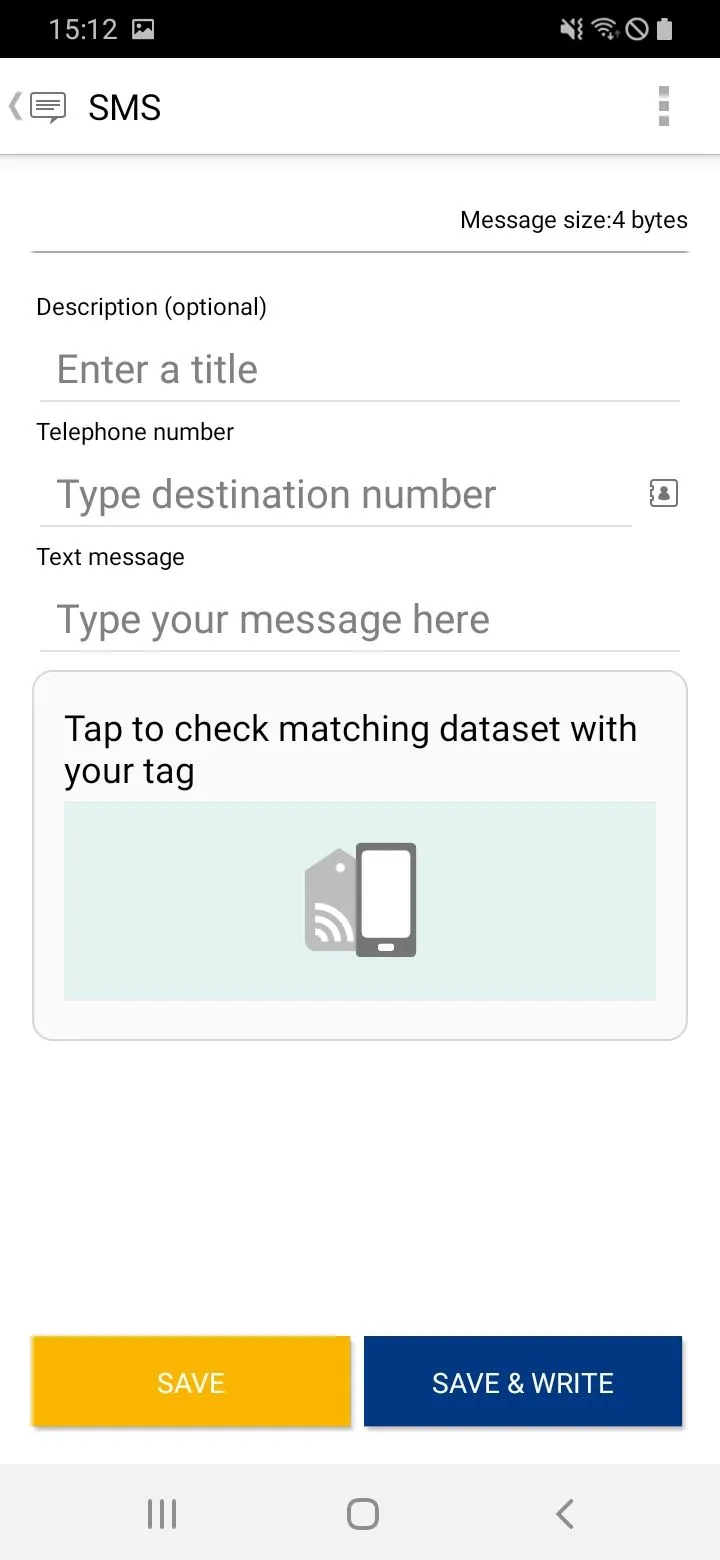
Create SMS through NFC tag
Similar to an e-mail, an SMS template can also be created using an NFC tag. Here too, we have the option of either entering a recipient and a message directly, or just the recipient, so that we can write an individual message for each scan.
- Tap on SMS
- We enter a phone number to which the SMS should be sent. We have to trigger the sending manually after each NFC tag scan.
- Tap WRITE
- Hold the NFC tag against the top back of the smartphone → CONFIRM TO SAVE
- At the top it says: Result: Writing successful. Tap DONE.
Summary
In this article we have explained how different data types can be written to an NFC tag. In addition to writing and reading NFC tags, automations (tasks) can also be stored on an NFC tag, which makes it possible to automate common operations on the smartphone.
Associated operating systems
AndroidFirst published: 25.07.2023 / Updated: 23.07.2025