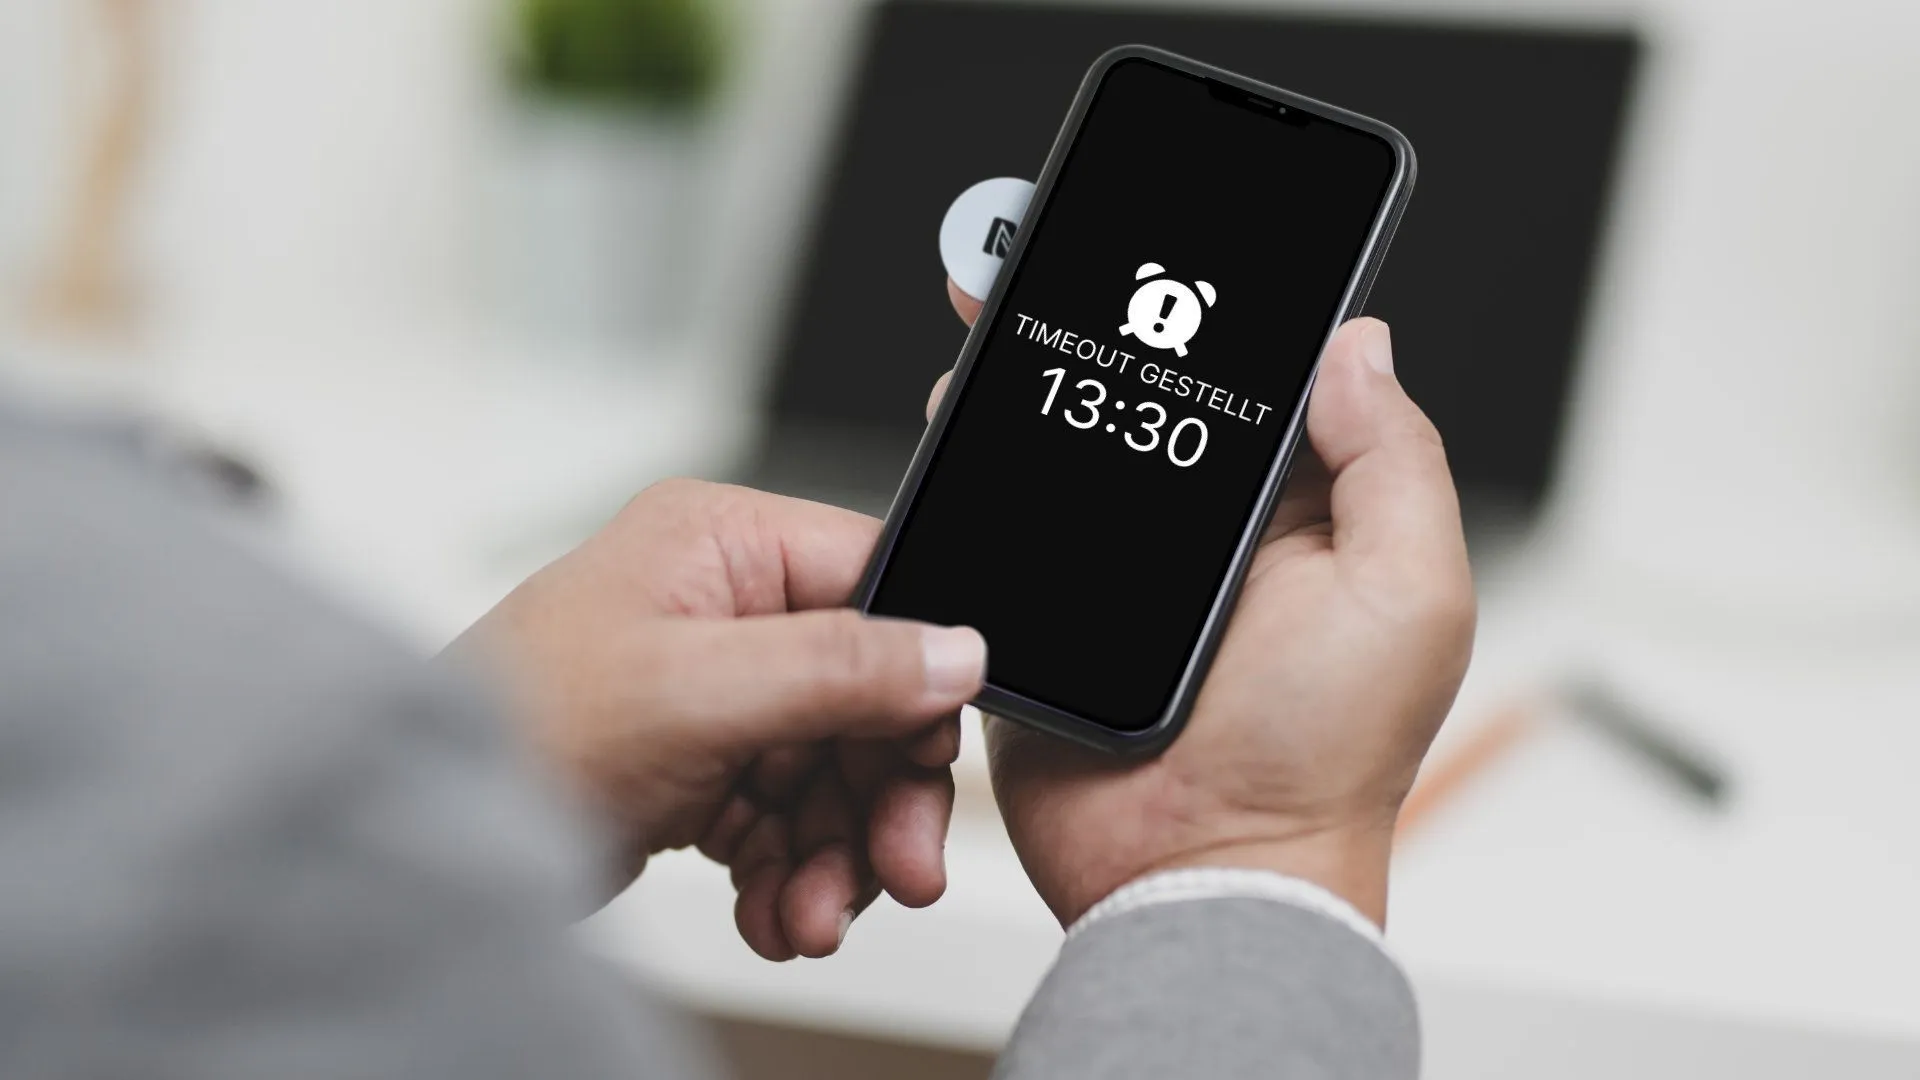
Notifications can be either on or off. The fastest way to mute notifications is the "Do not disturb mode", indicated by the small moon icon in the status bar. Especially when you need to read important things, answer emails or do other things on your iPhone, the "Do Not Disturb“-mode is often a very usefull. But as useful as it is, the more annoying it can be if you forget to switch the mode and miss important calls or messages.
In this How2 we explain how to put the iPhone in "Do Not Disturb"-mode for a self-determined time (e.g. for the next 15 minutes). During this time, the apps from which users could receive messages are muted. To do this, we create a Timeout NFC tag, which can then be conveniently placed as a sticker or magnet, on your desk, couch, or any other location. Besides the "Do Not Disturb"-mode, the dark mode can also be set directly, an app can be opened and other actions can be activated automatically.
Info: If you want to download the finished shortcut directly and save it on the NFC tag, skip straight to the end of this article.
Content:
- Add a shortcut
- Set period
- Start Timer
- Activate "Do not Disturb"
- Define further actions
- Test action, save and write to NFC tag
Add a shortcut
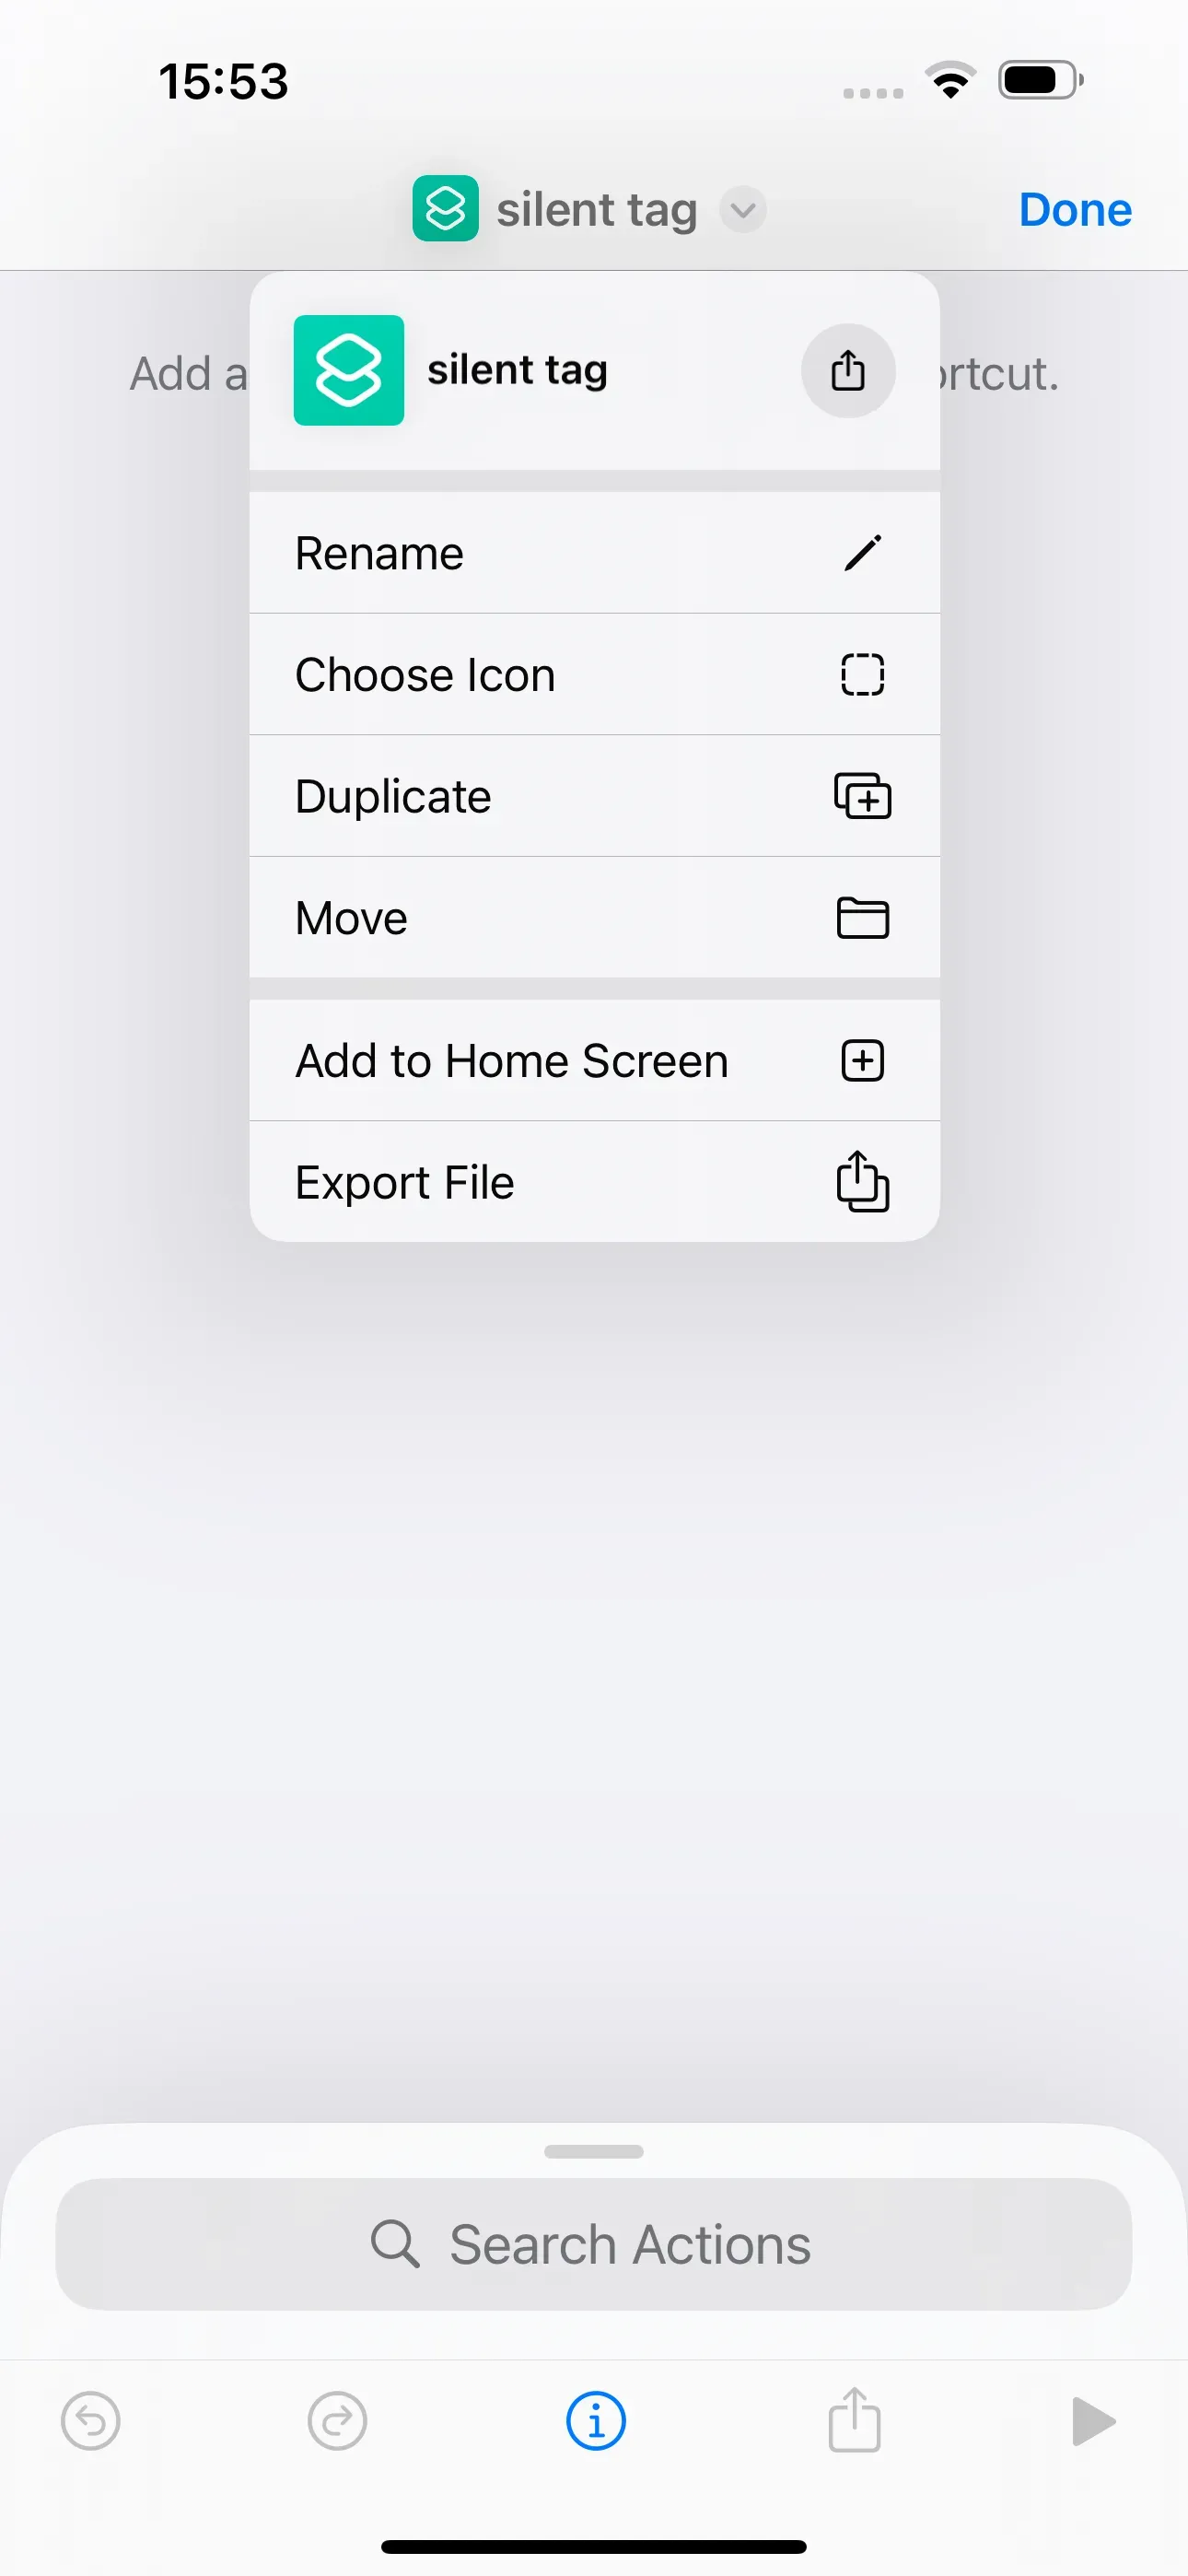
To create the desired actions that are to be executed when the NFC tag is scanned, open the Shortcuts app and tap on + at the top right to create a new shortcut. We now name this shortcut span class="h2-edit-ios">silent tag.
Set period
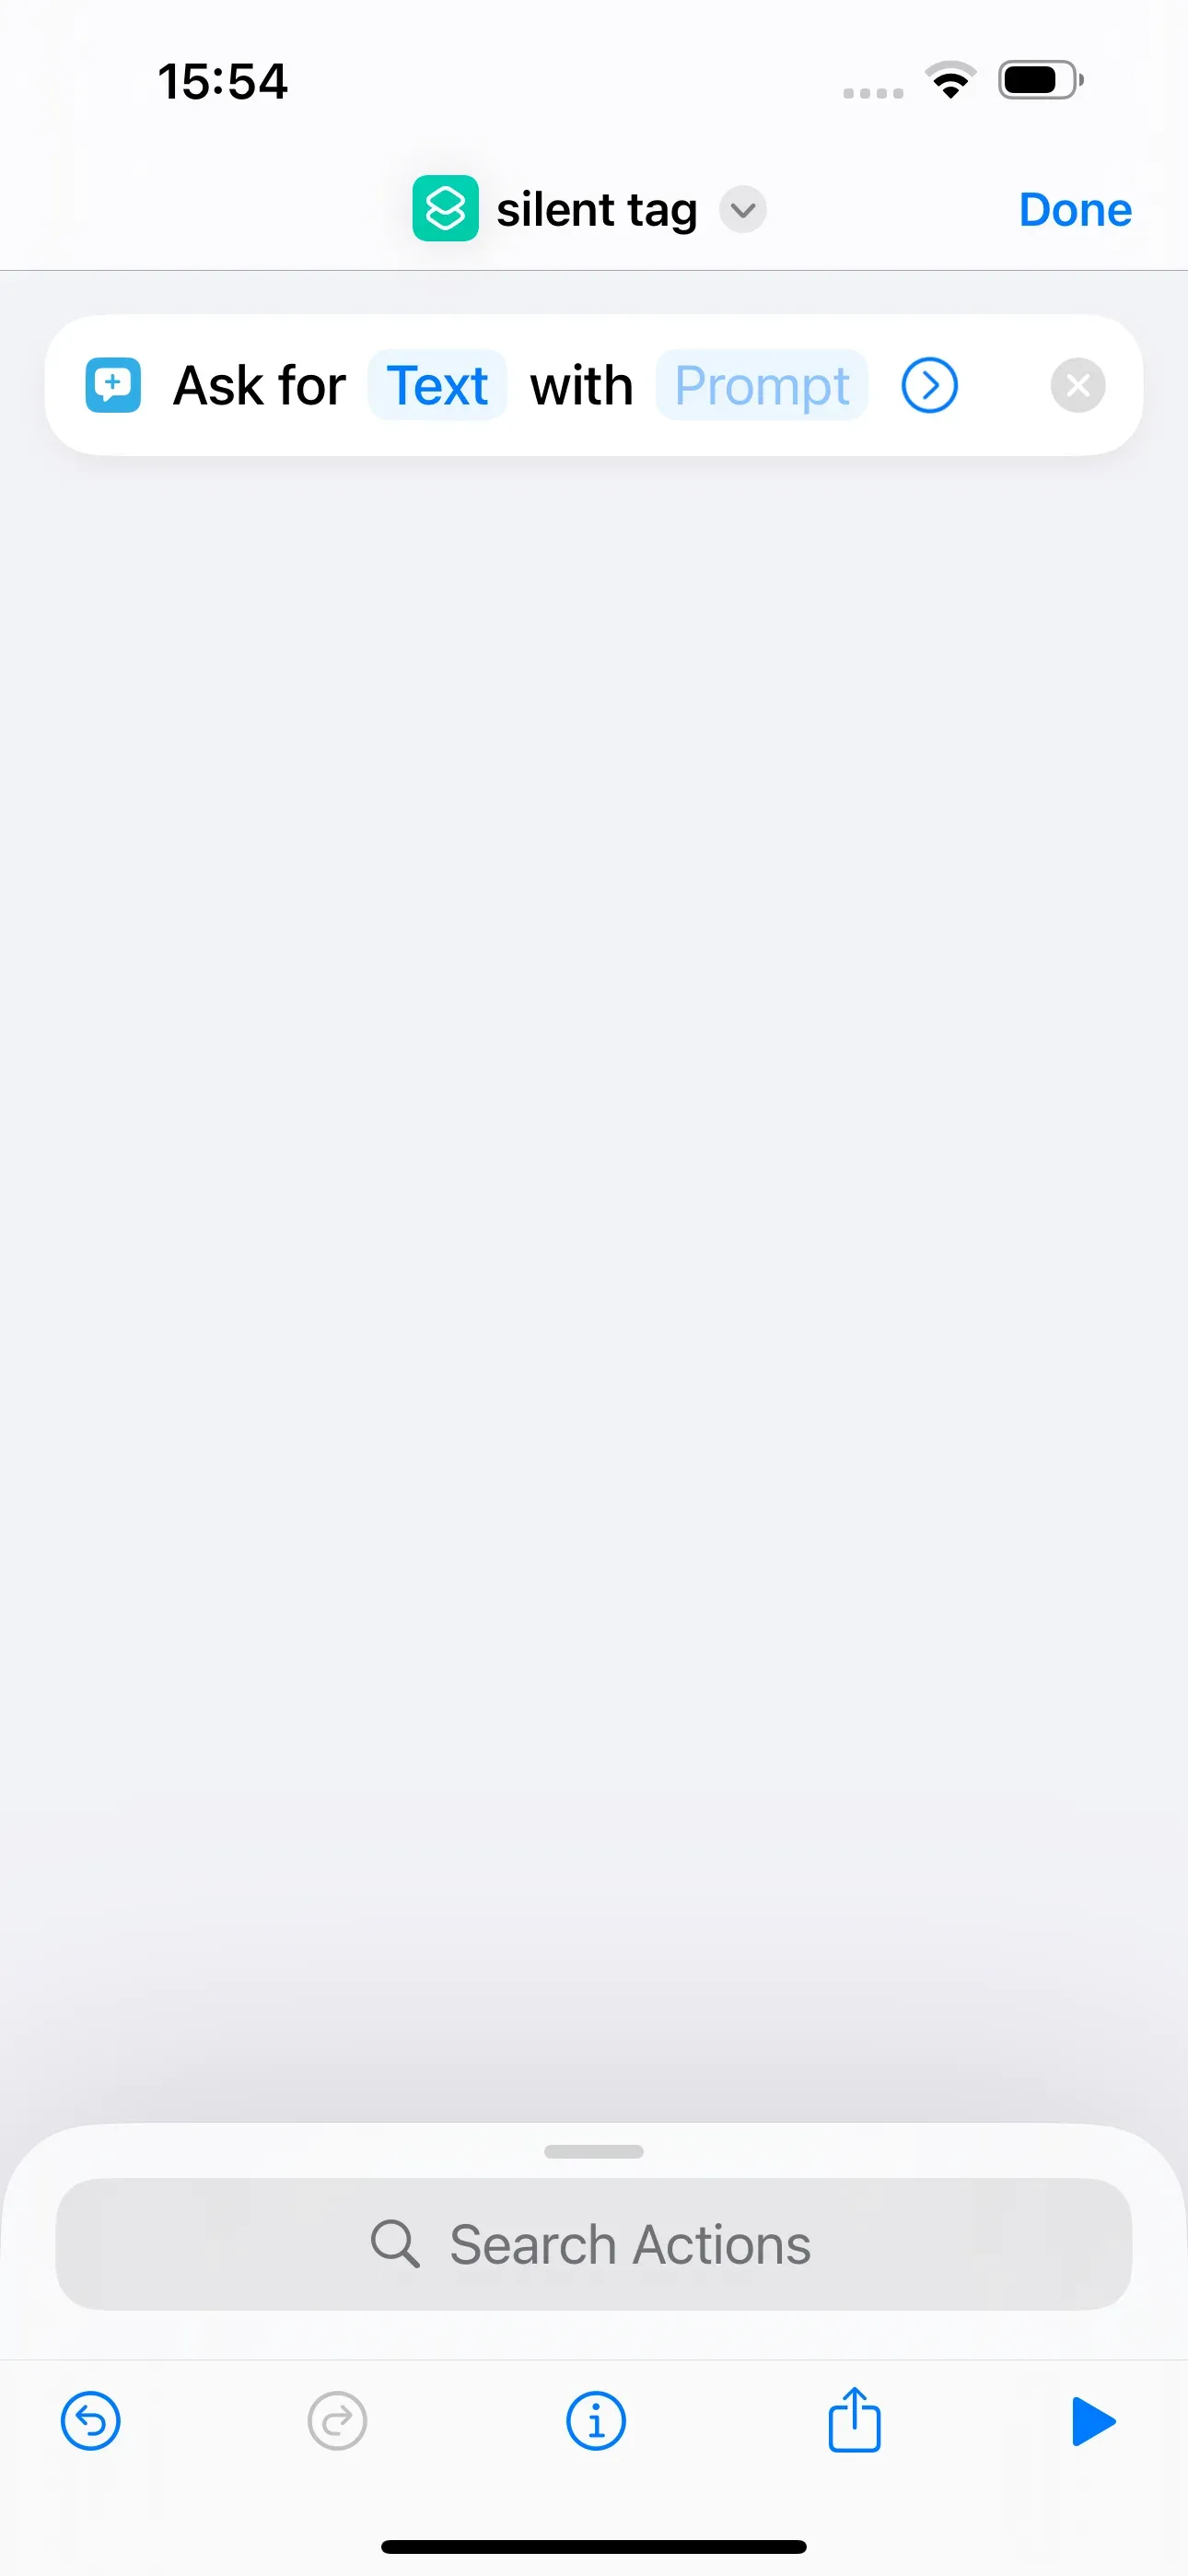
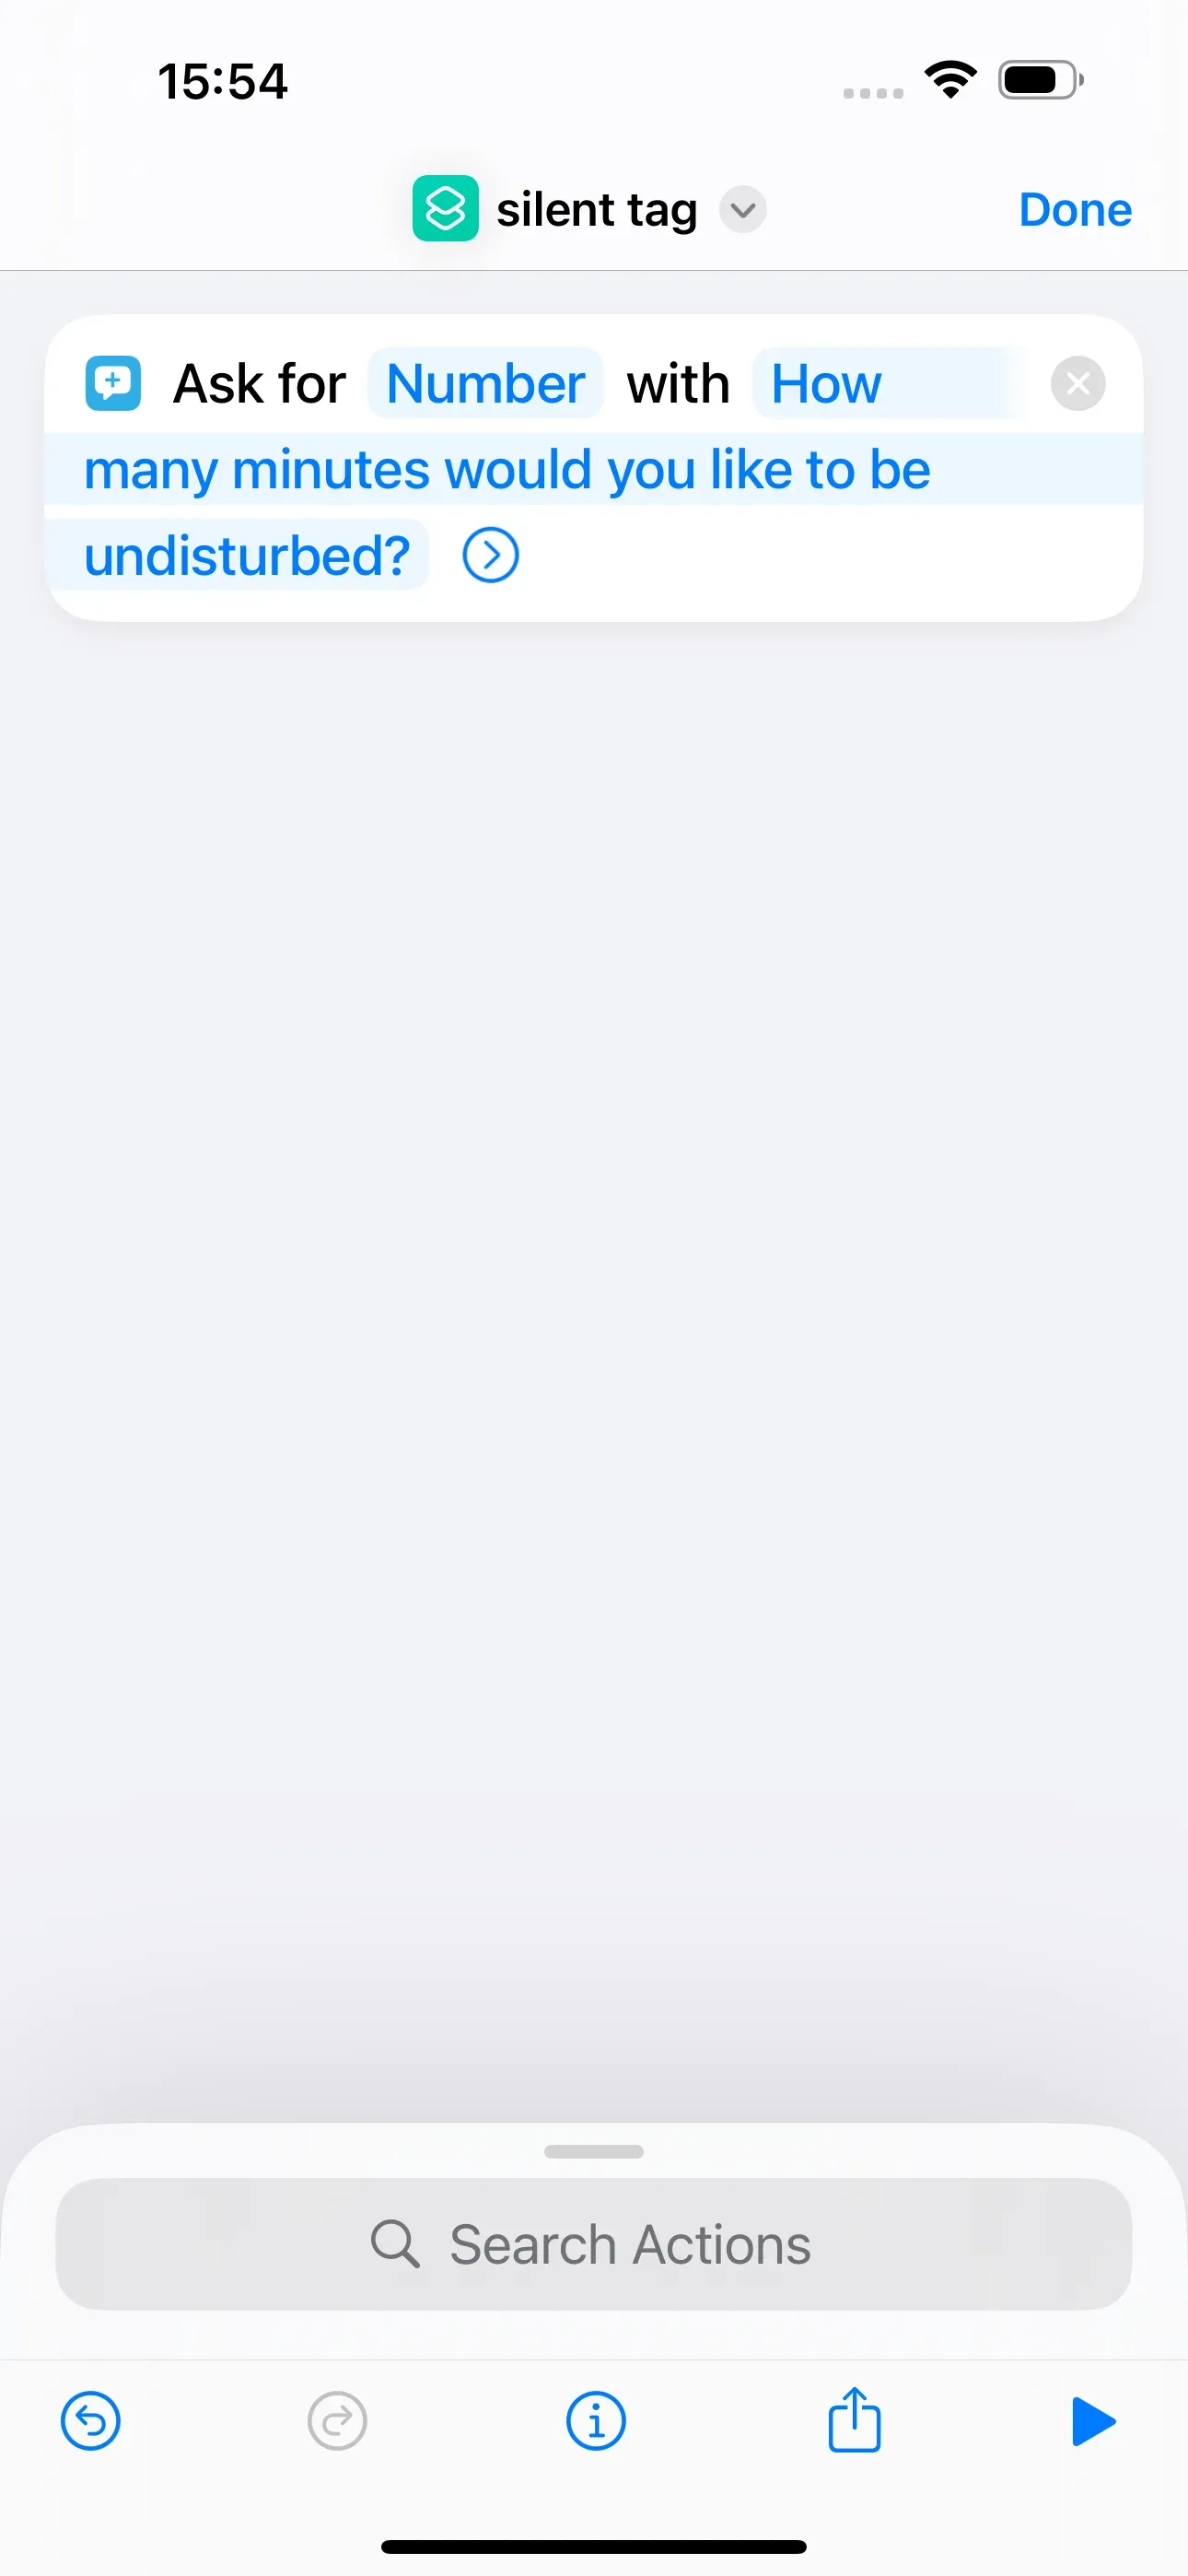
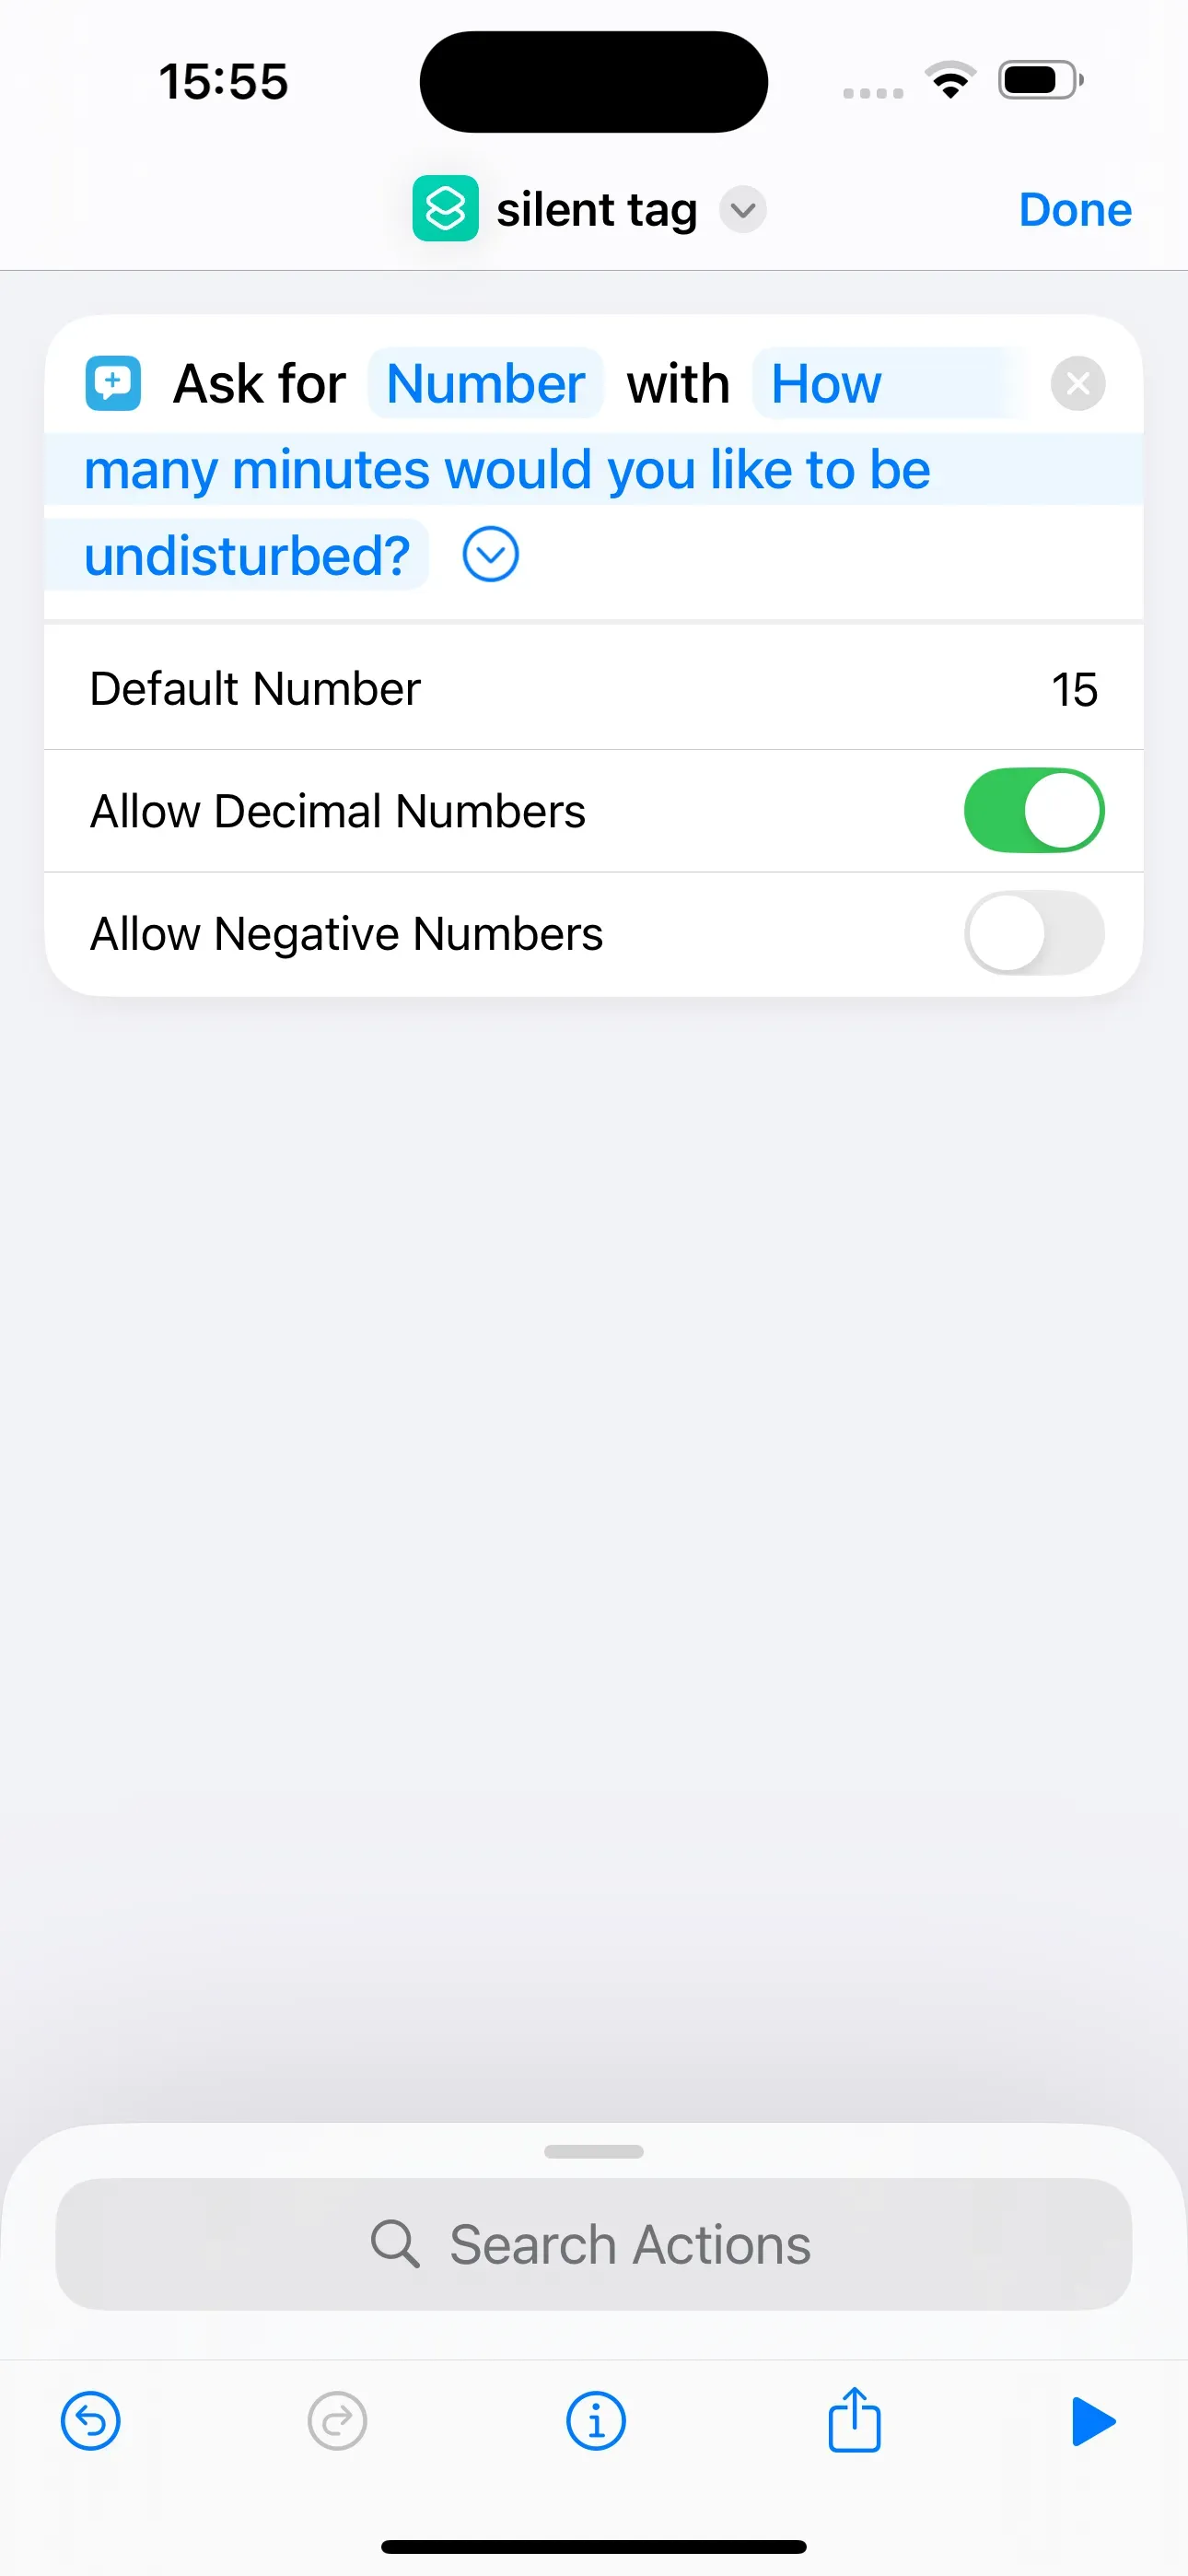
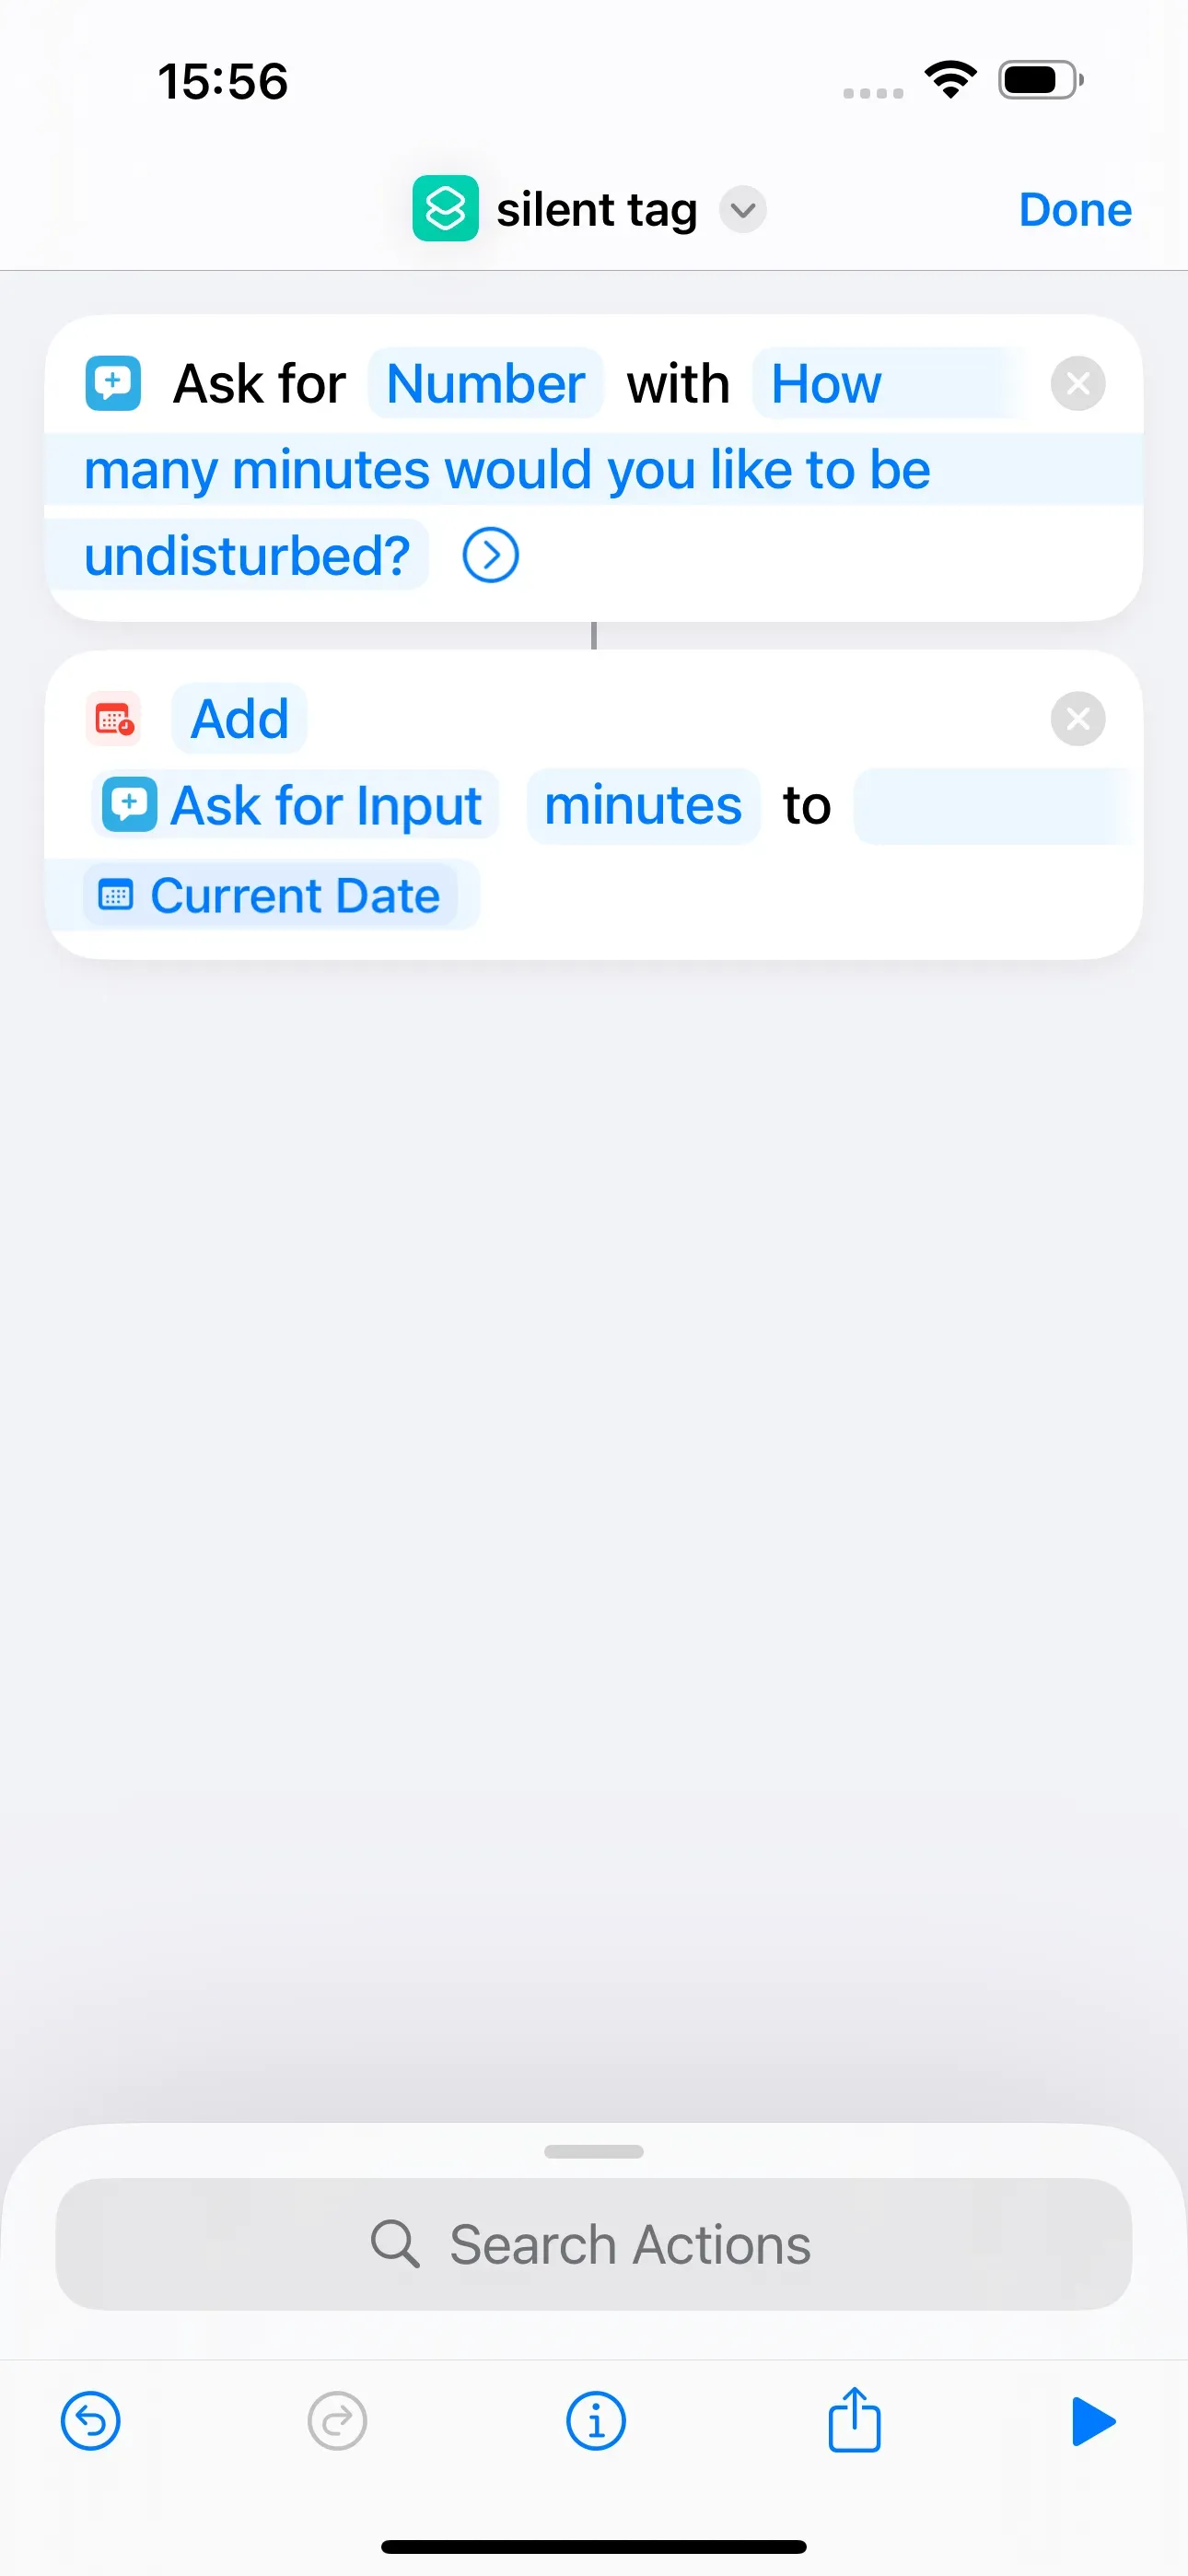
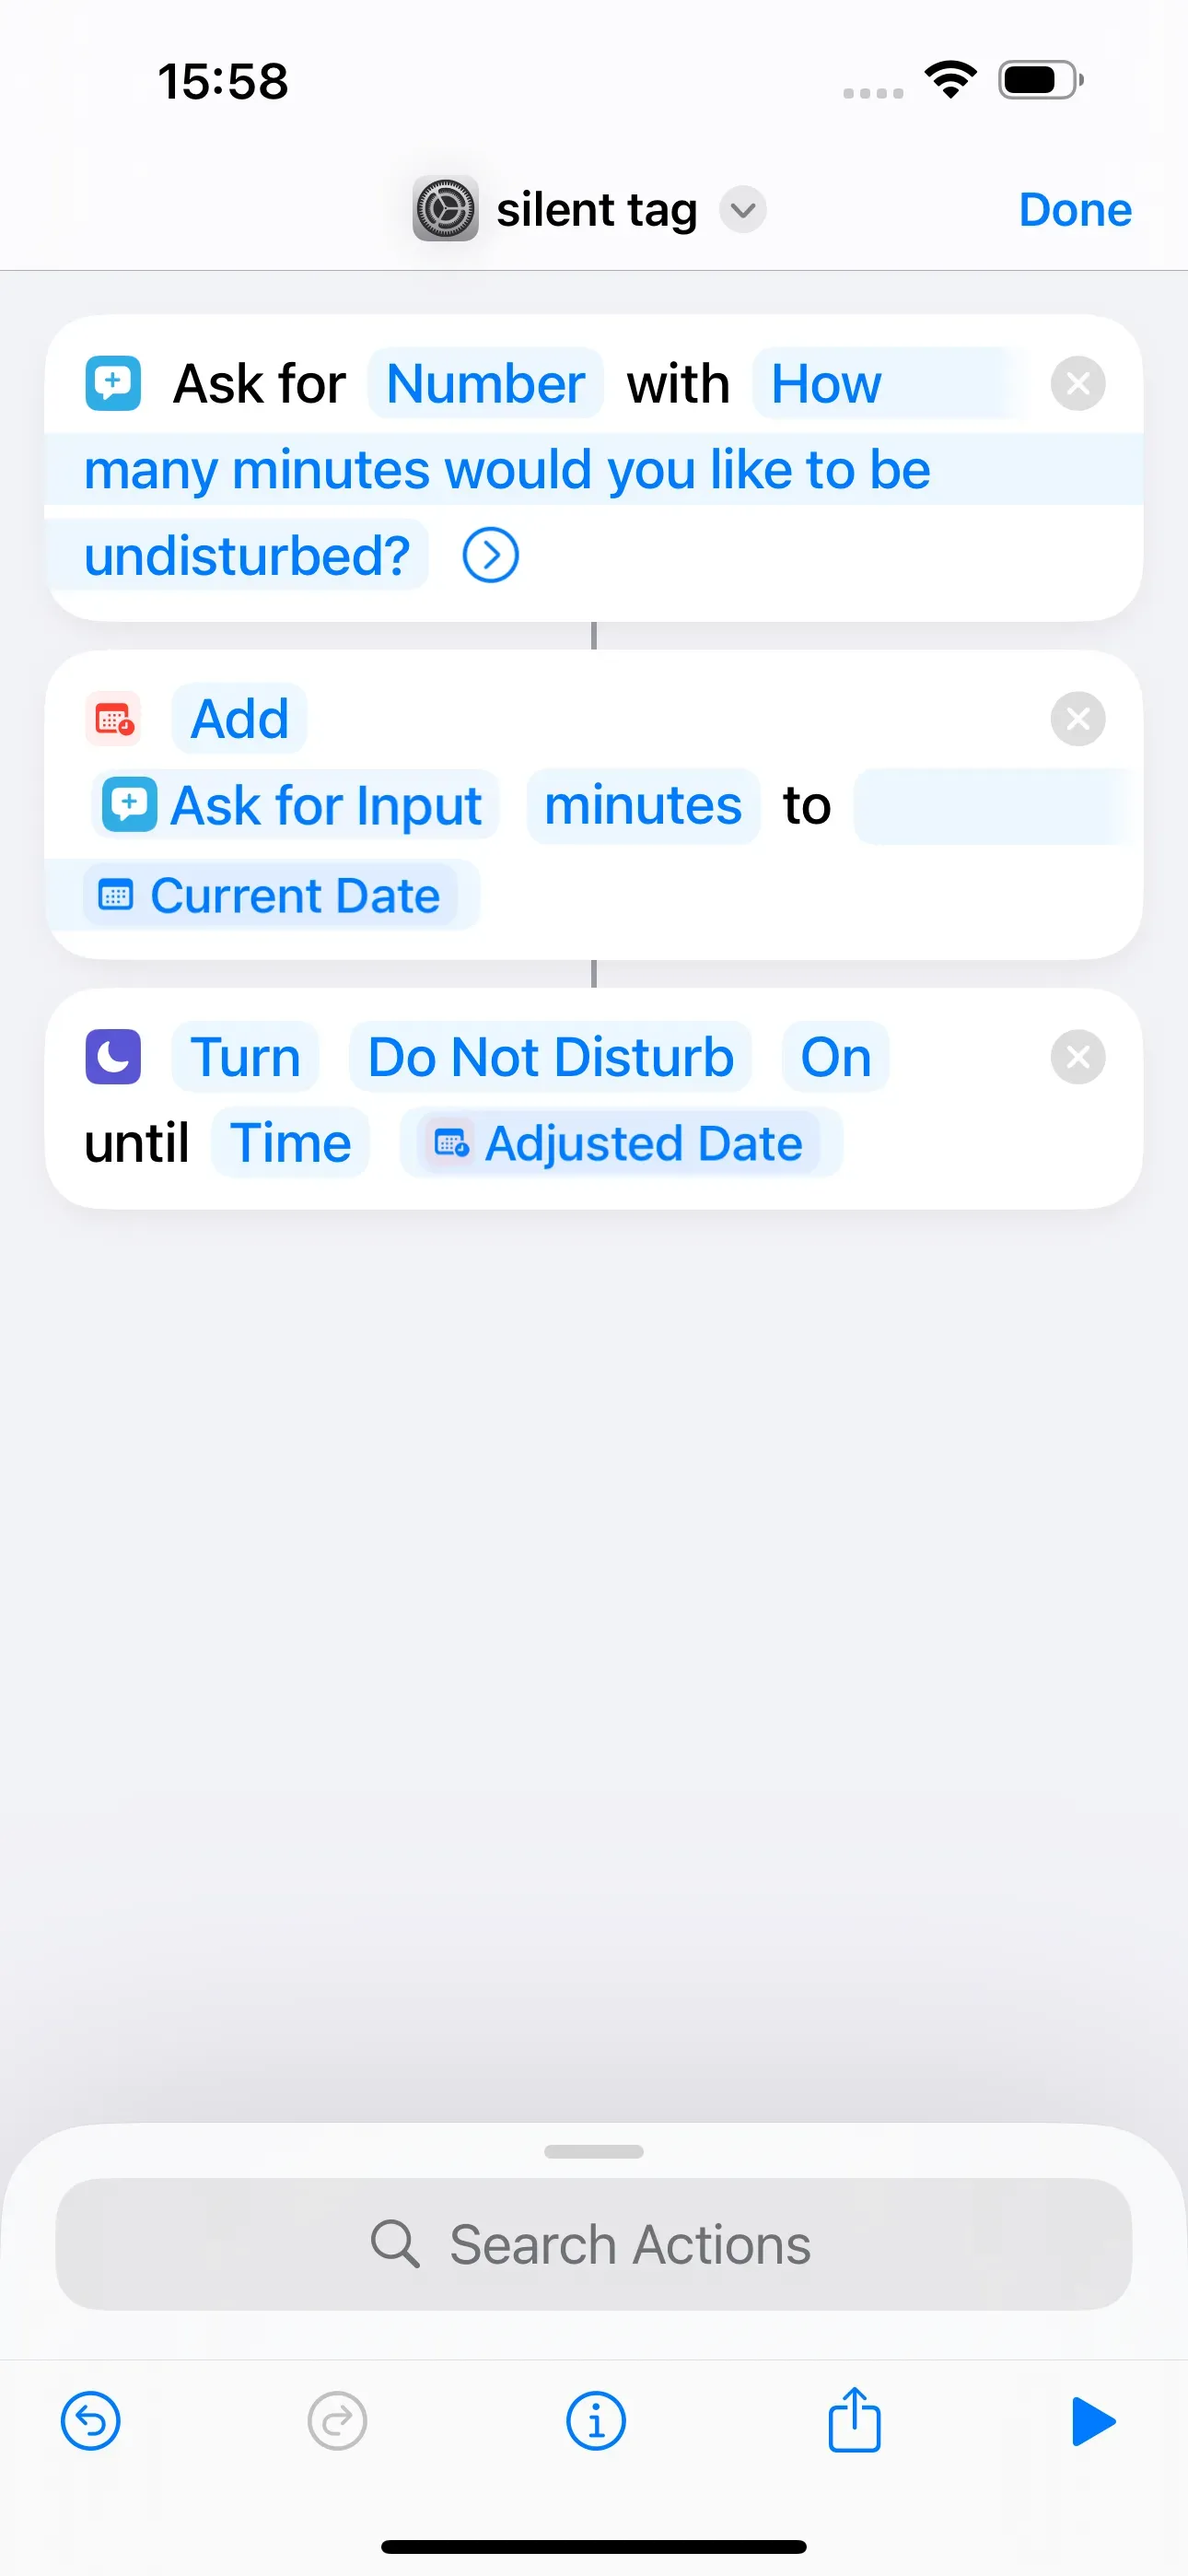
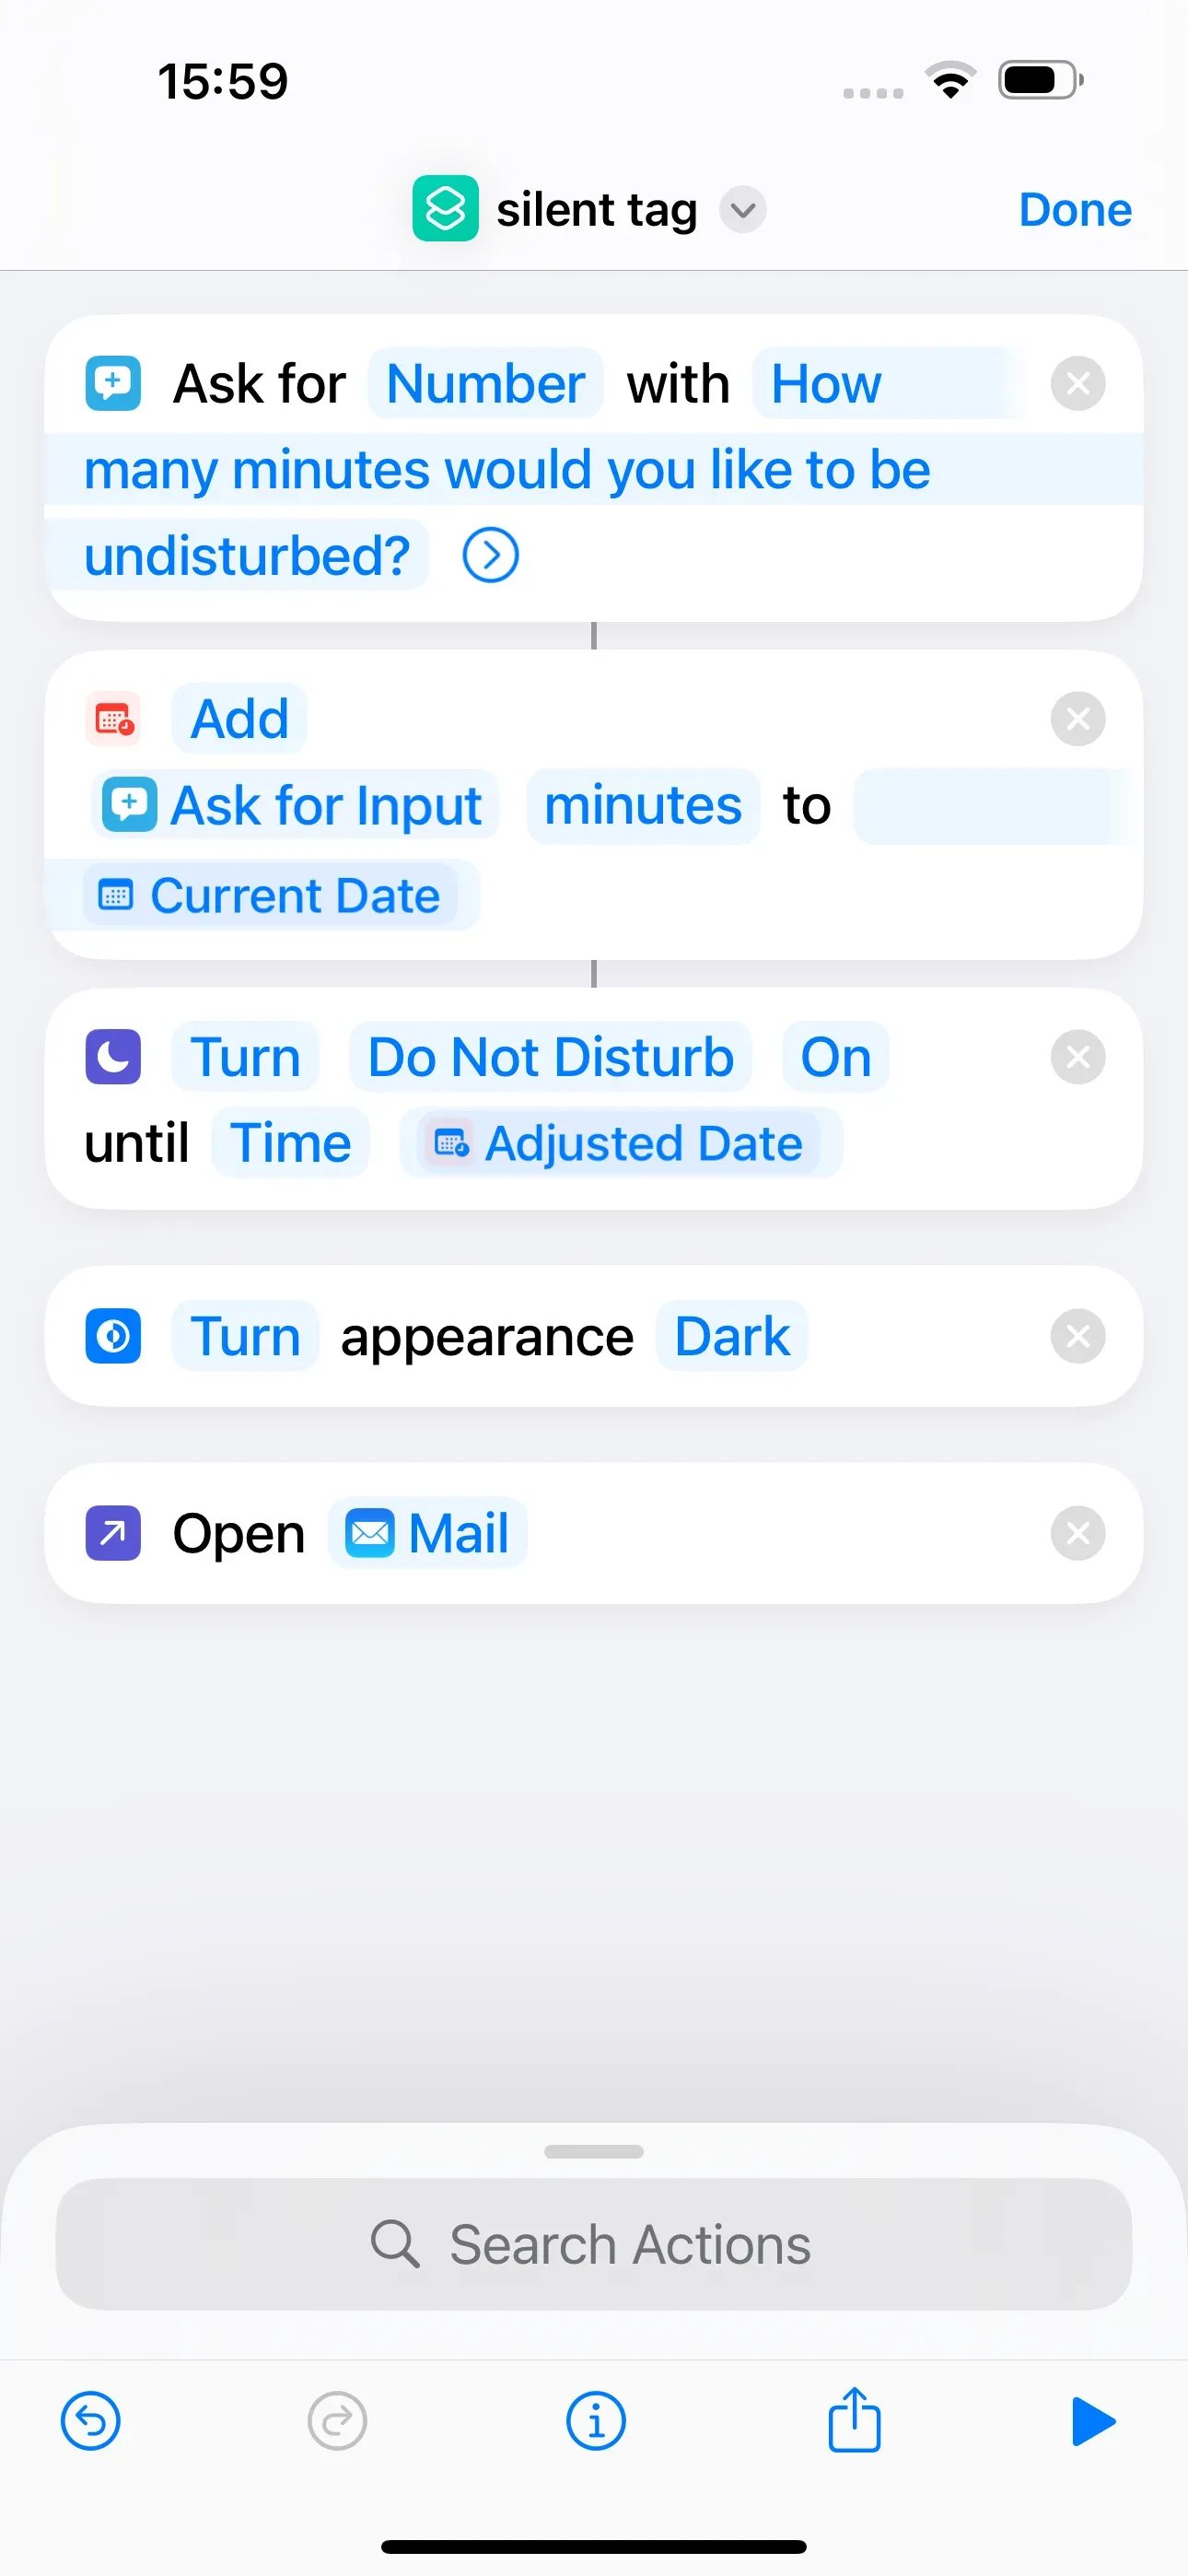
In this step, we add actions to the shortcut. We search for Input in the search field of the action list and select Ask for Input. Now we can configure our question by tapping on Prompt and entering “How many minutes do you want to be undisturbed?”, for example.
It is important that we then tap on the field on the left Text and select Number.
We then tap on the blue arrow and can make a default setting under Default Number, for how long the “Do not Disturb”- mode should be switched on. For example, we can enter a 15. However, you can always change the time specification when executing the short command. This means, that it is not automatically set to 15 minutes every time it is entered, but this time can still be changed.
Negative numbers should not be permitted.
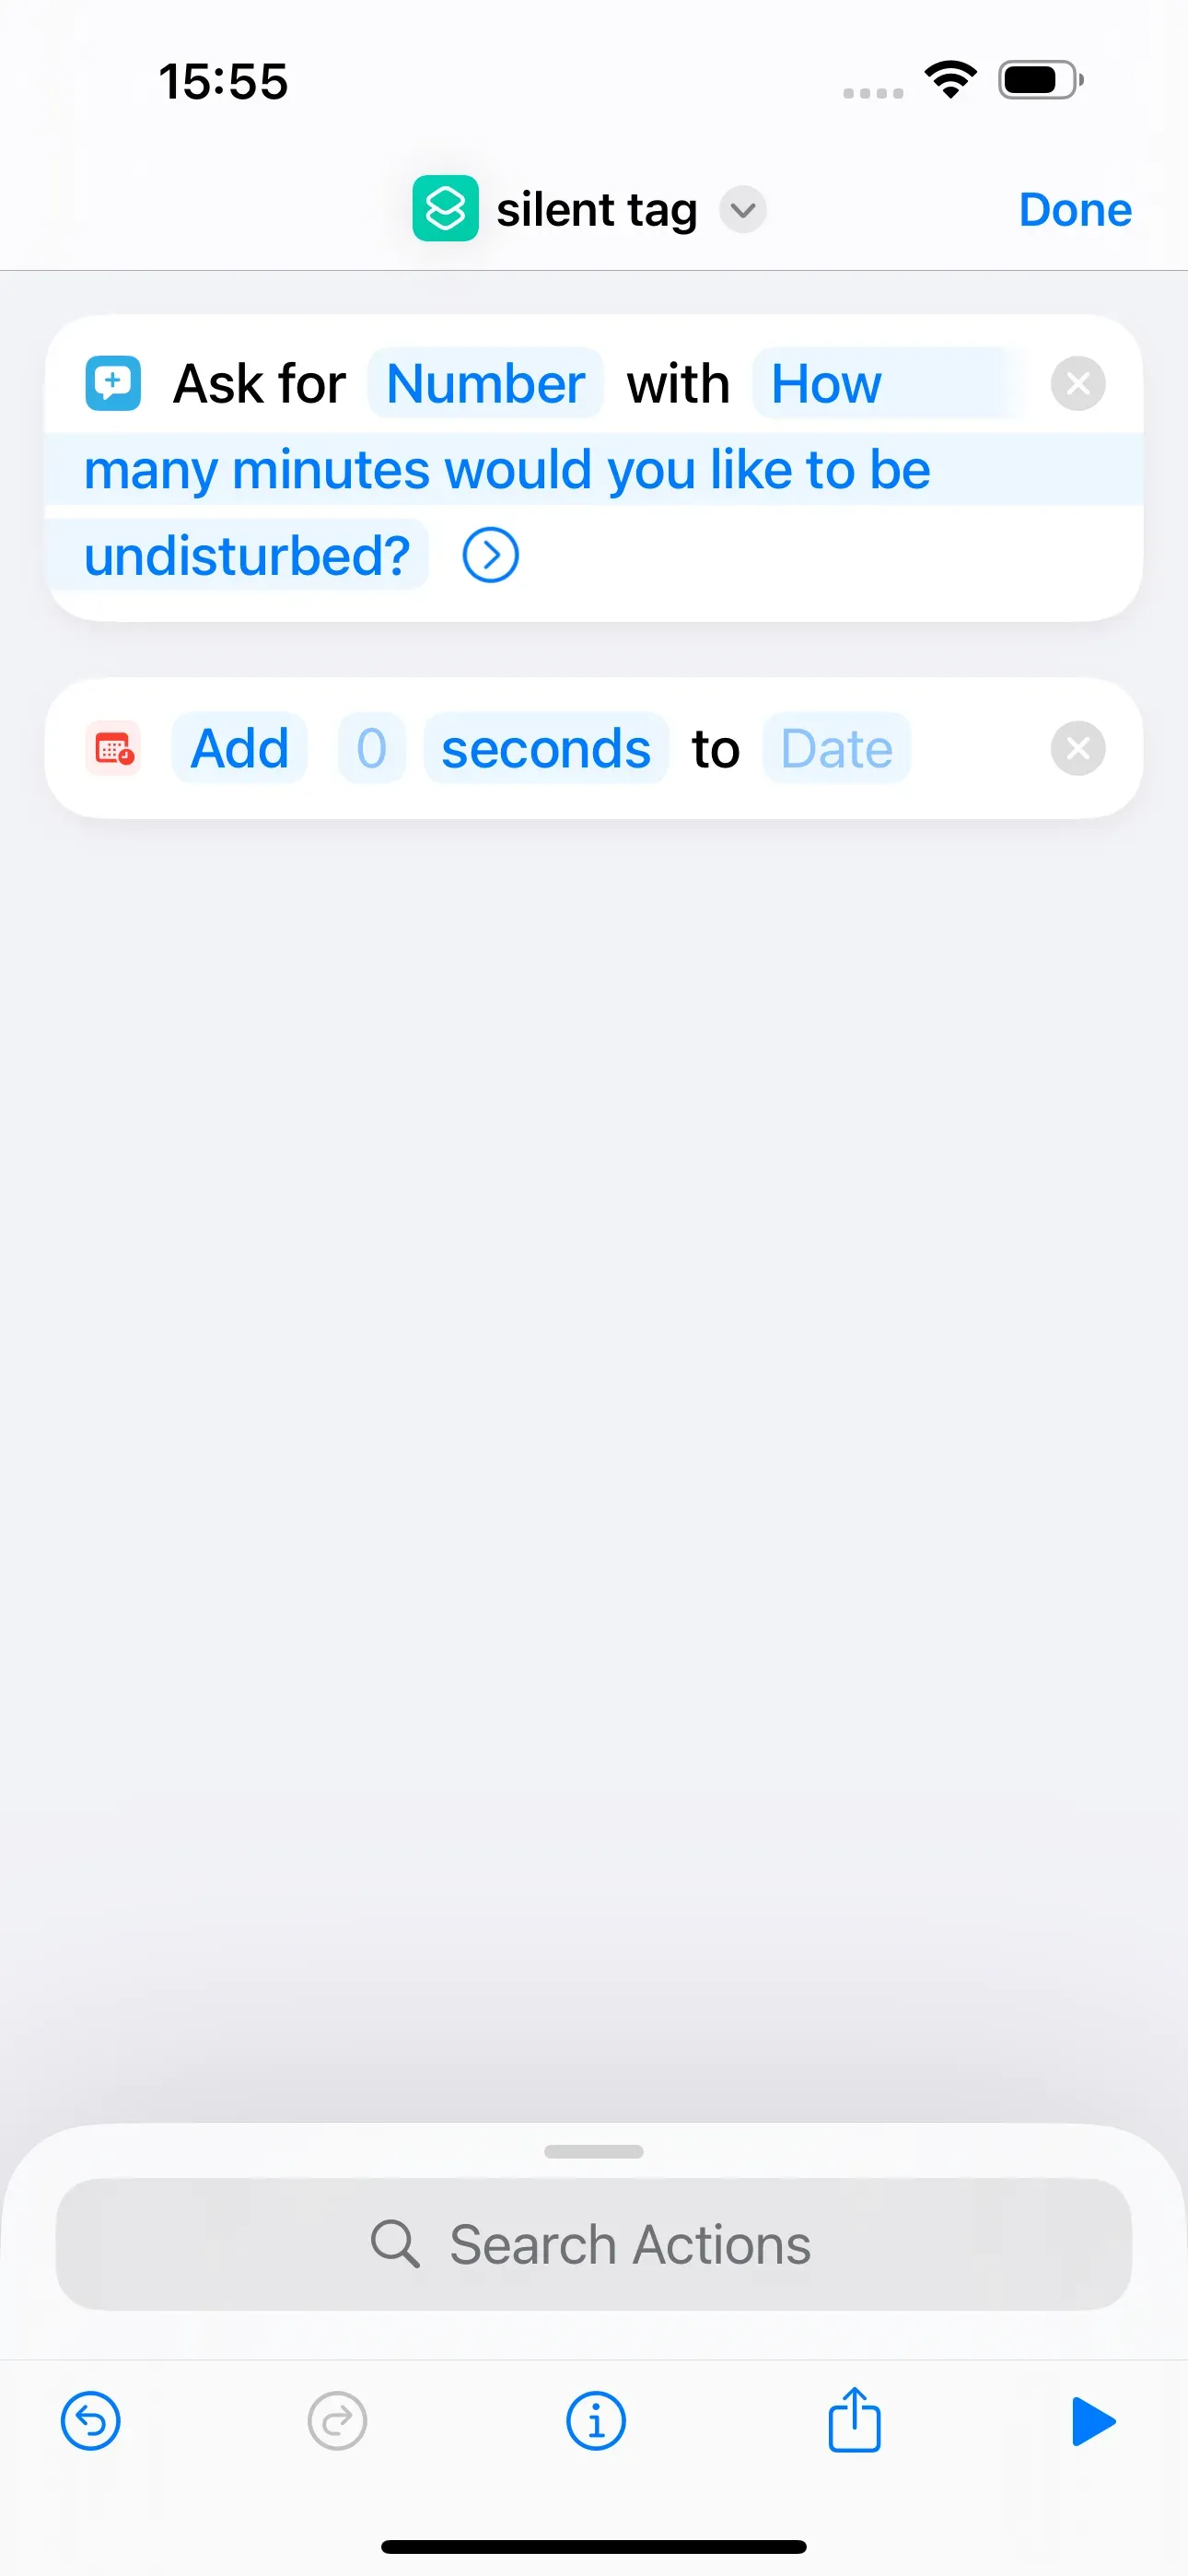
Start Timer
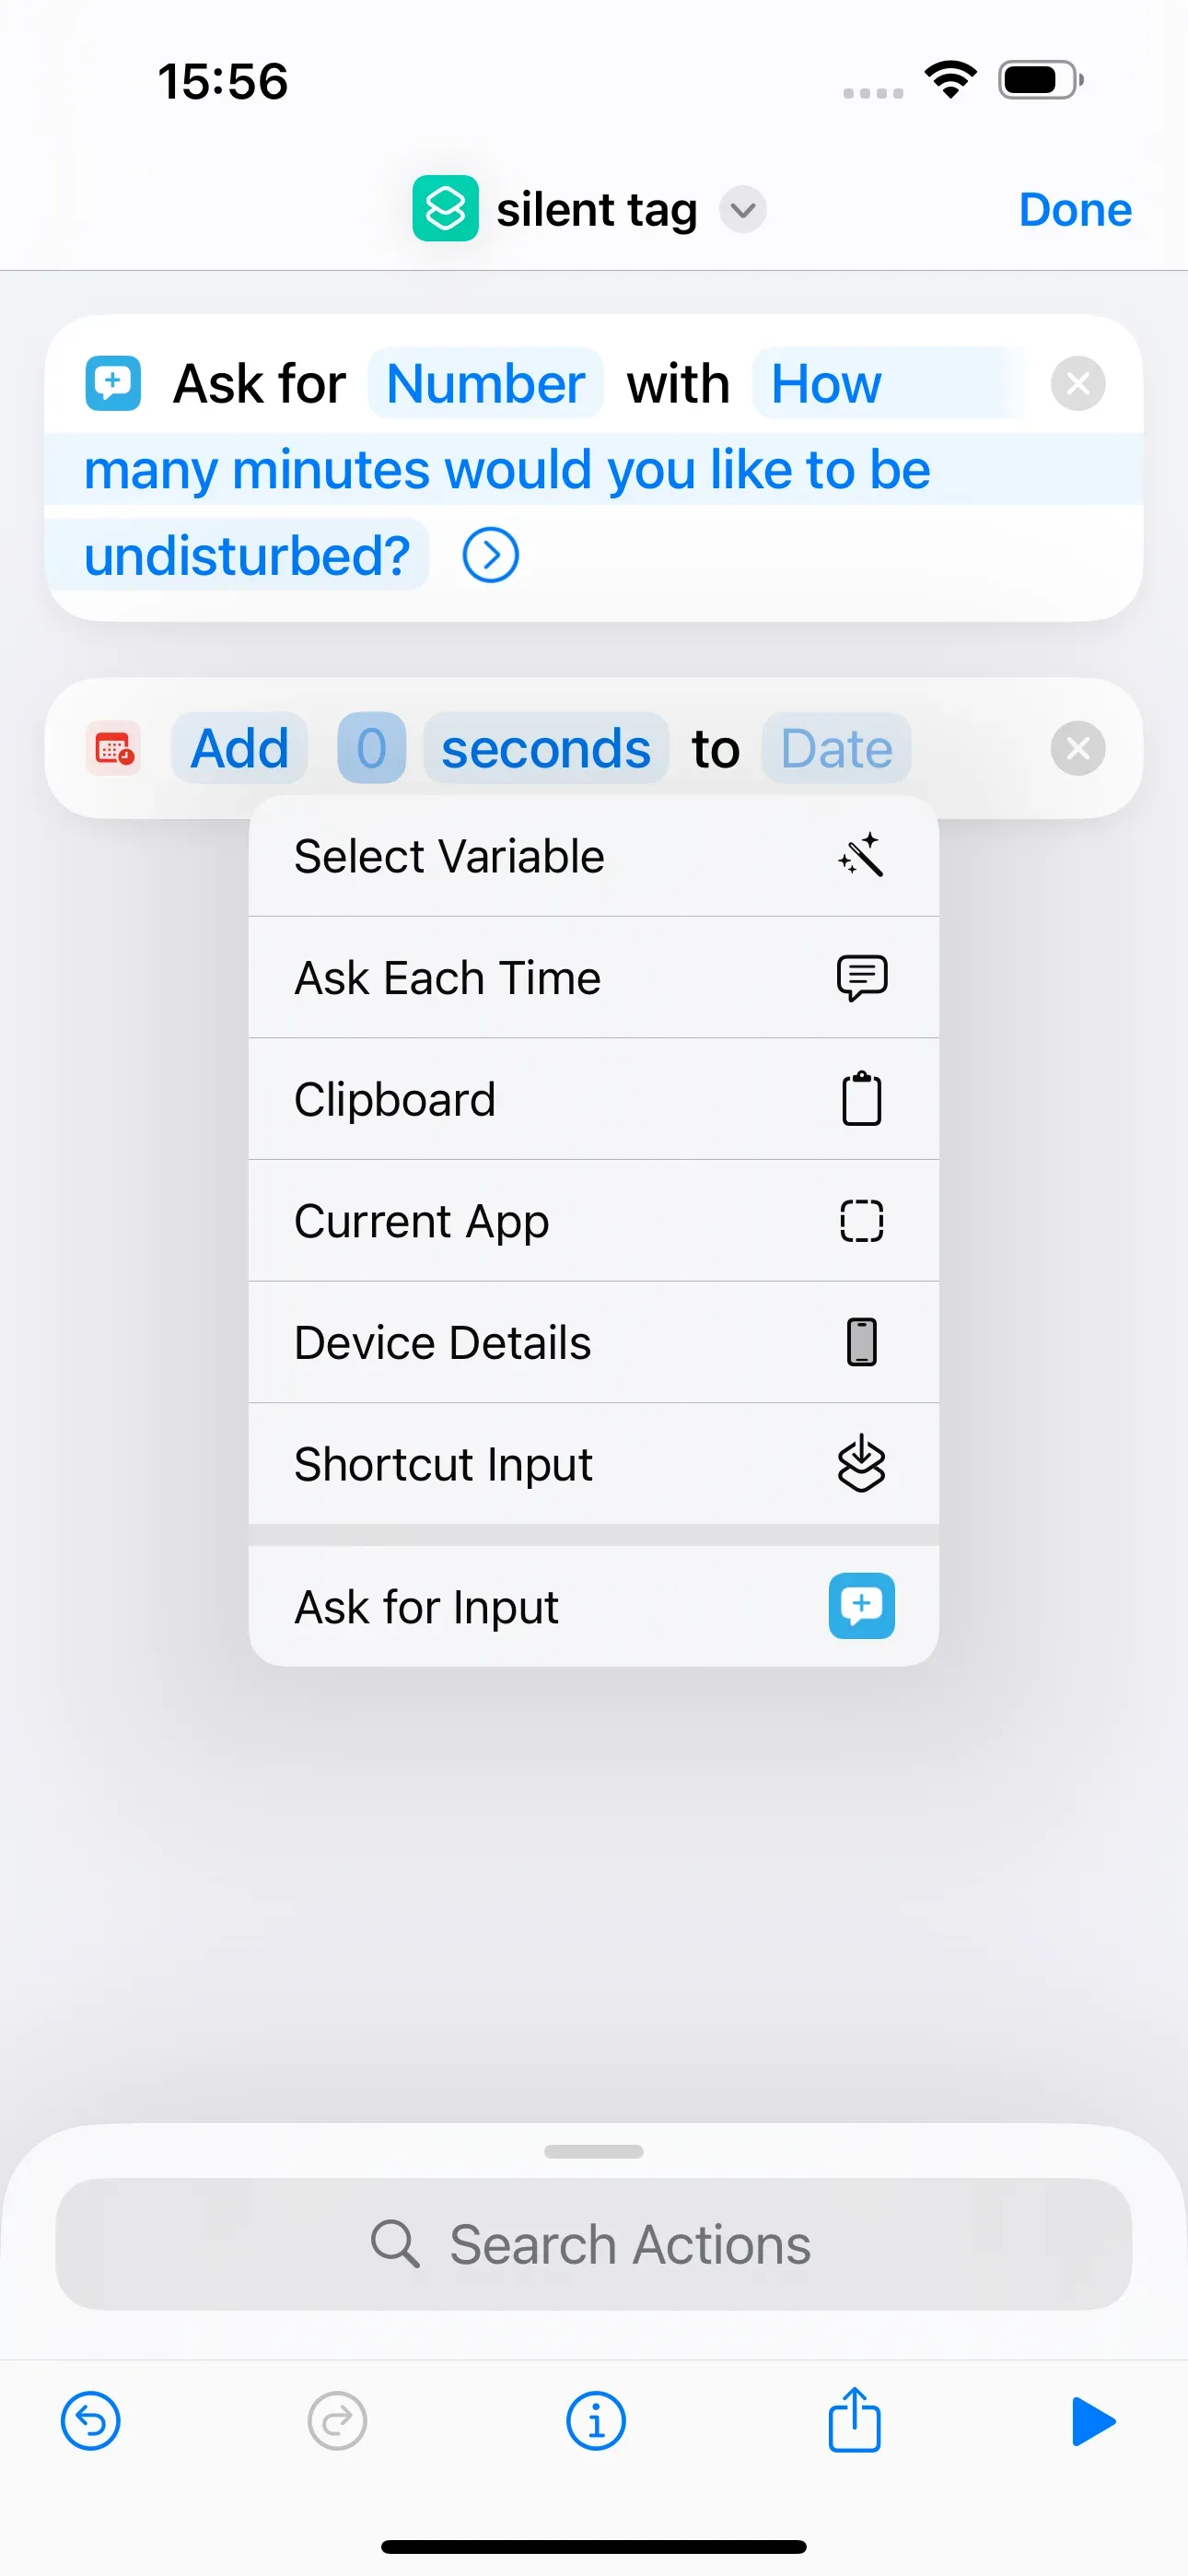
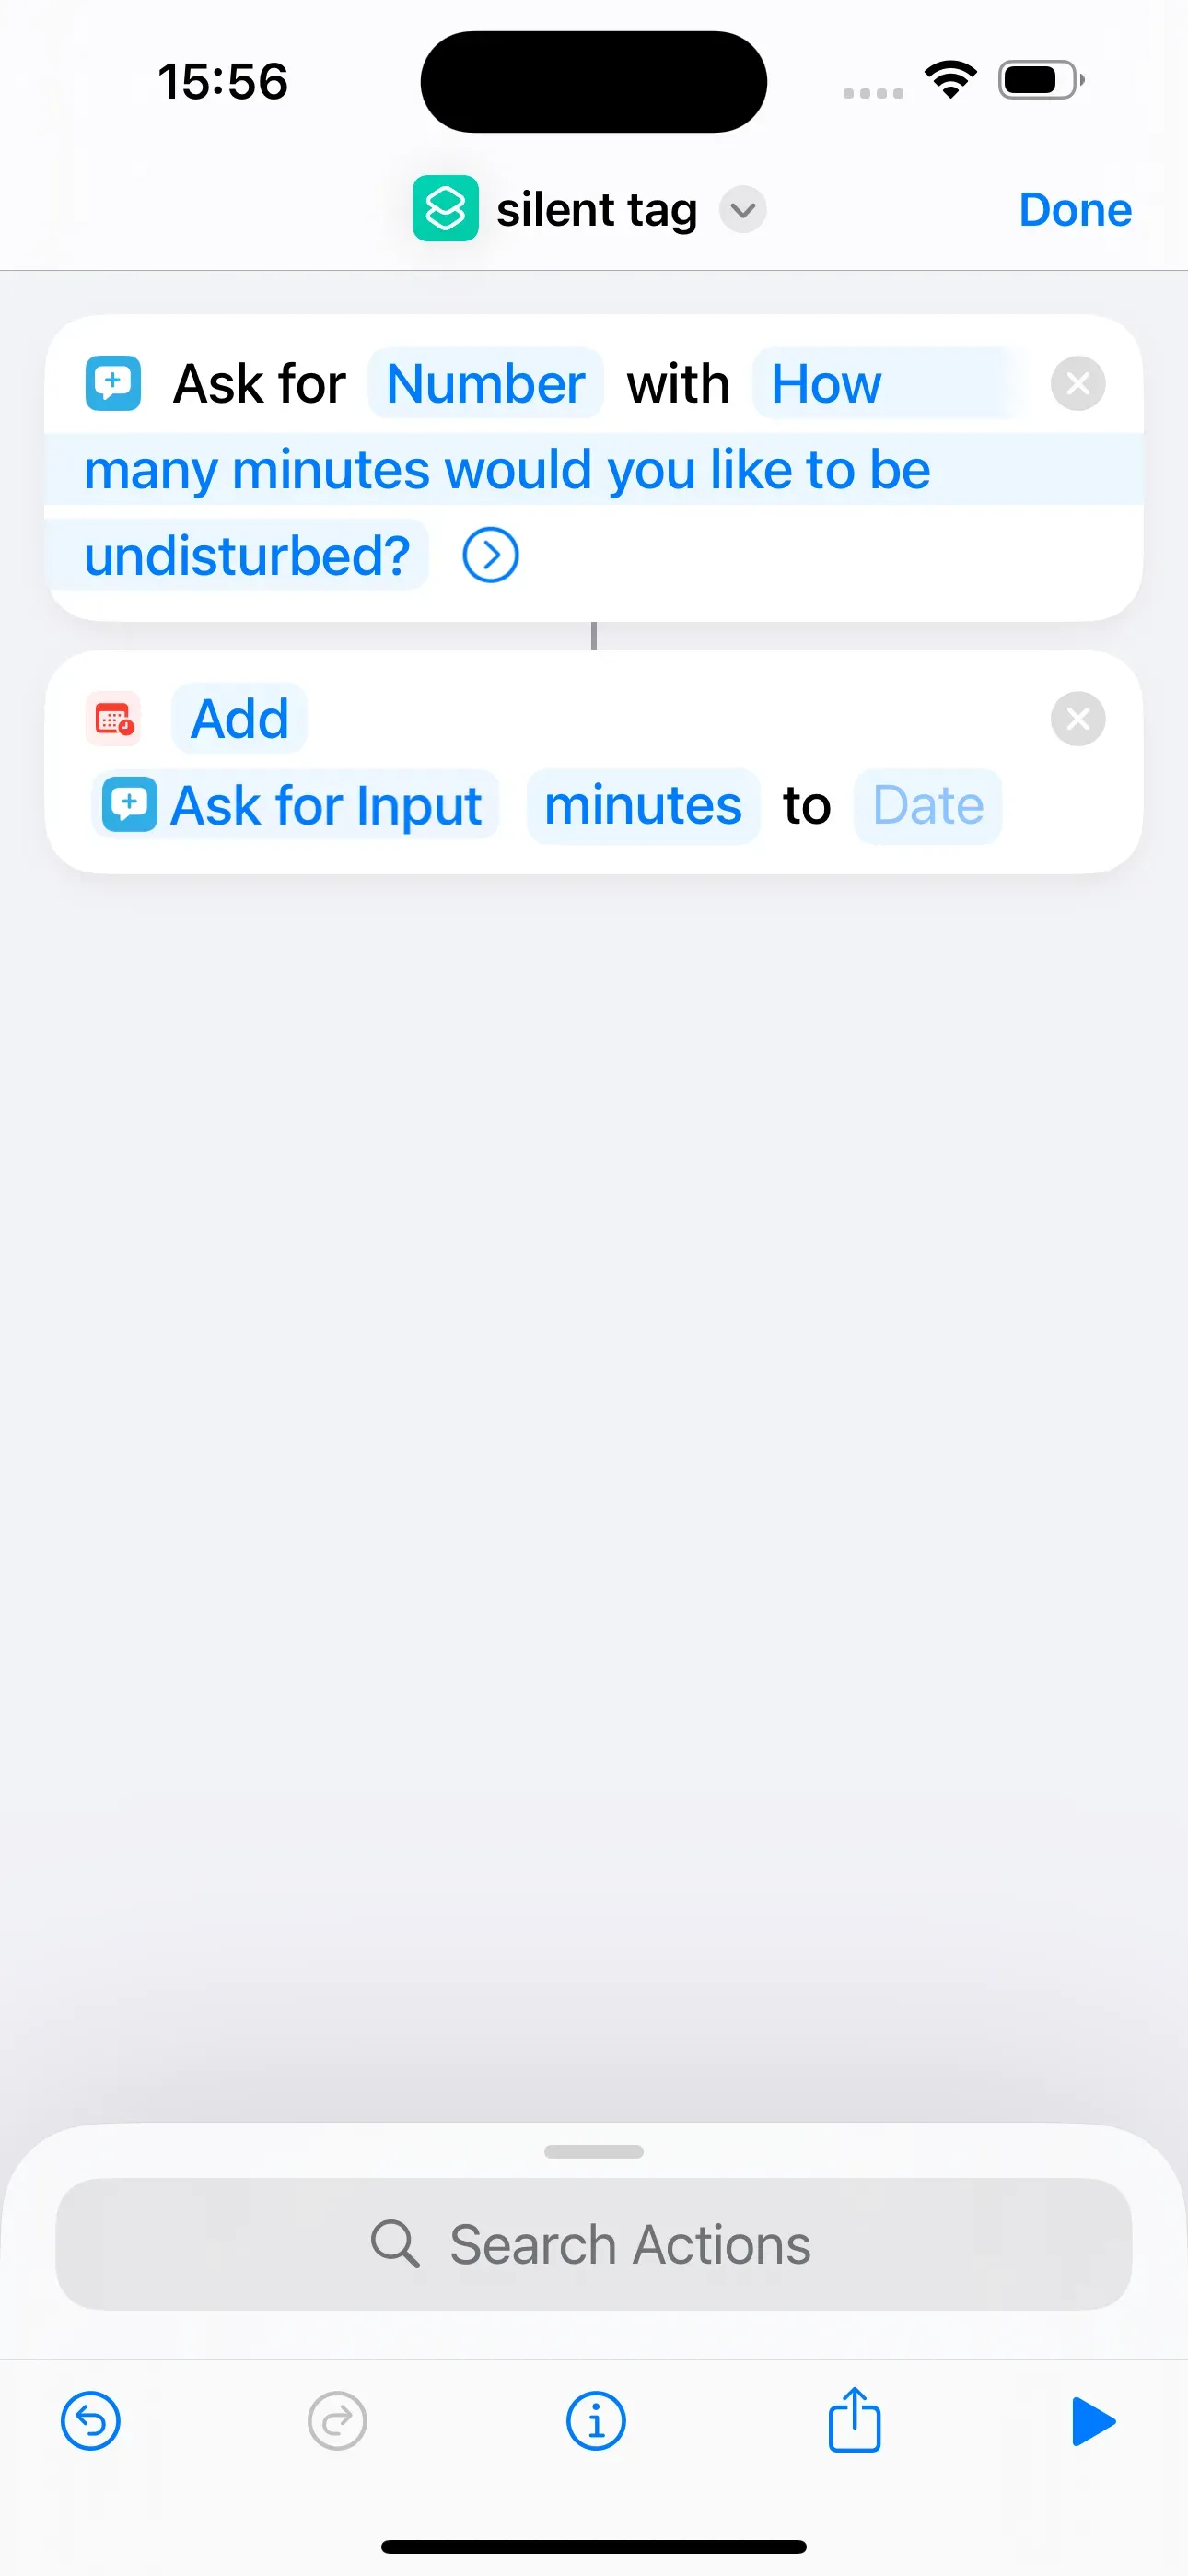
In the next step, we enter Date in the search bar and select Adjust Date. Then we tap on the 0 and select Ask for Input in the small bar above the keyboard, so that our minute input from step 2 is used. Or we hold down the 0 and then tap on Ask for Input.
Then we tap on the seconds field and minutes.
Finally, we press on the Date field and then tap Current Date.

Activate "Do not Disturb"
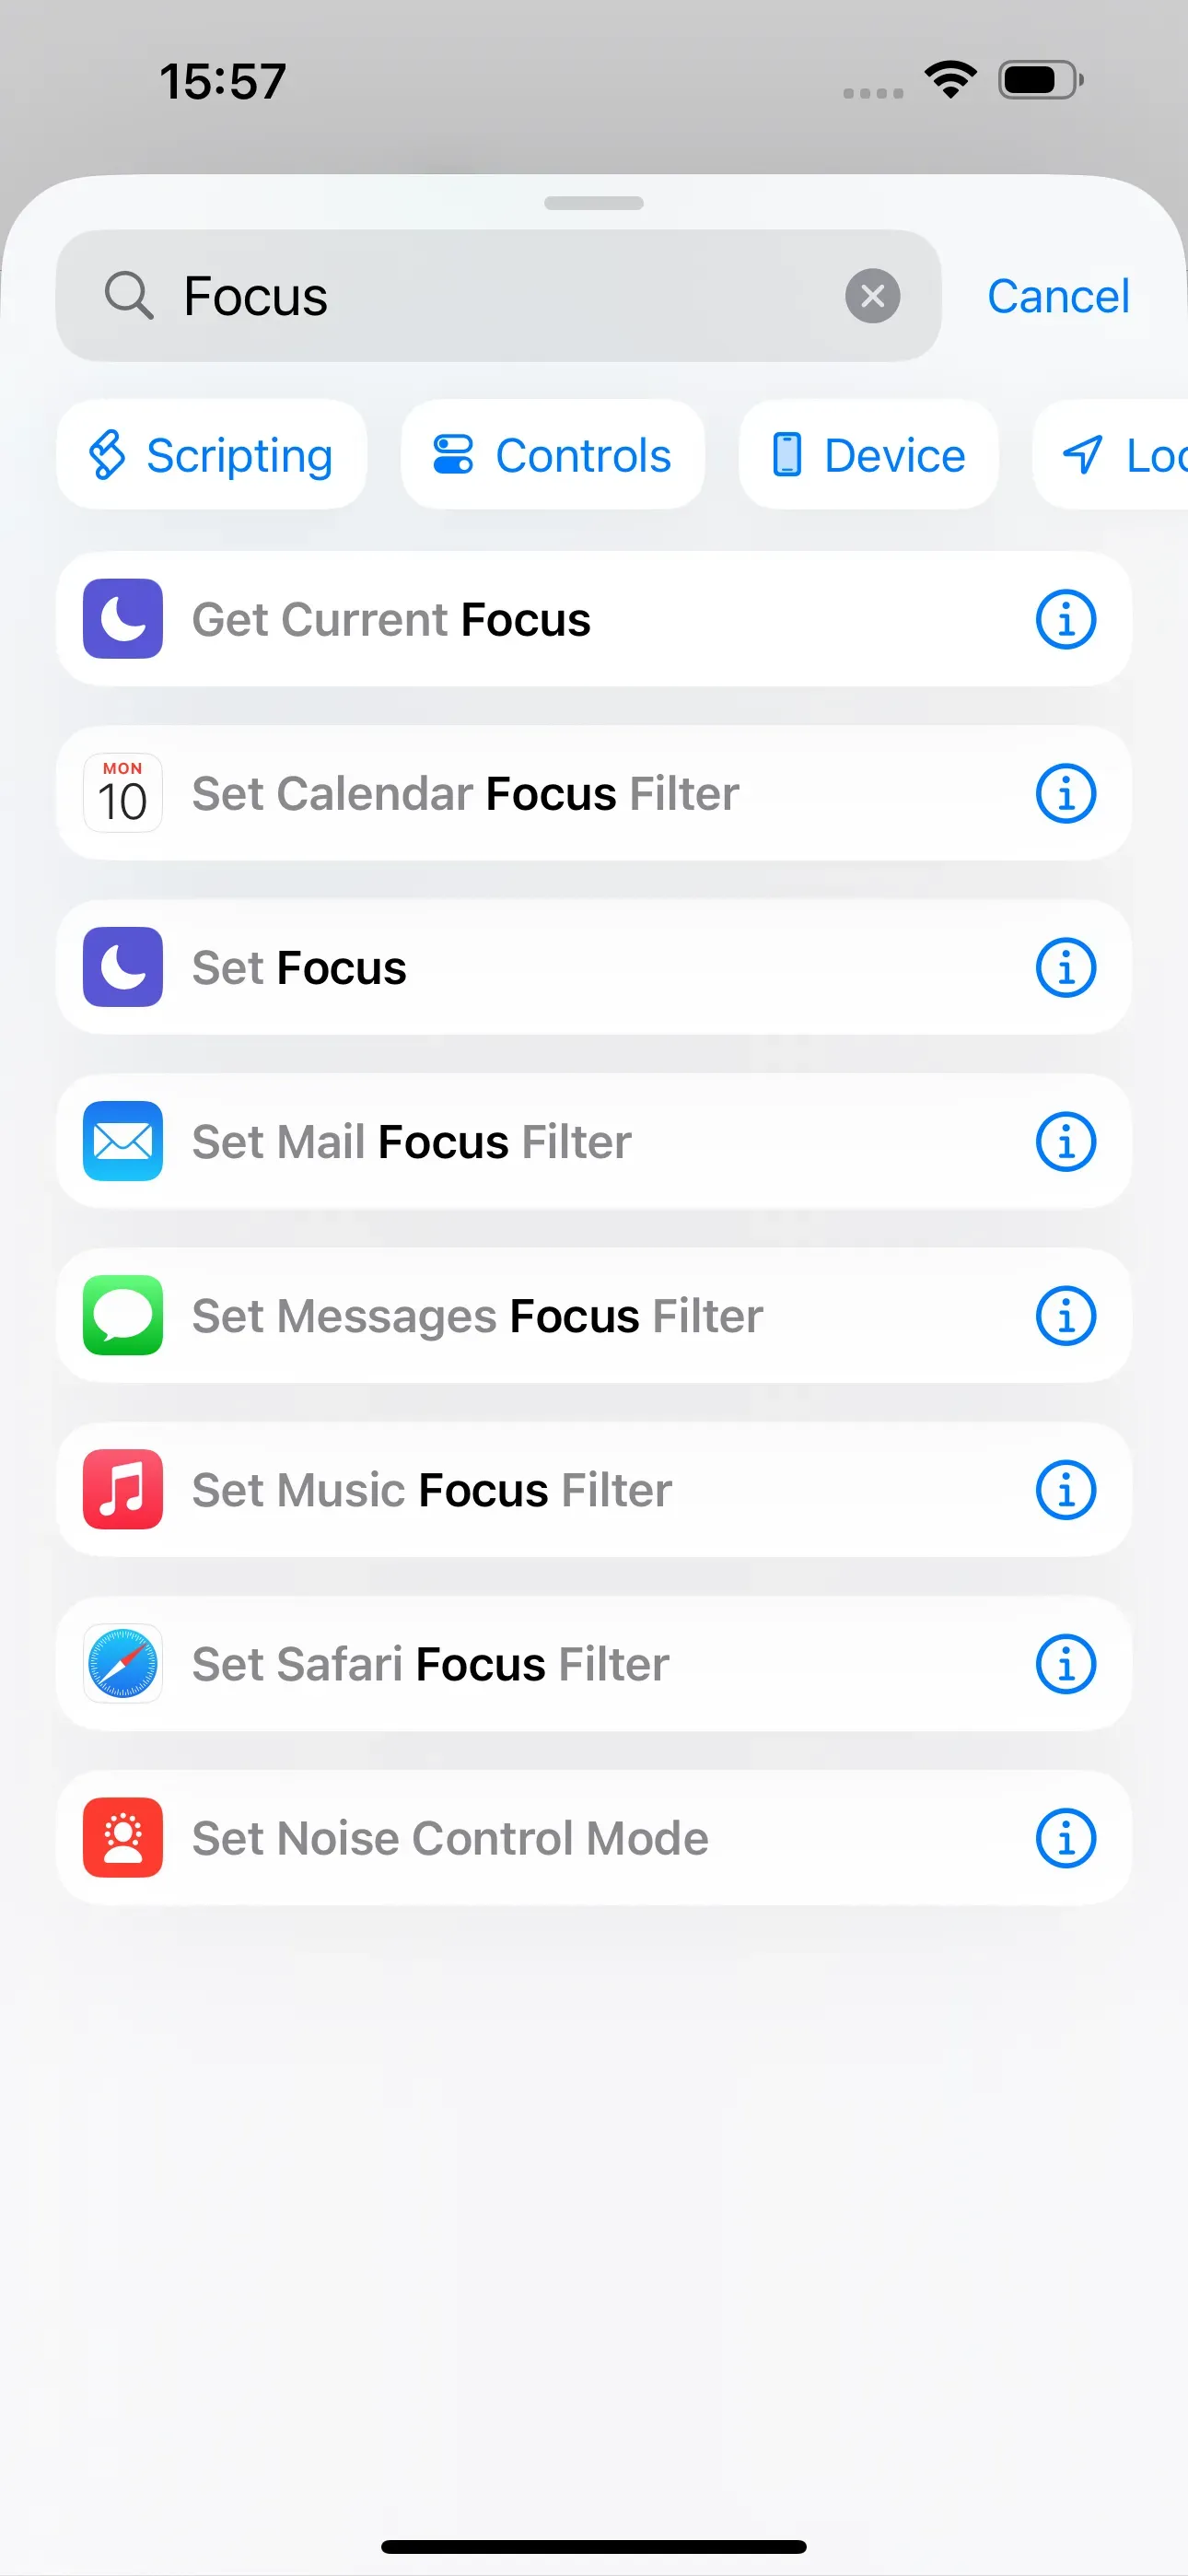
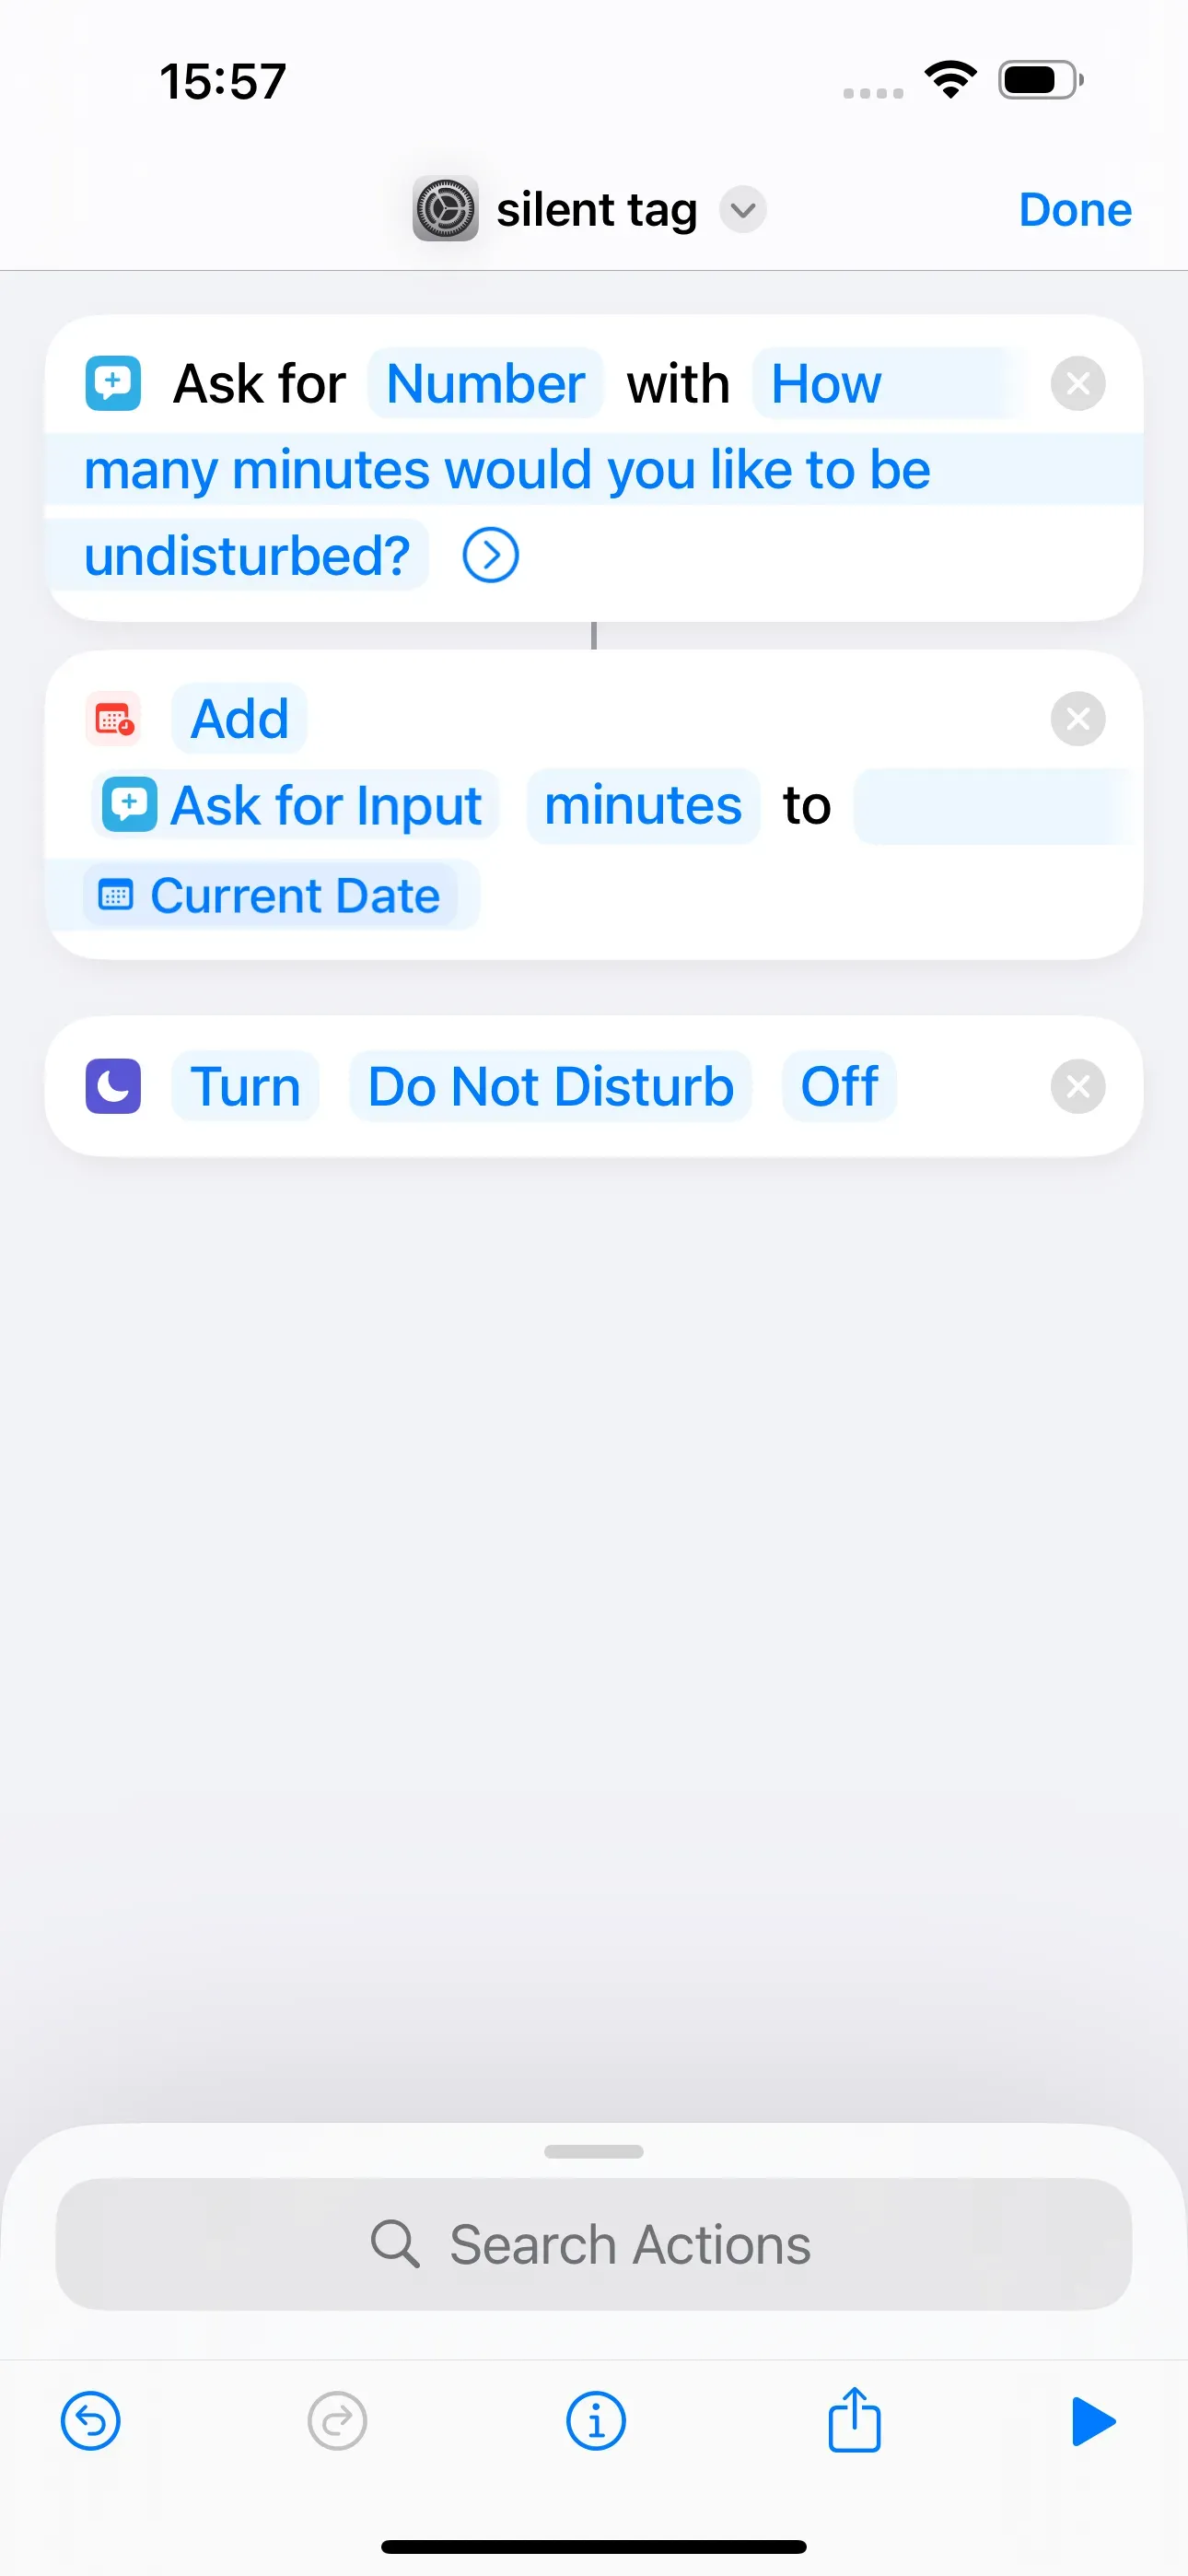
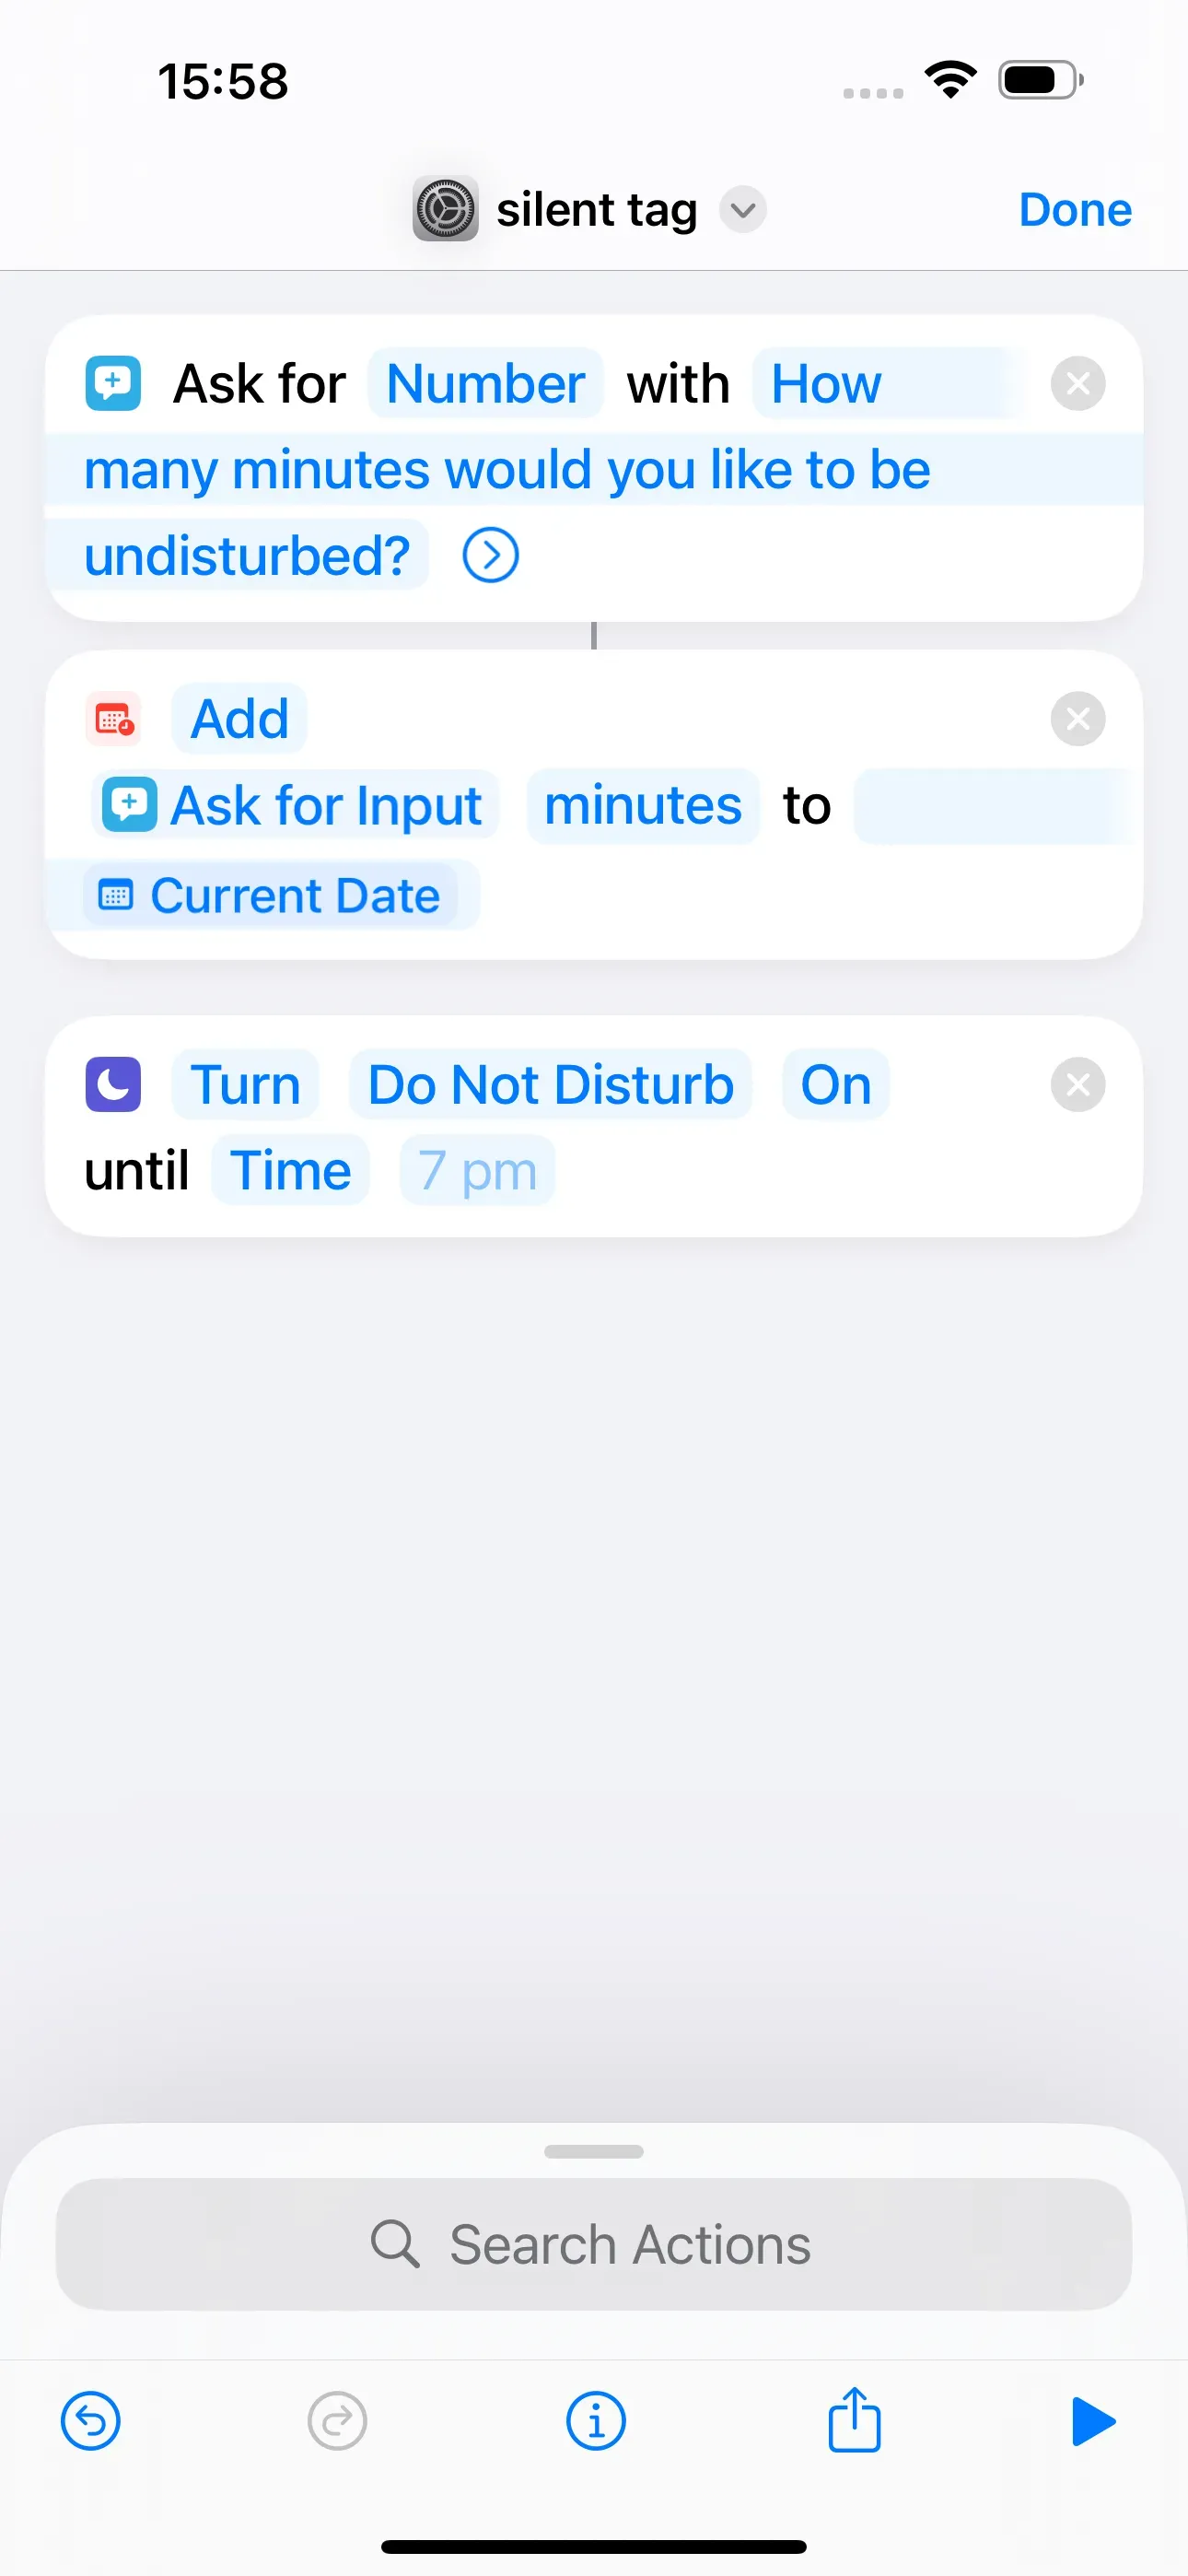
The next step is to activate the “Do not Disturb“-mode for the created time period. To do this, we enter Focus in the search bar and select Set Focus.
Then we tap on the Off field so that it changes to On. We then tap on the Turned Off button and tap on Time. Then a 7 pm field appears. We press it and select Adjusted Date.
Define further actions
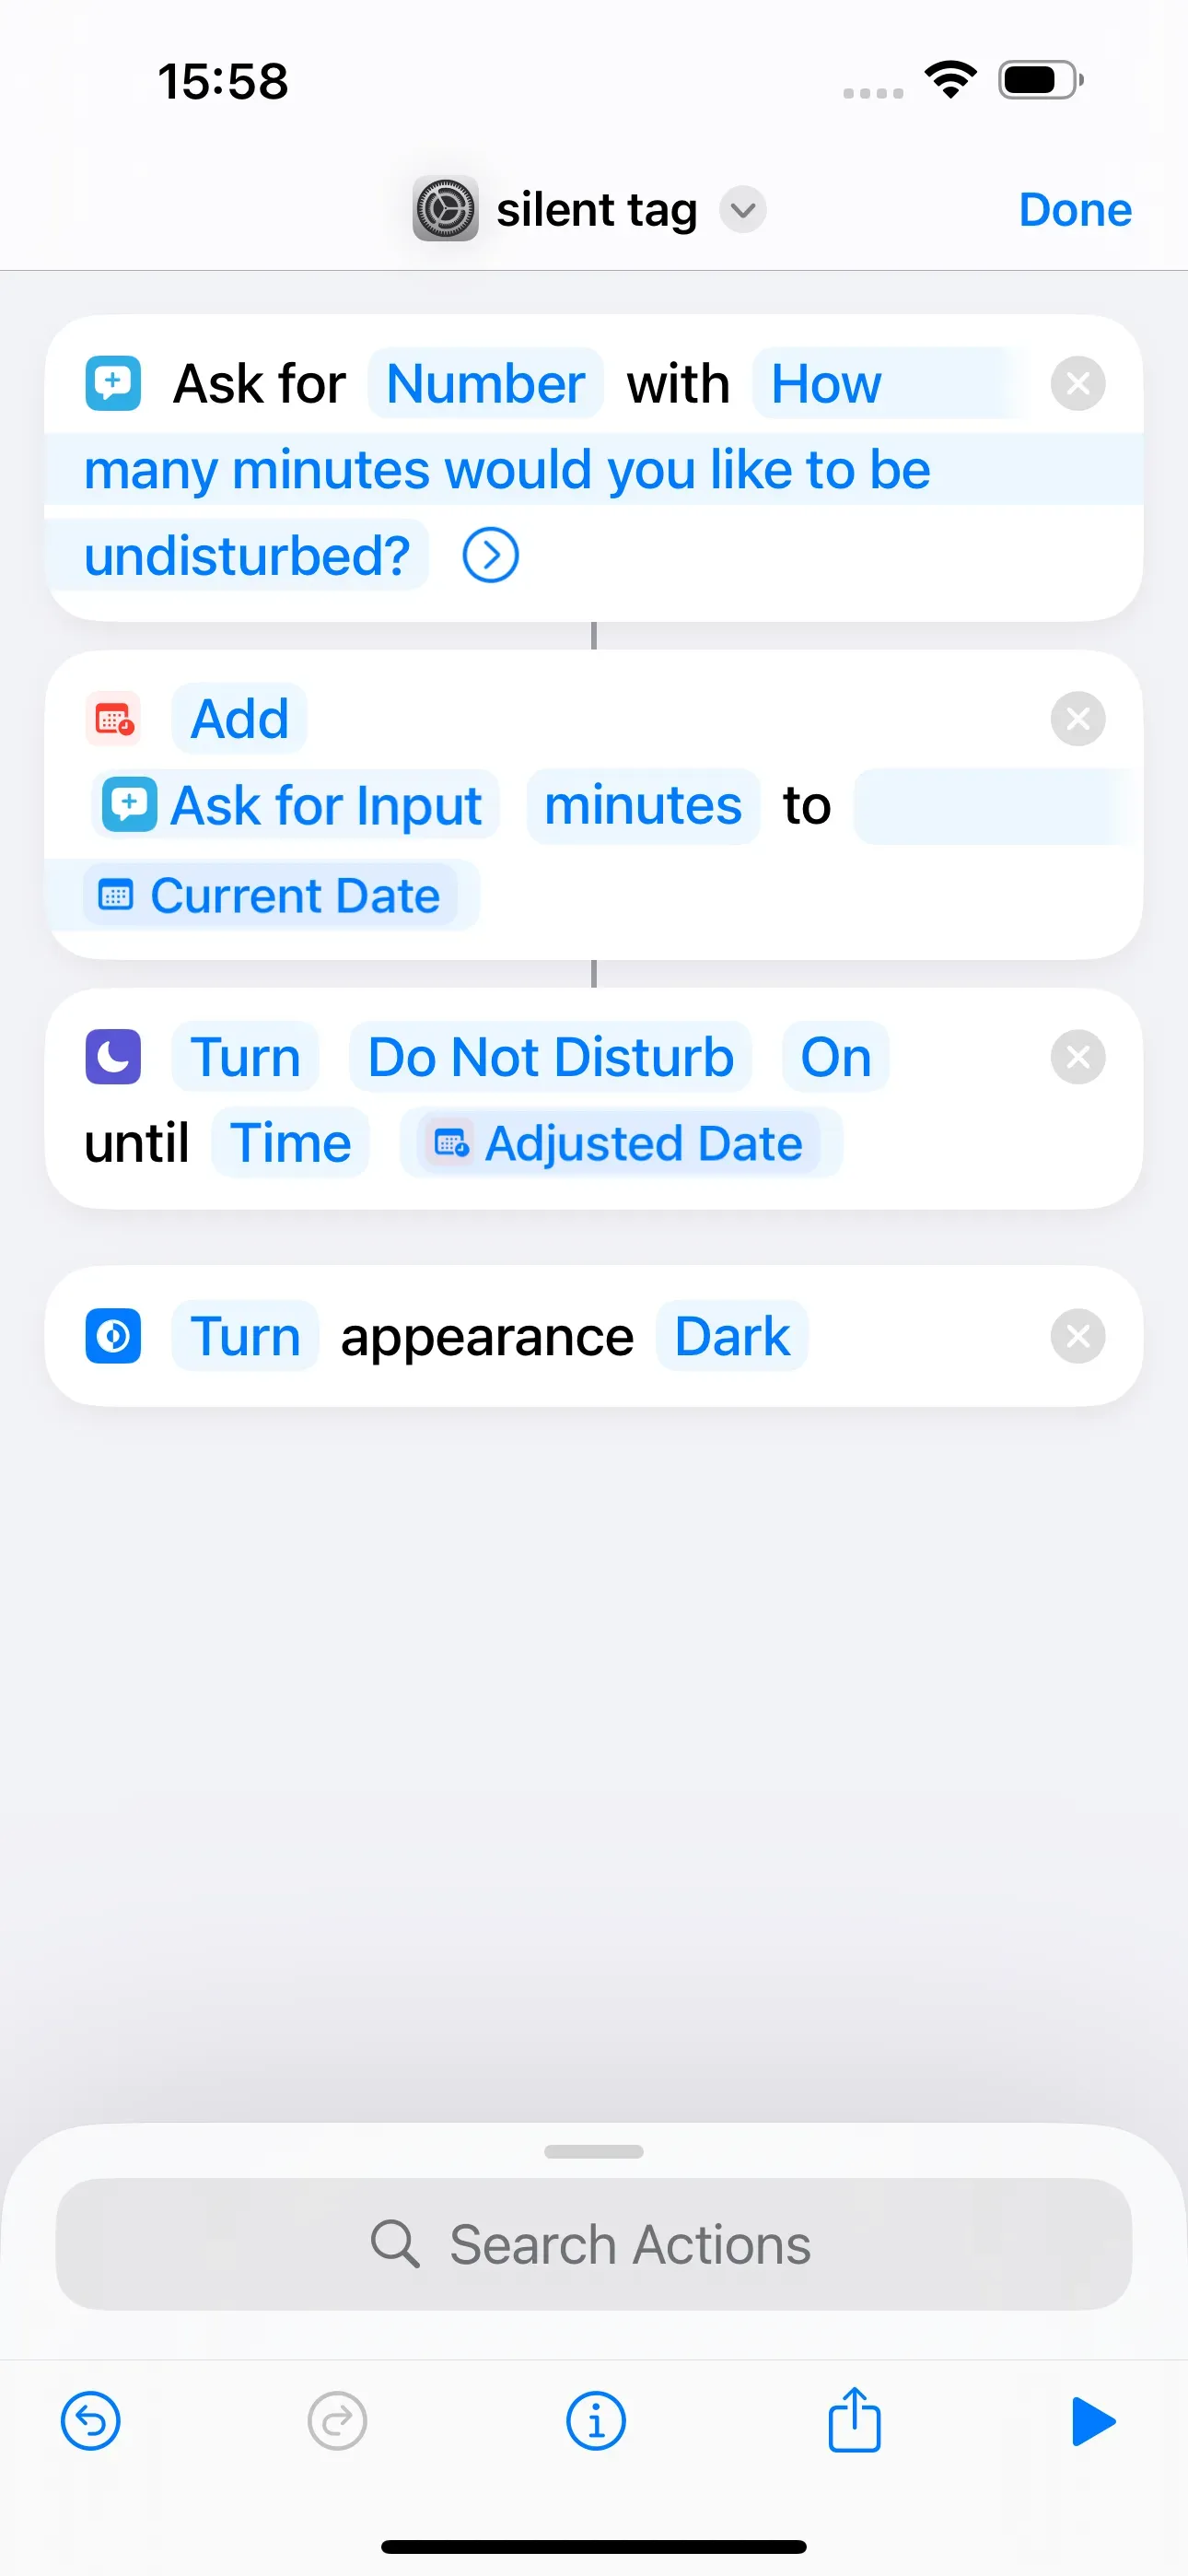
You can add further actions to the chain of actions we have created. These can be activated during the number of minutes we entered at the beginning (e.g. 15 minutes). To activate the dark mode, search for Dark → Set Appearance.
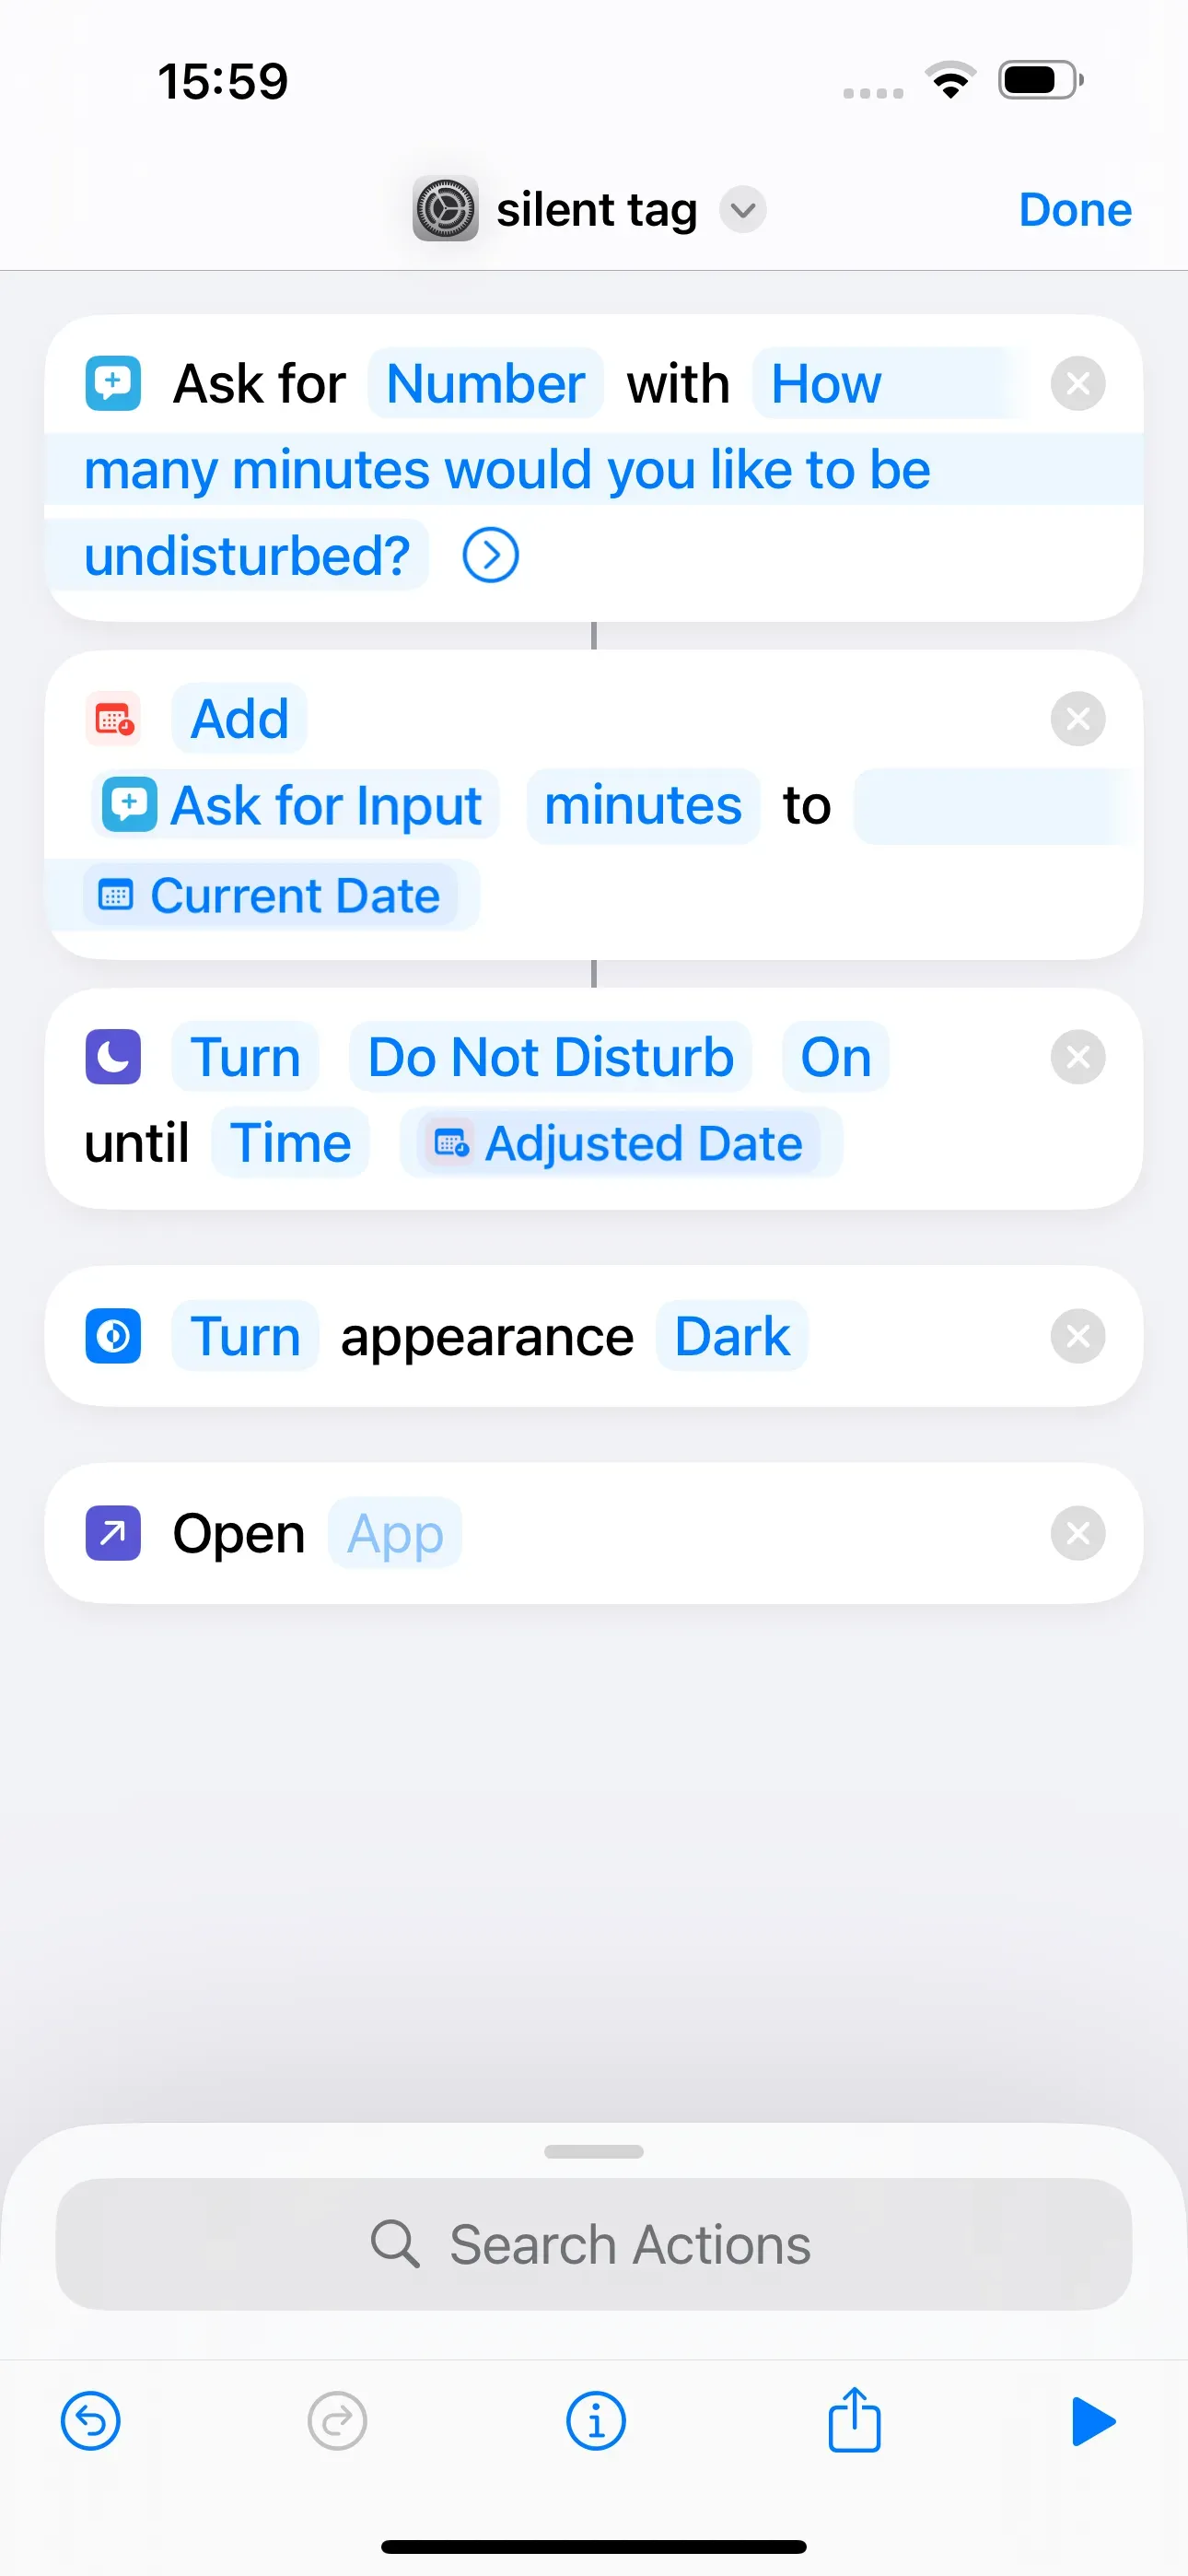
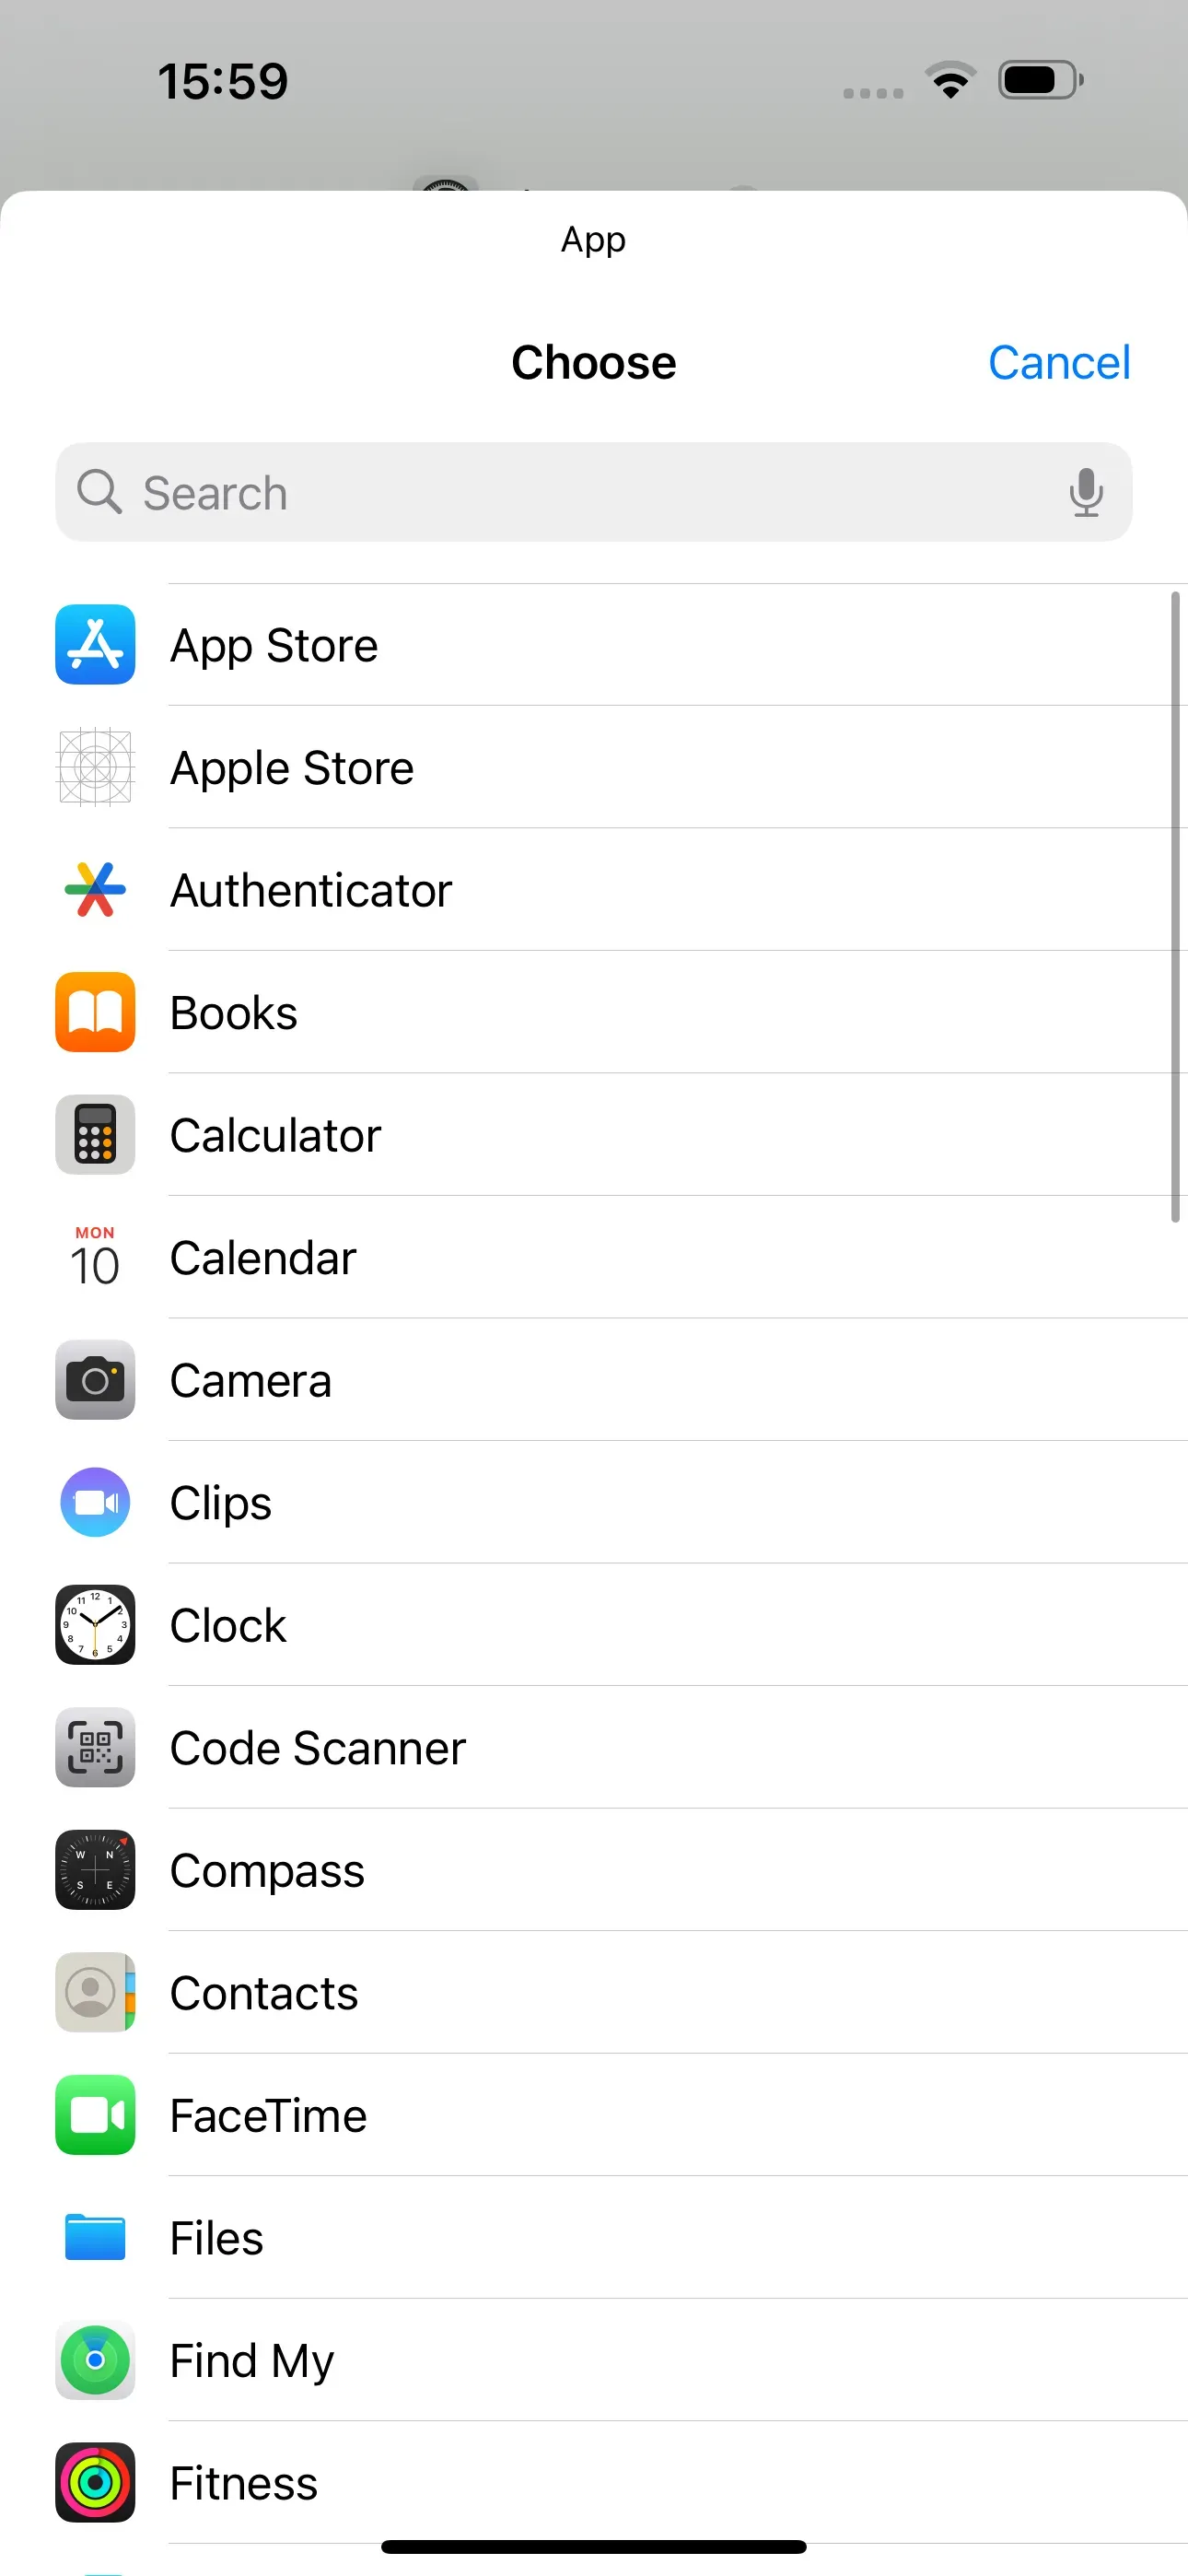
However, in order to still receive important messages, you must now select which app should not be muted. To do this, we search for App → Open App. There we tap on App and select the messaging app, we want to continue receiving notifications from. For example, we want to mute all apps except for Mail, because we still want to receive emails, so we tap on Mail. When we scan the NFC tag then, this app is opened.
Test action, save and write to NFC tag
Use the ► at the bottom right to test the shortcut once, before saving it. If we are satisfied with the shortcut, we can now tap on Done.
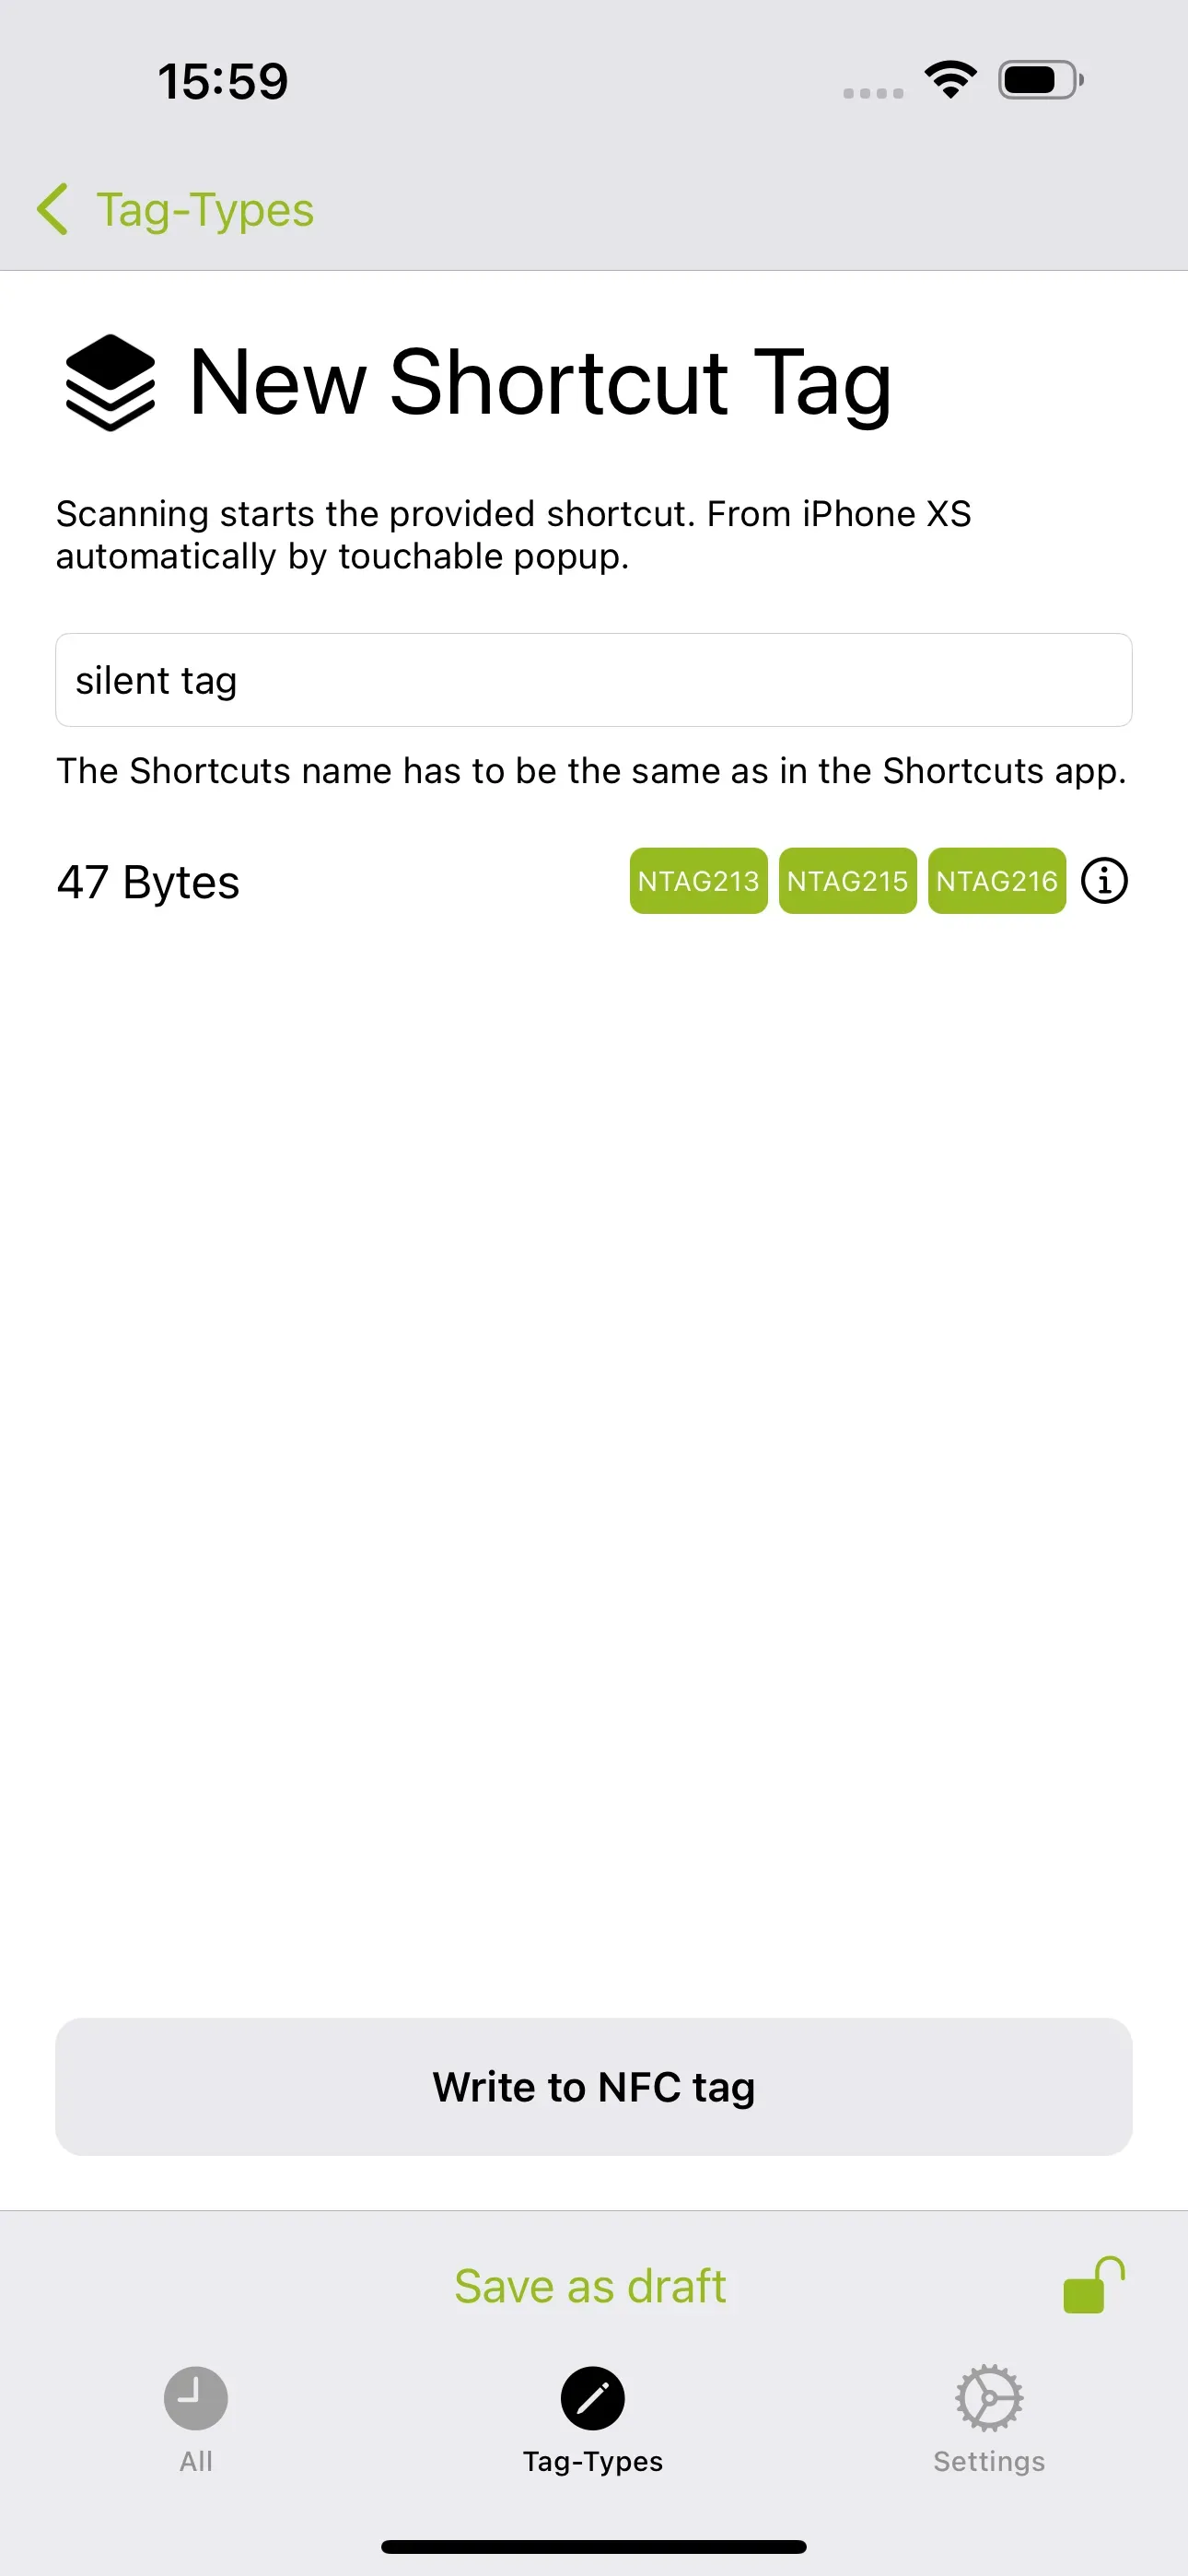
To save the shortcut to an NFC tag, open the NFC21 Tools app → Tag-Types → + + Shortcut → enter the name of our shortcut (timeout tag) → Write to NFC tag.
The shortcut created can also be downloaded here and then it can be saved on the NFC tag using the NFC21 Tools app.
Summary
In this How2, we have explained how scanning an NFC tag prompts the user for a period of time, during which certain actions are automatically performed. In our example, a number of minutes can be entered during which the notifications are muted. Additionally, dark mode is activated and a previously selected app is opened. Of course, the shortcut can be customised at any time afterwards. To transfer the changes to the NFC tag, the NFC tag must then be rewritten with the new shortcut.
Note: If you do not want to create the shortcut yourself, you can download the finished shortcut directly here. To do this, click on this link. Now you just need to save the shortcut to the NFC tag.
In another How2 we explain basic procedure for using NFC tags and automations with the iPhone. We also present further application examples and explain step-by-step how these can be implemented.
Associated operating systems
iOSFirst published: 25.07.2023 / Updated: 04.11.2025