
Many places and areas are visited on holiday and when travelling. Photos are taken to capture moments and motives. Often it would be nice if the current location is also recorded to save it for later. Of course there are possibilities for this: A pin can be placed on the map app, or a note can be created. But can be is quickly forgotten on the way.
With an NFC tag, for example on a key or wristband, the current location can be called up and saved immediately with a quick scan. This is not only useful when travelling: For example, it can also be used to mark the parked car, to share the current location, or simply to record and save an exact waypoint when jogging.
How this works is explained in this How2.
Content:
- Procedure
- Get current location
- Name the current location
- Create note with current location
- Save location in note
- Test finished short command and save it on NFC tag
Procedure
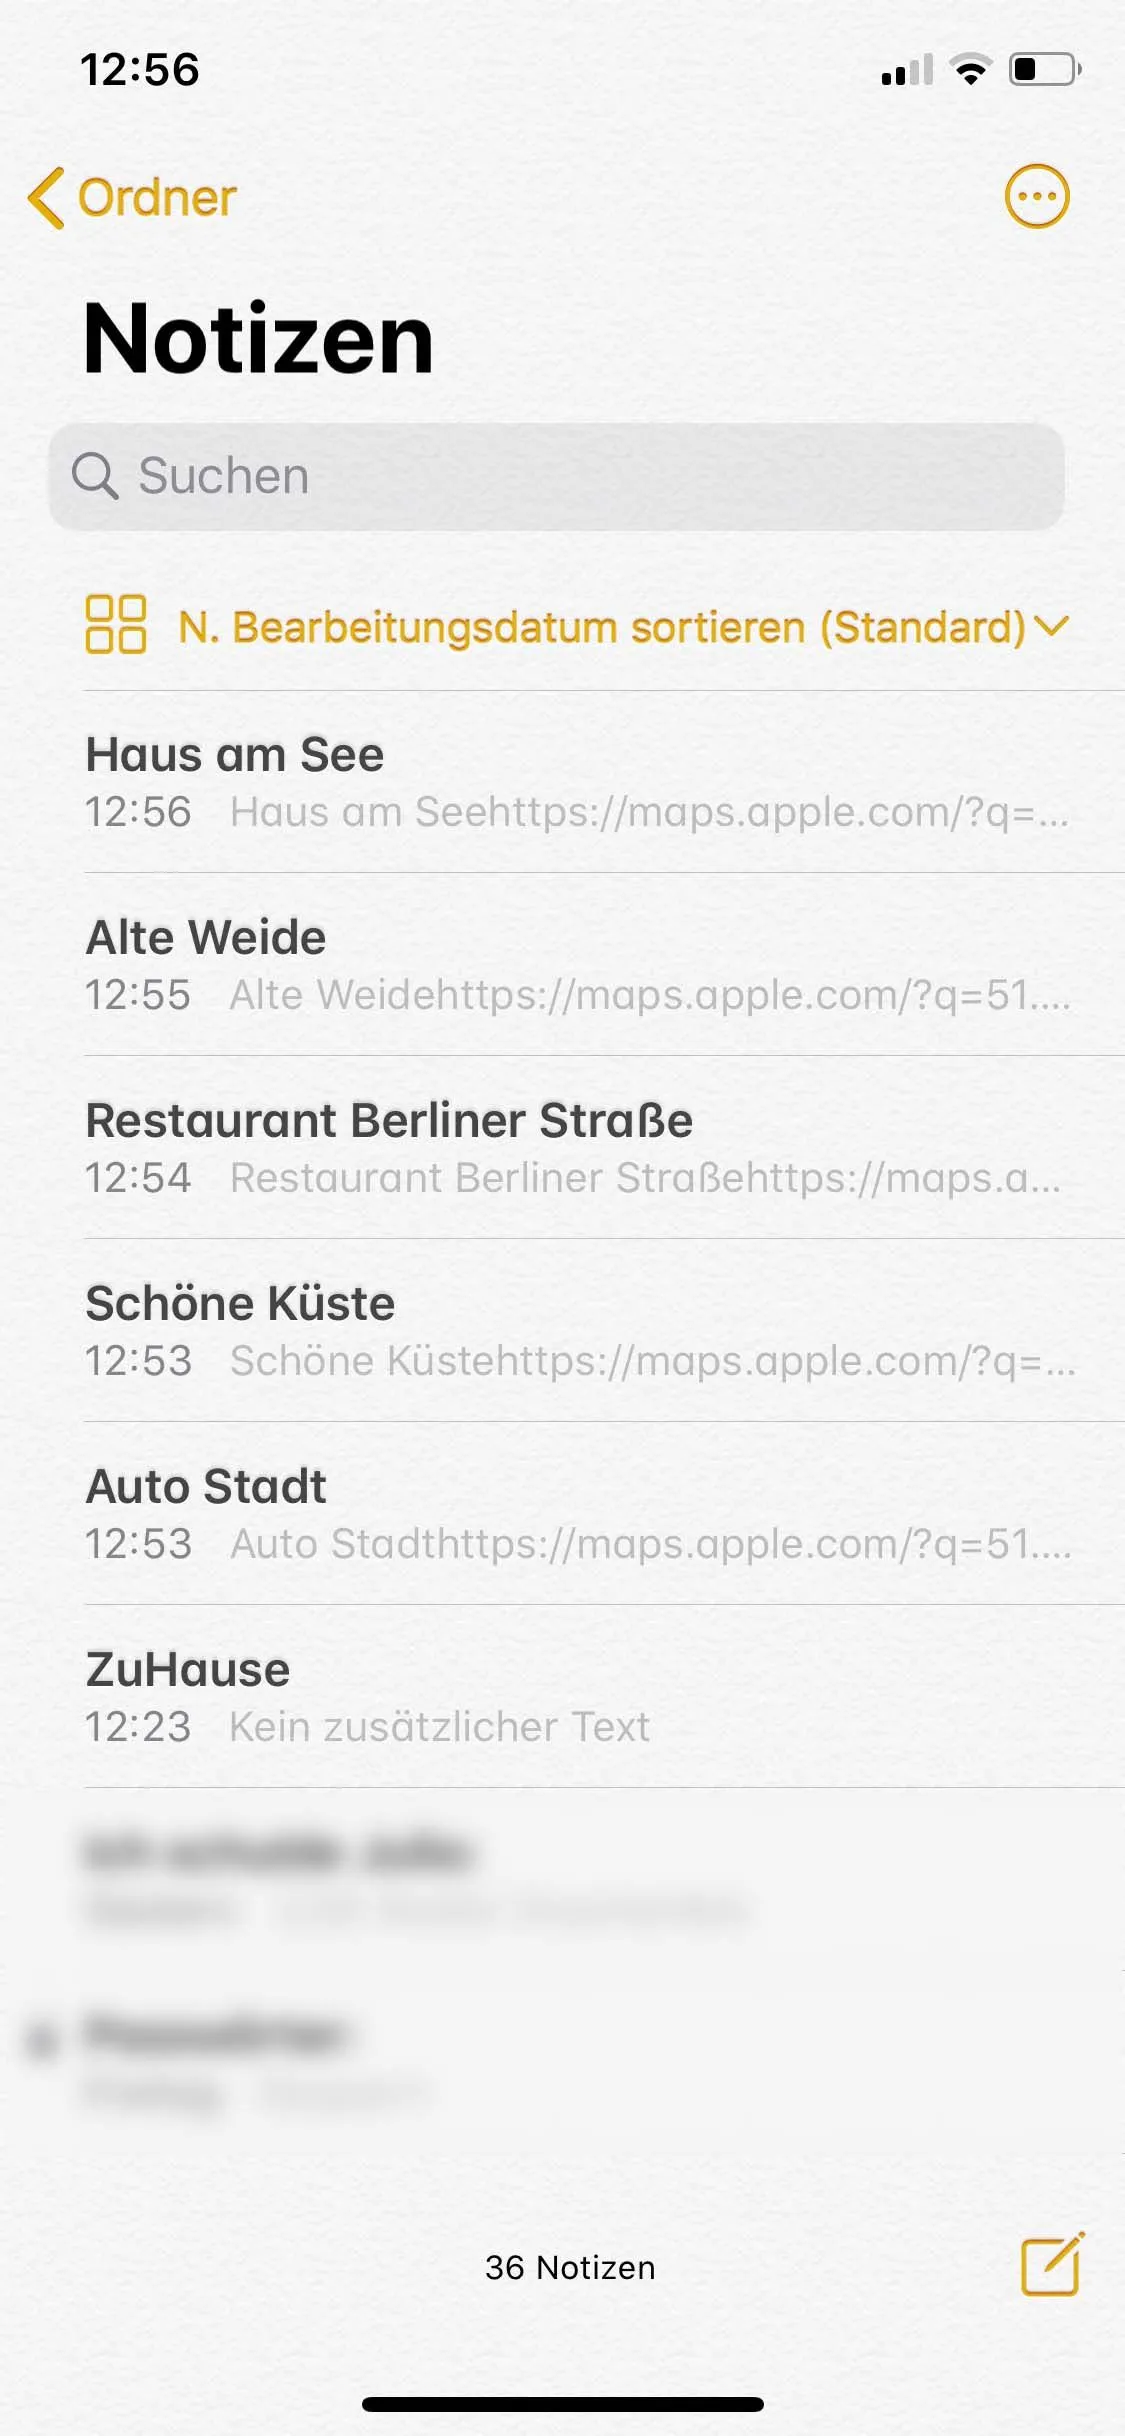
In this article, we'll create a shortcut that first retrieves the current location, then asks the user what the location is, and then saves it in a note with the same name. The goal is to name interesting places and record them in notes so that they can be found later. You can also write a note about the corresponding places in the note.
To do this, we open the app Shortcuts and create a new shortcut by pressing + Create shortcut.
Get current location
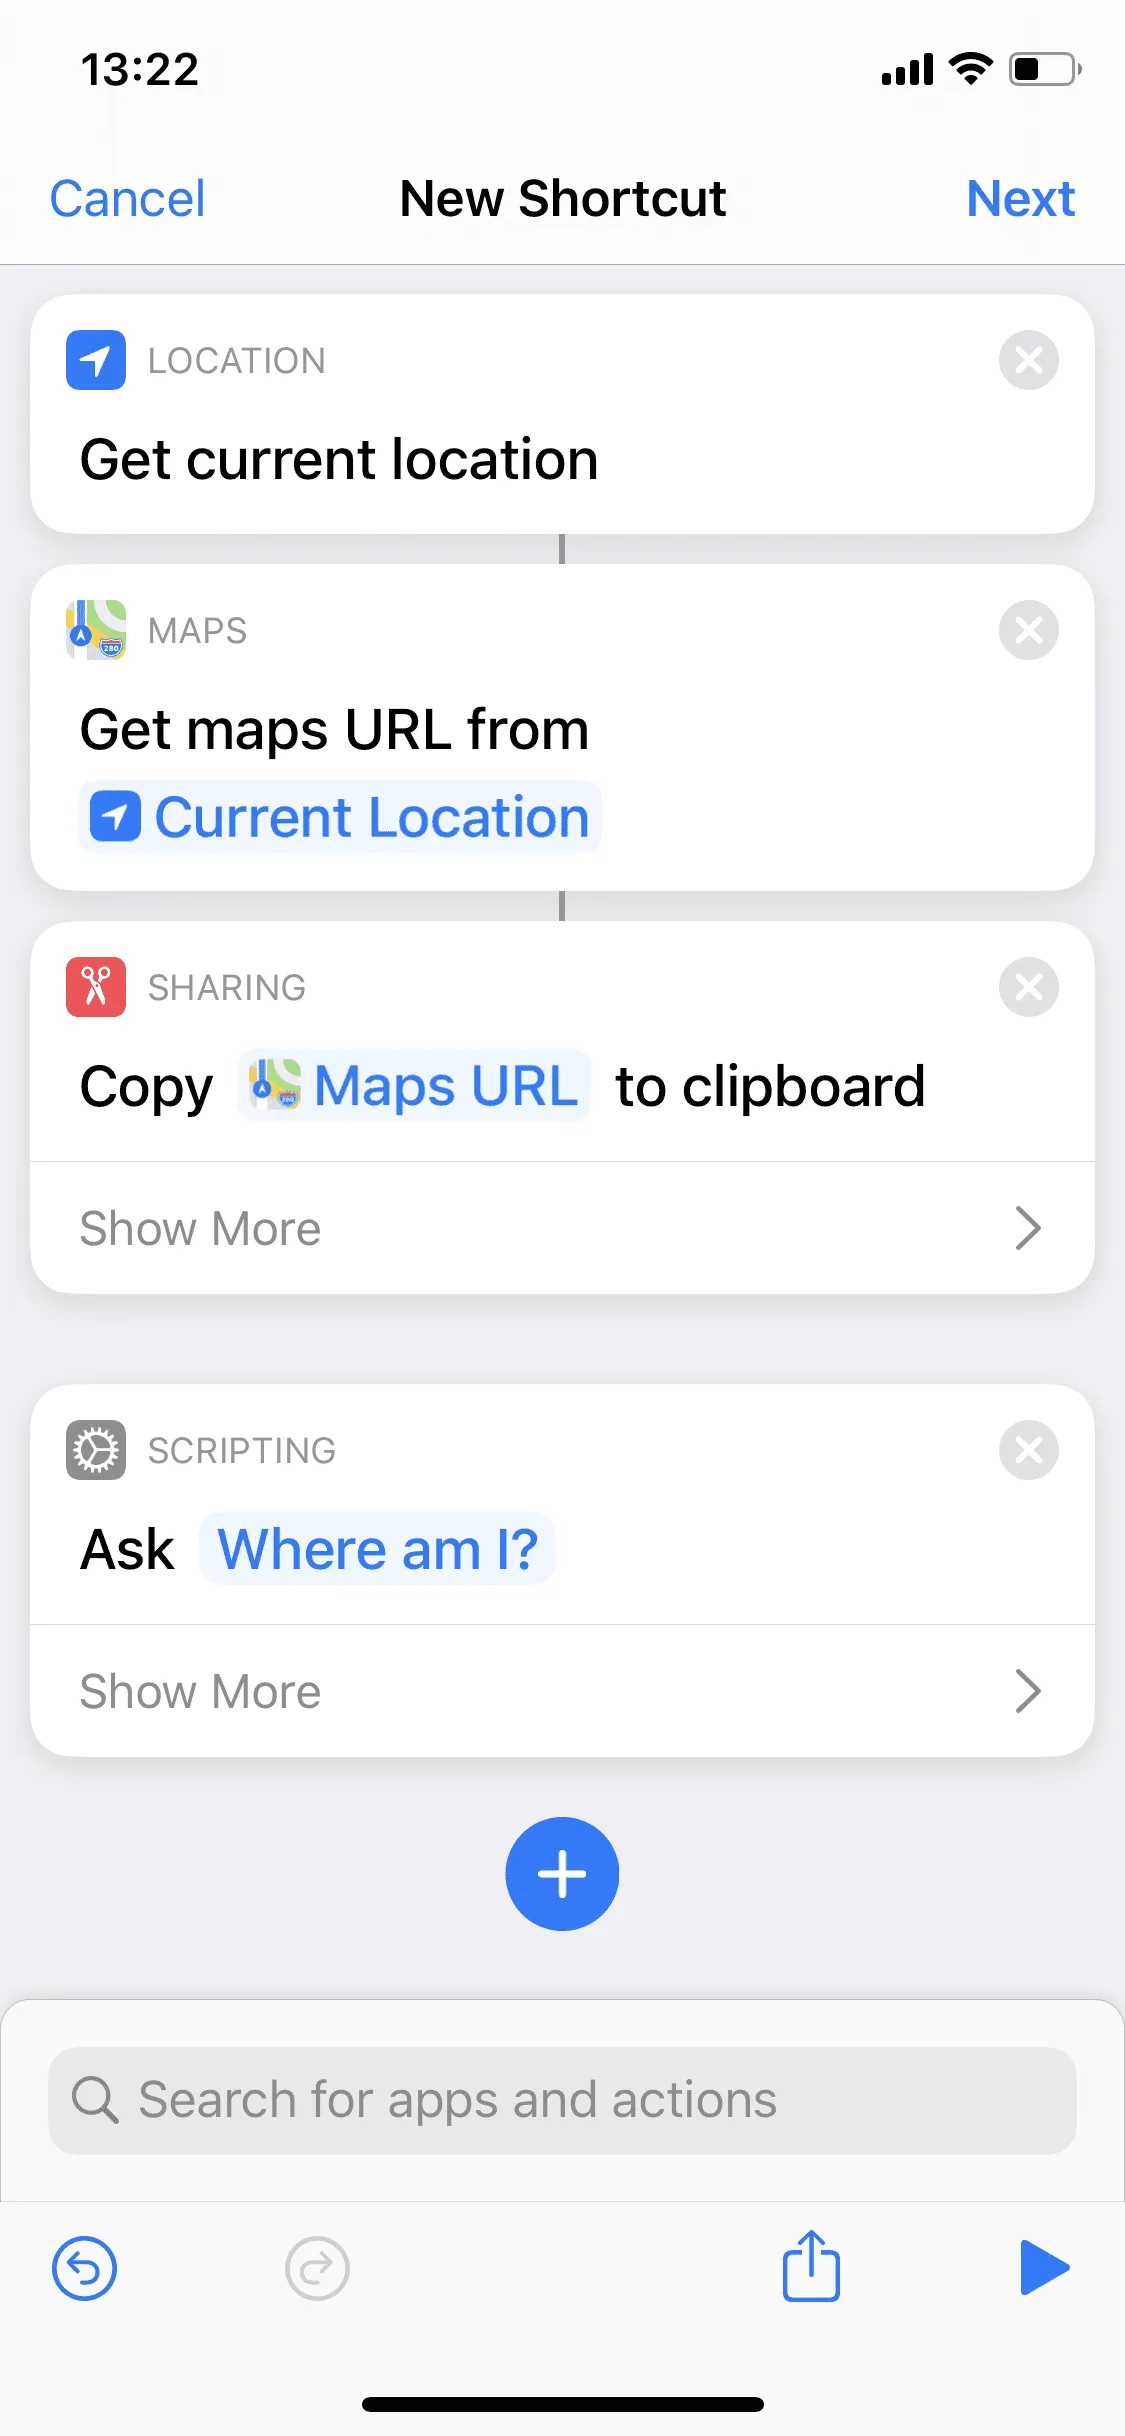
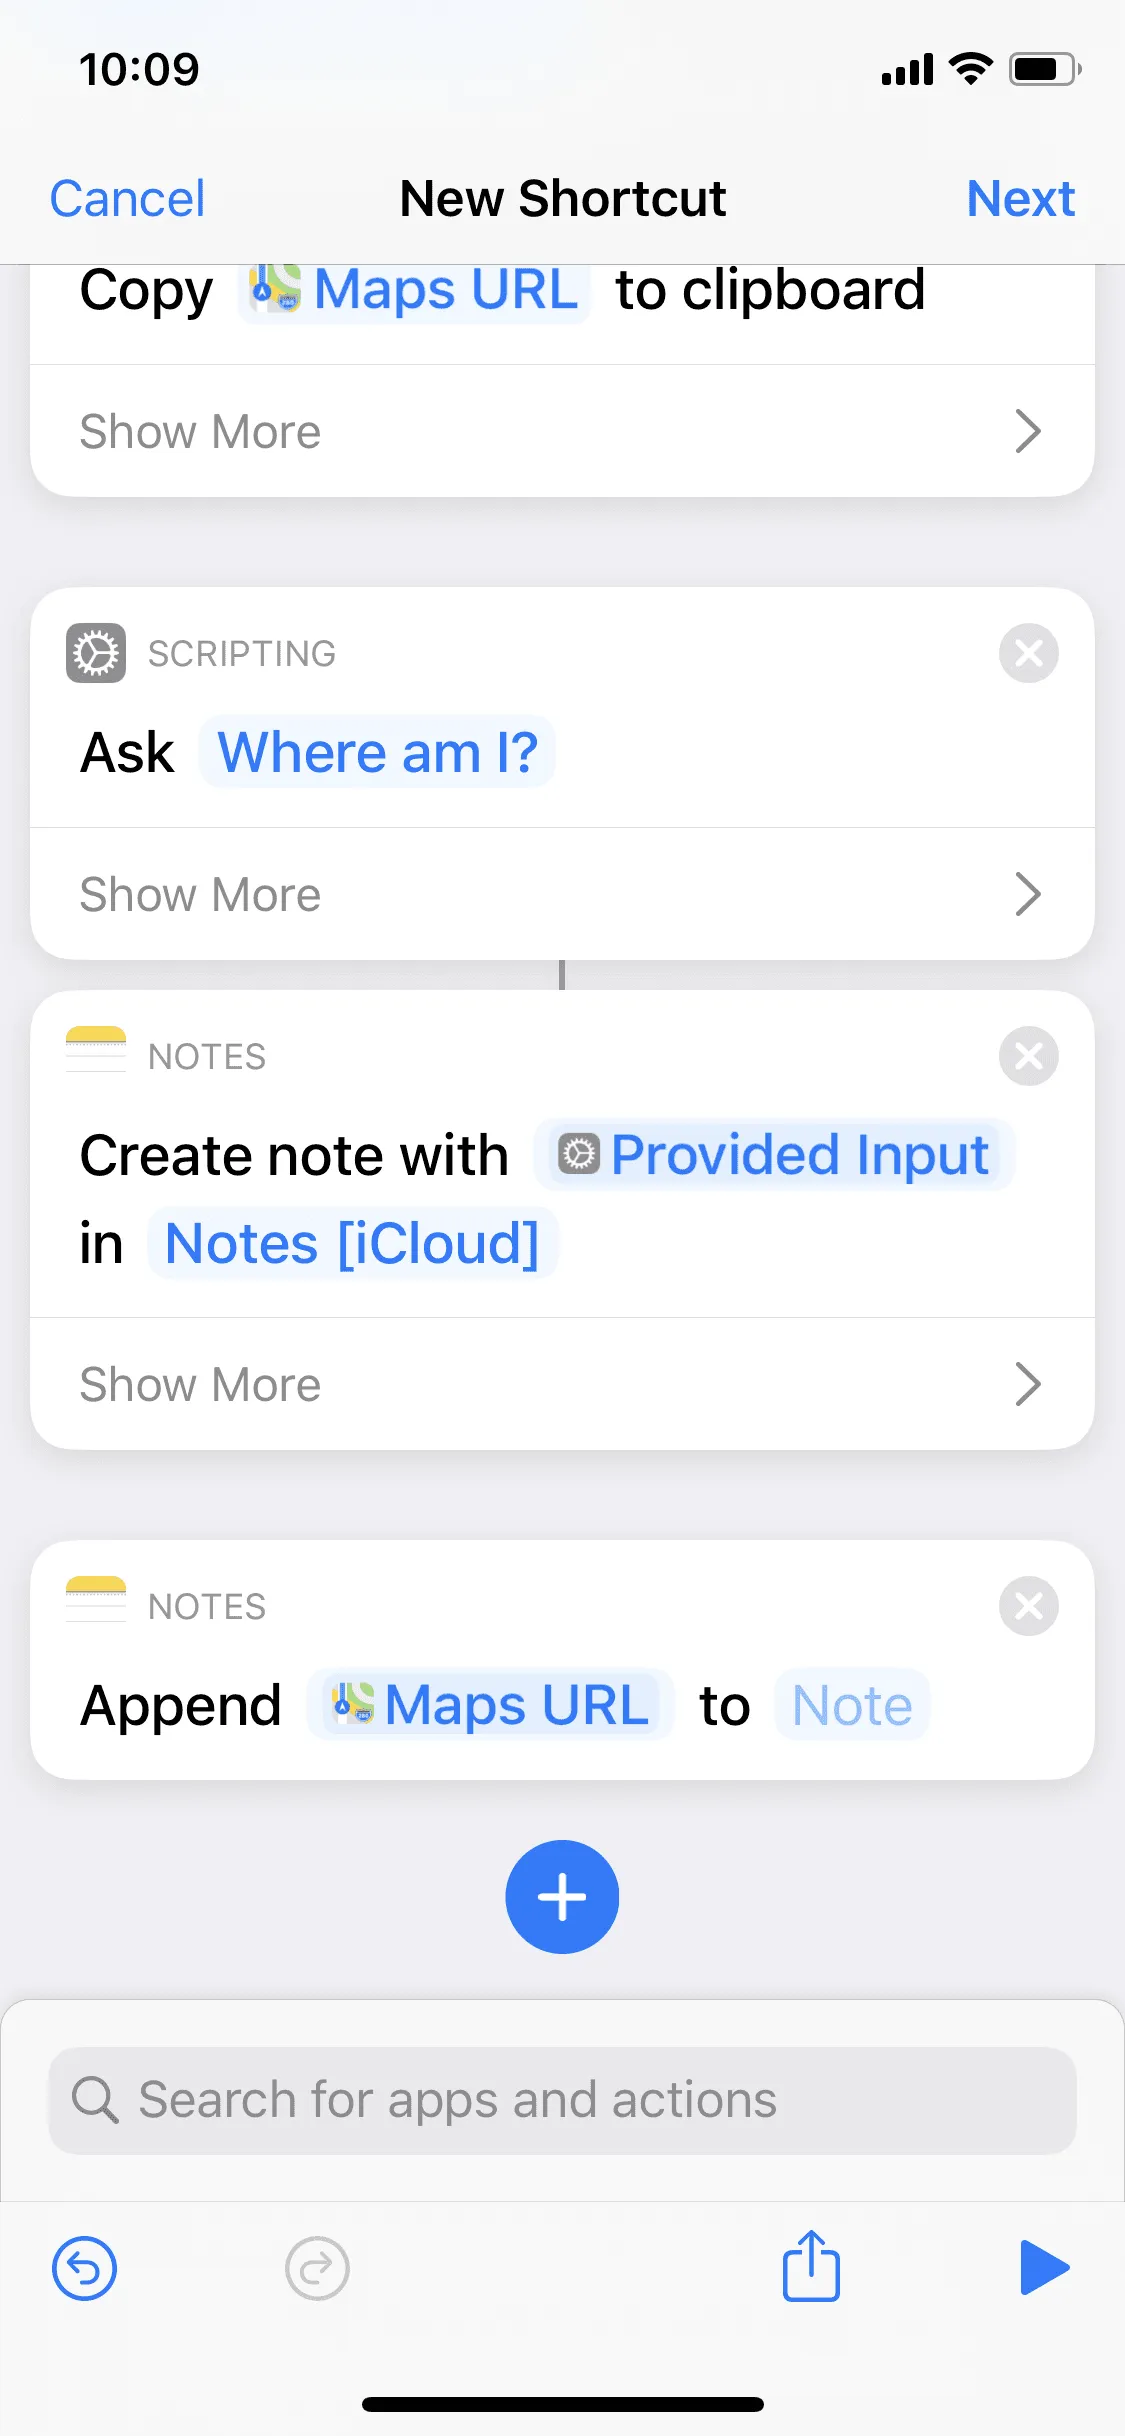
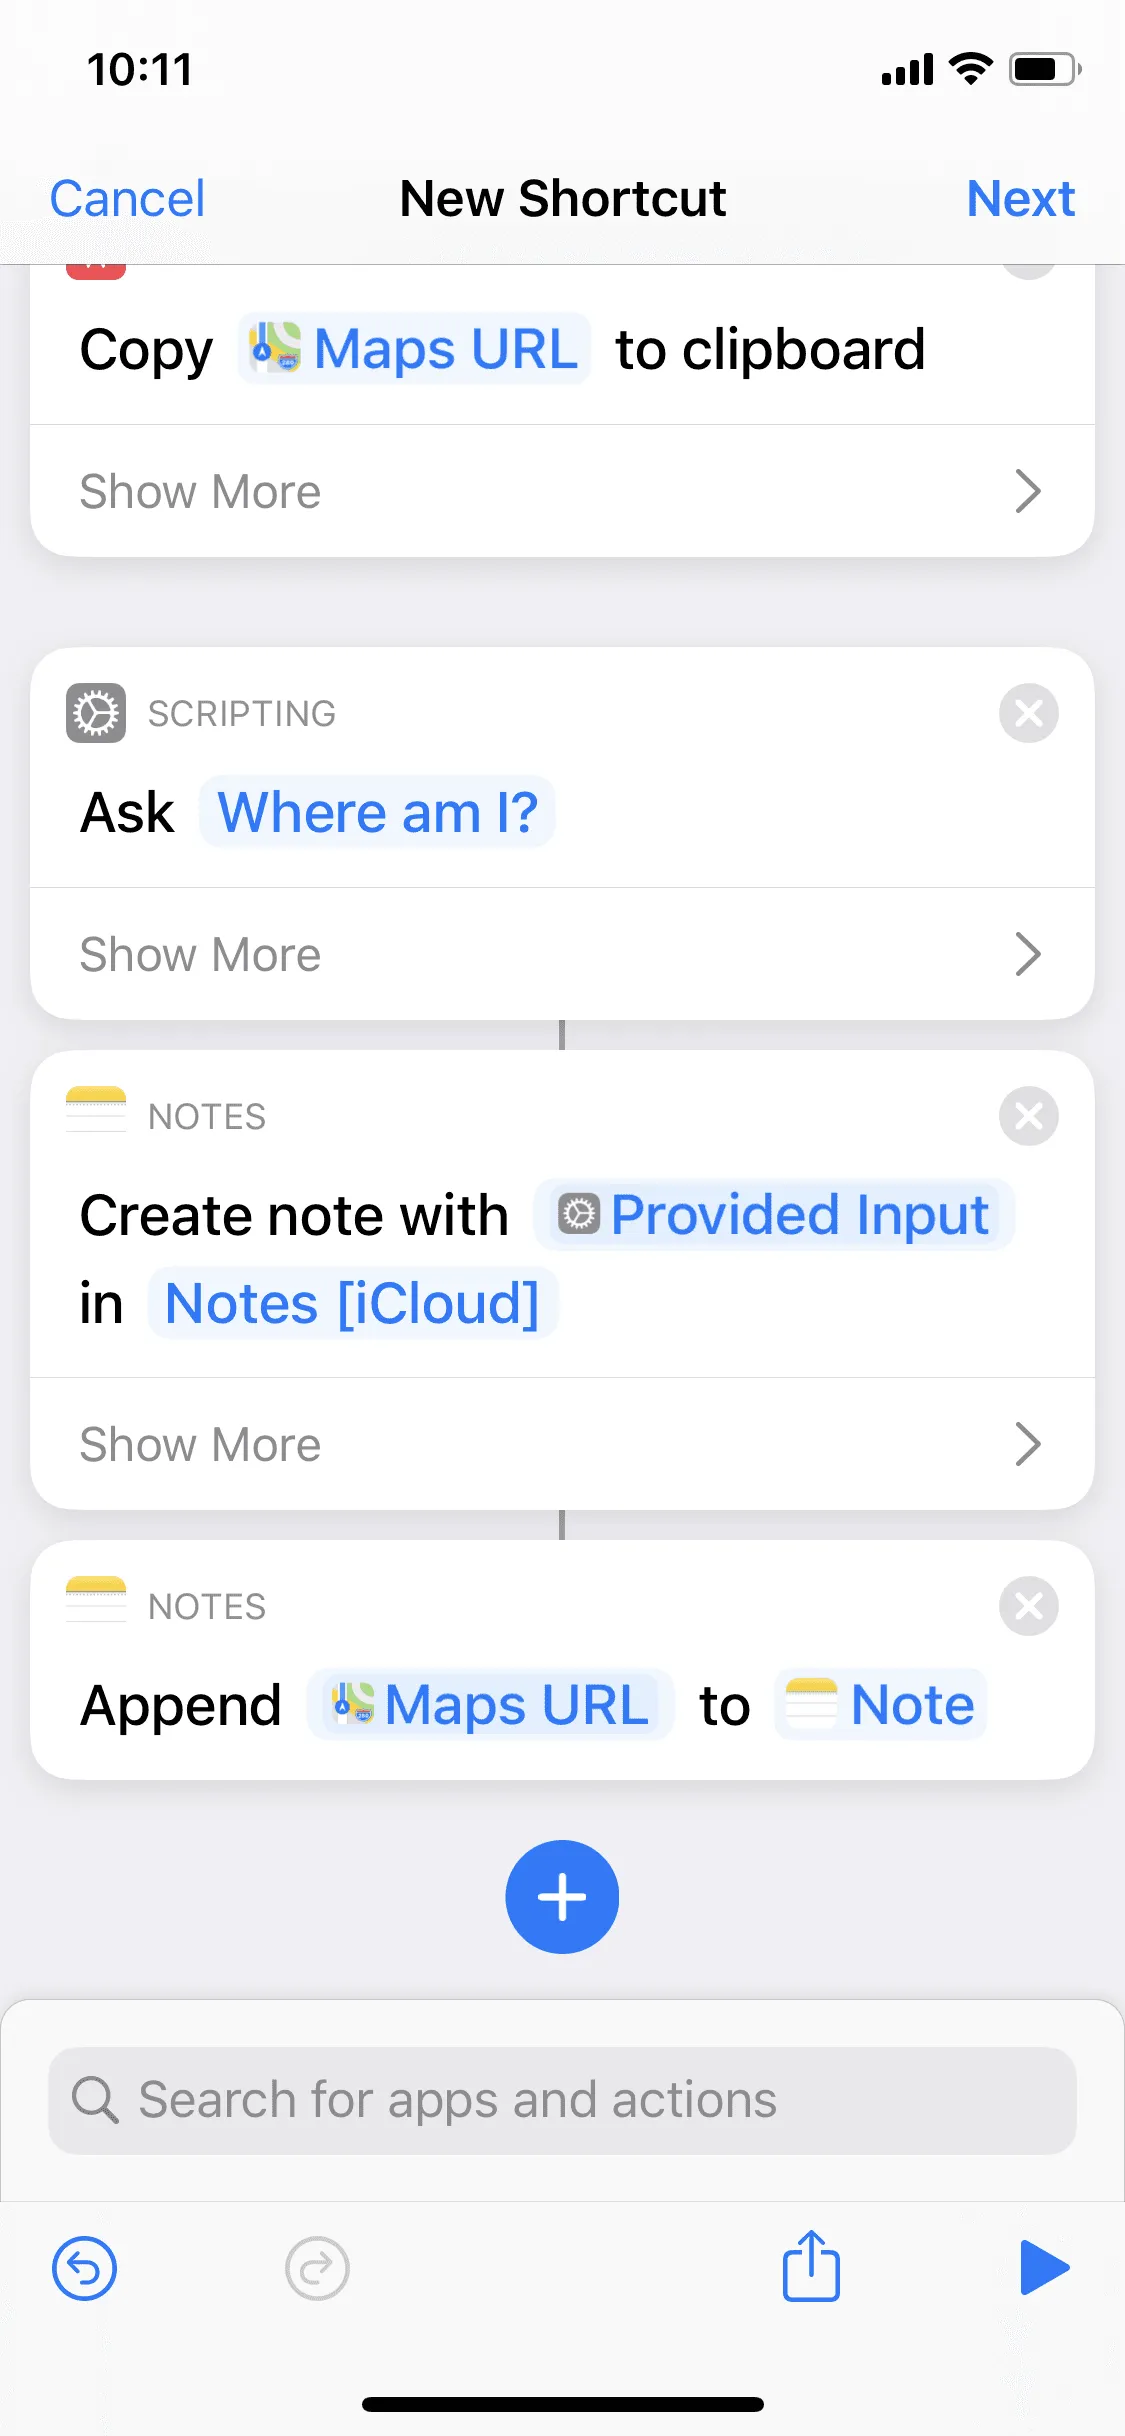
We tap + Add Action, search for location and select Get Current Location from the list. Now we tap again on + → Enter maps →Select Get Maps URL from the list. To save the current location to the clipboard, we tap + → clip → select Copy to Clipboard.
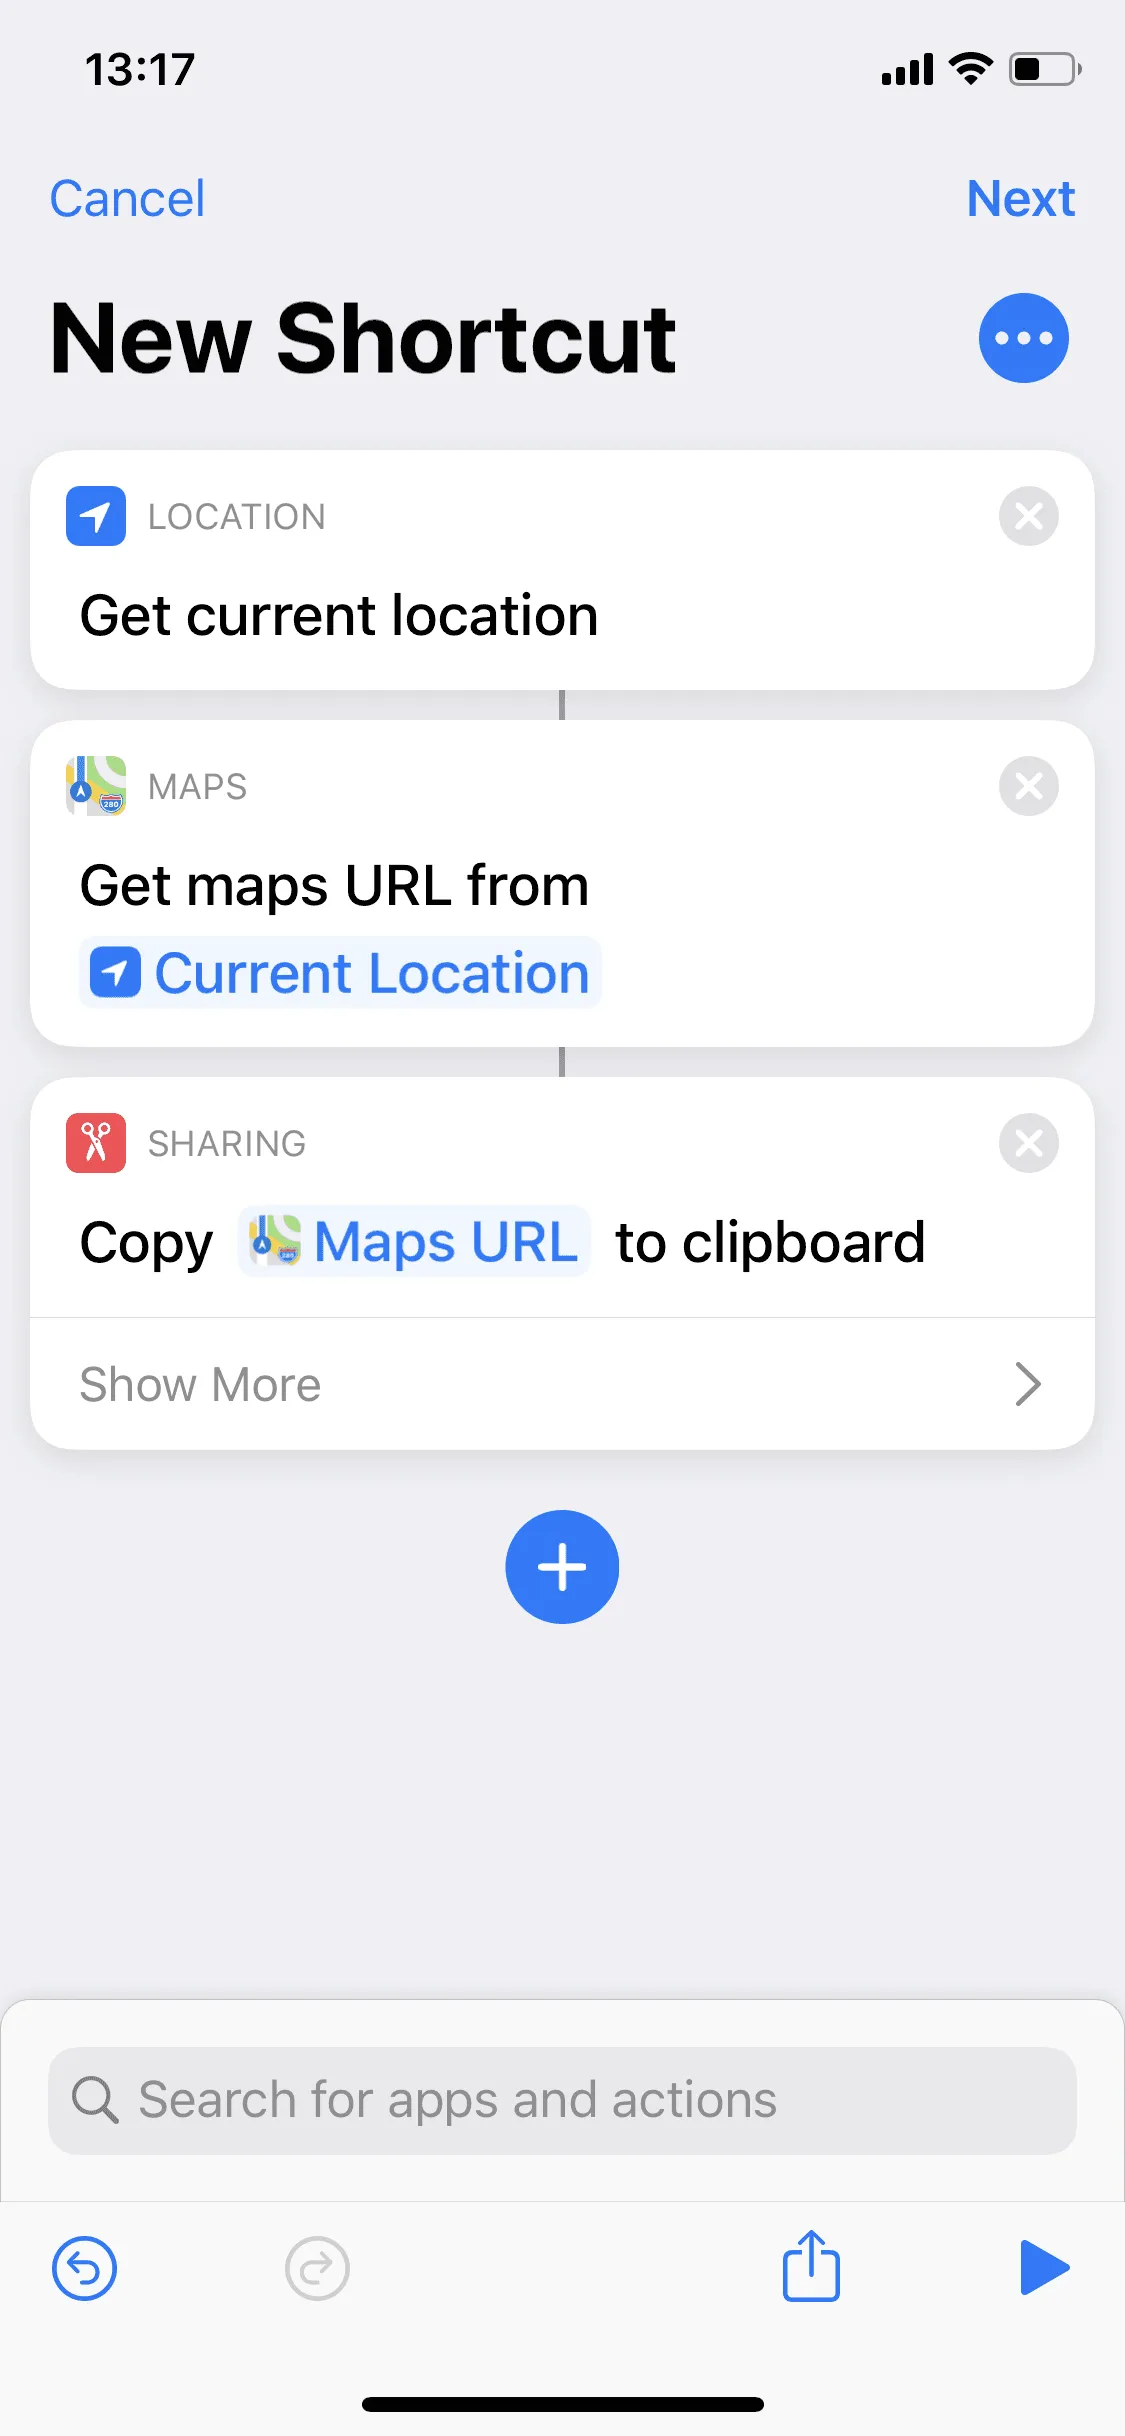
Name the current location
It should be possible to name the current location individually for each scan of the NFC tag. For this purpose we configure an input field with the question "Where am I?". We tap on + → type input → select Ask for Input. Here we now tap on Question and enter Where am I? and confirm with Done.
Create note with current location
Wir tippen auf + → geben Notiz ein → Notiz erstellen. In dem neuen Abschnitt tippen wir auf Mehr anzeigen und deaktivieren Bereich zum Erstellen anzeigen. Nun erscheint oben ein Feld mit Ordner, auf das wir tippen, um standardmäßig einen Notizenpfad zu wählen, wir wählen wir Notes [iCloud].
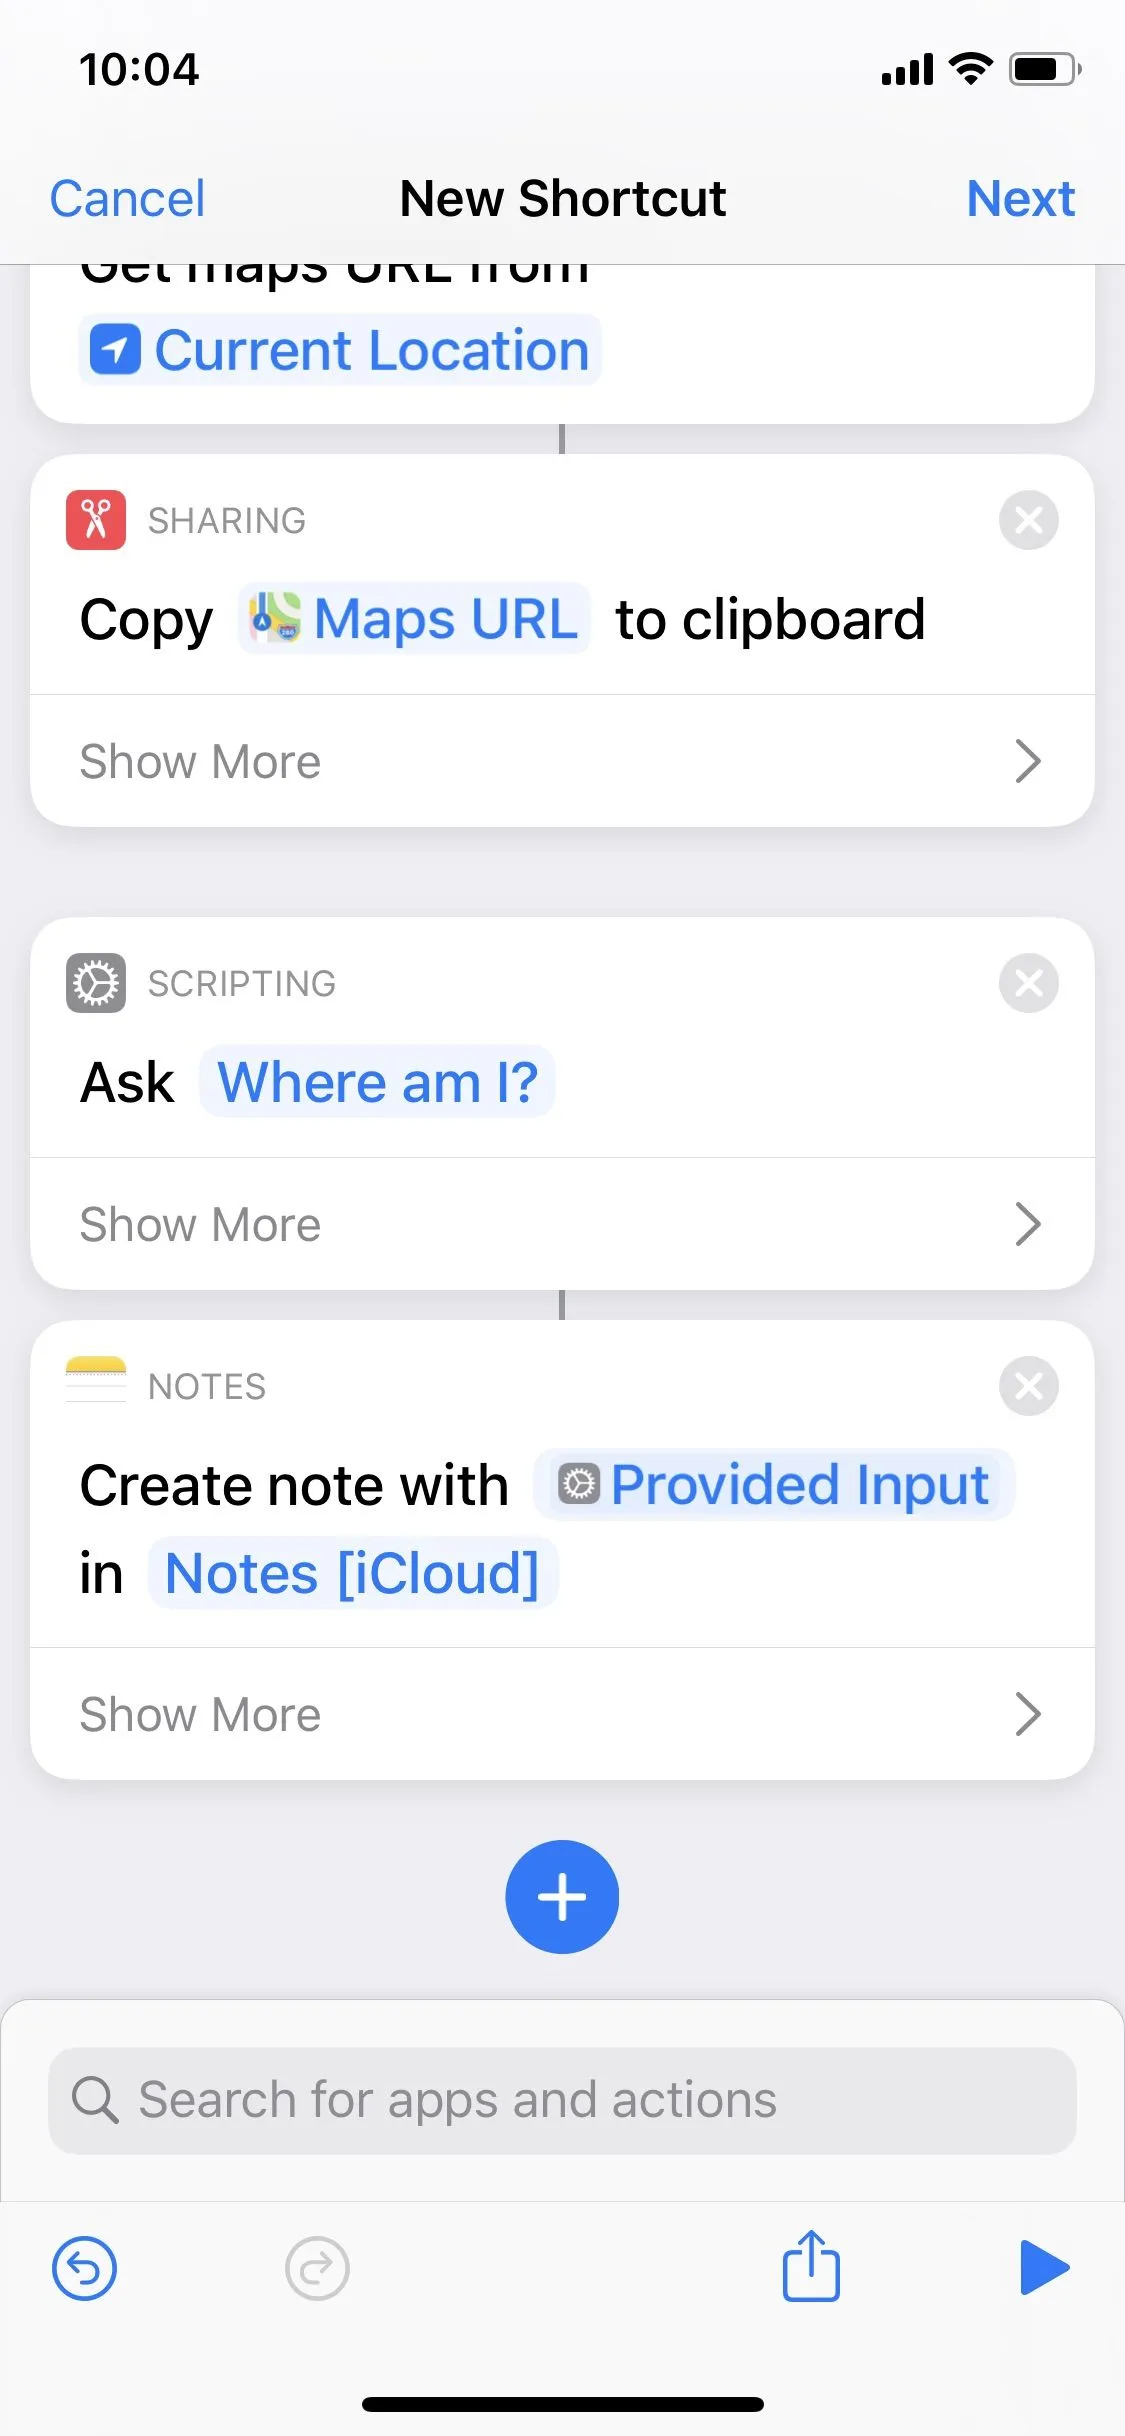
We tap + → enter note → Create Note. In the new section, we tap Show More and disable Show Compose Sheet. Now a box with Folder appears at the top, which we tap to select a note path by default, we select Notes [iCloud].
Save location in note
In letzten Schritt tippen wir auf + → geben Notiz ein → An Notiz anfügen. Hier tippen wir nun auf das erste dunkelblaue Notiz, dann auf das kleine Tastatursymbol und anschließend auf das kleine Zauberstabsymbol und wählen dann oben Karten-URL aus. Anschließend tippen wir auf an Notiz → Magische Variable → auf das mittlere Notiz.
In the last step we tap + → enter note → Append to Note. Here we tap on the first dark blue note, then on the small keyboard icon, then on the small magic wand icon and then select Maps URL at the top. Then we tap on note → Magic variable → taps on the middle Note.
Test finished short command and save it on NFC tag
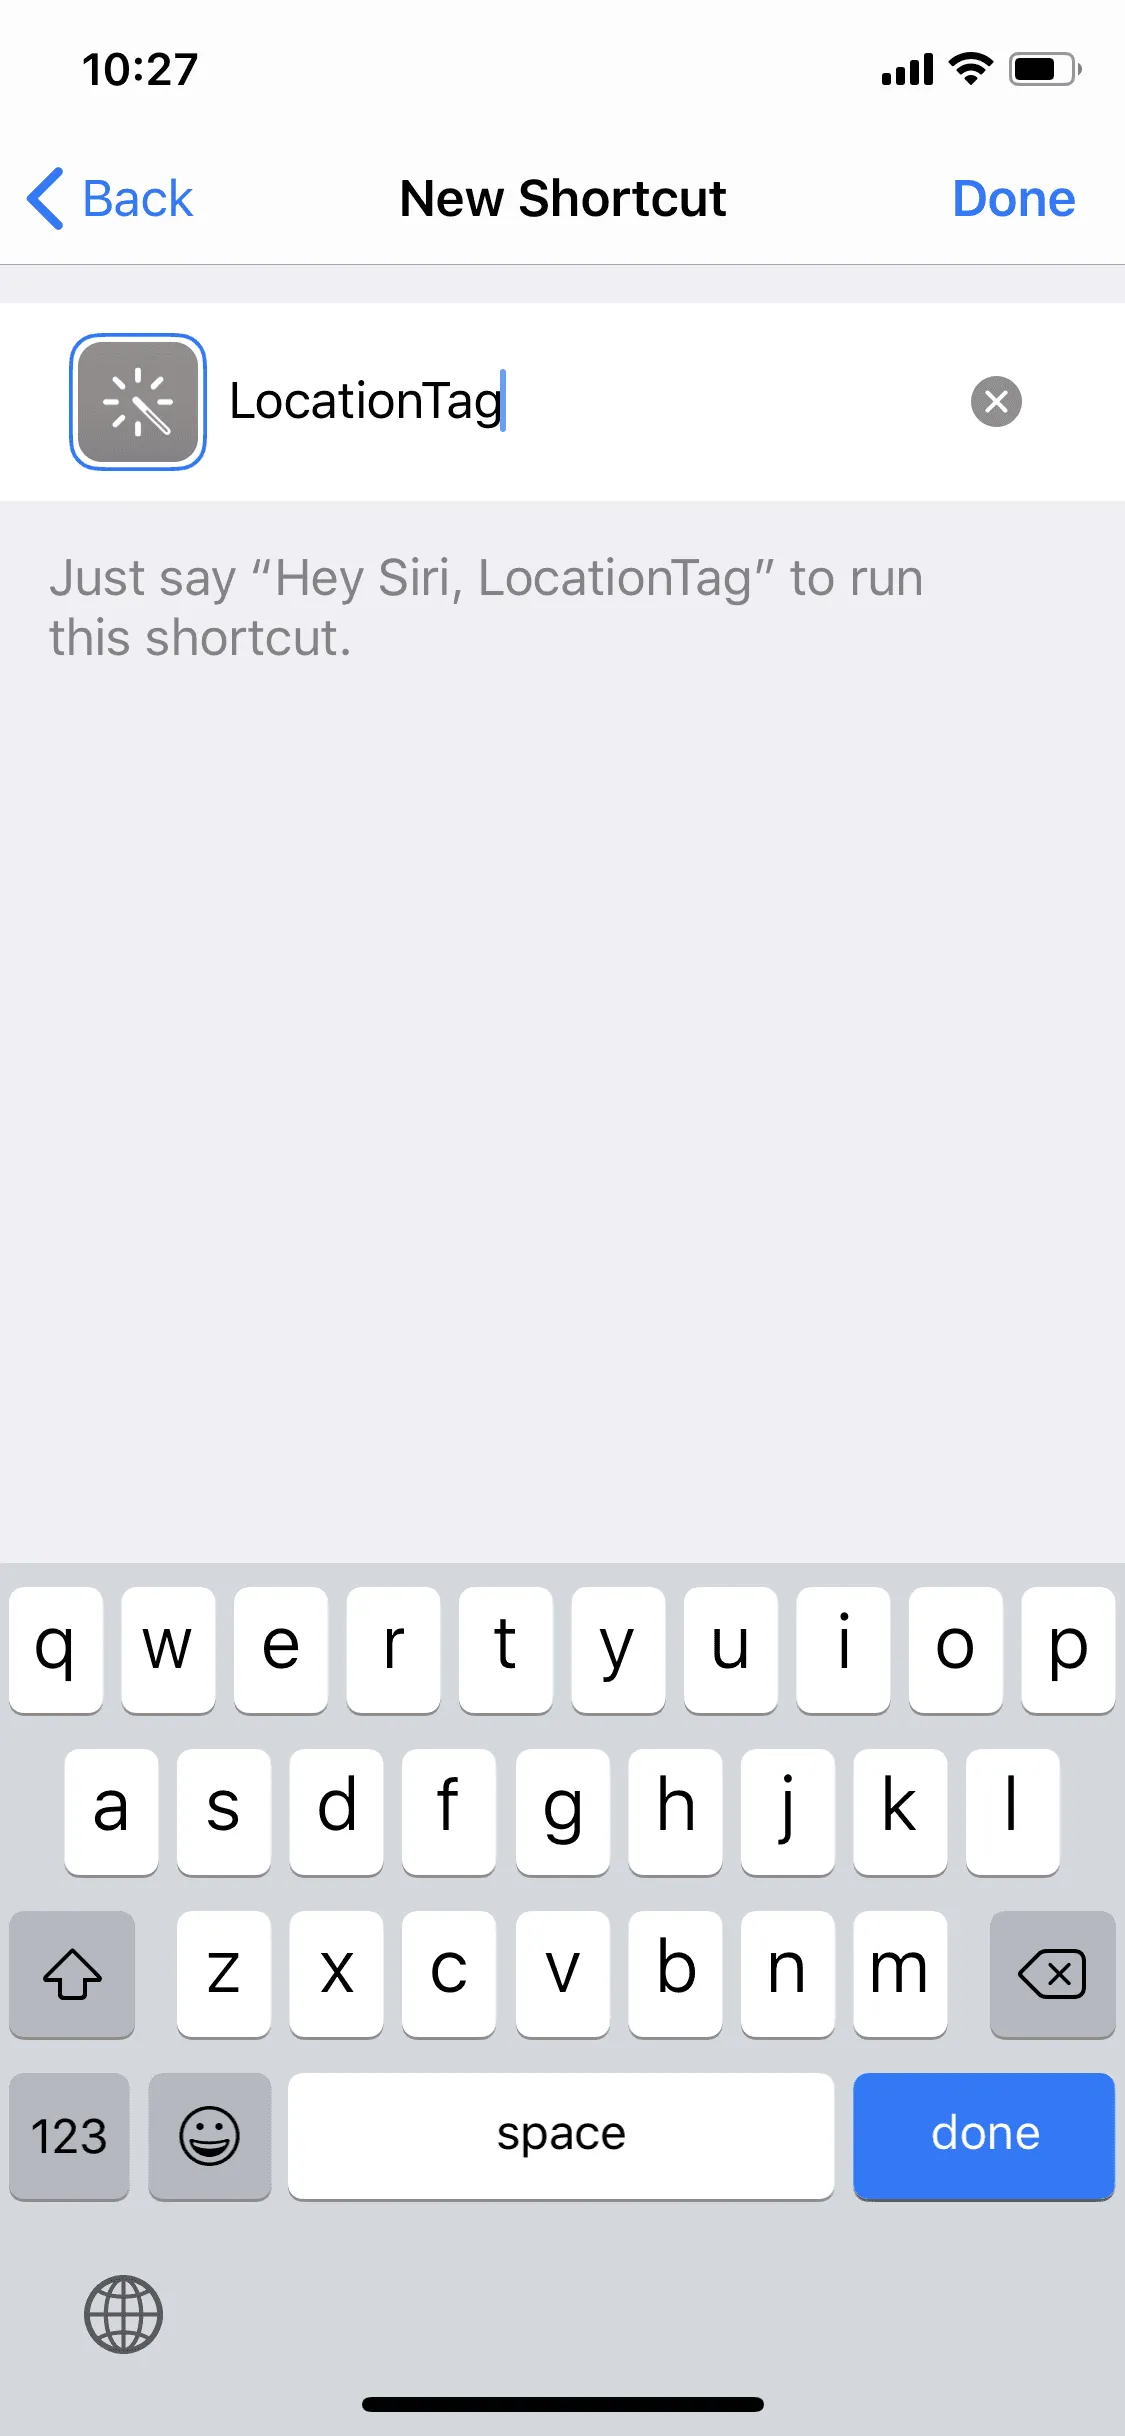
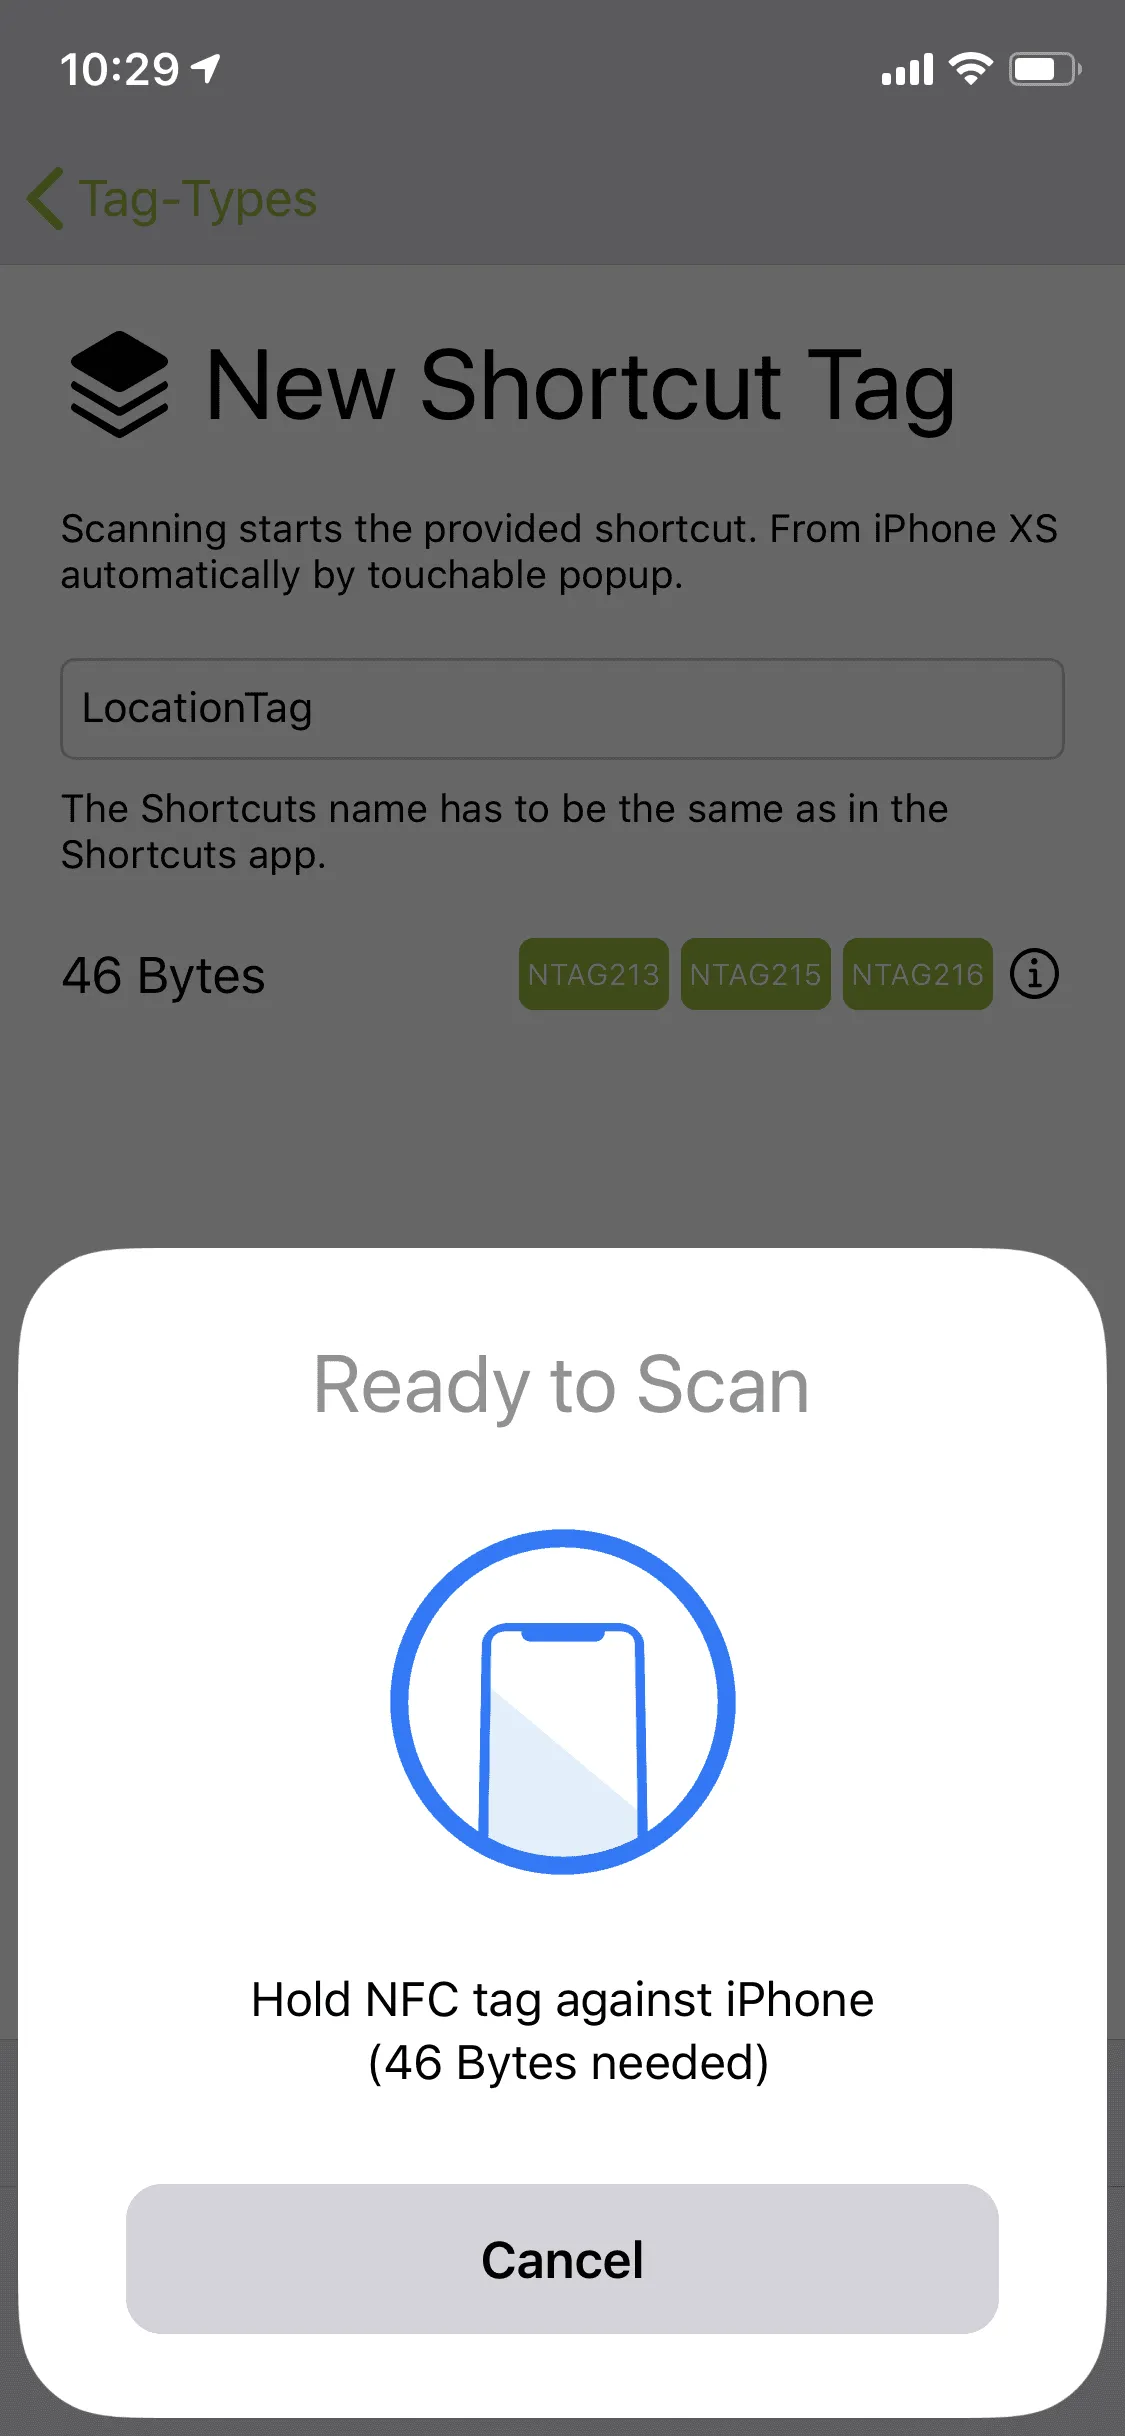
Der Kurzbefehl ist nun fertig erstellt. Wir tippen auf Weiter, benennen ihn (Wo bin ich?) und tippen auf Fertig. Um den Kurzbefehl nun mit einem NFC-Tag auszulösen, speichern wir ihn mit der App NFC21 Tools → Tag Typen → Kurzbefehle → Namen eingeben → Auf NFC Tag schreiben.
The shortcut is now finished. We tap Next, name it (LocationTag) and tap Done. To trigger the short command with an NFC tag, we save it with the app NFC21 Tools → Tag-Types → Shortcut → Type in LocationTag → Write to NFC Tag.
Summary
In this How2 we explained that an NFC tag can help to name the current location and save it in a note. Each time the NFC tag is scanned, a new name can be created and thus a note can be created. The finished shortcut can be downloaded here, which then only needs to be written on an NFC tag using NFC21 Tools.
In further How2 we also explain how to set a timer or share a WLAN network using an NFC tag.
Associated operating systems
iOSFirst published: 25.07.2023 / Updated: 03.04.2024