
With our NFC Cube you get a six-sided cube and nine separate NFC stickers. Each sticker can be provided by you with any data type and can be stuck on one side of the cube. The symbols on the stickers serve as an idea, in the end it is up to you which data type exactly you write on the NFC sticker.
In this manual, however, we want to use the given symbols as a guide and explain how to write the corresponding data types on the NFC sticker with an iPhone. For this purpose we use our app NFC21-Tools and the app Shortcuts from Apple for writing the NFC stickers.
Please also read our How-To about the NFC21-Tools App, in which we explain exactly how the App works.
Content:
- Call, message and URL sticker
- Location/address, contact and WLAN sticker
- Music
- Alarm clock
- Alarm Clock automation for download
- Weather
Call, message and URL sticker
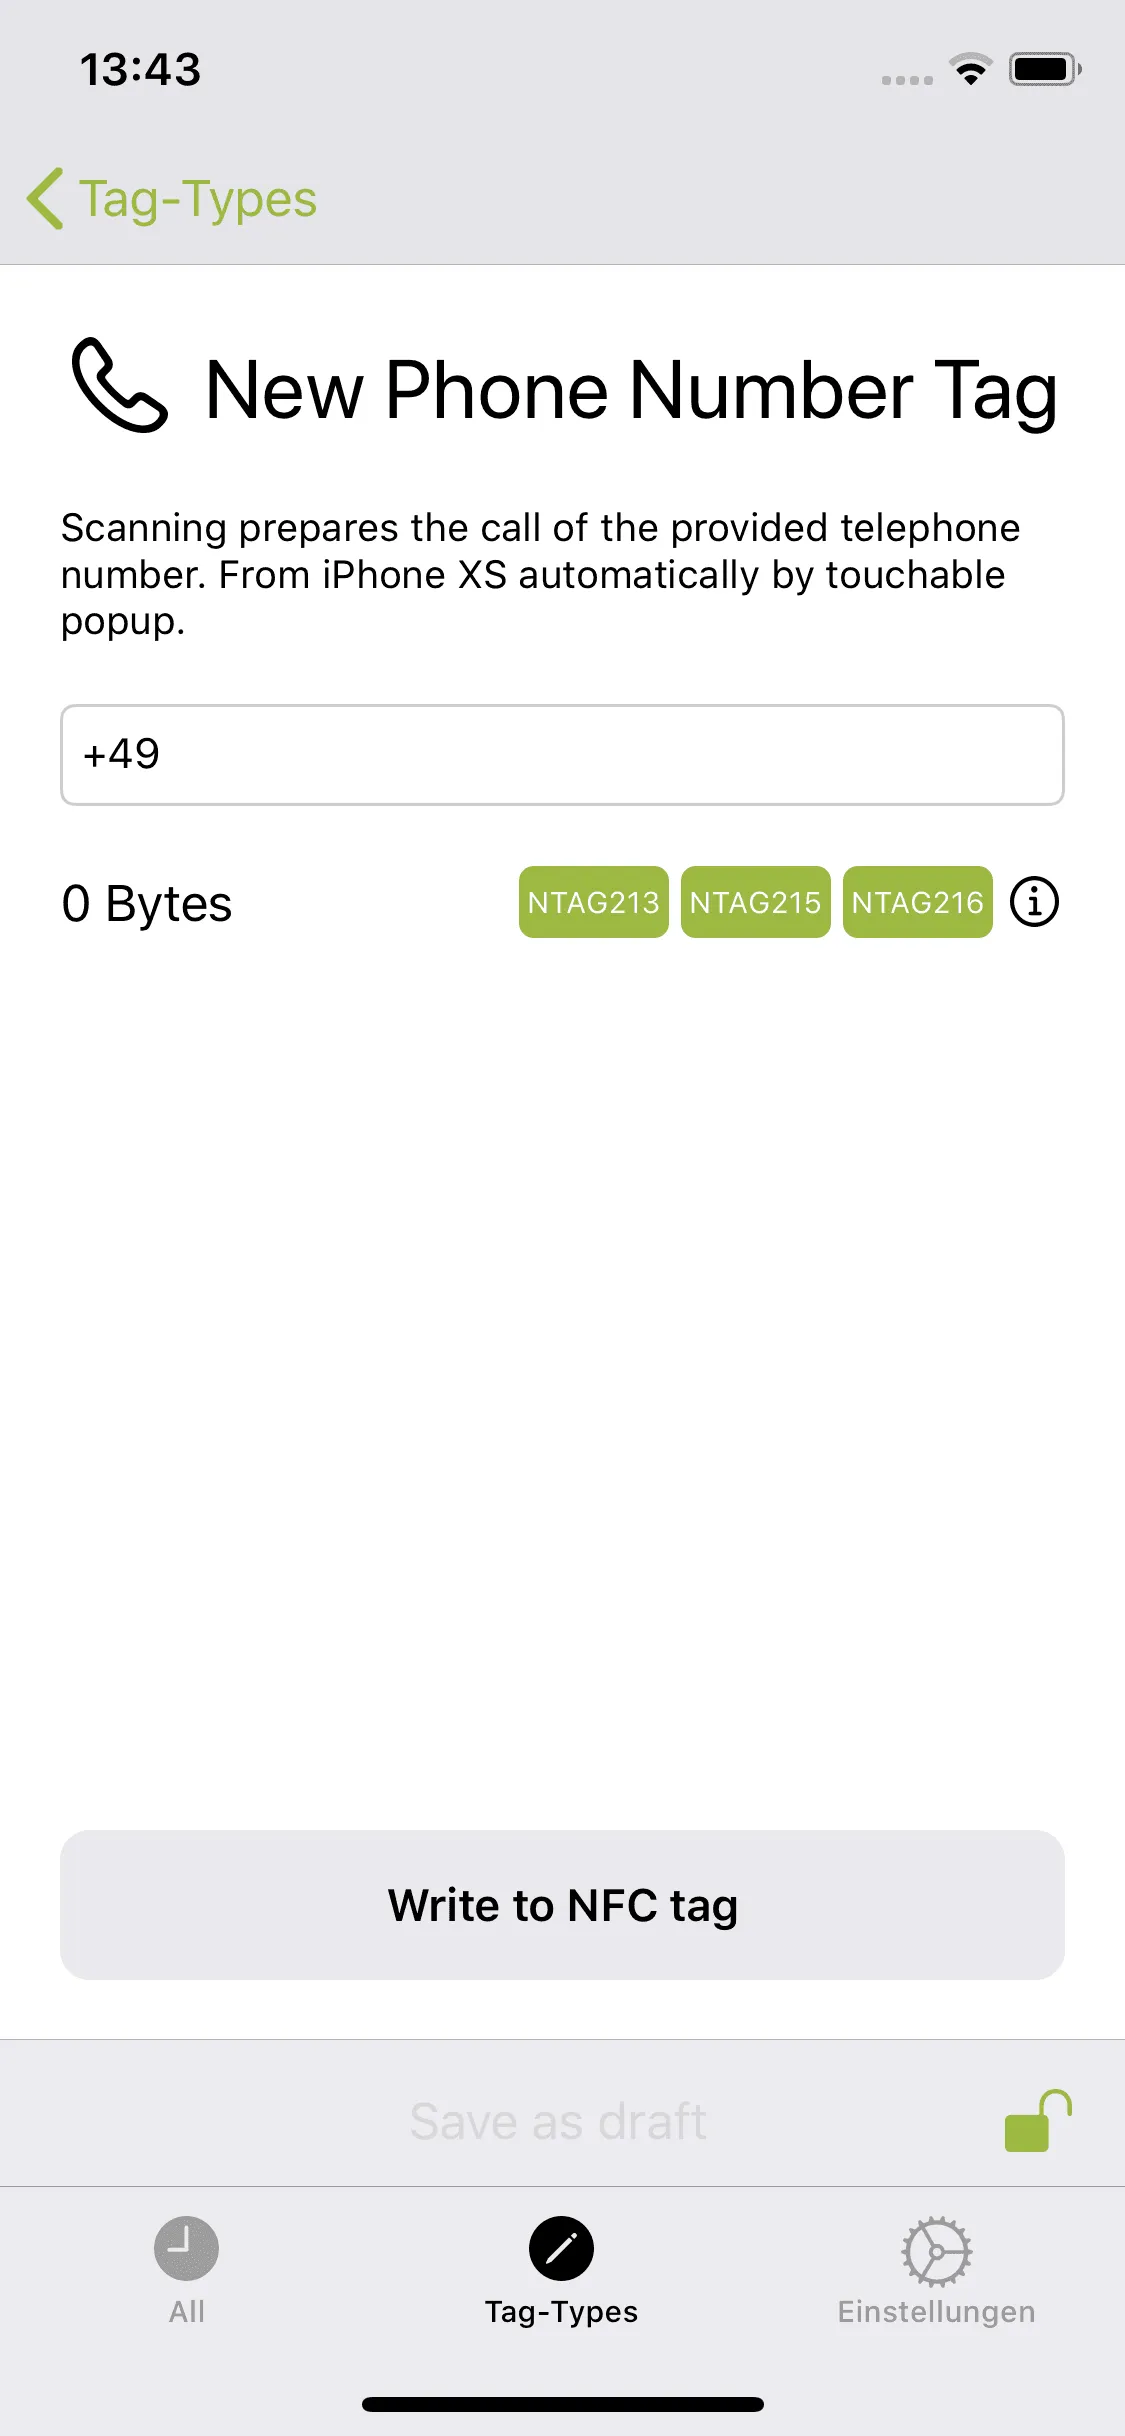
- You can save a phone number on the phone sticker that appears when the NFC tag is scanned and can be called directly. To do so, open the NFC21-Tools App, tap Tag Types at the bottom and then tap Phone Number at the top. Now you can enter any phone number and save it on your phone sticker by Write to NFC tag. To do this, the NFC sticker must be held to the upper back of the iPhone during the saving process.
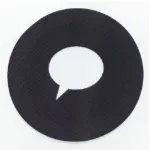
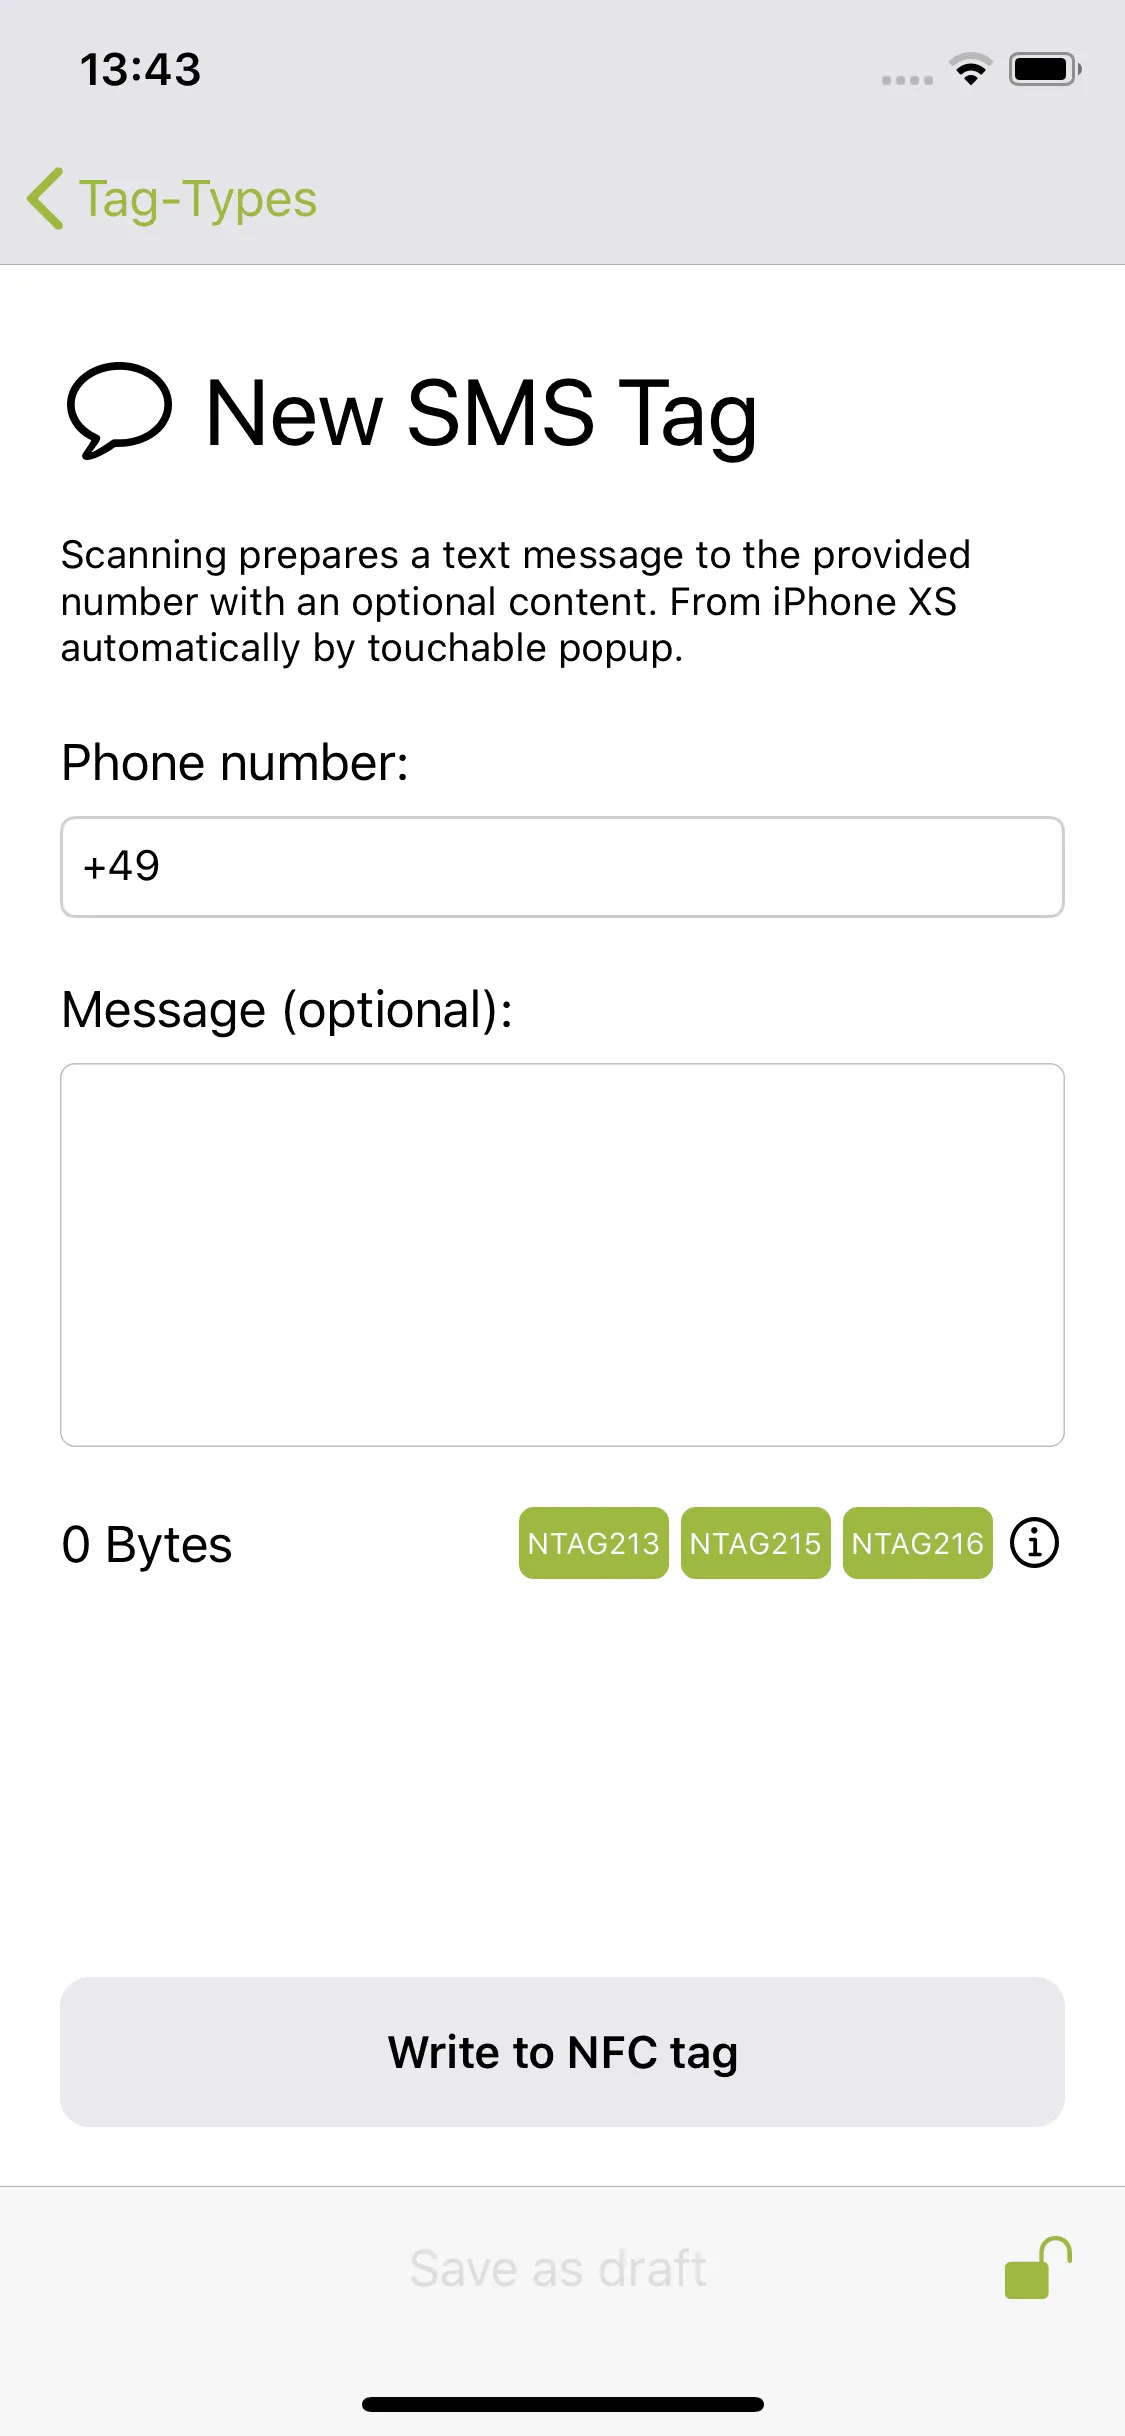
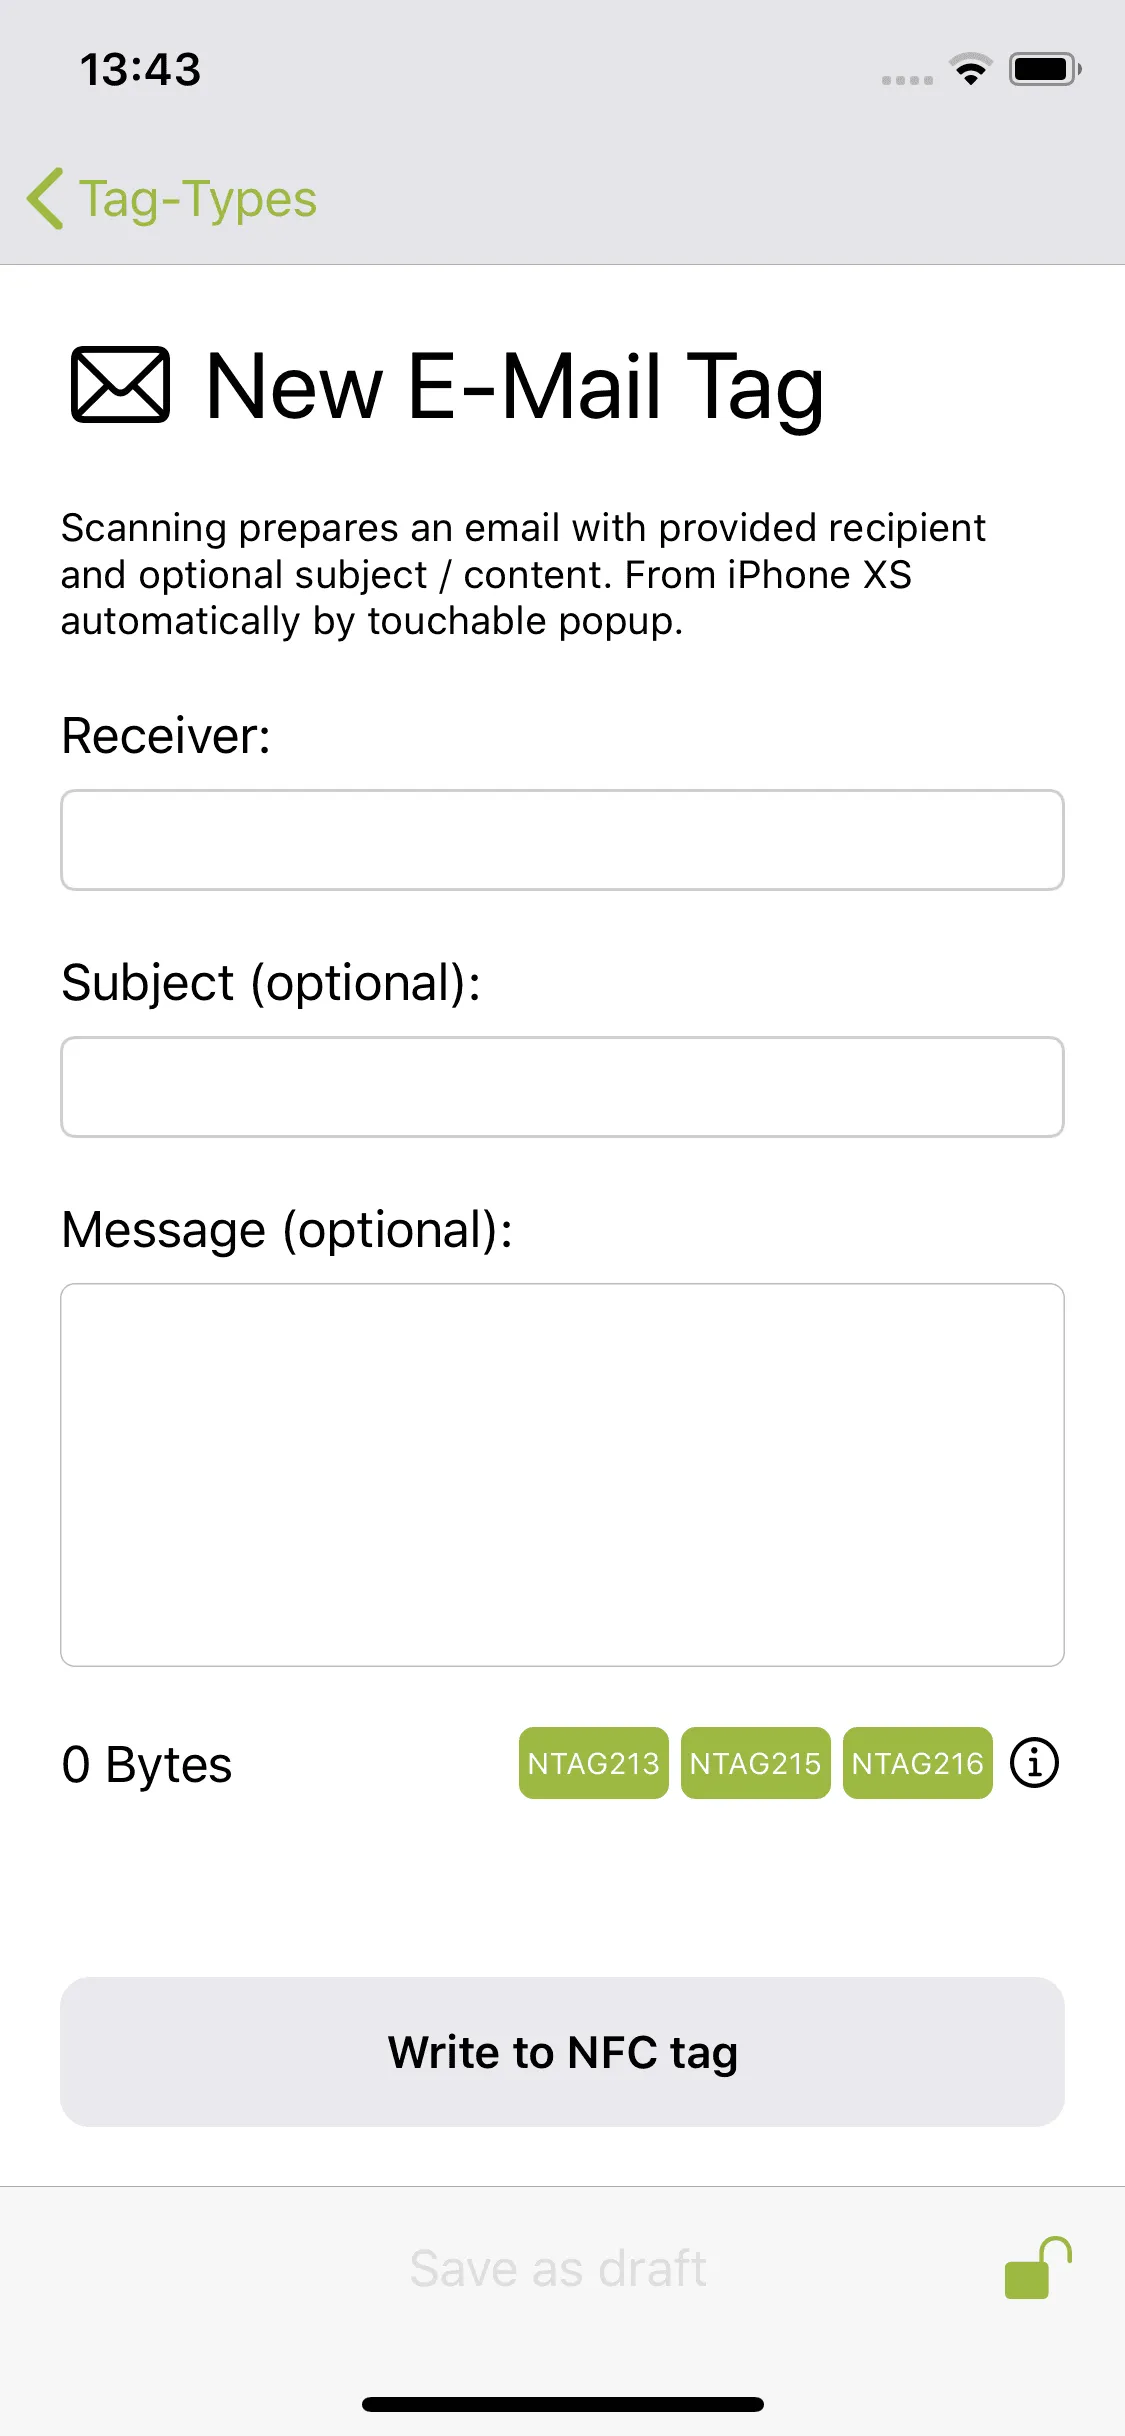
- To describe the balloon sticker, also open the NFC21-Tools app, tap Tag Types → SMS, or email, depending on what you want to associate with the sticker. Once you have decided, simply enter an addressee at the top (for SMS a phone number, for email an email address) and confirm with Write to NFC tag. Now a new SMS or e-mail to the desired recipient will be opened with every scan of the NFC tag. Alternatively, you can also predefine a message during the labeling process.
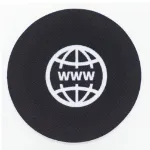
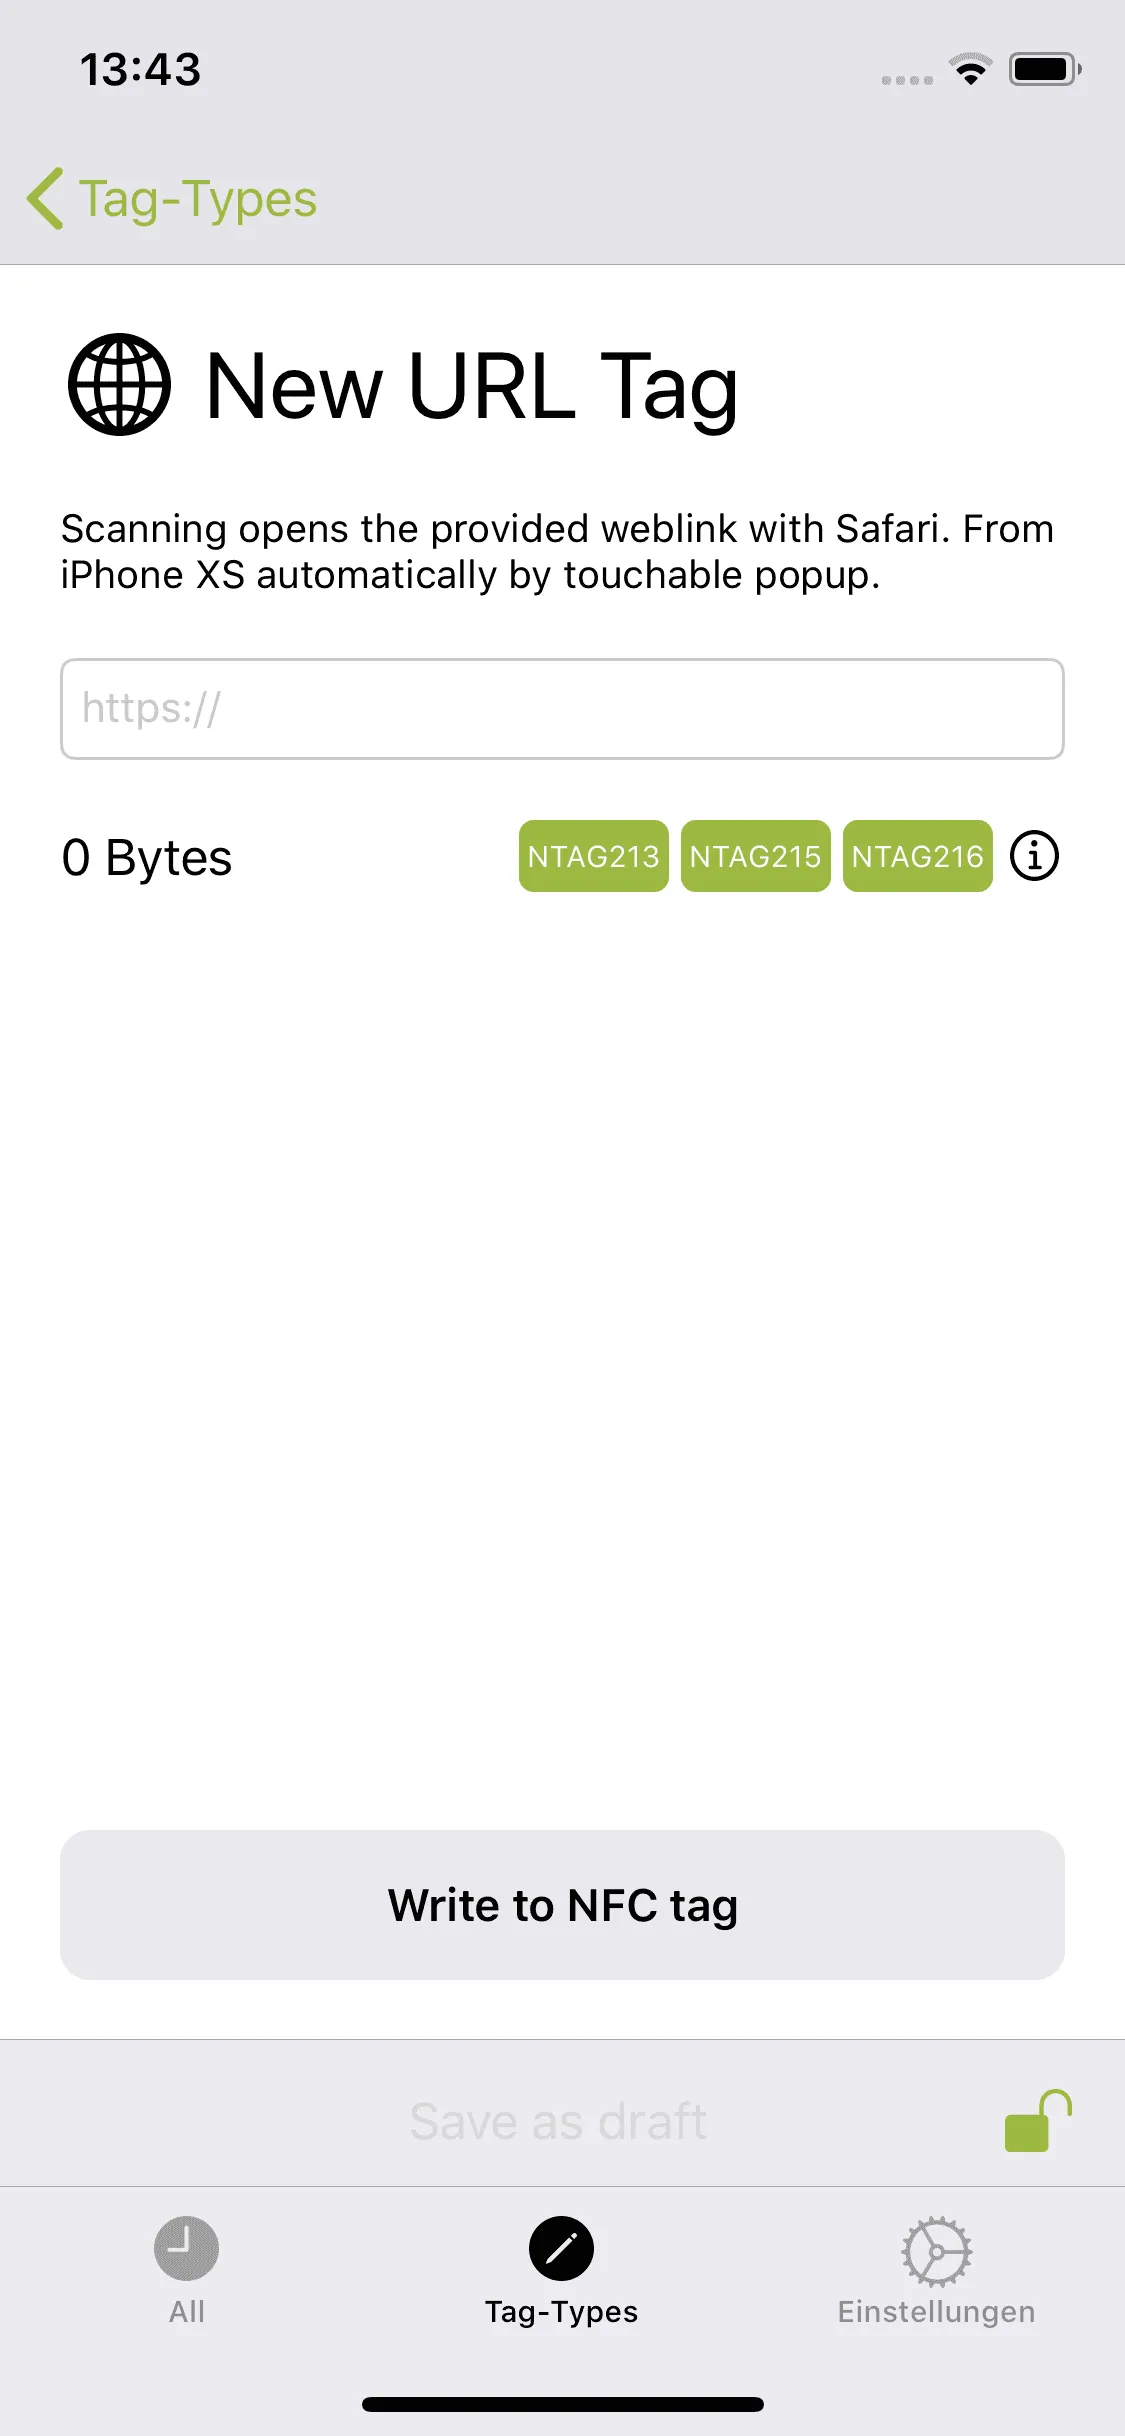
- Thirdly, you can also label the WWW sticker using the steps mentioned above. Here you choose URL and insert your desired URL. After scanning the NFC tag, this website will always be opened.
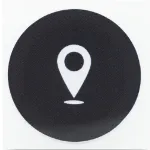
Location/address, contact and WLAN sticker
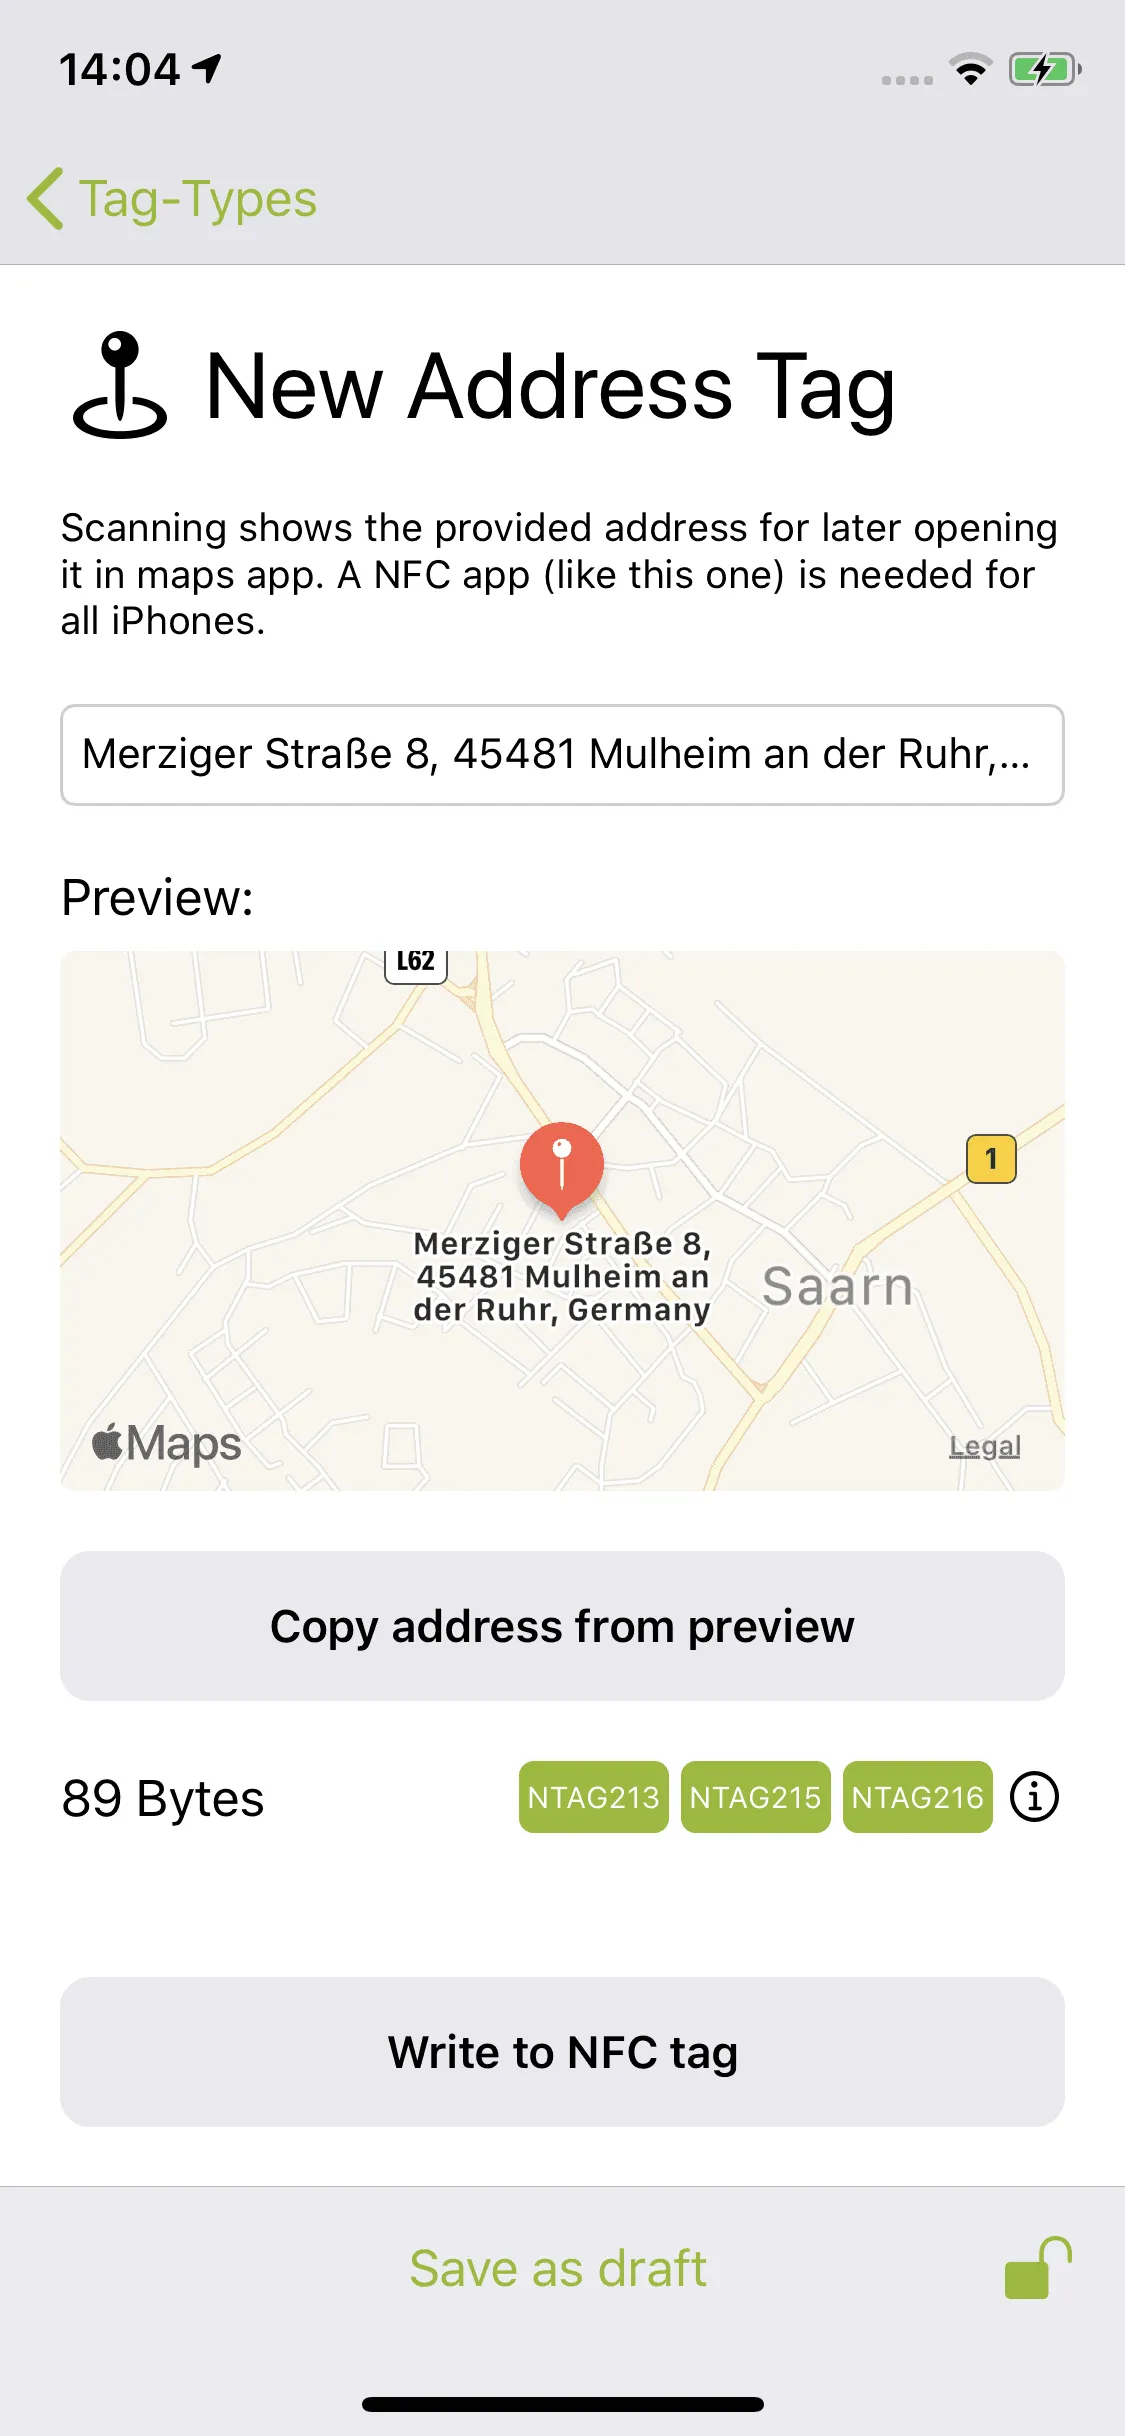
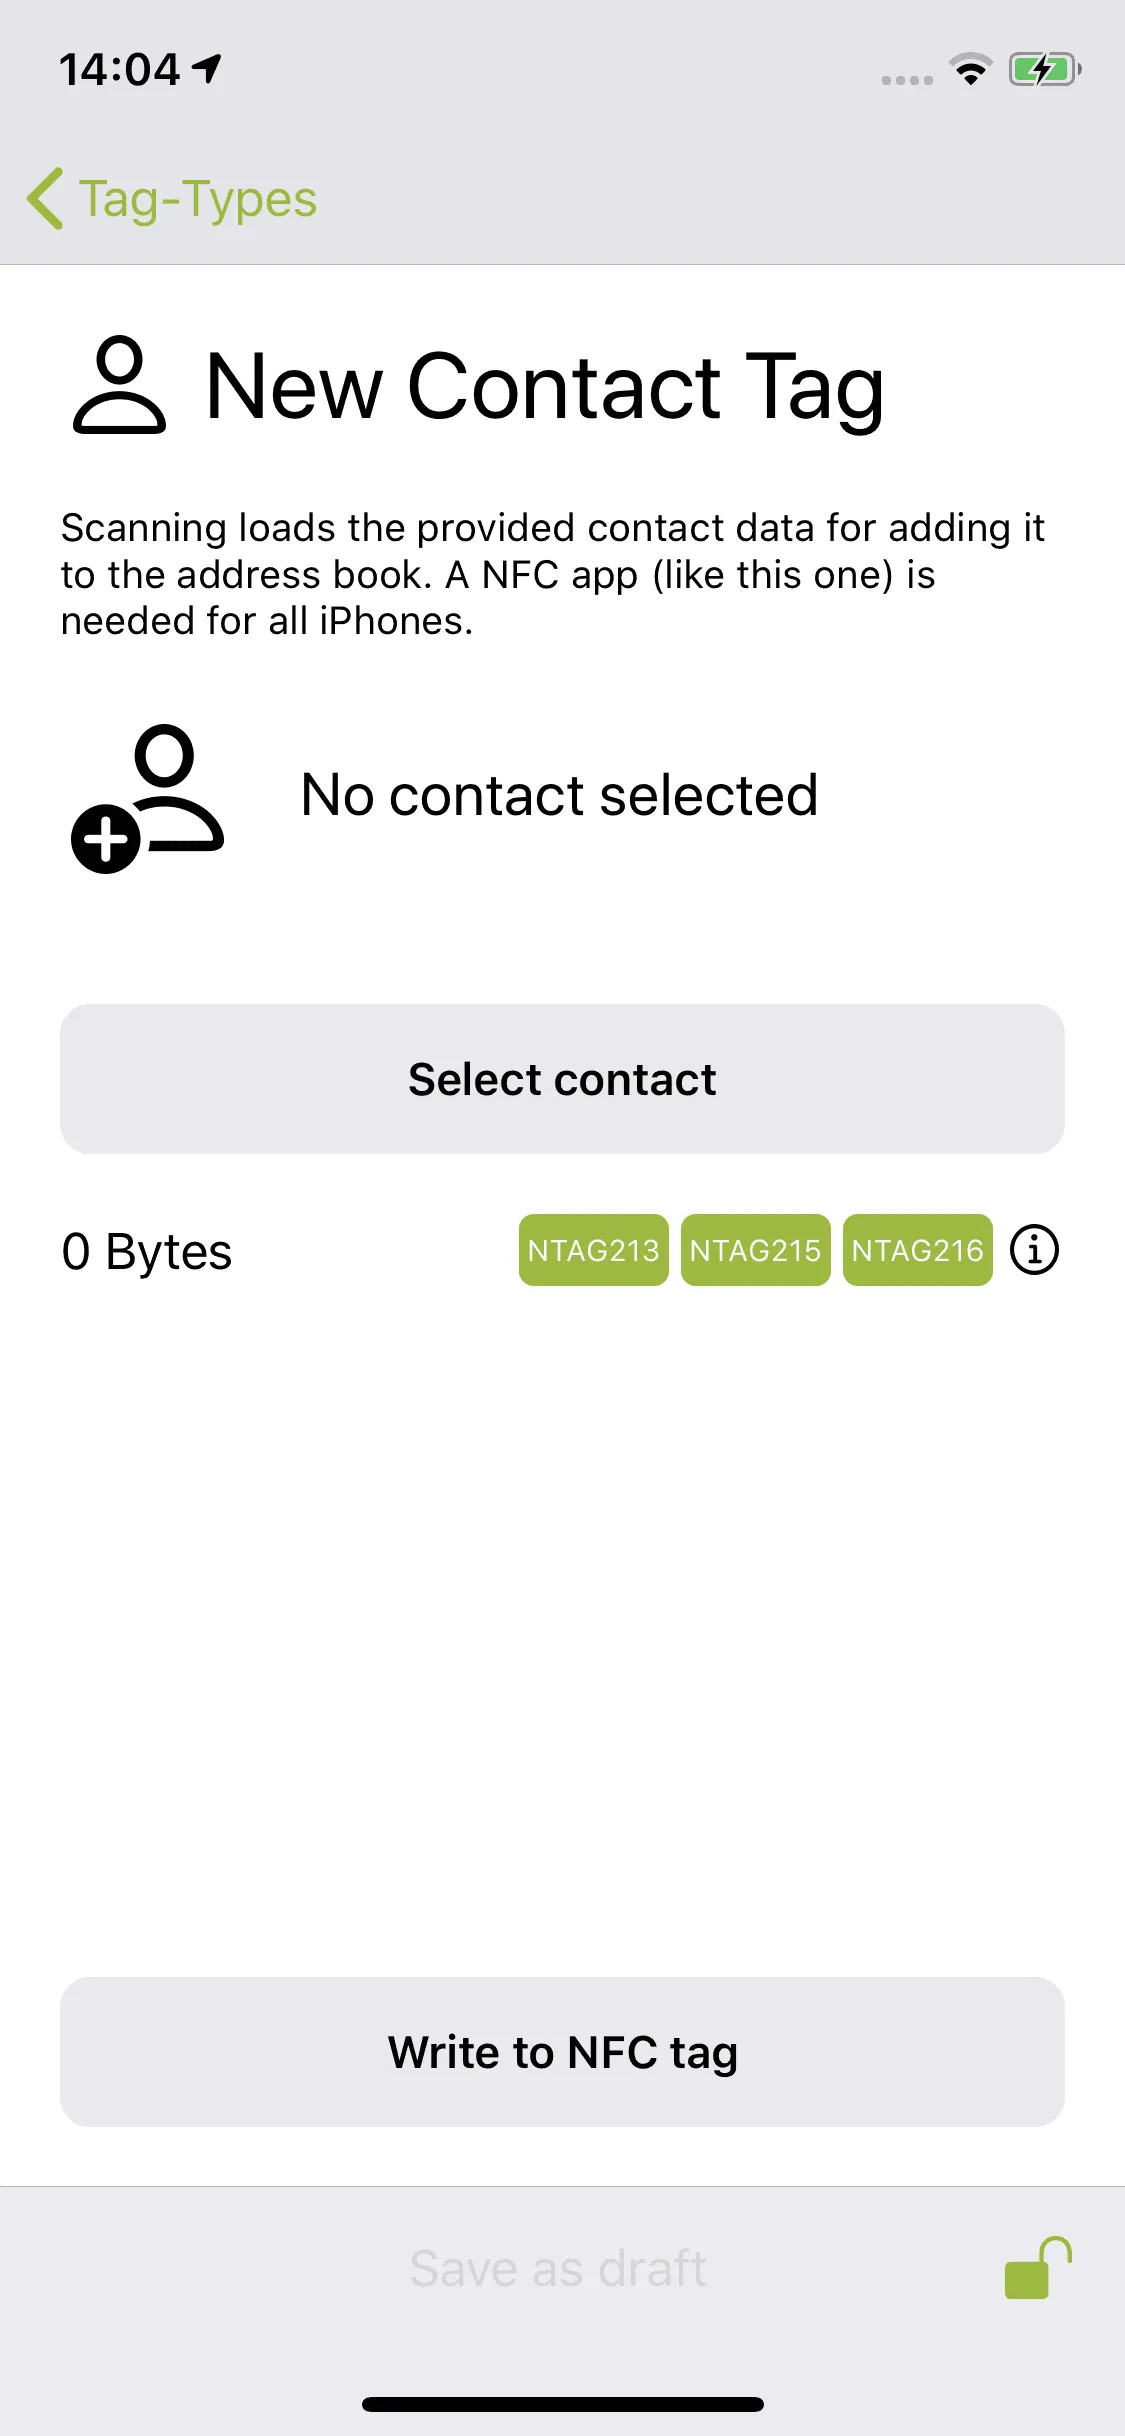
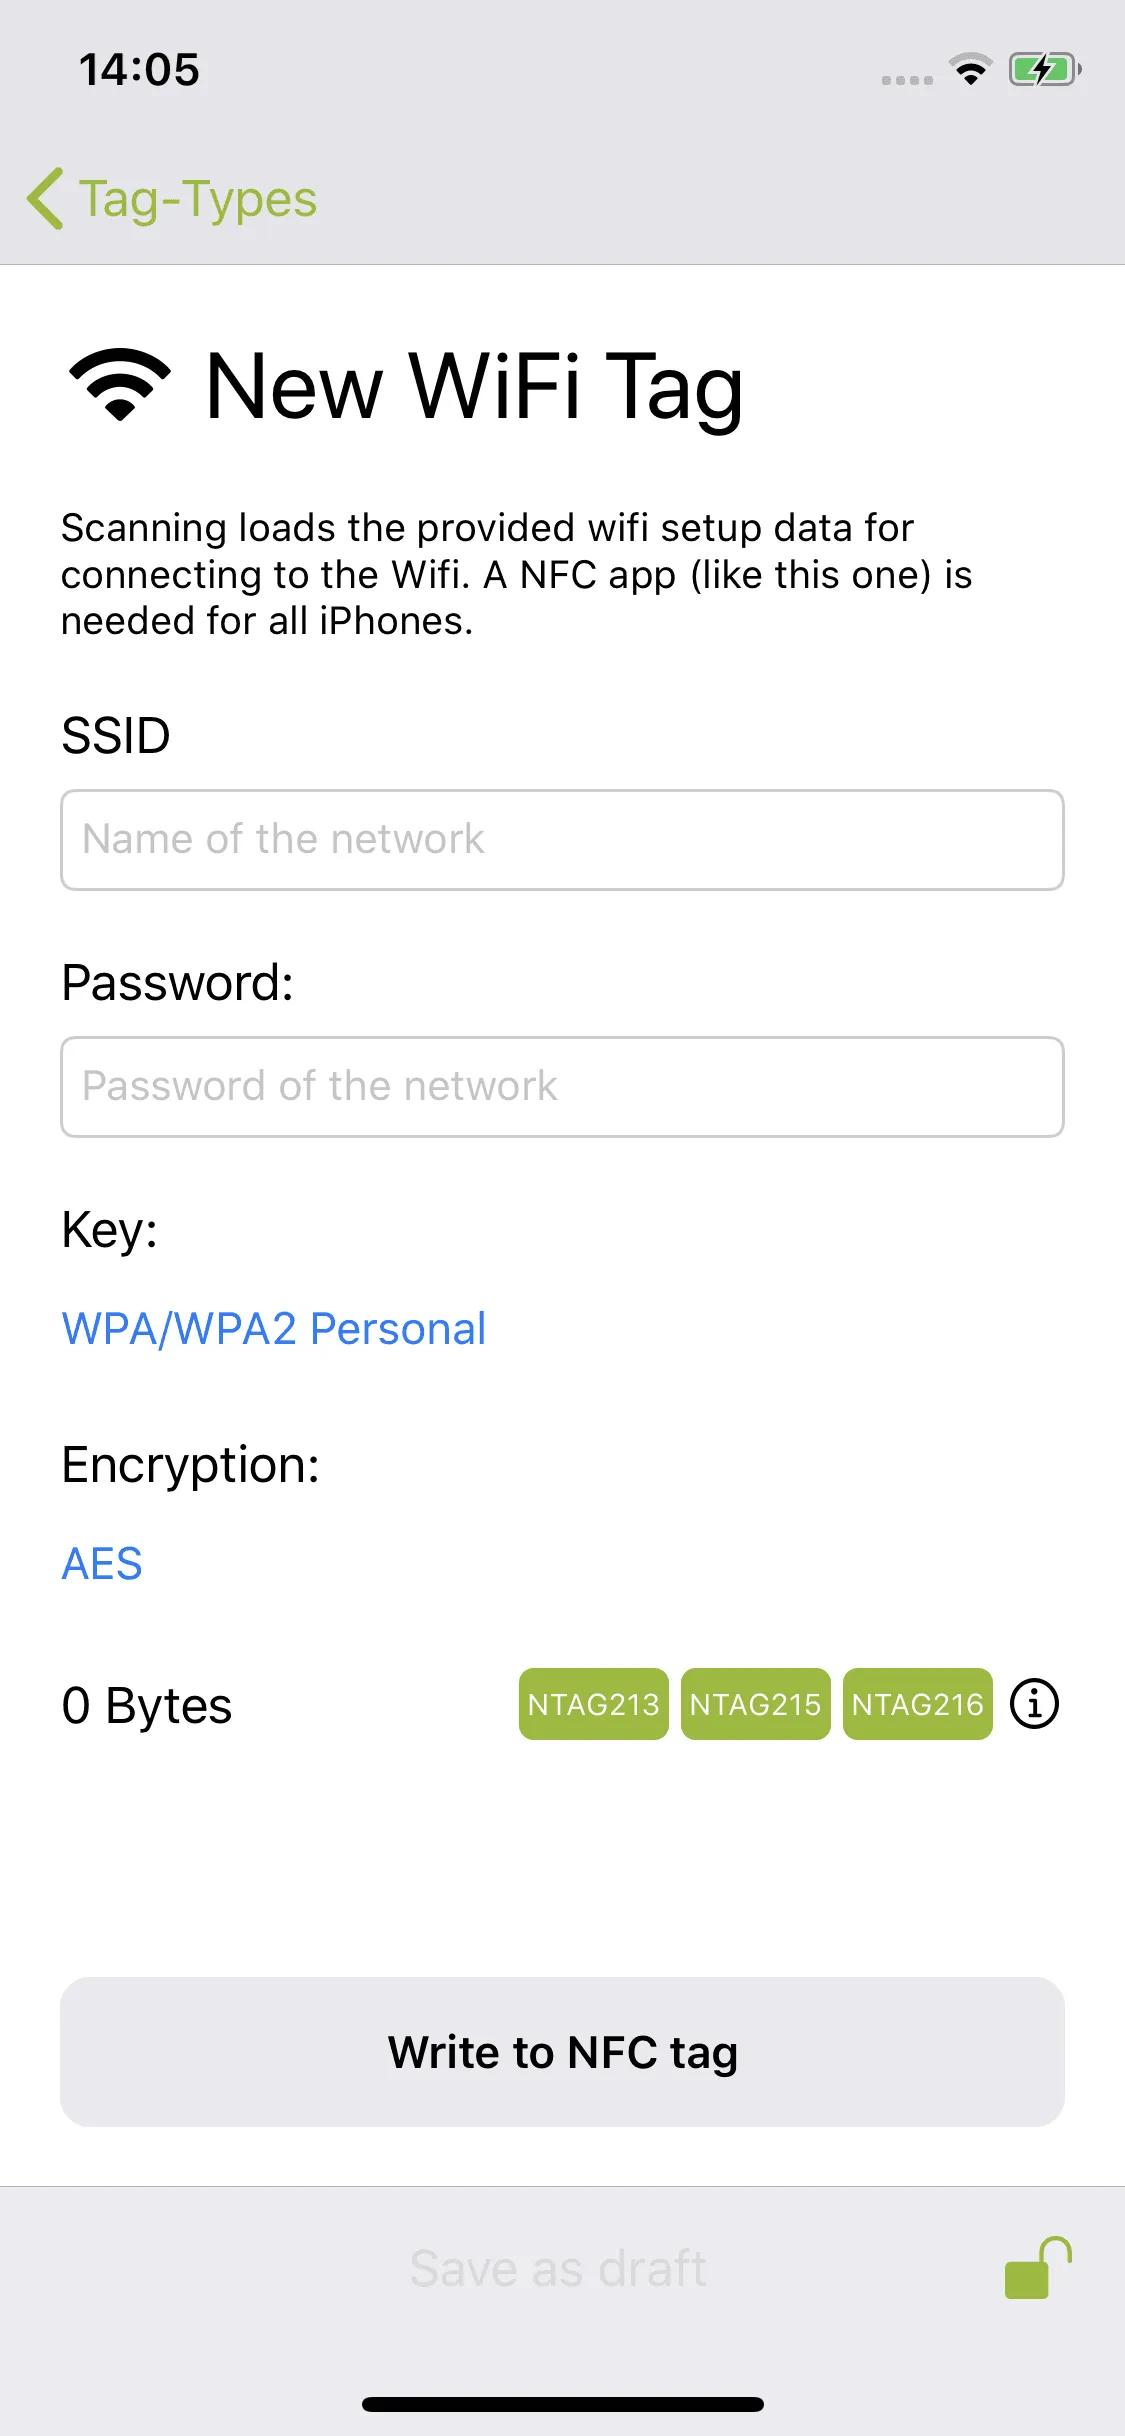
The GPS, contact and WLAN sticker can also be described with our app NFC21-Tools. The corresponding templates can be found under Tag Types and Extended Tag Types.
- To save an address or a position on the GPS sticker, we tap Address or Position. Here we can now select an explicit address or, by wiping over the map, a specific location. Once this is done, we save the data on the GPS sticker by Write to NFC tag. If the sticker is scanned, we can interact directly with the location (e.g. save the address or start navigation).
- By tapping on Contact, we can select a contact from our address book via the Select Contact field and finally save it on the contact sticker with Write to NFC tag. If this sticker is scanned afterwards, the contact can be saved or contacted directly.
- Via WLAN, a WLAN network access can be stored on the WLAN sticker. To do this, the correct network name (SSID) and password must be entered. Once the data is written on the NFC tag, other smartphones can connect to the WLAN network immediately after scanning.
Music
At this point, two possibilities shall be presented to play music directly after scanning the music sticker. For this we use the app Shortcuts. In this tutorial we will explain exactly what this app can do and what it is used for.
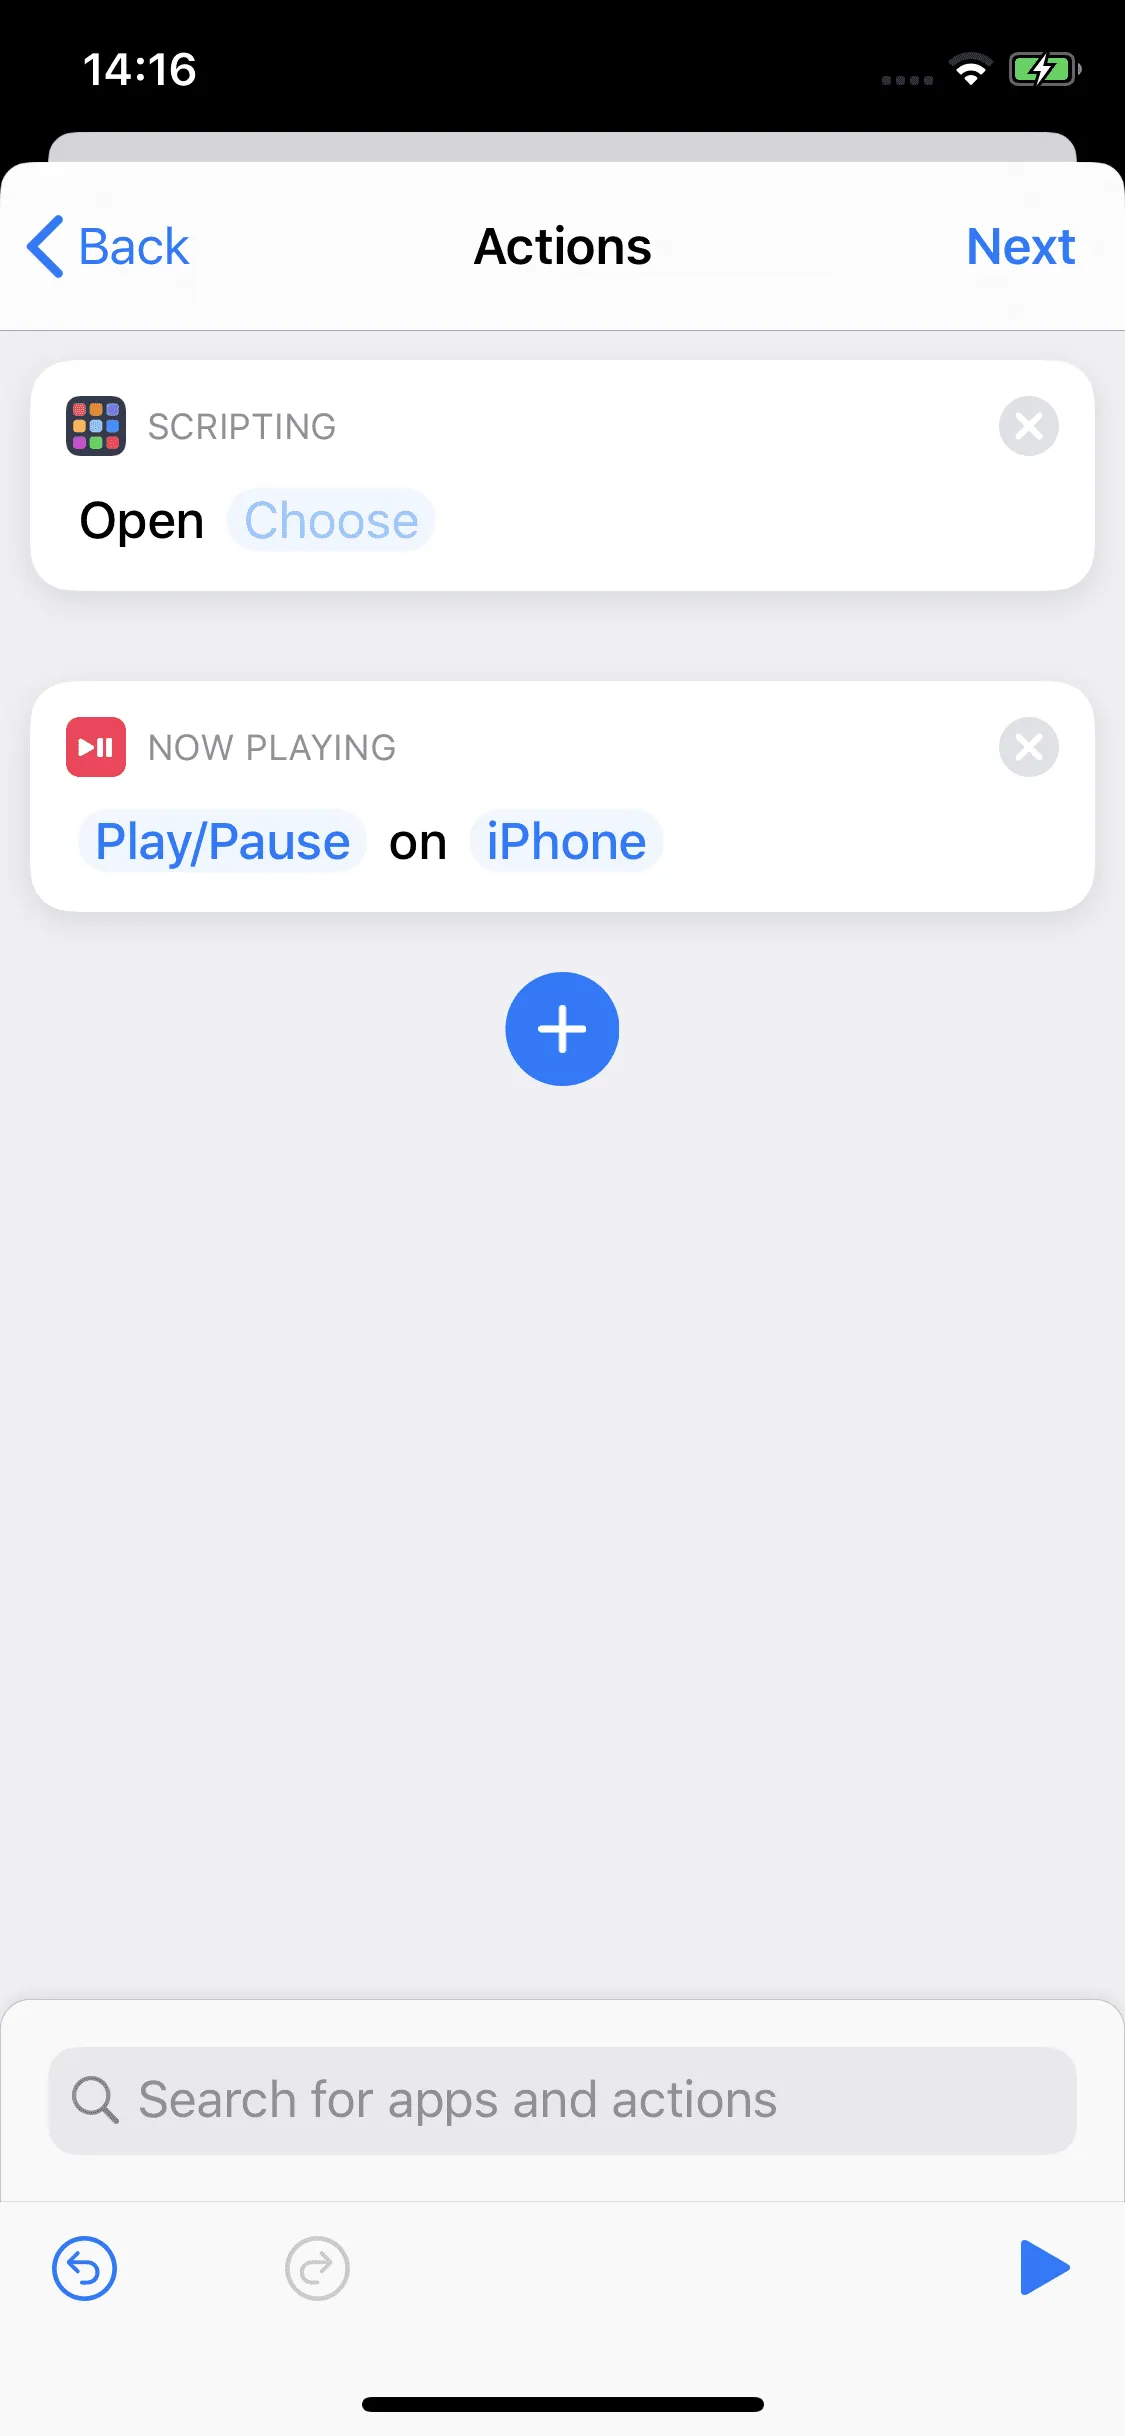
We type shortcuts at the bottom of the app on Automation → Create Personal Automation → NFC → Scan → Next. After we have scanned the music sticker we have to name it. Then we tap Add Action. Here we can decide what should happen after scanning the NFC tag. If we want Spotify to be opened, we select Scripting → Open App. Then we tap on Chose and select Spotify. Finally we tap on + and enter Play in the search bar at the top. Here we select Play/Pause.
Now Spotify is automatically opened when scanning the music sticker and playback is started.
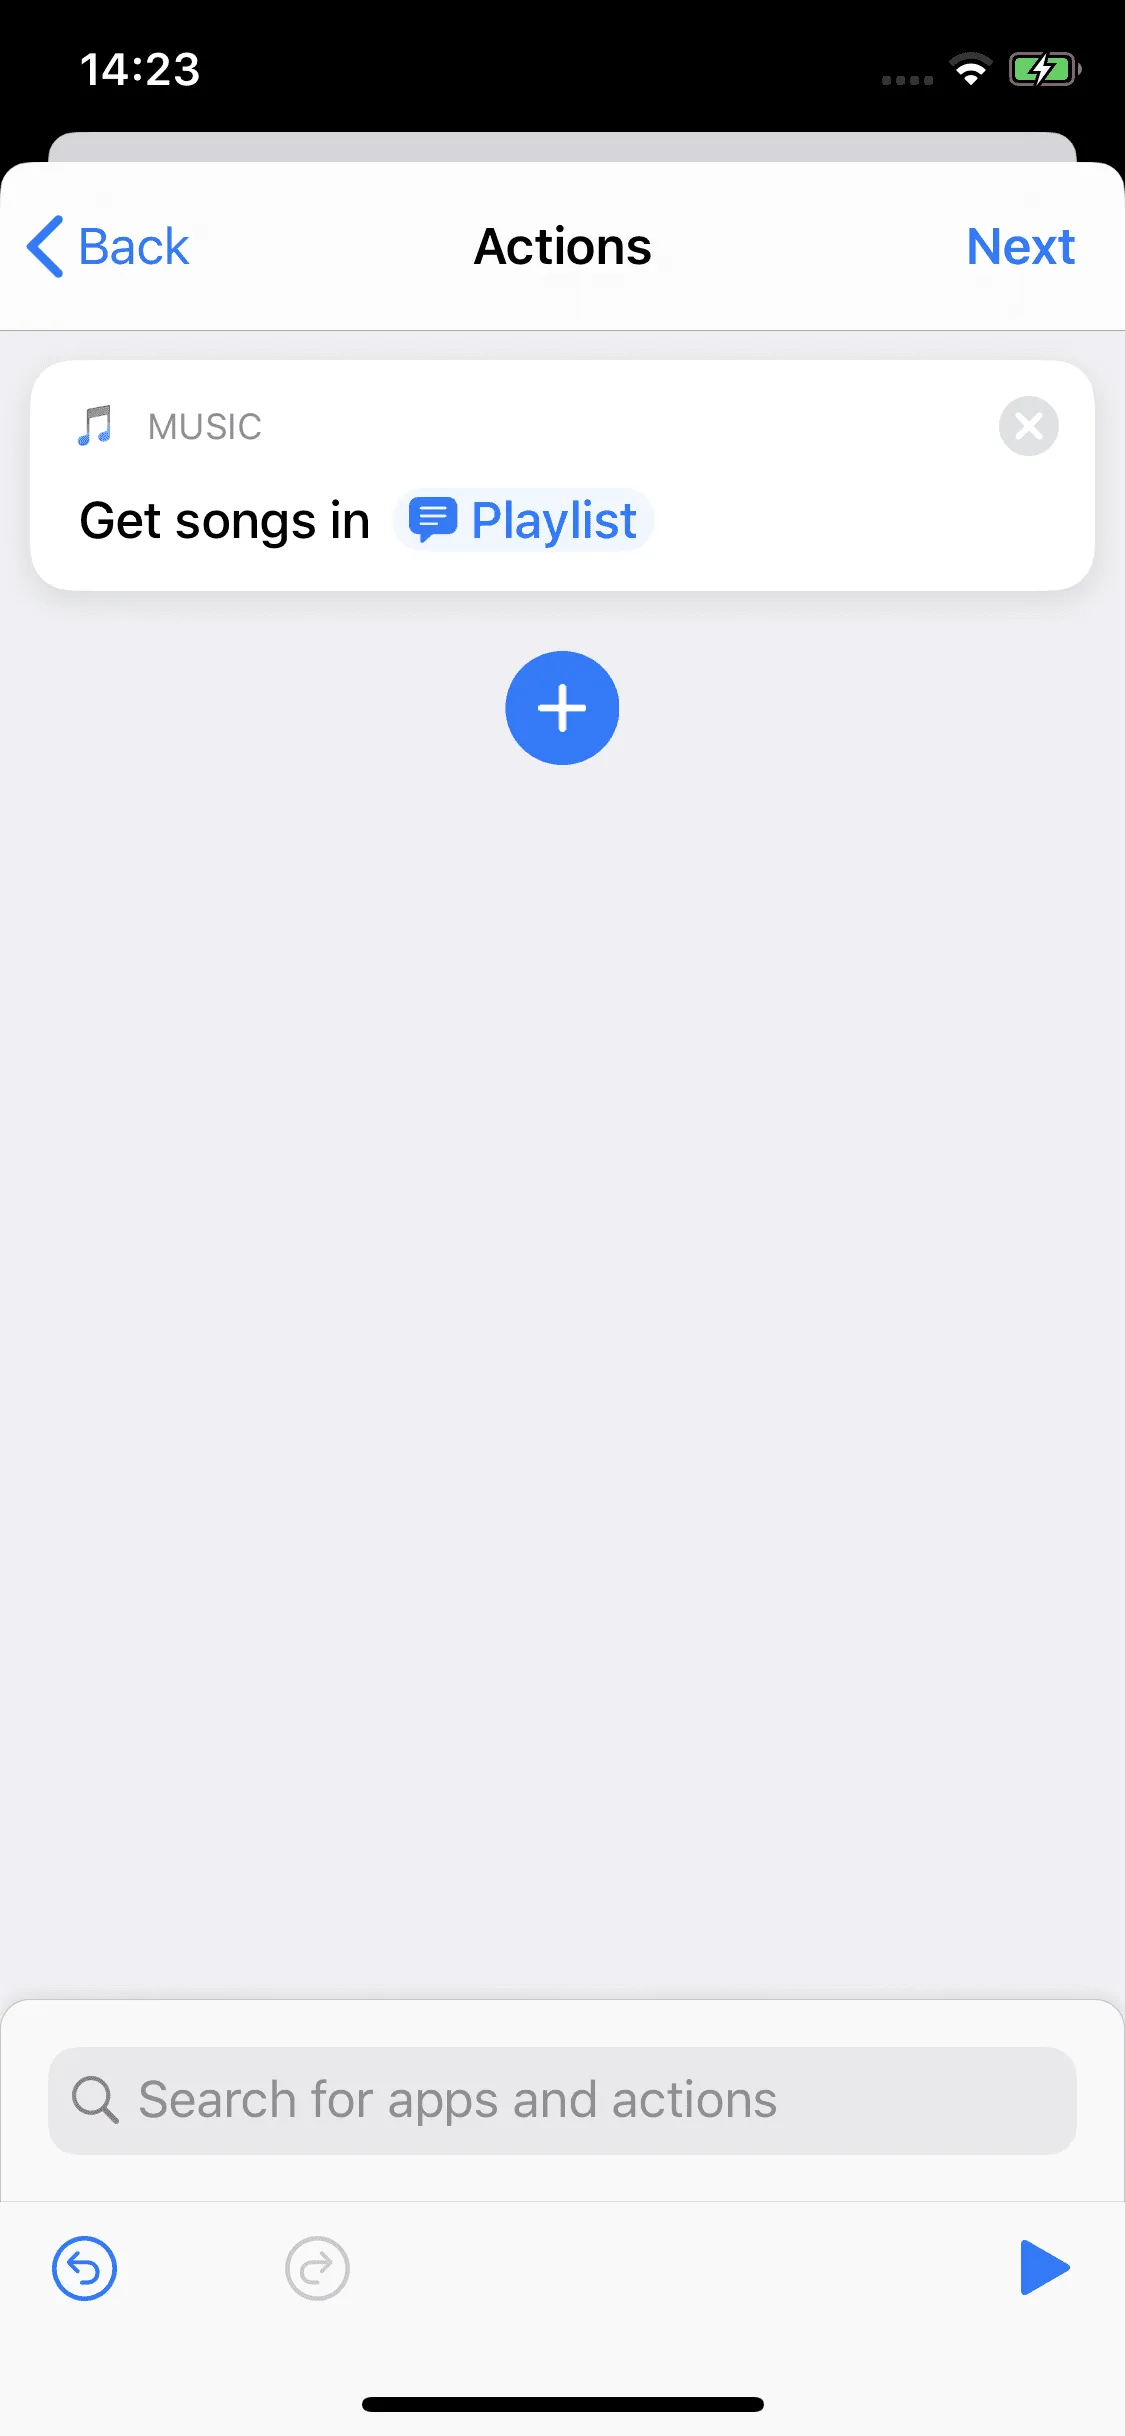
The same works with Apple Music and any other (music) app, of course. To do this, we repeat the steps Automation → Create Personal Automation → NFC → Scan → Name our tag → Next → Add action. To have Apple Music play a playlist automatically, we enter Playlist in the search bar at the top and select Get Playlist. With a last click on Playlist we can now retrieve the desired playlist.
Read our How-To about playing music using NFC directly via Bluetooth Box to play the music automatically on a Bluetooth Box.
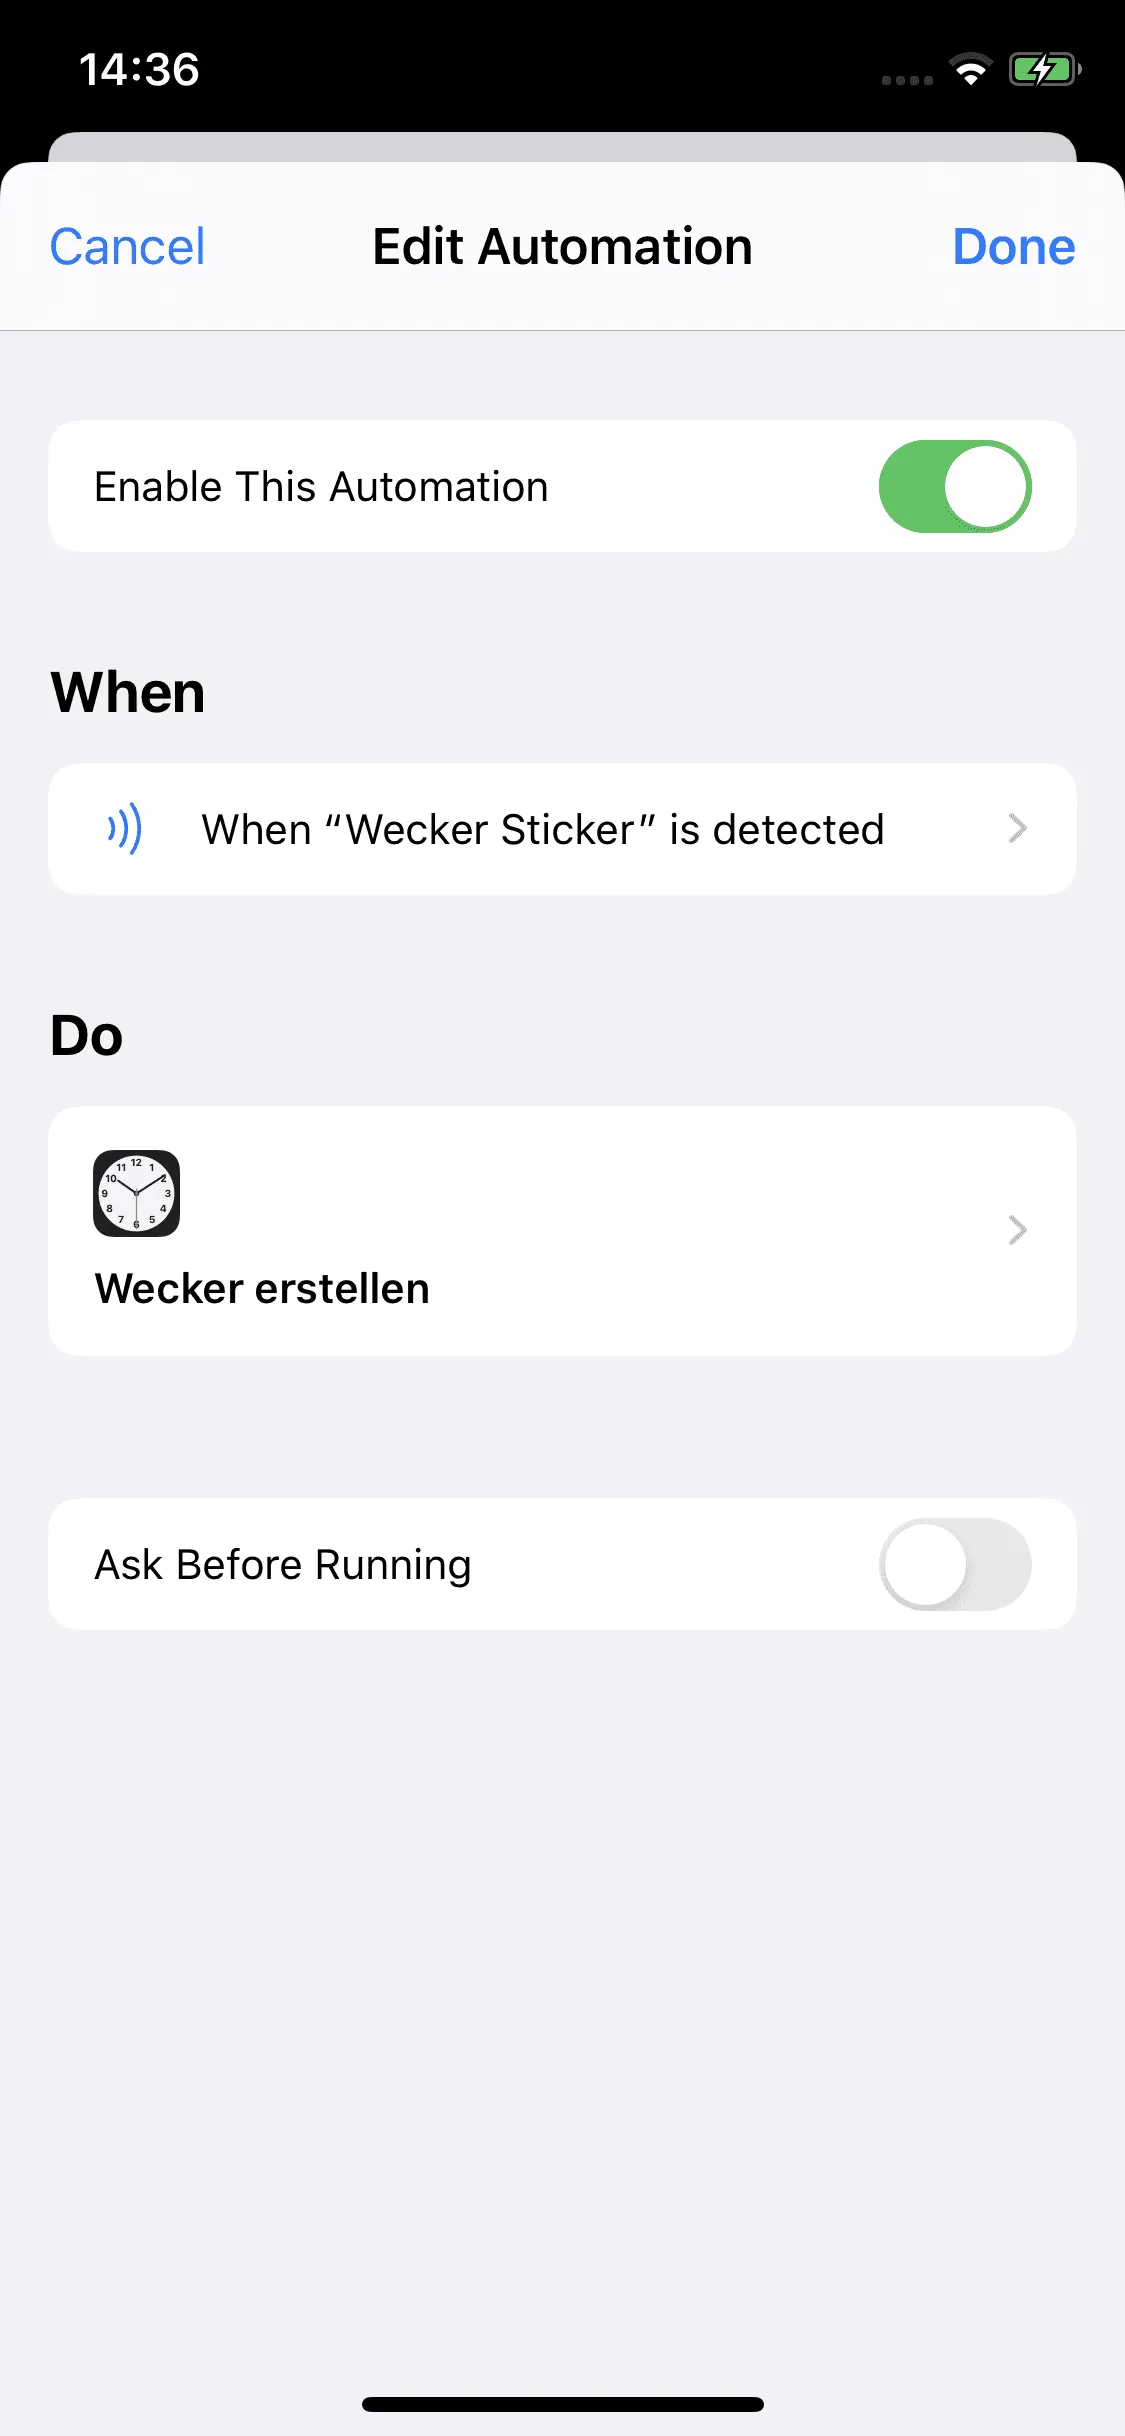
Alarm clock
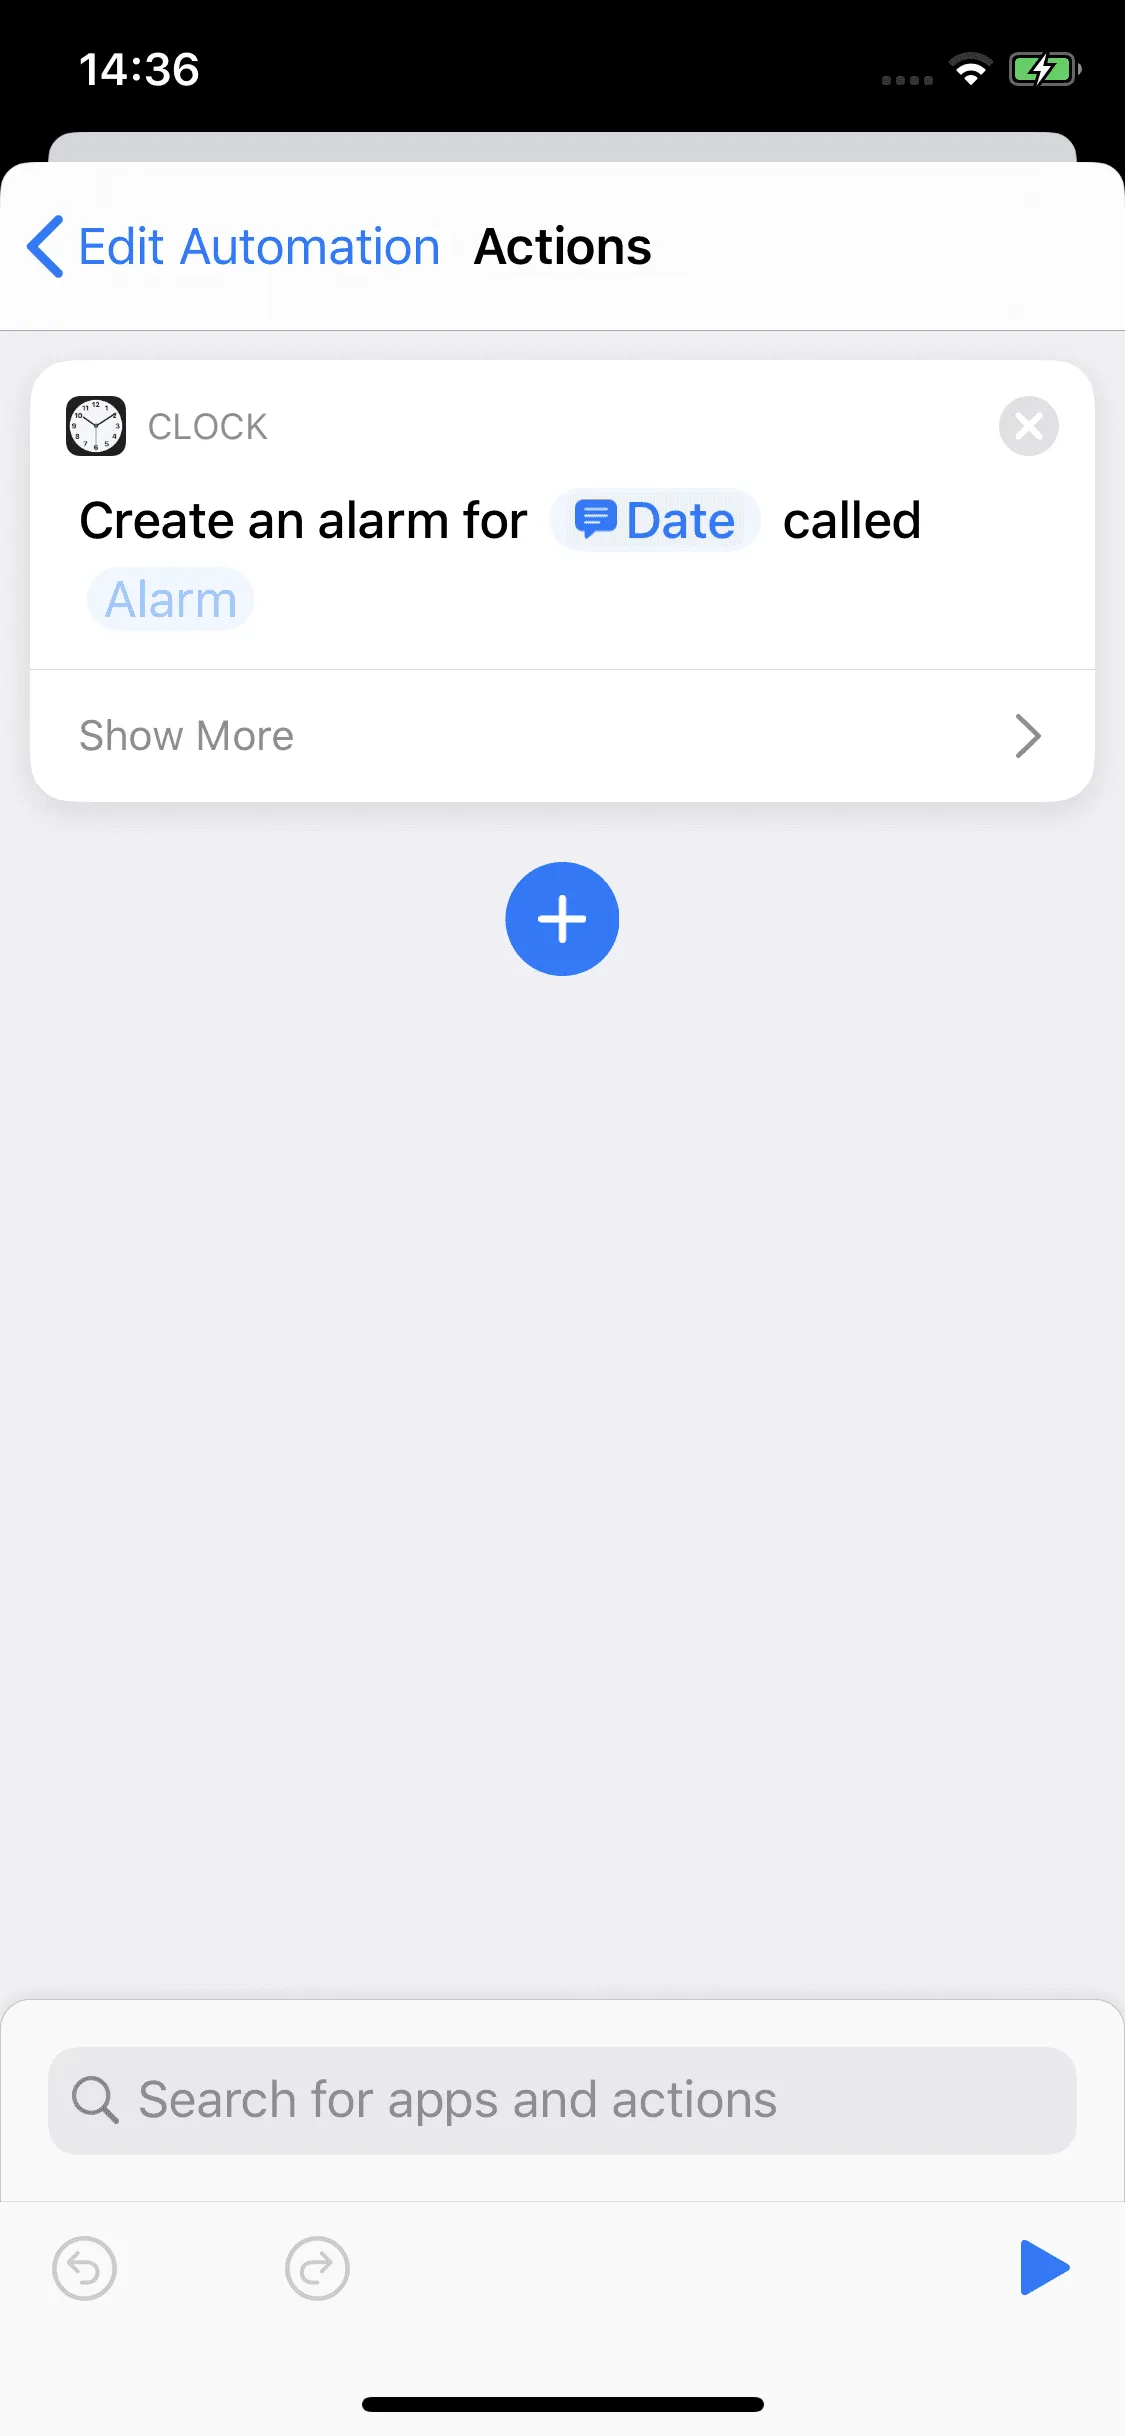
By touching the Alarm Clock Sticker, an alarm clock can be set automatically. To do this, hold the smartphone against the sticker and enter the desired time. We do this, as with the music sticker, by means of the app shortcuts.
We open the app and tap on Automation → Create Personal Automation → NFC → Scan → Name our tag → Next → Add action. In the search field above, we enter alarm clocks and select Create alarm. Here we tap Time and select Ask Each Time.
Finally, we tap Next → disable Ask Besfore Running → Done.
Now, when the phone is held against the NFC sticker, you can enter an alarm time and then press Done to create the alarm. The created alarm clock is now also visible in the Alarm Clock app.
Note: After scanning the NFC sticker, you can not only enter a time, but alternatively a name for the alarm clock to be created.
Read our article about creating more complex automation chains to learn more about other possible settings.

Alarm Clock automation for download
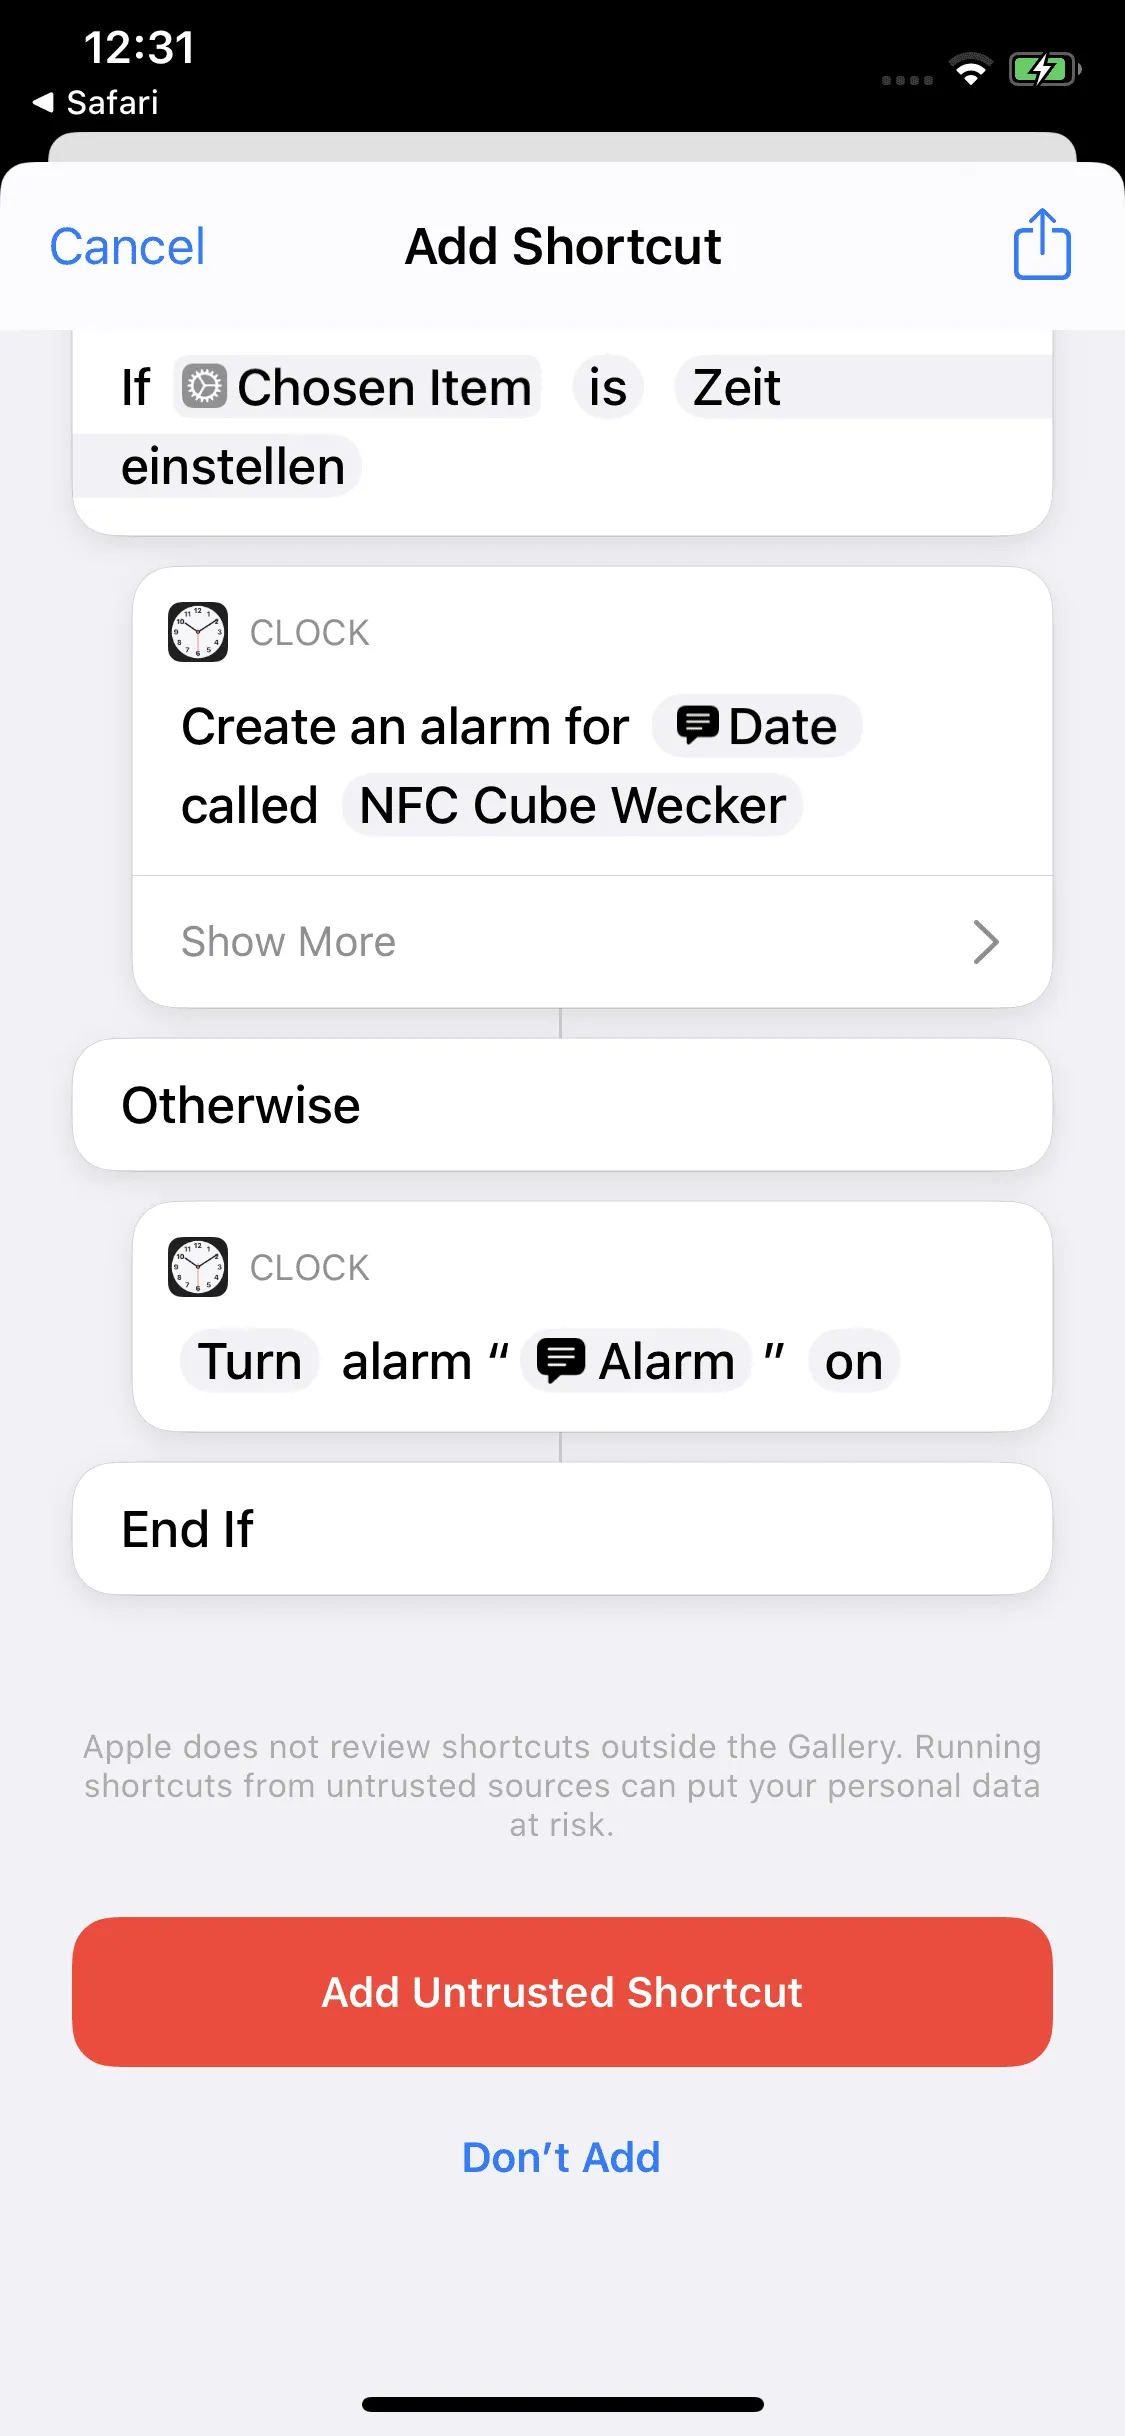
If you want to be asked every time you scan the Alarm Clock Sticker whether you want to set an alarm time manually or select from an existing alarm clock, you can download our pre-installed shortcut: NFC Cube alarm clock.
To install, tap Get Shortcut, then tap Add untrusted shortcut. This note is a security measure by Apple, but in our case you can ignore it. How you can quickly make the necessary settings, they can be found in our FAQ.
To link the shortcut to the NFC sticker guide open the app shortcuts and repeat the steps automation → Create Personal Automation → NFC → Scan → Name tag → Next → Add action. If you now search for shortcuts above and select Execute Shortcut, you can select our created shortcut NFC Cube Alarm Clock by clicking on Shortcut again.
Deactivate Ask Before Running and click Done.
When we now scan the corresponding tag, we can choose between Set Time and Select Alarm Clock.
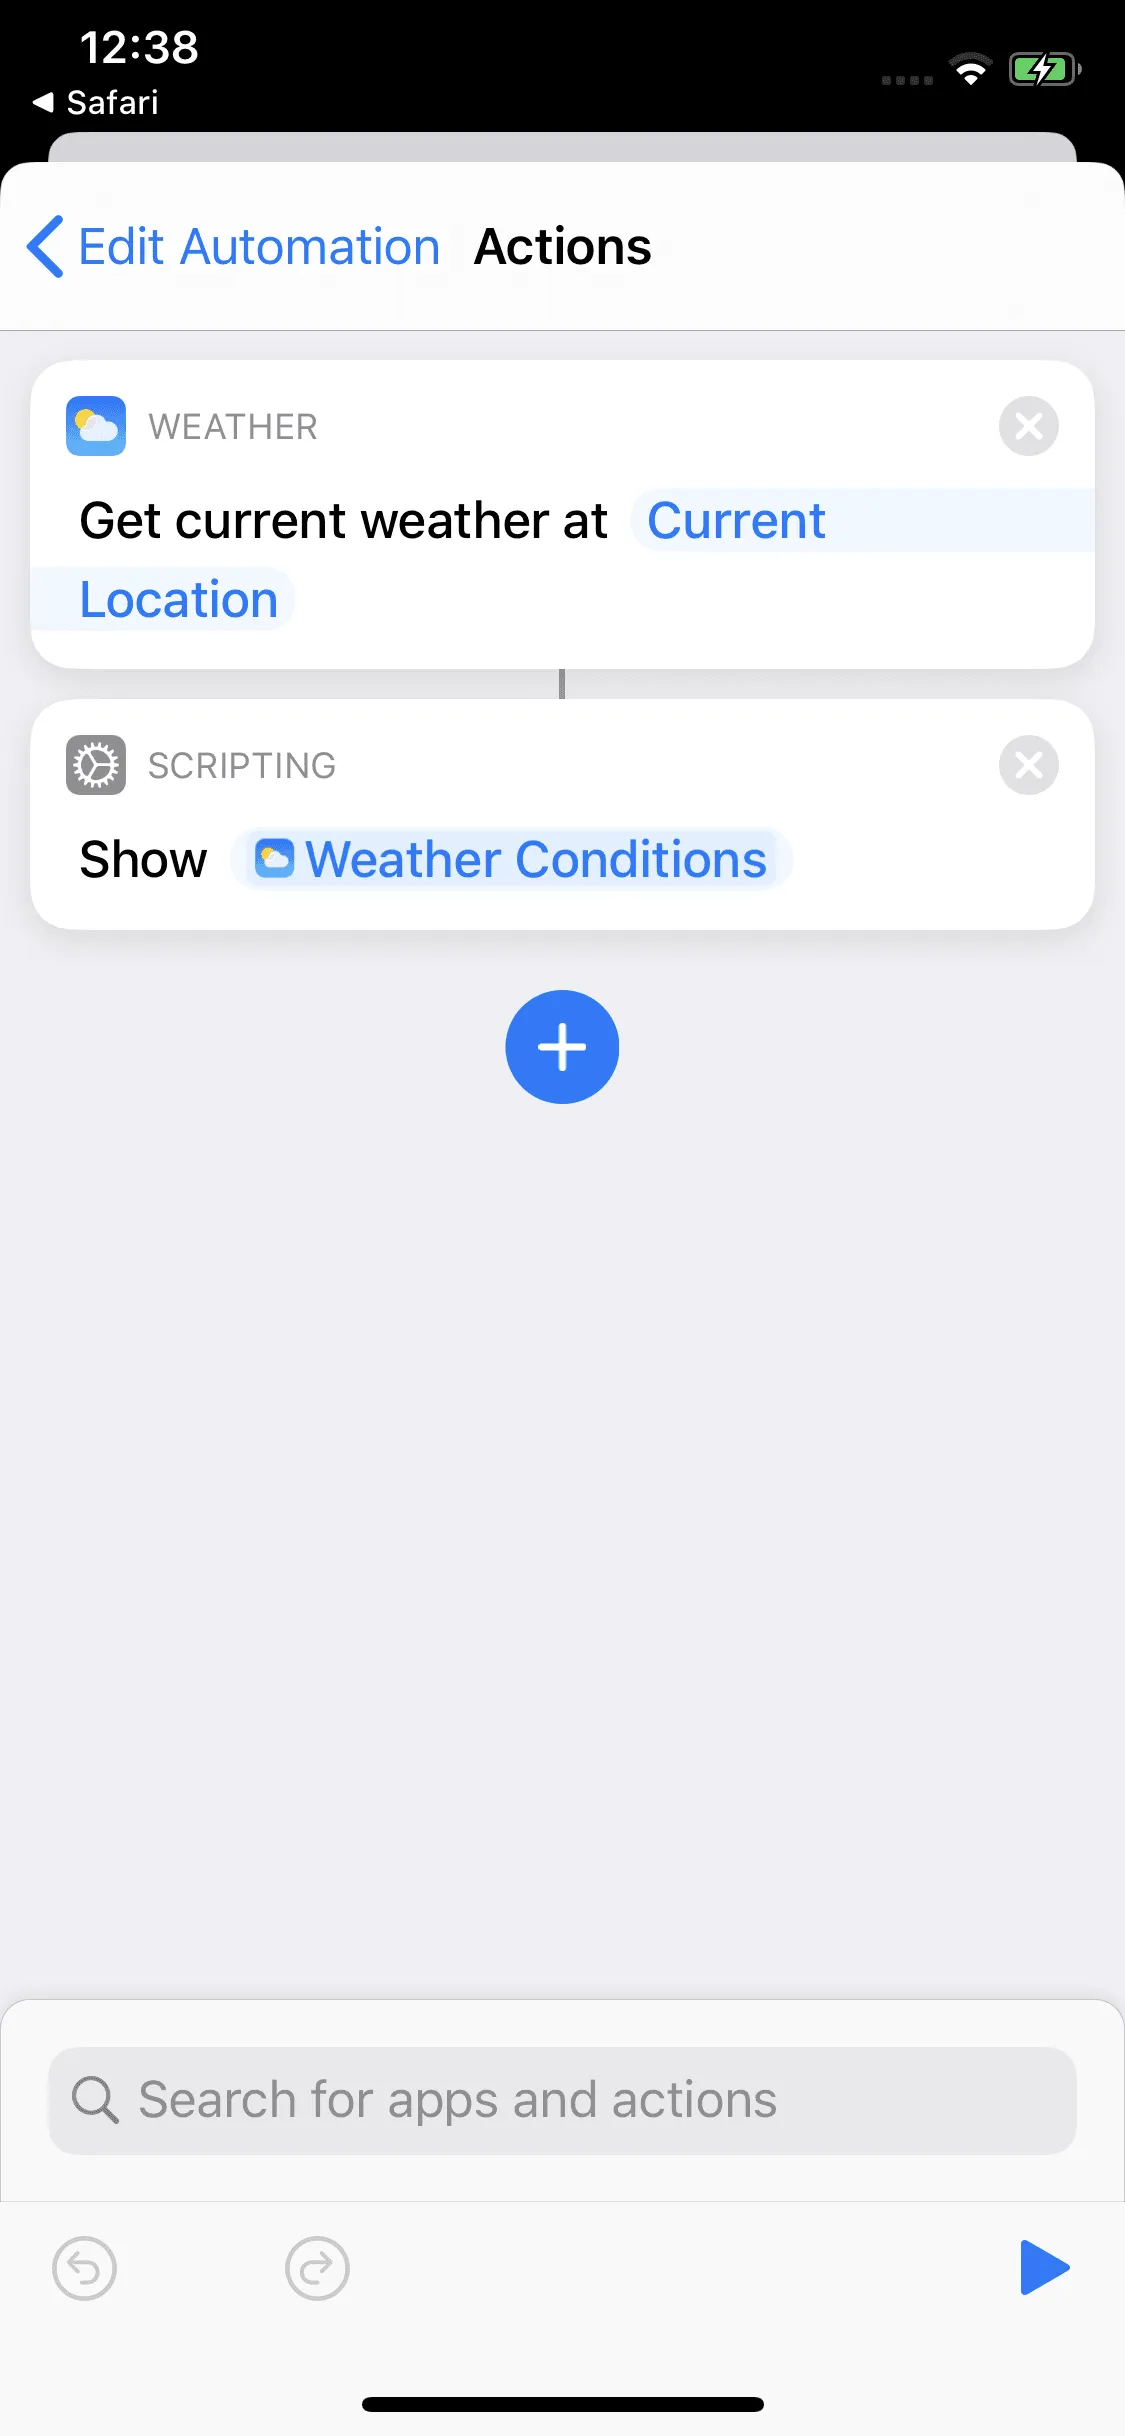
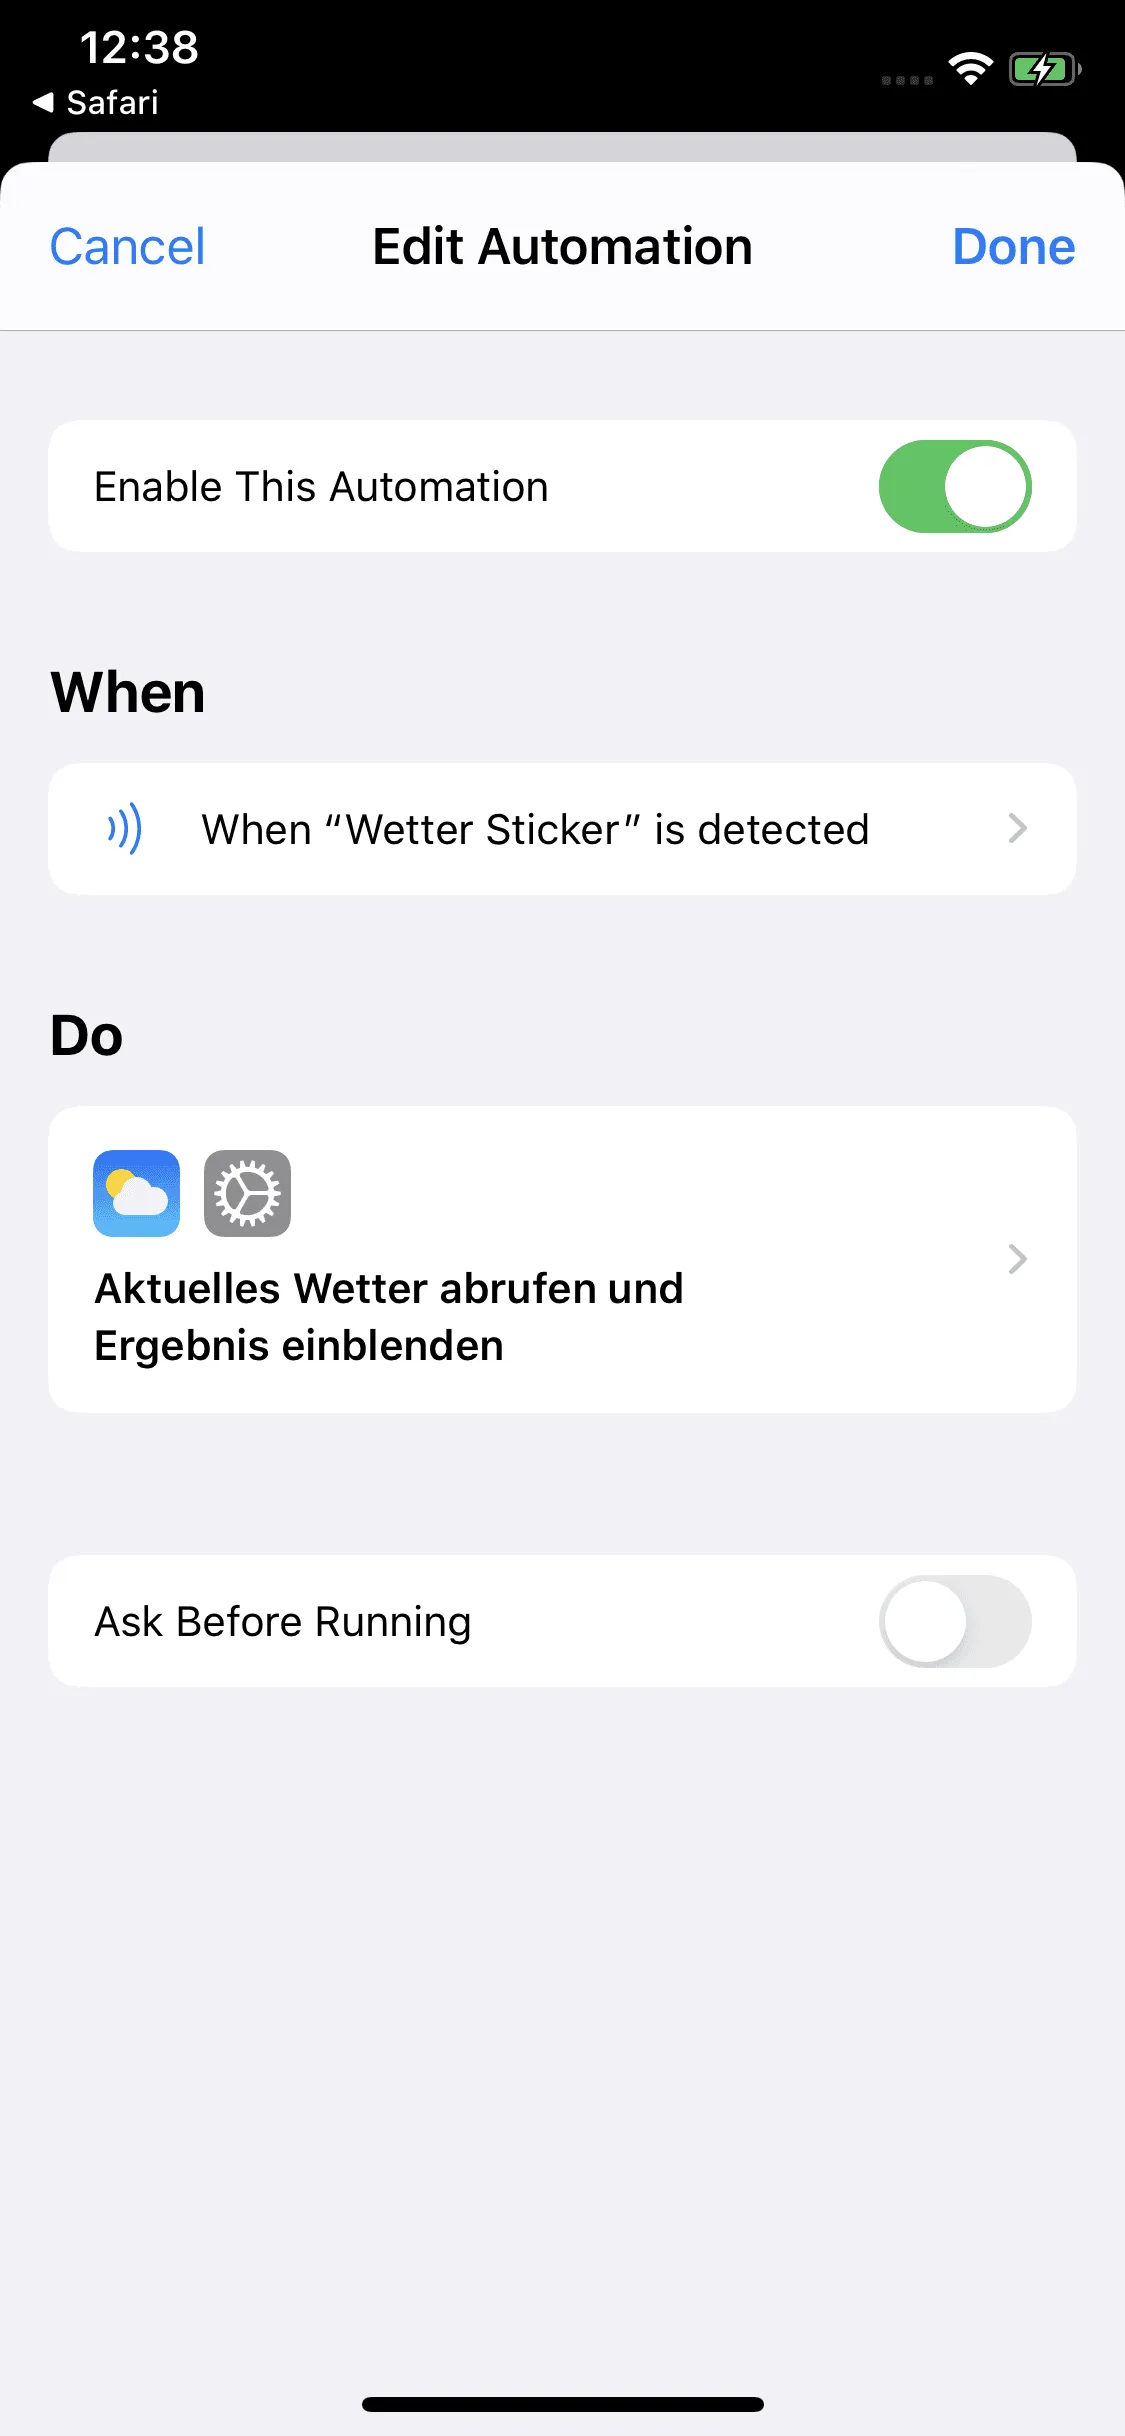
Weather
To get the current weather data with a scan of the weather sticker we open the app Shortcuts again and go to Automation → Create Personal Automation → NFC → Scan → name your Tag → Next → Add action. Now we enter weather in the search field above and select Get current weather. In the next step, we tap on +, enter result at the top and select Show Results.
Our automation is now finished. We only have to press Next → deactive Ask Before Running → Done.
If the smartphone is now held against the NFC sticker, the current weather data for the current location is displayed.
Summary
Note: During each write operation, the NFC tag can be locked by the lock symbol at the bottom of the screen. If the tag is written afterwards, it is locked and can no longer be overwritten.
In this article we have provided the NFC stickers with meaningful links based on their symbols. Of course, each sticker can be described as desired.
In our article Writing NFC tags with the iPhone and our series on the possibilities of the Shortcut App we explain how you can describe and link your NFC tag according to your individual wishes.
Associated operating systems
iOSFirst published: 25.07.2023 / Updated: 09.04.2024